|

This page is about the story of my Honda Civic
Hatchback. I bought it in October of 2002 and it's still going
strong! Read through the years to see the progress of my hatch.
2002 - A New Chapter
About a week after the demise of my '95 GSR
powered civic coupe, I picked up this gem of a '94 Si hatchback.
What would have been the 3rd year in review, in the swap story, is the
build-up of the hatchback. i've learned quite a bit in the past
few years and I'll do the best that I can to inform of you of
everything there is to building a Civic.
After pulling the engine out of my wrecked civic, I had to piece it
back together. The accident left it in pieces. The valve
cover, intake manifold, fuel rail, injectors and other miscellaneous
bits and pieces were destroyed.


Top
2003 - Getting It All Together
With a rebuilt transmission and reassembled engine, I was almost
ready to start the swap.


Given my experiences with the first swap, and the experience gained by
doing swaps for other people, I was armed with everything anyone would
ever need to know to do the infamous 5th gen engine swap. I
chose to swap out the steering rack and brake MC given the fact that
it was going to be significantly easier to accomplish with the engine
out of the way.
Changing the steering rack
Why would I want to swap out the rack? The stock Si steering
rack is a powered unit with a mediocre steering ratio. The rack
from a 3rd gen Integra is a much faster and very easy to change
especially when the engine is not in the way.
If you don't have the luxury of an empty engine bay, the best way to
swap out the rack is to drop the sub frame.


With the sub frame on the ground, the rack is easily removed. If
you are swapping a power steering rack for a power steering rack, just
reuse all of the hardware. You MUST have a weather seal from the
GSR since it is the only one that will fit on the GSR rack. Make
sure you have the universal joint for the steering column from the
Integra as well. If you are replacing a manual steering rack,
you will need to modify the right side bracket to make it fit.
Some grinding of the holes will do the trick. Ultimately, a sub
frame from a power steering equipped civic (or integra) would be ideal
but it is not necessary.
You will need all of the fluid lines and pump from an Integra to
complete the operation.
Brake MC swap
Bang for the buck, this is probably one of the best upgrades you can
do with the biggest pay-off's in performance. For around $100
you can swap out the Mc and benefit from a much more positive braking
feel. If you have the 13/16" MC, you can easily upgrade to the
15/16" without modifying any of the lines or changing the booster.
If you want to bump up to the 1" MC, you will want to make sure you
get the fittings with the MC. Honda used two different sized
fittings (same sized lines) on ABS equipped Integras and Civics.
You can use any MC regardless of whether or not your civic is equipped
with ABS.
Swapping to the 1" MC will require you to swap the booster as well.
This is a little more involved but not difficult. There are four
bolts on the inside that need to be removed along with the linkage
from the brake pedal. With the new booster and MC installed, the
brake lines will need to be bent to meet the ports on the new MC.
If you have a non-ABS civic, you will need to cut the line to removed
the flair for the rear line and use a flaring tool to install the new
larger fitting.


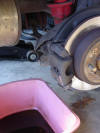
Once the new MC is installed, you will need to flush the system.
This is a great time to upgrade to a performance brake fluid like ATE
Super Blue or Motul 600.
Wrapping it up
With the rack installed and the brake hardware finished, it was time
to drop in my B18C1. The installation was smooth and once I
worked out a few minor problems, I was back on the road with my new
swapped Civic!

Sub Frame Dilemma
Shortly after I bough the hatch, I discovered a strange handling
issue. It would pull hard in one direction while on the gas then
jerk back off the gas. It wasn't torque steer, but I couldn't
figure out what it was. The problem was rather unnerving.
I took the time to install Energy Suspension's bushing kit up front
(the rears were installed later) The bushings didn't solve the
problem.
I did discover that the bushings made a tremendous difference in road
feel. I was expecting a harsh ride but instead, gained a more
comfortable ride. Rather than experiencing a vibration, caused
by the soft bushings, the components do their job quickly and
efficiently with no negative effects.


One day, while doing some spirited driving, I was on the brakes
heading down a bumpy hill. I heard a massive pop up front!
My steering was completely erratic. Once I made it back home, I
quickly discovered that my right front lower control arm mount, in the
sub frame, was broken.
With a new sub frame and a fresh alignment, I had the Civic that I
knew I could have.
Steering Wheel Swap
While waiting for parts, I took the time to do a swap that I was
preparing to do in my coupe before I totaled it. The steering
wheel swap. After I installed the Momo steering while in my
240SX, I knew I needed the same performance advantage in my civic.
The lighter and smaller wheel provides much better feedback.

The operation was a success! The cruise control and horn both
work as they should and I couldn't be happier!
Check out the operation
here.
Recaro Seat
A friend of mine was selling his Recaro racing seat and I jumped on
the opportunity. It had all of the necessary hardware to mount
it in a Civic. After I did a couple of adjustments and
acclimated to the shape of the seat, I was hooked! The extra
support is phenomenal giving me the confidence that I never expected.

Top
2004 - A year Later
Due to a "mishap", I had to pull the B18C1 for repairs. Check
out the project work
here.

After finishing the
engine installation, I realized that my half shafts needed to be
replaced. I installed Drive Shaft Shop's stage I axles.
They are rated for horsepower up to 225 whp. This should be more
than enough for my new power plant.
Sway Bar Upgrade and Rear Bushings
The Si is
equipped with a front sway bar but no rear. I needed something
to help with the excessive body roll. I didn't want a huge 21mm
rear bar like the ITR, Comptec or Ground Control. Eibach offers
a kit that seems to fit what I was looking for. The stock front
bar is 20mm and the Integra's rear sway bar is 14mm. Eibach's
kit includes a 26mm front bar and a 17mm rear bar. Since I did
not have a stock rear sway bar, I needed to pick up the hardware
necessary for the installation. In this case, I needed new rear
lower control arms and end link hardware.
The
installation is tedious, but something that can be accomplished within
a few hours.

Before I could
install the rear bar, I needed to replace the rear control arms.
This was an excellent opportunity for me to swap out the rear
bushings. I also ordered energy Suspension's rear trailing arm
bushings since they were not included with the full set. With
all of the bushings replaced, that can be replaced, and the rear sway
bar installed, the rear suspension was finally up to my expectations.


Engine Mounts
I was still
having engine slop issues. My home made motor mounts were doing
well but I wanted to try Energy Suspension's torque mount set.
The low cost of the set makes it worth trying even if I didn't like.
I reused one of my home made torque mounts along with the ES torque
mount and rear engine mount bushings. The feel of stiffening all
three mounts is excellent! Take off is much smoother. The
only disadvantage is a fair amount of rattling in the interior at
lower rpms. Leaving out the rear torque mount will still give
you a substantial advantage but without the excessive interior
rattles.


Top
2005 - Race, Race Race!
This was the year that I really came back to
autocrossing. After I destroyed my Civic coupe is late 2002, I
hadn't felt comfortable racing. I attended one event in 2003 and never
even tried in 2004. With the work that I had completed, I needed
to get the car to the track!
Armed with a fresh set of tires and brakes, I headed
to Putnam Park Raceway for a weekend with NASA's HPDE program. i
had never been on a track before and couldn't wait to try out the
Civic! By the end of the long weekend, I was completely
exhausted having maxed out on fun and educated myself with the
understanding of what makes a fast car. Handling!!


After that weekend, I went to nearly all of the local
autocross events and dominated Street Modified in the North West
Indiana region SCCA and came in 2nd overall in the South Bend Region.

I was thrilled to come back to the sport and reap the
benefits of all the hard work I had done to the Civic.
Top
2006 - The Suspension Upgrade
2006 marked the year for a massive suspension overhaul. I was
never happy with my Ingalls camber kit and knew I needed something
better. Omni-Power makes a kit that allows for adjustment at the
ball joints rather than the inner mount. My alignment guy was
much happier with the Omni-Power components. I also installed an
adjustable upper link in the rear. (Update, Omni-Power went out
of business, Skunk 2 now makes the same part)


I also upgraded my springs to Ground Control's coil-over springs.
I utilized 400 lb/in springs in the front and 450 lb/in springs in the
rear. I used all front length springs in case I wanted to swap
the springs from front to back.
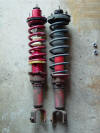
Along with the springs and camber kit, I installed an ASR rear lower
arm brace/swaybar mount. This area of the unibody is very flimsy
and needs the extra support.

A
new set of wheels a tires is always nice. I ordered a set of 16"
Rota Slip Streams and a set of Falken Azenia RT 615 205 40 16 Tires.
 I tied everything together with JDM Password's
front 3 point tower brace and their 2 point rear tower brace.


The handling of my hatch was truly amazing!
Between the LSD and the tighter suspension, I was able to drastically
improve my lap times! Body roll was minimal compared to the
milder suspension that I had replaced. A two day driving event
at Gingerman Raceway was the perfect proving ground for all of the new
equipment and it did not disappoint!


Racing Harnesses
Another discover I made at Putnam Park Raceway was that my Recaro seat
was not enough to keep me in my seat. A friend of mine suggested
that I try Schroth's Ralley 3 harnesses. The harness utilizes
the rear seat, upper seat belt mount as the anchor which creates the
proper mounting angle for the harness.
The improvement
in support from the harnesses was incredible. Adjusted properly,
the harness keeps you pinned in your seat allowing you to concentrate
on driving rather than trying to stay in your seat.


Later in the year, I installed a Walbro Fuel
Pump, B&M adjustable fuel pressure regulator and an MSD external coil.

 
Top
2007 - A Few Solid Upgrades and Some Bad
Luck After the massive suspension upgrade in
2006, I cracked a valve guild during a two day driving event at
Gingerman Raceway. I took my engine to Demaree Automotive in
Indianapolis, IN and had them rebuild the entire engine. They
installed new rings and bearings and completed a full head rebuild
with new valves, valve guides and retainers.
Custom Transmission While the engine was being
built, I decided to pursue a custom set of transmission gears.
The stock Integra GSR transmission has a very long jump in gear ratios
from 1st to 2nd gear. I've always struggled with this issue
during autocrosses. The modification is to use
the B16a 1st through 4th gears along with an Integra LS (B18B) 5th
gear. The B16a's transmission contains one of the shortest gear
sets available from Honda. The only drawback is that 5th gear's very
short ratio keeps the engine at high rpms at highway speeds.
With the LS 5th gear, the engine can cruise at a much lower RPM which
will save the engine an improve your fuel economy.
The
difference is immediately obvious! Shifting into 2nd while
driving aggressively will bring the engine right back into the meat of
the power rather than dropping below it. During my first
autocross with this setup, I was stunned by how much stronger the car
feels. A friend of mine, who has the same swap, made the
observation that it feels like two 1st gears when comparing it to the
stock GSR ratios.
Exhaust and Clutch
I decided to stay away from a pre-bent aftermarket exhaust and had a
local shop do the work. The shop bent a 2.5" exhaust with a
muffler and resonator. For the final "stealth" touch, I painted
the can and tip black.

After
only 37,000 miles, my stock Integra clutch lost one of it's springs.
I had experienced Murf's Exedy Street set-up and decided to install
one for myself. Check out my
clutch comparison.


Of course, more racing:


 Uh Oh...
My engine disintegrated
itself. What to do. Demaree Automotive claimed that I
miss-shifted my transmission and over revved the engine. I
blamed them for the faulty workmanship as the engine only had 4000
miles on it after the second rebuild. The engine consumed itself
at 4000 rpms. Even if I miss shifted, as they claimed, the valve
train was good for more than 10,000 rpms. I had no recourse.
Legally pursuing them would cost more than the engine was worth.
I found myself with a broken Civic and a 16 year old
Miata. I had just
started a new job and my wife felt that I needed a new car that I
could count on. Two weeks later, I took delivery of a
brand new '07 Si!
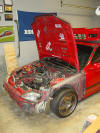
Now that I didn't have to worry about getting my hatch back on the
road, I sold the Miata and spent some time selling parts on eBay and I
was able to pull enough money together for another B18C. Along
with that, I received a few donated parts fro my friend Rick. I
was back in business once again!

Top
2008 - Sorting out Minor Issues
In December of 2007, I bought a JDM GSR B18C. To
save money on shipping, I ordered myself a long block and my friend
Tom a complete swap. It was a blast having the opportunity to do
two swaps back to
back! With my Civic back on the road, I started to
experience what happens when you fight to keep a working engine under
the hood. Everything else wears out and needs to be replaced!
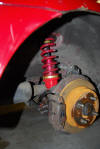
When I bought the hatchback, it came with a set of KYB AGX shocks.
The mileage was unknown and after 5 years of my ownership, they
started leaking. I installed a fresh set of KYB AGX's. I
also opted to raise the ride height to help maintain better suspension
geometry. Another benefit to raising the car ist hat it allowed
me to run a larger tire without rubbing.


My tires bald and hard as hockey pucks. Rather than buy the same
205 40 16 Falken Azenis 615's that I had, I decided to bump the size
up to the 215 45 16 tire. This is a substantially larger tire!
Visually, it fills the wheel wells better.


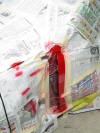
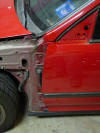
After nearly two years, I finally painted my fenders. I tried to
do some touch-up on the doors, pillars and hood. they didn't
turn out great, but the overall effect was great. The car looks
finished for the first time in years! Wet sanded and polished,
the fenders turned out great!



For years, I was a strong proponent of aftermarket short shifters.
I loved them and had one in nearly every car I've owned. Why the
change in heart? I was sick of the design flows in my B&M
shifter. The lower part of the shifter had no way of keeping the
dirt and moisture from contaminating the sleeve and causing it to rust
and bind the shifter. As part of routine maintenance, I would
remove the shifter, grind the rust off of the sleeve and reinstall it
with fresh grease. Why not try another short shifter?
Unless you have an excessively long shift, the benefit is trivial.
I thought about autocrossing as well as driving on full blown race
tracks and realized that the length of the shift is completely
irrelevant.
I needed a new shifter and decided to install a stock
Integra shifter. I learned that after '98, Honda used a chrome
shifter on all of the Integras. If you look at the picture
below, you can see that the Integra shifter will result in a shorter
throw than the stock civic shifter (the black shifter in the picture
is from a '99 Civic Si) I installed the shifter with
fresh o-rings and seals and couldn't be happier with end result.
 To help pay for my engine, I sold my Hondata
ECU. A friend of mine gave me a spare ECU to help me with my
project. The ECU had an unknown aftermarket chip with a very
high redline and different maps. Since I was worried about over
revving my engine along with the fact that the low cam fuel maps were
terrible, I scoured the internet for a stock USDM P72 ECU and managed
to find one. With the stock ECU, the engine ran great!
PGM-FI Relay
My hatchback was about thirteen years old
at this point. I had been plagued with a very odd problem of
having the car stall and refuse to restart. It was an issue that
only came up once or twice a year. It was very hard to diagnose.
One day, when the car refused to start, I noticed that I had no fuel
pressure or spark. After consulting my Helm manual, I discovered
that the fuel and ignition are activated by the PGM-FI relay. I
later discovered that this relay is problematic in older Civics and
Integras. I threw in a spare and never had the problem again.
Top
2009 - More Maintenance and Learning How
To Drive Again In 2007, I blew my engine at
the second autocross of the year. I retired for the season.
2008 saw a new engine, fresh tires and shocks. I was ready to go
and love my car all over again. I only made it to two races
before a work schedule prevented me from racing for the rest of the
season. In 2009, I was awarded a normal work schedule
and a well preserved Civic! I replaced the right rear wheel
bearing and ABS sensor and headed out to the races.


 I started the racing season on the wrong foot.
I did a fairly poor during the first event. I learned that the
class I had run for years, Street Modified, had really become a
catch-all class. I was running against 400+ HP racing tire clad EVO's
and STi's. As long as the car was street legal, it could be in
my class. I had to rethink my strategy.
I realized that I had been away for a couple of years so my driving
was a little rusty. It would take practice and patience to get
back into my groove. I also realized that I wouldn't be driving
the hatch as a daily driver. The creature comforts of a huge
stereo were unnecessary along with a few other details. I
decided to start thinking about my hatchback as my dedicated weekend
warrior. I ditched the custom stereo and started removing as
much as I could from the interior. I removed all of the seat
belts except for the driver's belt (it is very uncomfortable to use
the harness for normal driving)
The weight savings was
immediately noticeable. The hatchback had more pep and was much
more nimble on the course. I miss the monster stereo but at the
same time, I love what the civic was becoming.
I
managed to get through the entire season without having to perform any
maintenance. I focused on honing my driving skills. I was
still dealing with a highly competitive class and knew that I would
have to do my best to out drive my competition.
I had a great season and managed to get 2nd overall in my class.
I really feel as if I've come back to the sport and look forward to
getting even better in the future. I have a few ideas for fine
tuning the civic for the next season and I look forward to trying them
out.


Top
2010 - Another Engine, Brakes, Tires and a
Diet My plans for this
year started out with a set of tires, brakes and the simple removal of
the last bit of stereo.

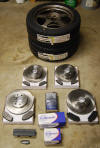
I installed a set of fresh rotors, fresh ATE super blue brake fluid
and a set of Carbotech AX6 brake pads.

I can't really remember why I switched to the
Falken Azenis tires a few years back. I don't know if it was
cost, or I just wanted to try them out since so many others, at the
time, were using them. I always seemed to struggle to keep up
with the faster cars. When it was time to replace the last set,
I decided to try something different. Car and Driver had
conducted a performance tire comparison and the Falken tire did poorly
overall compared to the newer tires available. Between my
experience with them, and the article, I definitely knew it was time
for something new.
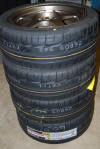
After talking to my good friend Luke at The Tire
Rack, I decided to try out a set of Bridgestone Potenza RE-11's.
It is the direct descendant of the S03's that I loved and used in the
past. I was not disappointed! The improvement in my times
were spectacular! I was besting times of people with faster,
race tire clad cars.
The Diet
Last year, after I decided to ditch my custom
stereo and remove a few unnecessary parts, I realized how important
weight reduction was to overall performance. Yeah, you hear
about it but without experiencing the impact, it's hard to really
appreciate what it can do for you.
With the bulk of the stereo gone, what was left
sounded awful. It was time to go hardcore. I gutted the
interior and started removing any unnecessary wiring, sound deadening,
clips, braces and so on.
I used dry ice to break apart the tar sound
deadening. I pulled out the firewall mat. I removed all of
the wiring associated with the stereo and slimmed down the dash wiring
harness.


I had installed tweeters into my original door
panels and didn't want to have gaping holes from the missing stereo.
I bought a pair of used base model panels that lacked the map pockets.
The fabric on the doors was in sad shape. I decided to freshen
up the look with some red suede. The process was a little
cumbersome but I was really happy with the end result. It is a bit
flashy but with the rest of the mostly stock interior, it was a nice
touch. As you can see from the pictures, I also covered the rear
speaker panels.
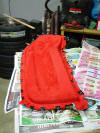


Through the process, I tried to save every scrap to try and get an
idea of what I saved. The tar and sound deadening alone saved
about 10 lbs. The stereo and all of the wiring saved another 35
lbs for a total of 45 lbs. That may not seem like much but when
you consider the weight that I lost with the custom stereo, I have
saved about 150 lbs. which is substantial considering the overall
weight of the car. Without me in it, the hatch weighs about 2280
lbs. Not bad!
There is still quite a bit more that can be pulled. I could get
a CF rear hatch, remove the AC, remove the sunroof and have the hole
filled, and so on. I can't quite bring myself to pull the AC and
the rest of the weight savings comes at a high cost.
For this year, I also had a new set of numbers
made. The answer to life, the universe and everything! I
also used some left over paint from my front fenders and painted the
emblems.


Old cars need parts....I had to replace the right
rear ABS sensor

Yes, another engine. I fell prey
to the cold air intake blues regarding standing water. For
years, I was very careful about water and the CAI. Not having to
worry about water with my '07 Si, I lost the habit of being careful
with water. That being said, I got another JDM GSR B18C and
turned my CAI into an SRI.
I decided to use a shop that came highly
recommended by users of the Honda-Tech Forum.
H-Motors Online sold
engines at a price that was similar to others out there. The
difference was the quality of the engine and the service. The
engine looked new with a refinished valve cover. The engine was
also wrapped with so much foam padding that you couldn't tell what it
was. They also removed all of the sensors that could be damaged
in shipping such as the TPS, and IAT sensors. I've never
received an engine with an unbroken TPS!! I was stunned and very
thankful of the effort they put into their work!


While I had the engine out, I pulled the entire
front suspension apart just to make sure everything was in good shape.
I found a sway bar mount that I installed backwards. Did you know
there was an arrow on these things? Oops!

Aside from the engine mishap, this was a really
great year. I attended an Evolution Driving school for auto
crossing and managed to make it to quite a few races.
Top
2011 - A Rebuilt Transmission and a Little
Tweaking I've know for years that my
transmission needed attention. Shortly after I built the custom
transmission, the 5th gear synchro started grinding. I wasn't
worried about the synchro because I wasn't experiencing the issue
during racing. However, when the bearings started growling, I
decided it was time to pull the trans and have it fixed. I had
my favorite shop install a full set of new bearings and a 5th gear
synchro. No more bad noises!
I used my parts mule '07 Si to drop off the
transmission!

Control Arms and an Alignment
I was concerned about the front upper ball joints
in my Omni Power upper front control arms. I ordered a set of
the Skunk 2 Pro Series Plus upper arms. The Pro Series Plus arms
include their heavy duty ball joint and poly urethane inner bushings.


After I installed the new upper arms, I had the
civic aligned and was ready to hit the track. Up front, I
started with -1.5 degrees of camber and 0 degrees of toe. In the
rear, I left it at -1 degrees of camber and 0 degrees of toe.
During the next event, I noticed that I was creeping onto the edge of
the tire during hard cornering. I realigned the civic to -2.0
degrees of camber up front, -1.5 degrees of camber in the rear and 0
degrees of toe all around. The minor adjustment helped with the
contact patch and wear during autocrosses. Using a temp gun, I
measured a fairly even temperature distribution across the surface of
the tire. I was satisfied with the results!

Sitting in grid, waiting to run


Helping set up the course.
The hatch is definitely useful for this!

Throttle Body
Anyone that has driven the older OBDI Hondas has
probably experienced the woes associated with the fast idle valve on
the throttle body. (see picture below)

I was having trouble with my fast idle valve.
Rather than replace it (again) I decided to use an OBDII throttle
body. The difference between the original throttle body and the
later version is the lack of a fast idle valve. Even Honda
realized it was a bad idea! I had a spare one that was in sad
shape.
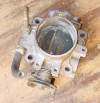

I dismantled it and cleaned it thoroughly.


Once it was back together, I installed it on the
engine. The end result was an engine that idles normally.
This "upgrade" is definitely worth the money if you can find a good
used throttle body (a new one at wholesale prices is still around
$450) Wheels and Tires
It was time for a new set of tires. I had
been running a 16" wheel for years. I like the way it looks
compared to a 15" wheel but I realized the difference in cost of the
tires. At the time of this writing, the Bridgestone RE11, in the
16" size is $177 each. The 15" size is $134 each. Both
tires are 205 mm wide. Both tires are nearly identical in height
so the contact patch, front to back, is the same. The only
reason for running the 16" wheel is cosmetic. I can save about
$185 per set of tires after taxes.
Another advantage to the 15" wheel is that there
are more tire options available.
With all that in mind, I ordered a set of 15" Rota
Circuit 8's.
2012 - Wiring woes and a limited budget
Bleh
Down The Road
It's August, 2011, as I'm writing this. After
the minor work that I finished this year, I can say I'm happy with the
Civic. I'm ever more conscious of my budget which is leading me
to more cost effective modifications based on what I'm doing with the
car. That being said,
I don't have any real plans for the future other than to maintain the
car. I've thought about more dedicated race bucket seats,
possibly some gauges for when I head out to the race track.
Beyond that, the money spent on big power adders seems frivolous.
I still think about
switching to race rubber for auto crossing, but time will tell.
|