|
Probably one of the more intimidating processes is swapping out
the factory steering wheel. The steering wheel houses the airbag,
the horn and cruise control, if equipped. In almost every case,
I've seen individuals abandon each function. Through a little
planning, trial and error, and a bit of research, I came up with a
solution that allows for the use of the horn and the cruise
control. In this case, and in most, the airbag is being
eliminated. This process is specific to the S14 however, it may be applicable
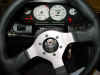
for other Nissans. The wheel being installed is a Momo Fighter Wheel with a Momo
hub.
Disclaimer: The airbag should
only be removed for off road or racing purposes only.
Tools Necessary:
- socket set
- wire cutters
- wire crimper
- soldering iron
- hand drill and drill set
- 1/4" wide brass strip (purchased at local hobby shop)
- T-50 security tamper proof Torx bit
| Note: T-50 security tamper proof Torx
bit can be purchased from
McMaster-Carr
|
|
T50 tamper-resistant L-key |
|
item #55525A34 |
|
Cost: $4.02
|
You may want to disconnect the battery and wait about 15-30
minutes before you start this process. You risk having the airbag
deploy and cause serious injury if you don't disconnect the
battery. I would start by disconnecting the airbag computer which
is located under the rear seat. I chose to remove the entire airbag
system, both the one located on the passenger side and the drivers
side. It is possible to leave the other bag in place, but it will
not operate if one is missing. Given that, I will start with the
removal of the dash, passenger side airbag and the
airbag/horn/cruise control harness.
Dash removal:
This process is much easier that it sounds. Start by removing
the climate control console, radio console and center console.
Behind the radio, you'll find two extra screws in the dash. Remove
them. Remove the glove box and then remove the 3 screws that hold
down the metal frame. Remove the knee bolster under the steering
wheel. Remove the metal plate (4 bolts) that is under the steering
wheel. Once that is out of the way, remove the two large bolts that
hold the steering column in place. Once the column drops, remove
the instrument cluster bezel then the instrument cluster. Take a
moment to remove the Airbag light. You'll thank yourself later.
Once the cluster is out, remove the single screw that you see behind
it.
Almost there! Next, use a blade screwdriver and carefully remove
the thin windshield vent on the top of the dash. Once that's out,
remove the two screws that you find there. On each side of the
dash, there is a vent that feeds the doors. Remove the vents and
remove the screw that you find behind each. On the passenger side,
there is one more screw near the kick panel. Remove the door sills
and the kick panels. At this point, the dash is free as a bird.
Carefully lift and pull away.
Once you are under the dash, remove the 4 tamper proof torx bolts
that hold down the passenger side airbag. Pull it out and set it
aside. (If you are not using the factory stereo amplifiers, you can
take a second to remove them now)
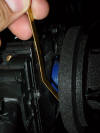
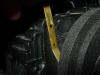
By now, you should have realized that the airbag harness is
wrapped in yellow tape and conduit. Remove the entire harness from
the passenger side bag, to the steering wheel and back to the
computer under the rear seat. To get at the computer, remove the
rear seat, the metal cover and then remove the tamper proof torx
bolts. The harness joins the interior harness near the passenger
side of the radio near the floor. Once the harness is out, set it
aside. You'll need to modify this harness for the cruise control.
Once you've pulled the harness, you can reinstall the dash, but
leave out the radio and other misc pieces. You'll need the access
to the harness plug that's there.
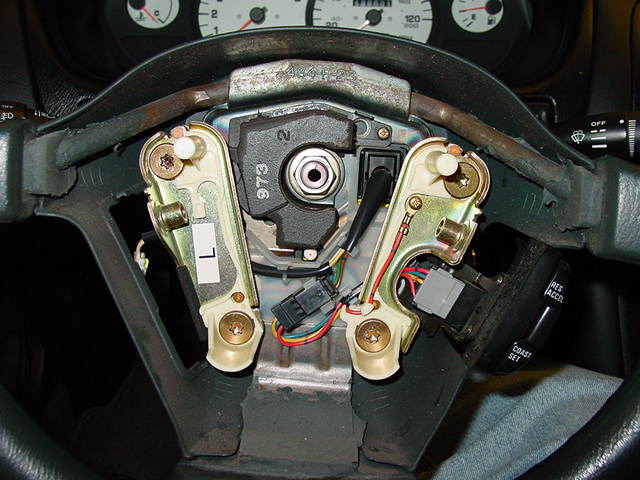
Steering wheel removal:
If you don't plan to remove the passenger side airbag, you can
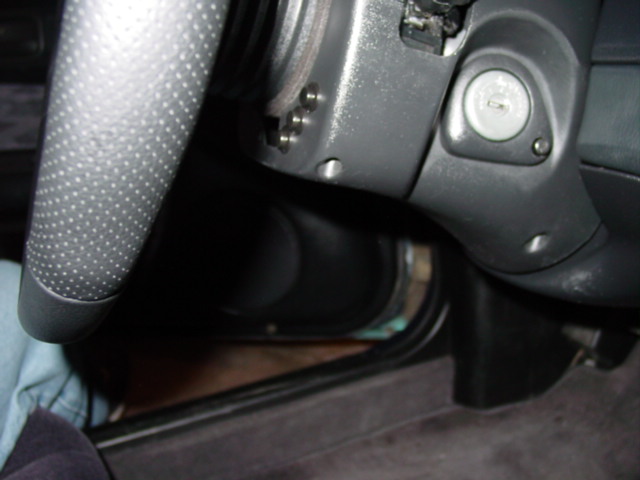
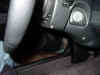
start here. Start by removing the plastic cover on the left hand
side of the wheel, and then remove the cruise control cap (if
equipped) or plastic cover on the right side. Remove the tamper
proof torx bolts form each side.
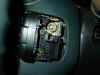
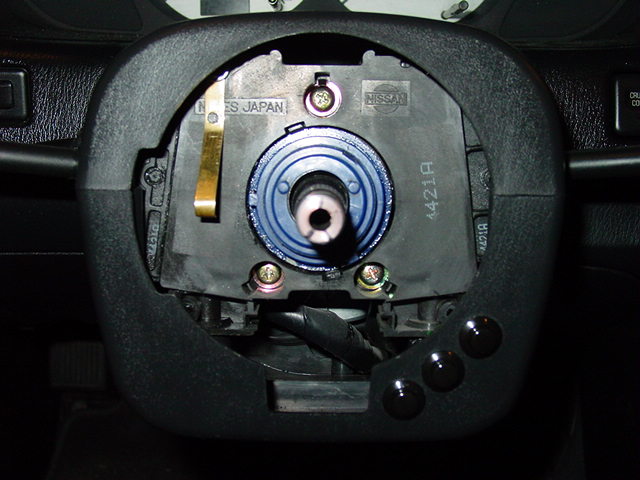
Once you get the airbag out of the way, Remove the large bolt in
the center of the wheel
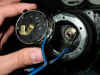
After you remove the nut, you can "wiggle" the steering wheel
off. Disconnect the harness and set the wheel aside. You will need
to remove the "spiral" piece. This is essentially the device that
allows the harness to pass through to the wheel and allow the wheel
to turn. It will not fit between the column and the aftermarket
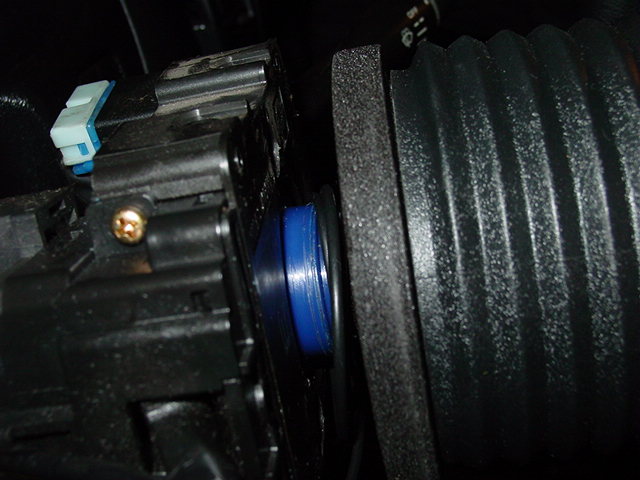
steering wheel hub. Once that is out of the way, you will discover
a blue ring. This ring is the device that cancels the turn signal.
You will have to modify the Momo hub to maintain the turn signal
cancel function.
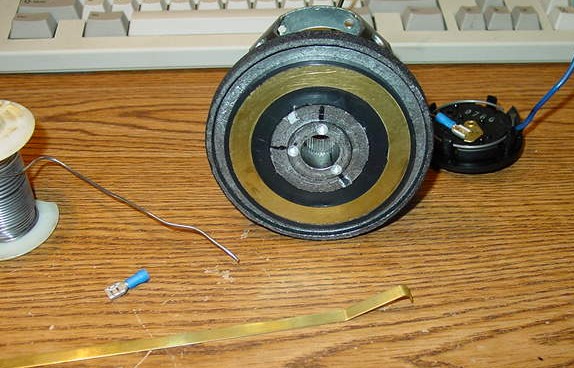
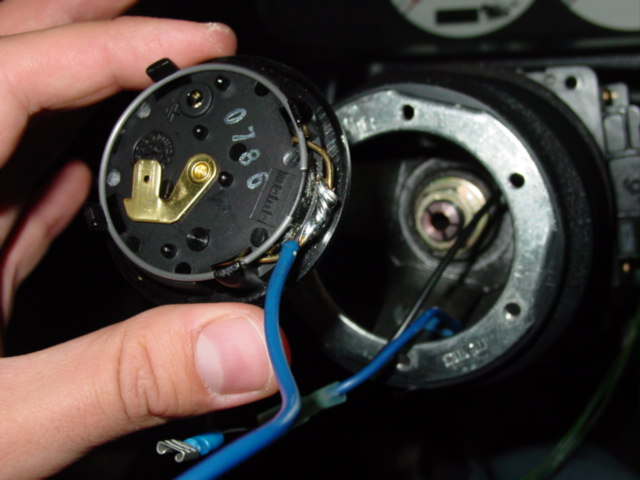
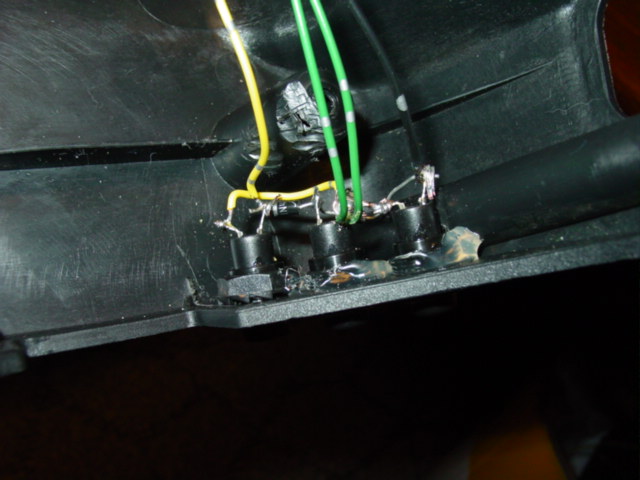
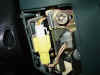
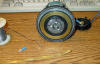
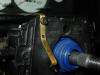
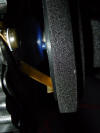
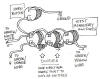
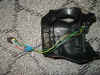
Here's a shot of the "spiral" piece along with the hacked airbag
harness. I'll get to that in a bit.
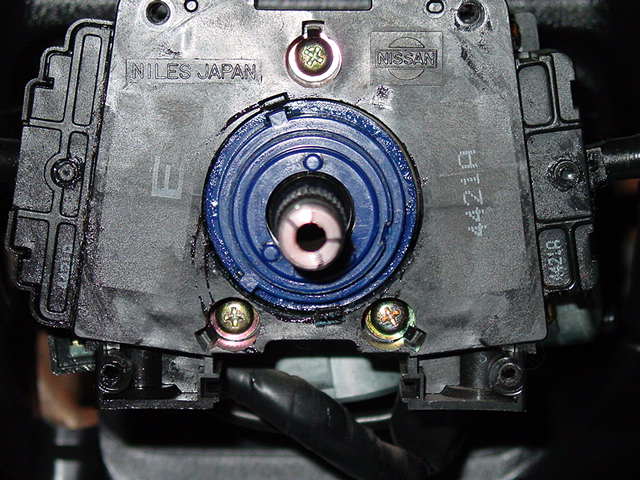
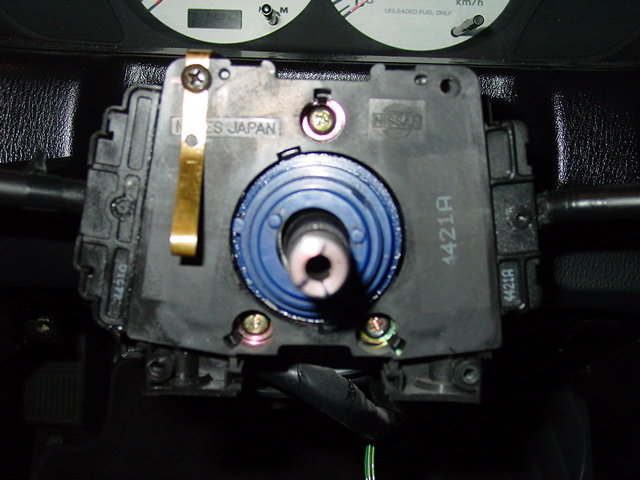
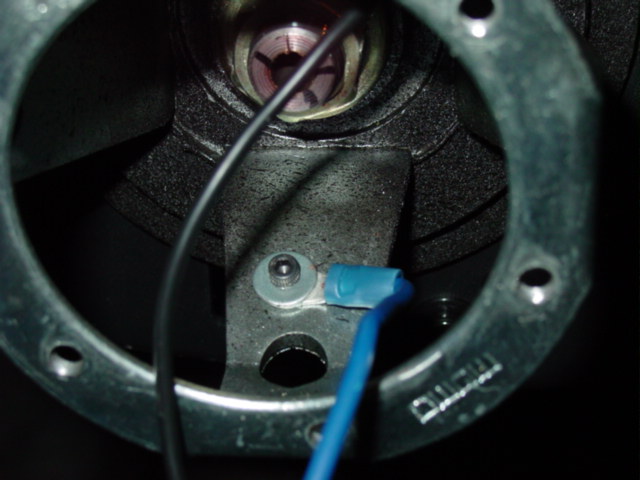
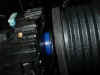
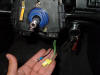
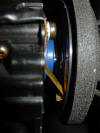
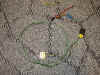
Here's a shot of the blue ring:
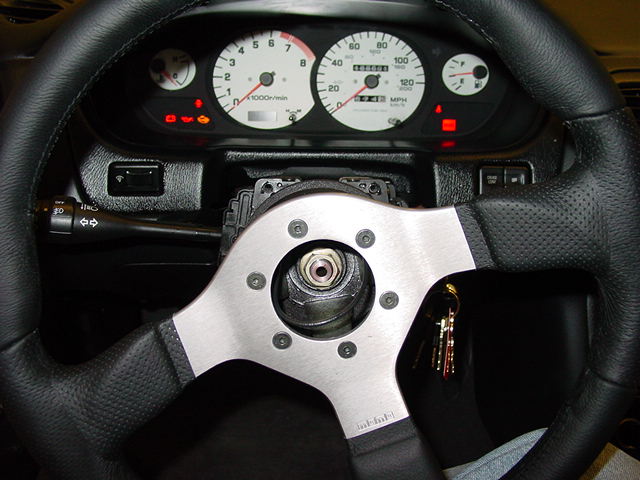
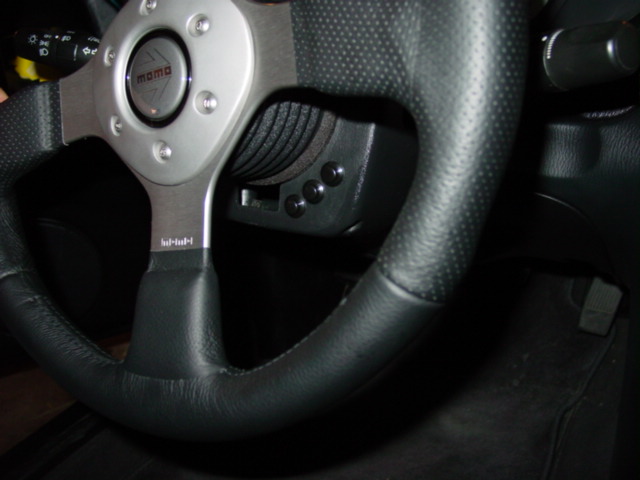
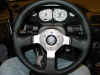
The first thing that needs to be done, is center the new wheel.
This can be a bit tricky and ends up being a trial and error
process. At least, that's the way it worked out for me. My Momo
wheel came with an extra set of screws that I used to mount the
wheel (without the horn cover) to the hub. Eyeball the alignment
the best that you can and hand tighten the nut. If you can, take
the car out and check your alignment.
Once you get it right, carefully mark the hub and the center of
the steering column. I made three marks which seemed to be more
helpful. You'll need to have the wheel aligned before you take care
of the turn signal cancel. This is important for the proper
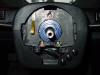
operation of the turn signal cancel. Mark the top of the hub and
pull the wheel back off. Remove the blue ring and take note that
the 3 pegs are not equally spaced. The bottom pegs are closer
together than the top peg.
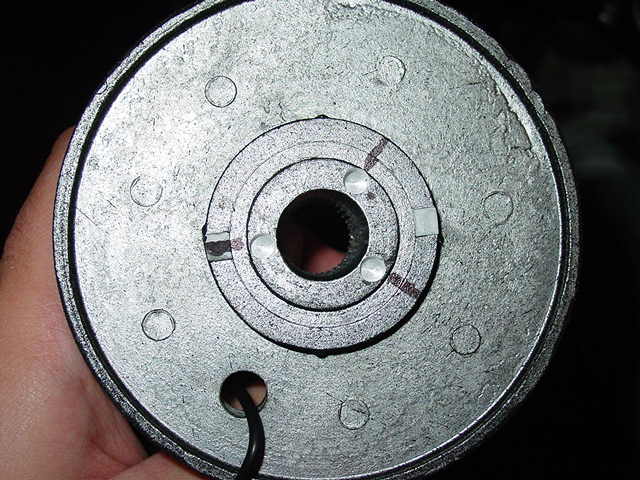
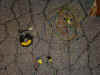
For S14's, break off the tabs on the Momo hub. The tabs are
necessary for S13's. Carefully line up the top peg with the mark
you made on the hub and then center the ring on the hub. Mark the
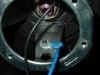
location of each peg. Using a drill bit that is slightly larger
than the peg, drill a hole next to each mark that you made (see pic
below). It is important that this piece is centered. Test fit the
blue ring and make sure that it can lay flush to the back of the
hub. Once that is done, pop the blue ring back onto the column.

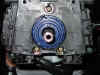
Momo only makes a hub for the S13. That is where the two pegs
come in to play as well as the metal slip ring. The metal slip ring
is used for the horn on S13's and with the modification that I made,
for S14's as well. Originally, I removed the slip ring in favor of
loop of wires. DO NOT use a
loop of wires
Wiring the horn:
My original attempt at wiring the horn was an utter failure. I
apologize for anyone that had the same problems that I did using my
instructions. However, I've come up with a solution that is fool
proof. Using the metal slip ring provided with the hub, I was able
to properly wire the horn.
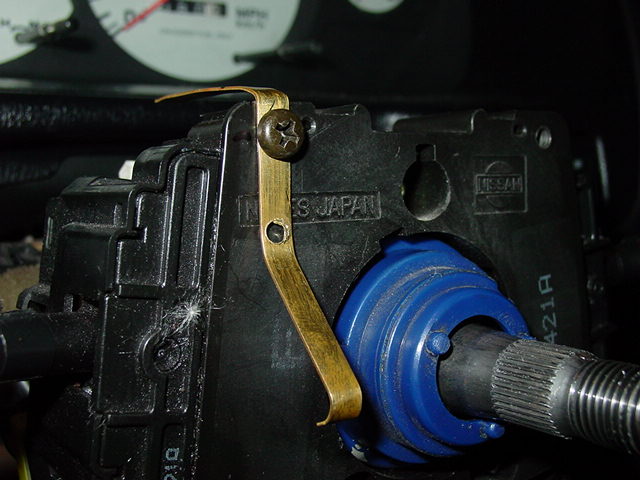
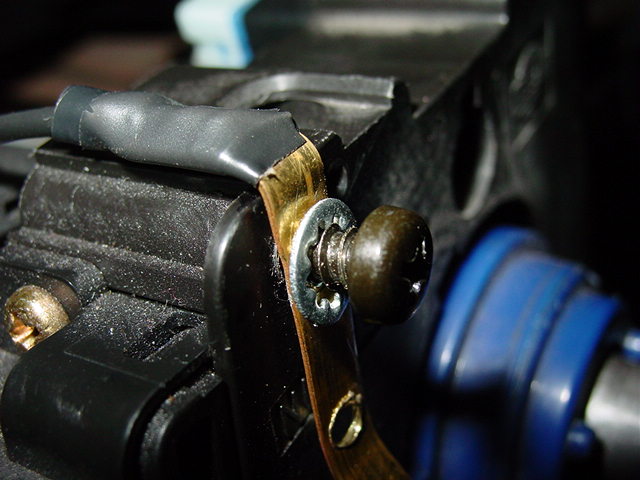
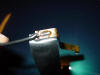
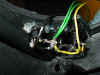
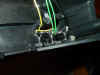
I picked up a strip of 1/4" brass from my local hobby shop and
bent it for proper contact with the slip ring.
After I bent the tab into the shape that I wanted, I determined
where to mount the metal tab and marked where the hole will be
drilled.
You may notice in the picture, that the metal tab lays over one
of the factory "spiral cable" mounting holes. I chose to use this
hole to mount the tab.
Once I drilled the holes, I test fit the tab.
I was originally going to use two screws and drill into the
steering column, but I discovered that using one screw was more than
enough. It also saved me a potentially damaging hole in the
steering column. You will also notice, that I bent the tab over the
top of the column. This will allow the wire a path behind the wheel
and keep it away from moving parts.
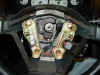
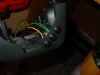
Once I was satisfied with fit, I soldered a wire long enough to
meet the cruise harness (more on that soon)
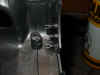
With the wire soldered and crimped, I attached the tab to the
steering column using one of the original "spiral cable" screws. I
also used a star washer to make sure that it will not move.

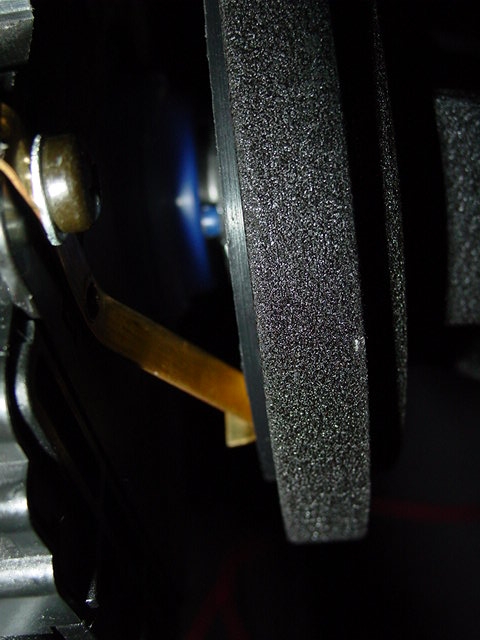
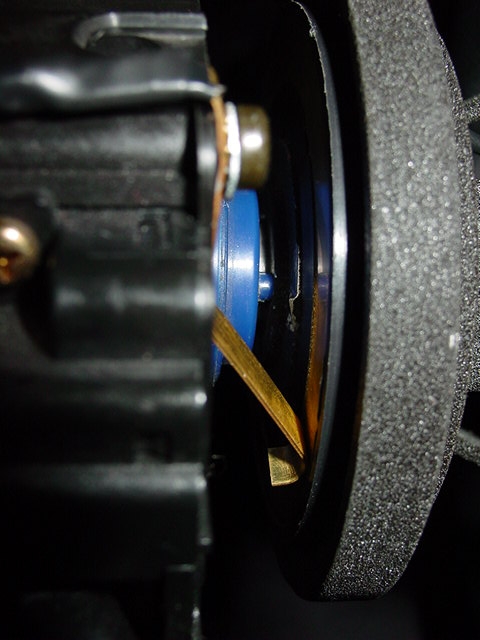
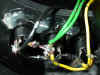
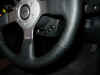
Here are a few shots from the side showing the alignment.
Finally, a few shots from the front.

With the tab and wiring finished, you can move on to wiring the
hub.
I chose to hardwire the horn button to the hub. I drilled a
small hole and attached a piece of wire using a ring connector. I
passed this out through the middle of the hub (same place the other
wire should be hanging out of now). Once all the wiring is in
place, set the hub back on the column, tighten the main nut and get
ready to attach the wheel.
Set the wheel on the hub and attach one wire to the middle tab on
the horn button and solder the other wire to the metal loop on the
side. Place the horn button and cover on the wheel and use the
supplied screws to attach the wheel.
At this point, you still won't have a horn, but I'm getting to
that.
Finally, the cruise control:
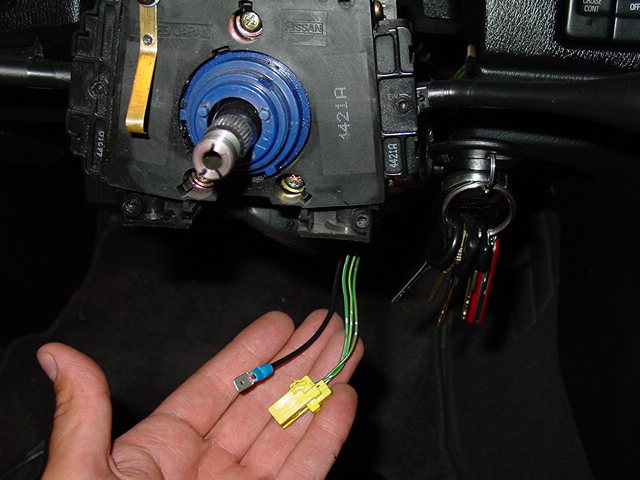
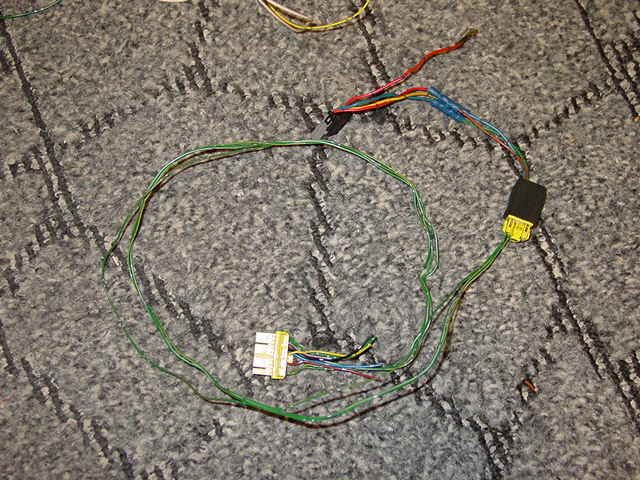
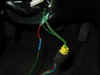
You'll need to dig up the harness that you set aside earlier. I
went through the trouble of stripping all of the tape and conduit.
I discovered that if you don't use the airbags, you can cut the
harness down to three wires. A Green/White wire, Green/Yellow
wire, and Green/Orange wire.
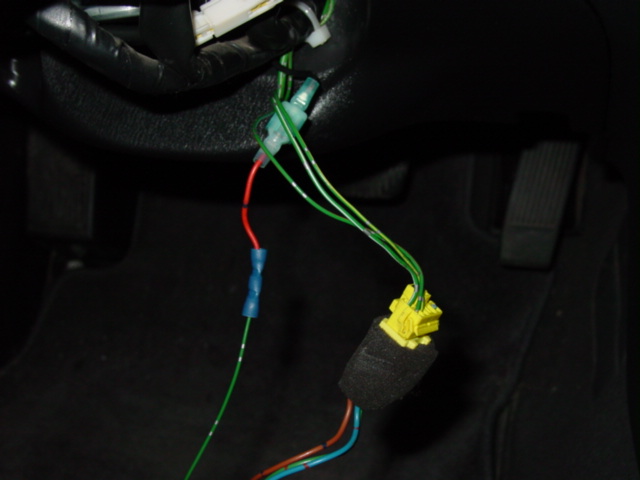
If you decide to use the buttons that are attached to the wheel,
you'll need to extract the harness from the wheel. For temporary
use, I setup the harness to use the factory buttons. If you look at
the diagram, you'll see the color combinations that you'll need. I
removed the harness from the back of the "spiral" and spliced it
into the harness that attaches to the buttons.
Button harness to "spiral" harness
Red -> Brown
Blue -> Green
Yellow -> Blue
The other red wire, that is on the opposite end from the other
three will attach to the horn wire that you set earlier (see, I told
you I would get to it).
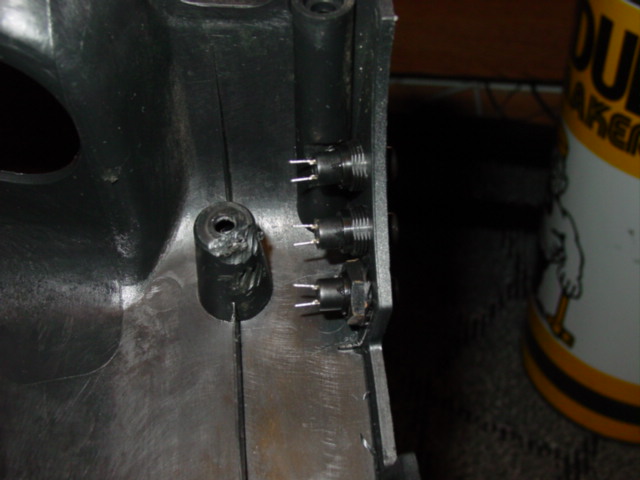
Now, if you are adventurous, you can setup your own buttons.
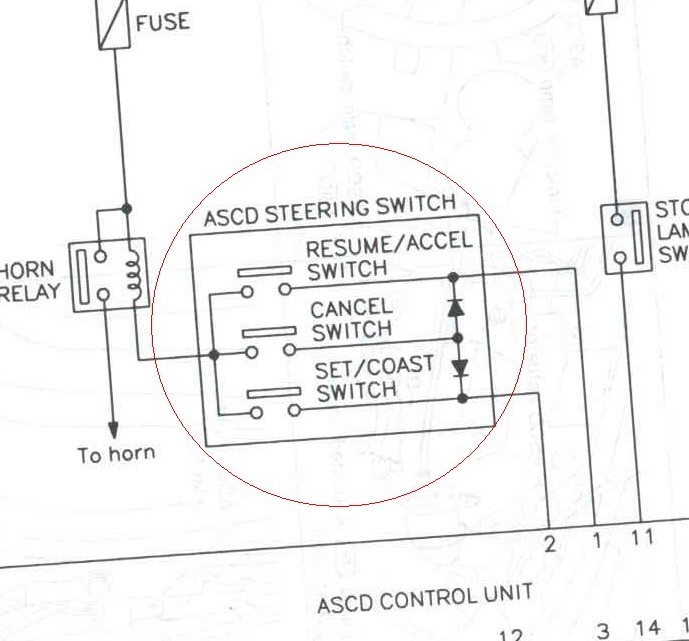
You'll need to go and pick up a few parts. Nothing big. I decided
to use Radio Shack's 275-644 push buttons and a pair of diodes. The
FSM provides a really good circuit diagram for the cruise buttons:
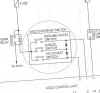
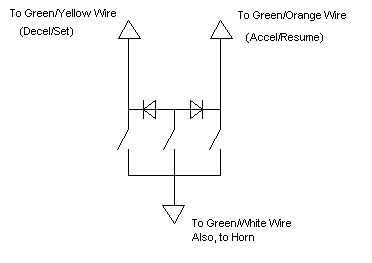
Using the FSM diagram, I came up with this diagram:
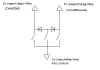
Finally a "cruise for dummies" diagram provided by
Bill Courtney
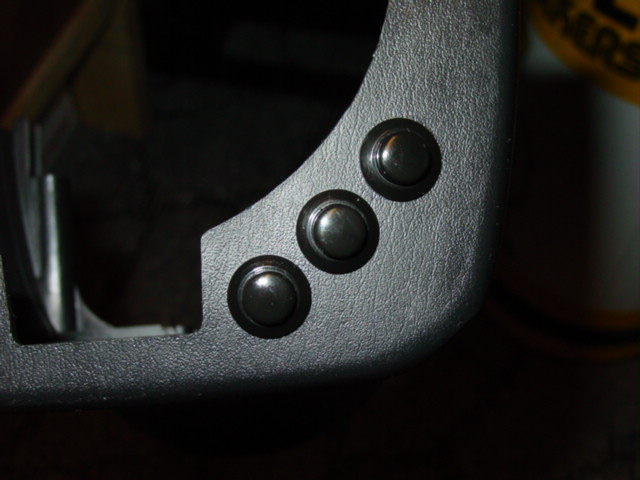
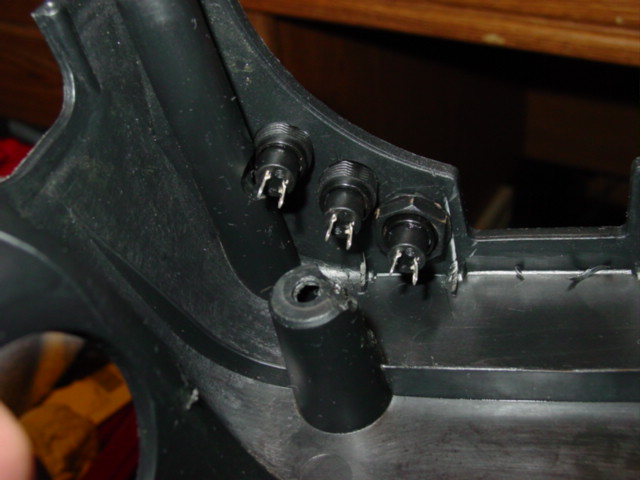
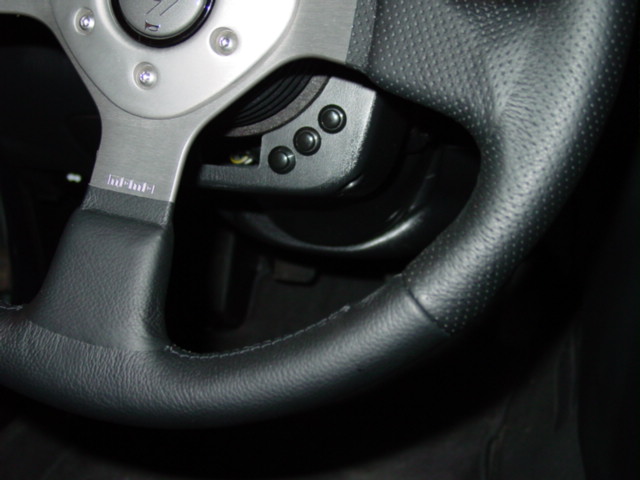
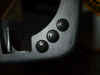
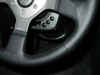
With this, you can start to wire the buttons. Use your own
discretion on where you want to mount the buttons. I chose the
steering column cover for the simple reason that they can easily be
reached through the spokes. I'll let the pictures do the talking
from here.

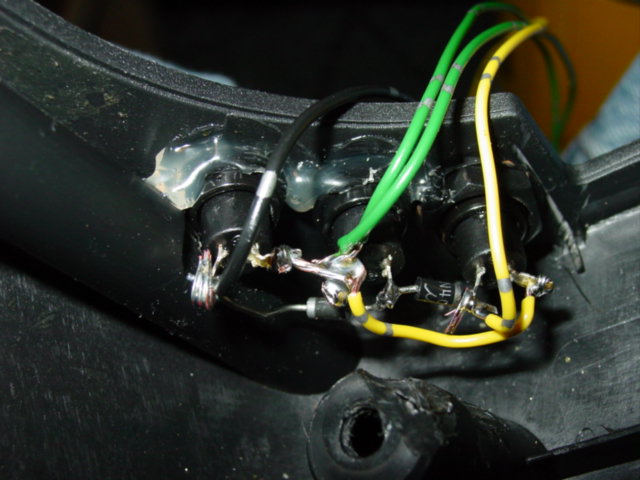
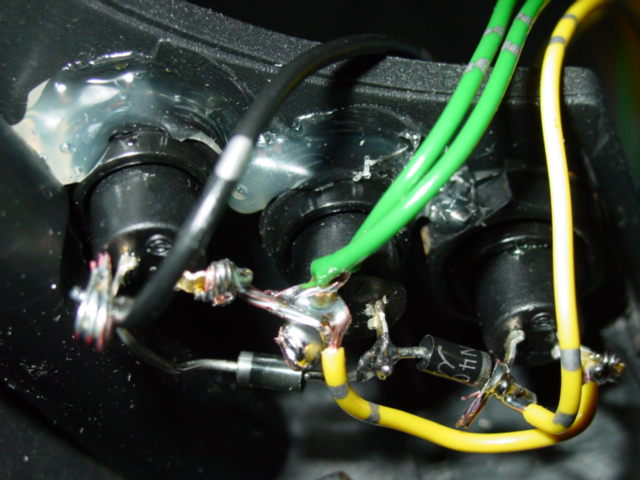
Basically, when you build your own cruise buttons, you need to
try and "emulate" the original unit. The two green wires are
essentially the two red wires that came out of the factory harness.
One for the horn wire and the other goes into the factory
harness. The colors that I chose were random.
If you don't have cruise control, all you will need to use is the
Green/White wire.
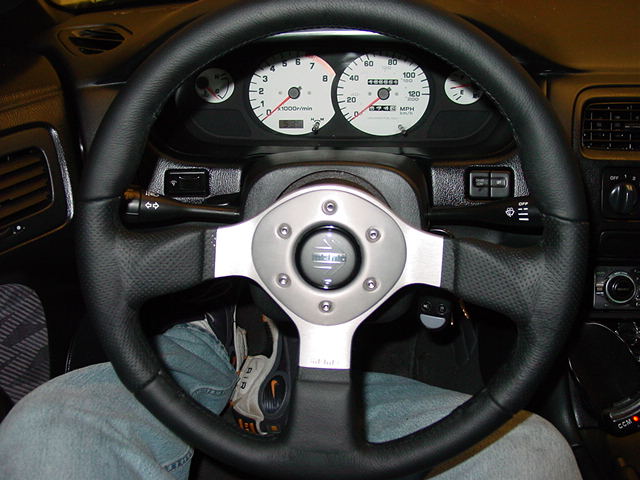
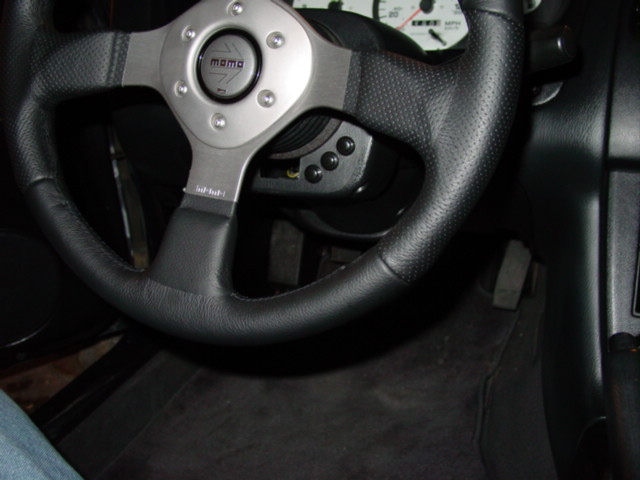
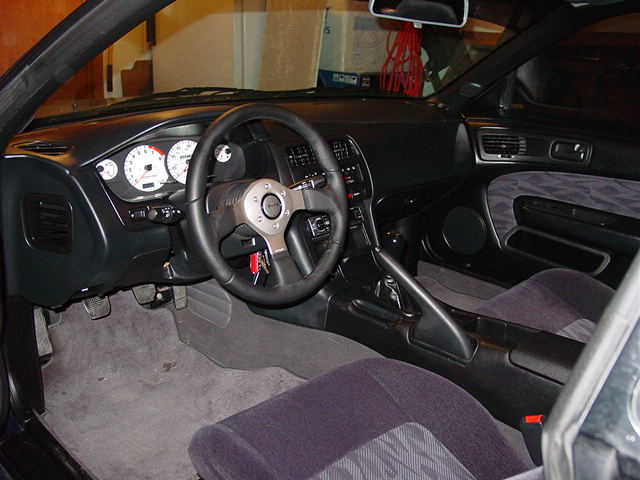
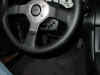
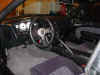
To wrap it up, connect all of the harness plugs to the respective
homes, button up any loose pieces and enjoy your fully functional
aftermarket steering wheel. Plus, you can tell everyone that you
have a 3-stage NOS setup....just tell them the bottles are empty!
As always, I'm more than happy to offer help.
Email me with any
questions or comments regarding this write-up.
|