|
Here it is...the final draft of Project 240.
It's been a while since I sold my 240 and I felt it necessary to
update, complete and finalize this page. My hope is that you
find this page and find some great advice to help you with your
project.
Not too long after I finished the swap project on
my civic in 2000, I started to dream up another project. The
bulk of the swap out of the way, I felt that I needed a bigger and
better goal.
Queue up Nissan's 240SX. I wanted boost, but
not in a Honda. I wanted a very fast car, but with creature
comforts. Add to that the desire for RWD and I realized why
I needed to find a Nissan 240SX. The 240SX is one of the
only RWD imports that doesn't carry the ridiculous price tag of a
Supra, RX7 or 300ZX. The car's chassis is very well balanced
and offers a significant level of opportunity.
While researching potential modifications for the
240SX, I discovered a general lack of 240SX information.
There are several sites and clubs that provide quite a bit of
information but I was still not finding what I needed.
This write-up is set up to walk you through my
time with my 240SX. The modifications, repairs, ideas and so
on are all listed here from start to finish.
Now that I've sold my 240SX, I wanted to wrap up a
few more details and close this page with a few thoughts on what I
would have done differently and what I would do again. I
never got to the engine build/swap but I did nail down nearly
every other aspect of the project.
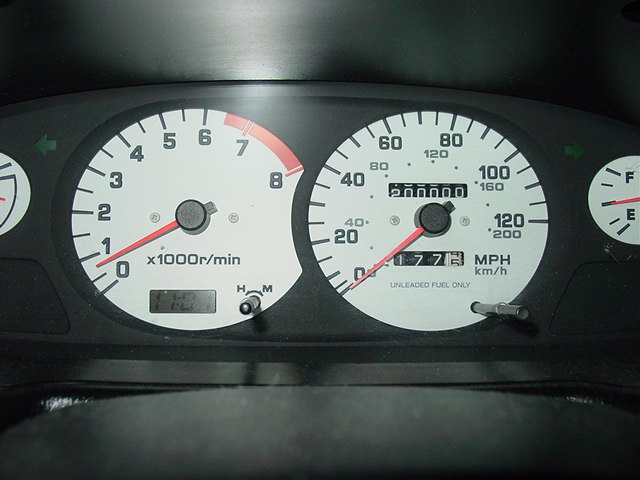
July 27, 2001 (181,000 miles)
The 240...
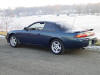
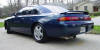
Through a friend, I was able to locate a '95 240SX
SE with a 5spd. The 240 had quite a few miles, 181,000 to be
exact. The service record on the 240 was flawless. The
body was straight and it ran like a top. There was a bit of
rust but nothing that couldn't be resolved with a little care.
While driving this high mileage car, I discovered that the
suspension had serious amounts of potential. The handling
was crisp and very solid even though the shocks and bushings were
original. All in all, the only concern that I had was the
fact that the interior color was nasty! I'll get to the
resolution shortly.
August 22, 2001
(182,932 miles)
Maintenance
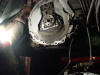
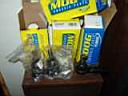
One of the first tasks was to replace the clutch
and water pump. The clutch had been slipping long before I
bought the car. It was still drivable, but it wasn't going
to last long. I managed to toast it along with the water
pump on one of my power slide attempts.
Here are a few pictures of the operation:
When I completed
this operation, I didn't reinstall the fan and shroud. For
the most part, there was no noticeable difference in cooling as
the auxiliary fan was more than adequate. I did discover
that the auxiliary fan is not enough to allow the AC to work
properly. I quickly reinstalled the clutch fan
September 15, 2001
(185,300 miles)
Tint
Clear glass is not my friend. Having grown
accustomed to tinted glass, I find it quit necessary to have it.
A quick call to my tint guy and my problem was solved.
December 30, 2001
(190,000 miles)
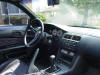
Interior Swap
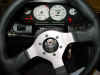
During this time, I wrapped up the interior color
swap and steering wheel swap. This process was quite easy
and there really isn't much to the interior. even the
dashboard was easy to pull out.

Momo Steering Wheel
Since I wasn't very enthusiastic about buying a
new airbag simply for the fact that it was black, to match the new
interior, I decided that it was time to pull the airbags and
install a Momo steering wheel. The process took quite a bit
of trial and error, but my time and effort paid off with an
excellent looking steering wheel that allowed me to utilize the
horn as well as cruise control. To top it all off, the
steering feedback is superb!
June 19, 2002
(192,845 miles)
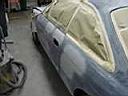
Body Work, Brakes and Diff
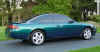
Back in February of 2002, I started a project that
finally ended in June. My 240 was fairly clean except for a
bit of rust in a few areas. Along with some nasty touch-up
paint from the previous owner, the 240 was just not clean enough
for me! After many hours of sanding, repairing, sandblasting
and welding, the body looks great! Painted in the original
Emerald Blue Pearl, my 240 looks great! During the
operation, I took the time to replace the bumper and chin spoiler.
I also dyed the roof liner black to match the rest of the interior.
While the car was laying dormant at my uncle's
auto body shop, I sniped a few parts from eBay. These parts lead
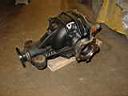
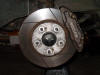
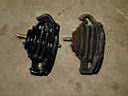
to a complete 300ZX brake swap and LSD Install.
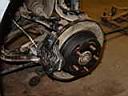
The brake swap was a great success and was worth
every last penny and ounce of effort that it took to do the work.
The LSD swap was also a piece of cake and yielded
excellent results.
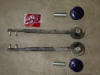
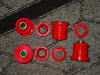
Another project that helped fill down time was the
installation of PDM's poly urethane tension rod mounts.
These mounts are liquid filled from the factory and will
eventually leak. Once the bushings deteriorate, the 240 as
well as the 300ZX will exhibit very bizarre handling
characteristics. Braking will feel strange and the car will
steer itself through fast sweepers or lane changes on the highway.
Add to that some very poor tire wear.
The solution can be to either replace the TC rod
with the factory equivalent or go with an upgrade such as
Whiteline's Ploy Bushings.
The aftermarket bushings made a substantial
difference and feel great!
July 31, 2002 (194,863 miles)
More Maintenance
With the new TC bushings in place, it was apparent
that I still had some quirky handling issues. Upon close
inspection it was obvious that my 195,000 mile ball joints and tie
rod ends were to blame. With a fresh set of parts, my 240
finally had confidence inspiring handling
October 5, 2002
(198,734 miles)
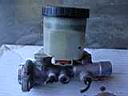
Master cylinder
Several months had gone by before I finally picked
up a 300ZX MC. The MC swap was the finishing touch on a
great set of brakes!
November 10, 2002
(199,397 miles)
I picked up a pair of 30mm 300zx calipers and
rotors from Tire Rack Luke for a good price. Power stop
rotors and Hawk HPS pads. Nice!
November 18, 2002
200,000 miles!
March 17, 2004
(202,383 miles)
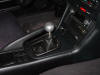
Short Throw Shifter and Sub Frame Bushings
It's been a long time since I've done anything to
the 240. Finally, I got a chance to install the 300zx
sub frame bushings and B&M's short throw shifter. The sub
frame bushing install was rather difficult. The bushings
were designed for the 300zx and are not exactly the same as those
found on the 240. After a little welding and torching, I
installed the bushings. I still need to cut about half an
inch out of each bushing. The improvement in the stiffness
of the rear of my 240 was immediately obvious, even with 204k mile
shocks. A worthy investment...especially if you can find
bushings designed for the 240.
The B&M shifter wasn't too difficult to install.
The difficulty was accessing the two front bolts. Read the
shifter install write-up for suggestions to make that easier.
I can't even begin to explain the difference in the shifter.
The old equipment was very, very sloppy and an all around pain to
manipulate. The new shifter results in a substantially
shorter throw as well as eliminates any slop the old shifter
exhibited. The only draw back is that the shifter will buzz
when you rev past 5000 rpms. The improvement in shift is
worth the buzzing.
May 30, 2004 (205,000 miles)
Tires, Shocks, and a header
A fresh set of tires and a new set of KYB GR2
shocks set me in the right direction for general duty this summer.
With the big civic
build-up, I just needed some hardware to get the 240 rolling
reliably.
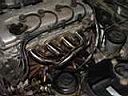
Just for fun, I picked up a header. It's a
cheap OBX header, but for $200, I didn't think I could go wrong.
Given the fact that I had a few exhaust leaks in the manifold, I
was happy to replace it with a header and fresh gaskets.
Header install here:
June 10, 2004
(206,070 miles)
Engine Mounts
Anyone that owns a 240SX has probably experienced
the slop in the engine. The mounts can be filled with
Window
Weld. I wanted to try a set of Nismo mounts before I went
for the window weld. My thought was that I would have
stiffer mounts which I could fill if I needed stiffer mounts.
In the end, I stuck with the Nismo mounts without filling them.
This was another very important transformation on my 240SX.
If you need stiffer mounts, you can still fill
them with Window Weld.
September 5, 2004
(208,492 miles)
I picked up a set of front Porterfield R4S pads.
I loved Porterfield Pads for the street. Driving confidence
has been improved even more with the addition of the pads.
February 2, 2005
Wheels
In the spirit of trying to cut costs for my
project, I decided to pick up a set of 300ZX TT wheels. They
were nice addition to my 240.
April 22, 2005 (209,840 miles)
Speed Bleeders
I installed a set of Russell Speed Bleeders.
I've heard mixed reviews from people that have had great successes
with these and others that have thrown them away for one reason or
another. I have installed three sets on three different cars
and I've been very happy with them. The only problem I had
with them on the 240 was the fact that I could not get them tight
enough on my aluminum Z32 calipers. I was concerned about
stripping the threads. By the time I sold it, I managed to
get the last one to stop leaking. If you have iron calipers,
you won't have the same problem.
Springs
I knew that my plans for the 240 would include a
set of coil-overs in the form of JIC's FLT-A2's but in the mean
time, I wanted some tighter springs to get my by. I picked
up a set of Eibach Sportlines and threw them on.
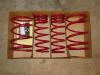
I was very happy with the results. After an
alignment, I took it to my first autocross with excellent results!
Plus, it looked better too! As with most strut equipped
Nissans, shock travel is limited in stock form and severely
limited when lowered. Tall bump usually resulted in
bottoming the suspension.
Summer 2005
New, Deep offset steering wheel
Something that many people may think about is the
limited headroom in the 240SX. Those of us who are taller
than 6' run into problems. I realized that the stock seats
lower as they move to the back of the rails. Head room with
a helmet is greatly improved! The only drawback to moving
the seat all the way back was that the steering wheel was too far
away for my liking. My solution was to install a deep offset
steering wheel. I picked out Nardi's Deep Offset wheel and
installed it using an S13 Nismo hub. Both Nismo and Nardi
use a different bolt patter from the Momo/Sparco type hubs.
The upgrade was a success! Other than having
to reach further to reach the turn signal and wiper stalks, I was
very pleased with the feel.
October, 2005 (217,951 miles)
Bushings, Sub Frames and E-brake
I was never pleased with the install of my Energy
Suspension rear sub frame bushings. They are taller than the
OE bushings which prevent you from being able to properly tighten
down the sub frame nuts. Beyond the Energy Suspension
bushings, the only direct replacement available, other than buying
a brand new sub frame from Nissan, was to buy Nismo's upgraded
bushings. They are of a higher durometer rubber and will
reduce sub frame slop. For the money, I knew I could do
better.
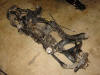
Armed with a fresh junk yard sub frame I set out
to overhaul the rear suspension. SPL offers aluminum
replacement bushings. These bushings are the extreme in that
there is no slop and no vibration dampening. As with the
Nismo Bushings, these are a full replacement. You can
completely remove the old bushings. While I was doing this
project, I also installed SPL's aluminum differential bushings as
well as White Lines rear control arm bushings.
The installation of the sub frame, diff and
control arm bushings was a long and drawn out process but worth
more than I can possibly explain. I strongly believe that
the best coil over kits, wheels and tires would not improve the
handling as much as replacing all of the bushings. Even with
my soggy Fusion ZRi tires, handling was much tighter and
definitely more confidence inspiring.
Along with the bushings, I also reworked the
e-brake cables in a configuration that worked. Check out the
E-brake
install.
Exhaust
This was one of the last upgrades that I did to my
240SX before I sold it. I installed a Blitz Realize TT
exhaust. This is a 3" mandrel bent exhaust. Along with
that, I installed a 3" test pipe. I was able to properly
mate a 3" test pipe with the 2.5" header using a 2.5" exhaust
gasket. The overall fitment of the exhaust was excellent.
I had gone with the 3" header back exhaust with
turbo power in mind but the power gains I had experience wit the
header, test pipe and exhaust was amazing! High end power
was remarkably greater! Hitting the speed limiter was very
easy as compared to stock. No discernable losses of power or
torque.
Final thought, 3" exhaust = good!

April 11, 2006
(219,500 miles)
I delivered my 240SX to it's
new owner! It was heartbreaking to see it go but at the
time, I really felt like I needed to move on. Funny...I
really wish I could have it back!
Here are a few final pictures
of my 240SX.
In Closing...
I miss my 240...
Feelings aside, I wanted to go
over some thoughts about what I did, what I would have chosen to
do differently and what I would do with the power plant if I
started over.
Brakes
The brake upgrade was a huge
success! The original brakes were not up to the task of high
performance driving. Yes, if you are on a tight budget, a
set of track compound pads will work but they are not ideal for
street use. The only issues I had with the entire upgrade
were the master cylinder and the e-brake setup. Coupling the
1 1/16" master cylinder with the stock manual transmission brake
booster resulted in pedal feel that was tight and crisp but very
difficult to operate. My braking effort was rather high and
often resulted in odd wheel lock-up issues.
Alternative Brakes
I would use the 1" or 15/16"
master cylinder along with the automatic equipped 240sx's booster.
The idea is that the larger booster would help with pedal effort
and allow you better control of the brakes. You definitely
do not need the biggest master cylinder to get the job done.
An additional alternative would
be to us the 1 1/16" master cylinder with the 300ZX booster.
I spoke with one individual that successfully executed this swap
with excellent results.
I would probably skip the rear
brakes. In the grand scheme of things, doing the front
brakes and upgrading the master cylinder along with a good set of
pads would have done the job, even for heavy track use.
The e-brake was something that
I struggled with to the end. I never had an opportunity to
try the R33 e-brake cables. Many people have used these
cables on their S14's with great success.
Bushings
The single most noticeable
upgrade to the car was the upgrade to poly urethane and aluminum
bushings. It was the most labor intensive project given the
fact that I did not have a press with proper tooling to do the
job. However you go about installing your bushings, the
transformation in ride quality and handling is well worth the
effort.
I probably wouldn't install the
aluminum differential bushings. At the time of my project,
the only true sub frame bushing replacements were from Nismo and
SPL. I wanted to go all out with the aluminum bushings and I
they are worth it. There is quite a bit of noise
transmitted into the car with all aluminum bushings. Either
skip the diff bushings or install poly urethane bushings to cut
down on the noise.
Short Shifter
I loved the B&M short shifter.
The kit transformed my sloppy transmission into one of the
tightest and shortest throws I've ever felt. If B&M had
maintained the rubber damper that is found on the original shifter
I strongly believe they could have avoided the shifter rattle.
I would certainly do this again!
Exhaust
I was pleased with the exhaust
I installed. I enjoyed the Blitz realize TT exhaust. The
exhaust along with the test pipe and OBX header were a potent
setup that really uncorked the KA24. Engine output improved
across the entire power band!
As much as I liked the Blitz
exhaust, I would probably try something different. I would
definitely install a 3" exhaust along the appropriate catalytic
converter.
LSD
I was never happy with the VLSD
unit from Nissan. Considering my efforts and expenses, I
would have benefited from installing a Quaife, Kaaz, or some
other aftermarket unit. By the time I sold my car, with a
relatively stock engine, the VLSD had almost completely
failed. Save your money and skip the factory VLSD.
Engine
I've witnessed my fair share of
KA vs SR vs RB arguments online and I will do you this: Do
what you want...don't worry about everyone else thinks! I'm
always a sucker for a small car with a big engine. Drop in
an LS1 or even an LS7...nothing like a small block 427 to kick
start your day!
Crazy ideas aside, I want to
lay out the Nissan alternatives in a way so you can make an
educated decision based on facts rather than opinions.
SR20DET
Factory Turbo Power. Out
of the box, it is a sturdy engine with the potential to make great
horsepower with stock internals. This engine can rev fairly
high and be reliable doing it. Had I kept my 240sx, this
would have been my 4 cylinder choice for power. With a goal
of around 275-300 whp, a small turbo like the Disco Potato
(GT28RS) would suit my needs and avoid too much turbo lag.
The SR20 is an engine that is
better suited for road course racing or any kind of extended high
performance driving. The engine has a shorter stroke than
the KA with more appropriate piston speeds.
Another consideration is the
bountiful aftermarket support for the SR20DET.
As with any option, there are
drawbacks. The SR20 has issues with cooling due to water
pump cavitations at high rpms. I also understand that the
rocker arms can be troublesome.
KA24DET aka KA-T
I really liked this engine.
Anyone whom I spoke to, in the time before I sold my 240, will
tell you that I was very serious about a big turbo build.
Big block 4 cylinder power, long stroke, huge torque...that's
where I focused my thoughts. The KA24DE has a sibling, the
KA20DE which used a much shorter stroke. Similar to the QR25
being the stroked version of the QR20 found in Japan. I've
read countless articles discussing how it is difficult to raise
the redline for road-course bound QR's because of the massive
stroke. The same holds true for the KA24. This isn't a
problem if you plan to autocross or drag race where you won't
experience extended use.
Ivan from Turbo 240 mentioned
one time, while discussing stroker kits for the KA, that the KA
already has excessive stroke. He suggested the alternative
of destroking to 2.3 L to reduce piston speeds resulting in a more
reliable engine for extended use.
Over the past few years,
support for the KA24DE has improved but is still lacking the
massive aftermarket support of the SR20DET
The KA is a very stout engine
with a great deal of potential. If you are not going to take
it out on the road course, you can make some serious reliable
horsepower!
Lastly, this alternative is
ideal if you don't want to tackle the wiring issues associated
with an SR or RB swap.
Any RB
I don't care what anyone says.
This is just an awesome idea. There will be issues of
weight, but not as much as you think. A good set of
coilovers with custom spring rates will help you compensate for
the extra weight.
Naturally, there is serious
potential for massive horsepower depending on which variant you
choose. Many companies offer conversion mounting kits that
resolve issues with the drive shaft, motor mount and transmission
mount issues. Getting the RB in is not going to be a
problem.
One thing I've always worried
about is the idea of needing simple maintenance parts.
You're local parts store isn't going to have a valve cover gasket
or water pump for your engine.
A V8
Most modern V8's are aluminum.
An all aluminum V8 isn't going to weigh much more than the stock
iron block engine found in the 240. An LS2, found in the
later GTO's made 400hp stock! Conversion kits are out there
to properly mount the engine and transmission and tackle the
wiring.
Think about it. How much
money will you spend upgrading your KA, RB, SR to make 400hp?
What about the torque? I don't think you could do better.
Think about how much power you can make and still run on standard
pump gas.
Don't forget that great V8
sound!
Without a doubt, this would
definitely by my choice, overall, for a 240 power plant!
Updating this page has been a
trip down memory lane. I thinking about every project and
remembering the blood sweat and tears that I put into it and
wishing that I still had it. Given the feedback I've
received, I know the pages I created regarding the 240SX
have helped people all around the world. It feels good
helping others!
Good Luck!
Alex
|