
The Build
The NSX was a car I always lusted after back when they were new. It’s not a car I’d want to own but building a model is always an option! I picked up the kit a few years ago and had to have the Rays CE28 wheels. I picked up a set and other than the wheel/brake upgrade, I planned on building it box stock.

Body
Back in early 2020, I decided that I wanted to start the build. I deepened panel lines and mostly finished the prep work. The body and chassis were primed and then I set the kit aside.
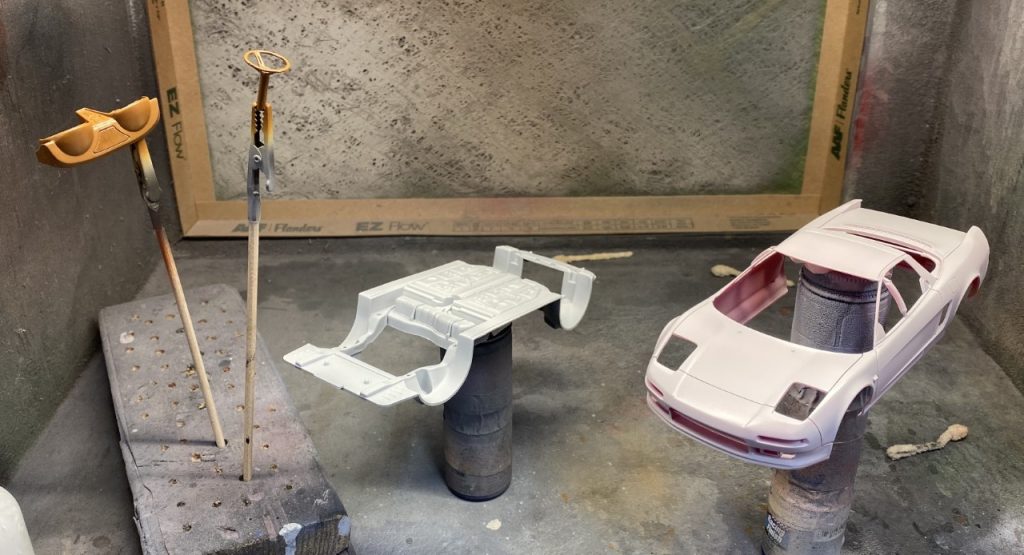
In late 2021, I dug into several kits to get the bodies painted and included the NSX. The rest of the body work was completed and I finished priming the body colored parts.
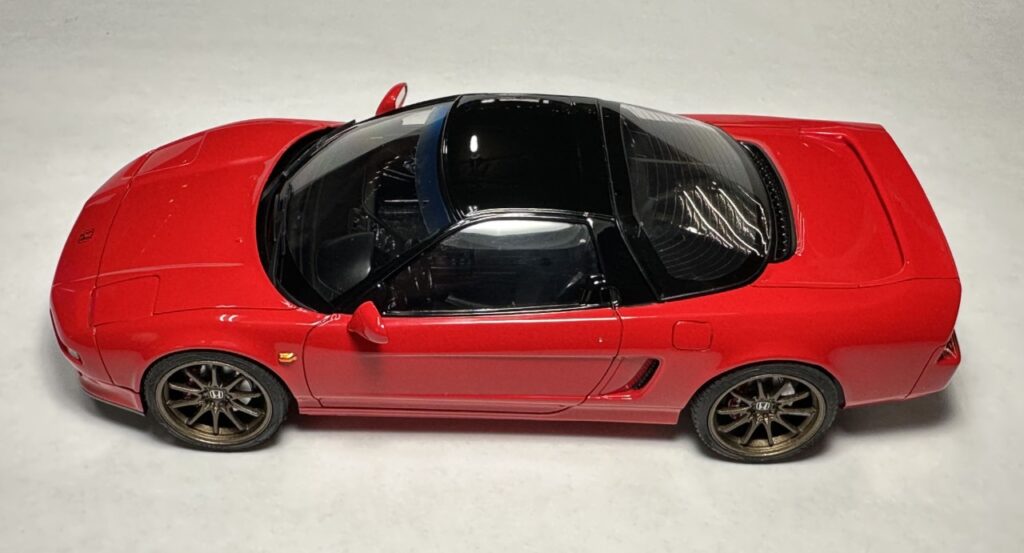
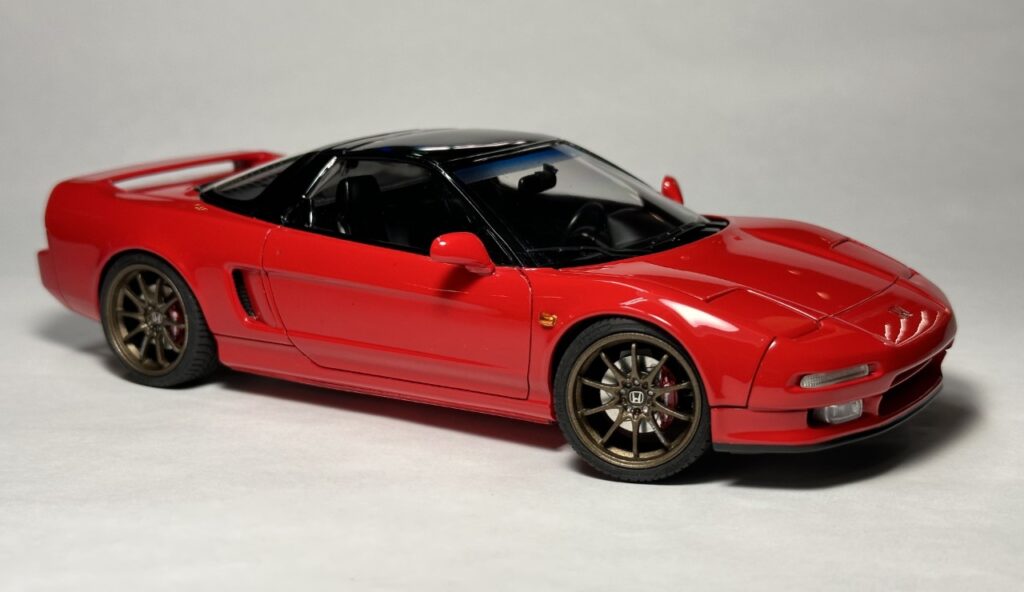
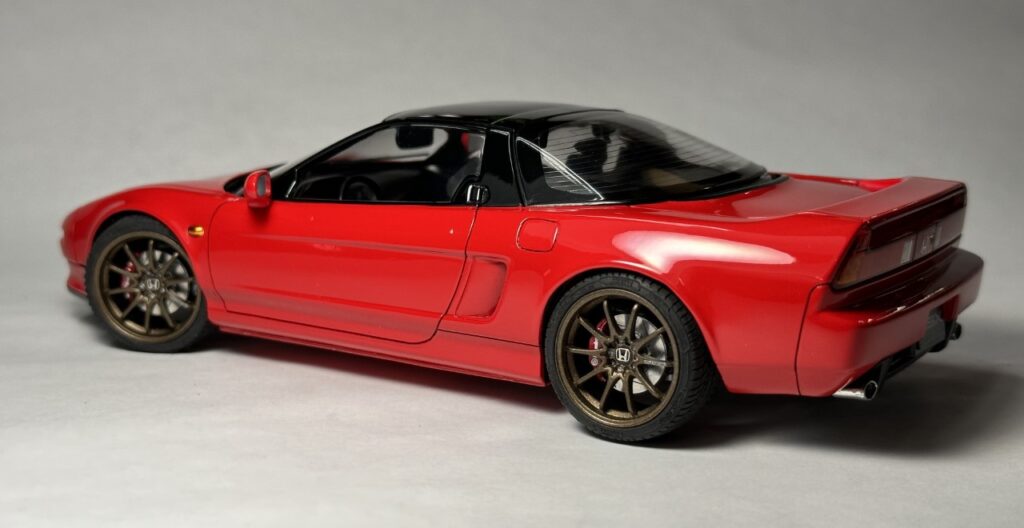
For the color, I used Scalefinishes.com Formula Red, the OEM color.
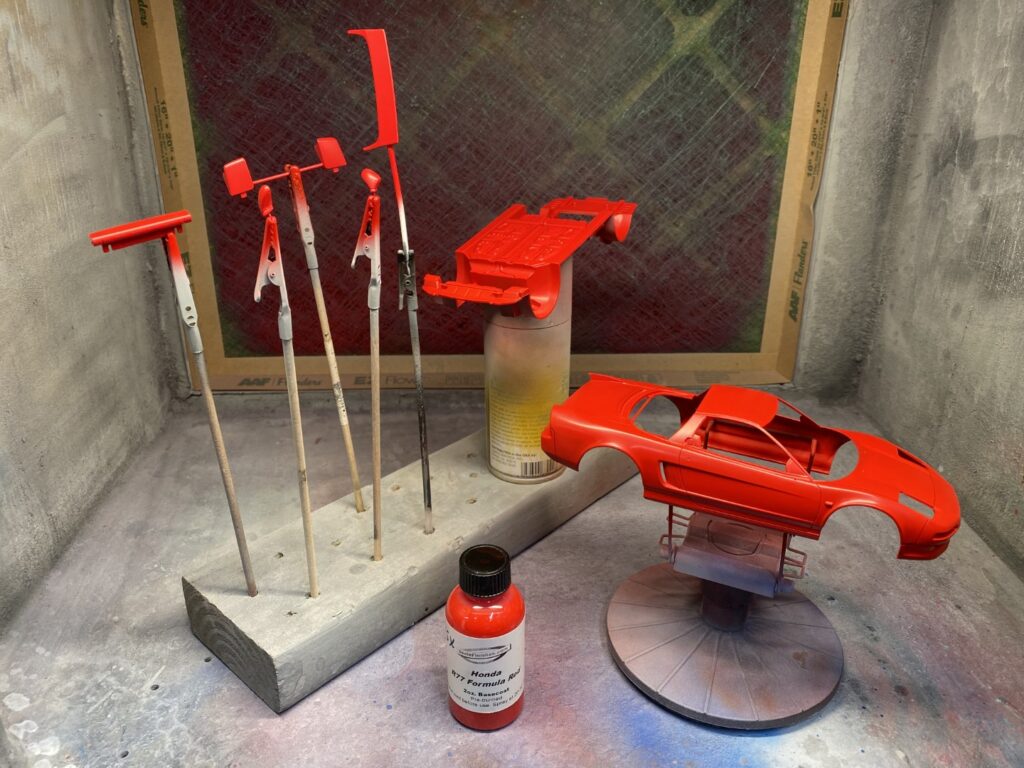
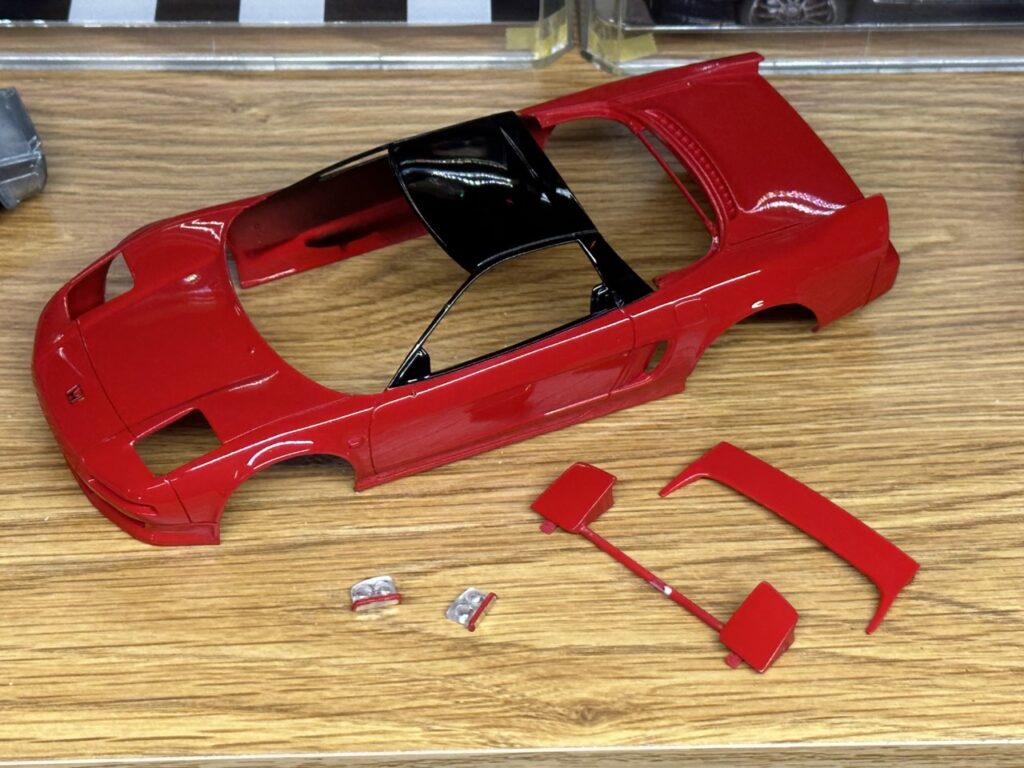
I masked and sprayed the roof satin black. For the front emblem, I attached Zoomon’s photo etch Honda emblem. After that, I sprayed all the body parts in 2 part automotive clear.
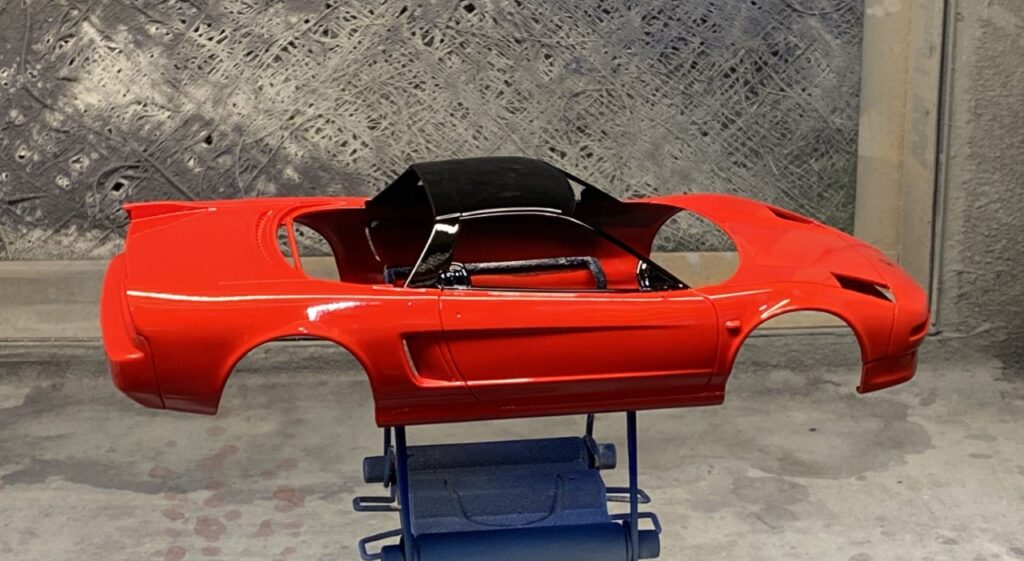
Once again, the kit sat, but not for long. In late 2022, I chose it to be my last build for the year. The body was sanded and polished.
One of these days, I am going to take into account the thickness of the paint and ensure gaps are large enough to allow for proper fitment. I had to massage the rear wing and the head lights to make them fit properly. Once done, I had to do minor touch-up to the paint and it was ready for the next steps.
Engine/Chassis/Suspension
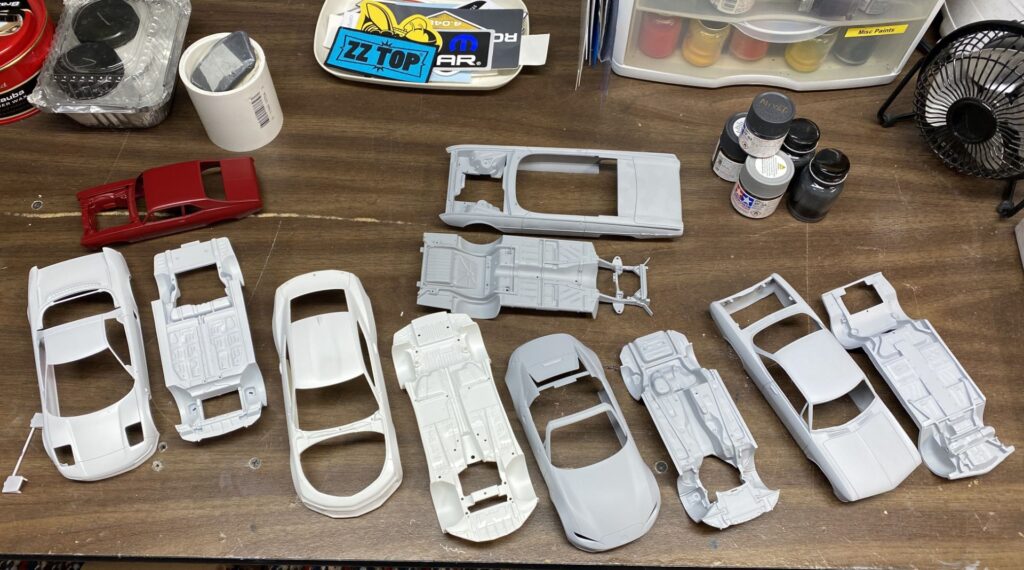
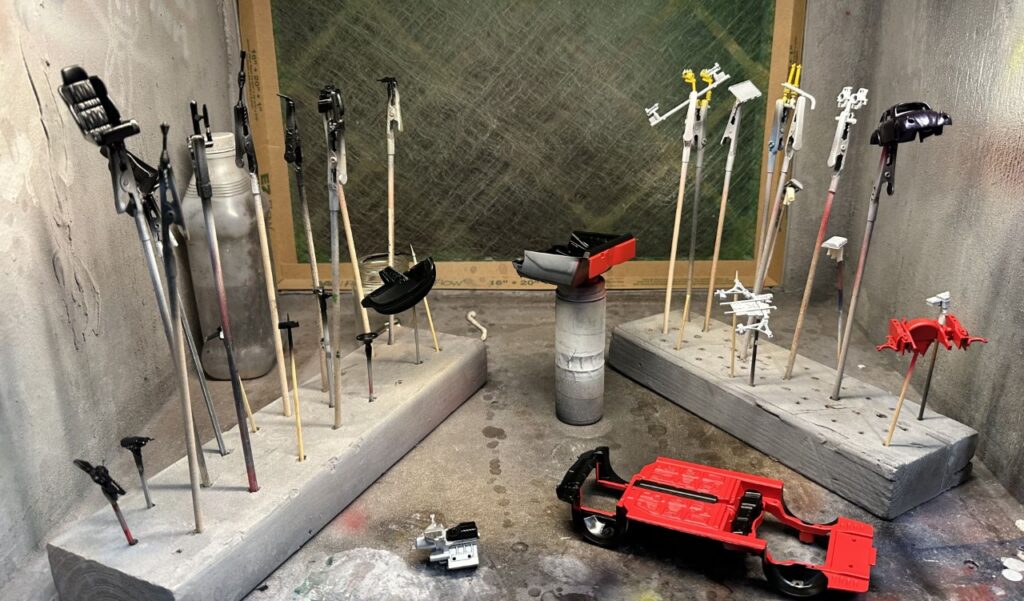
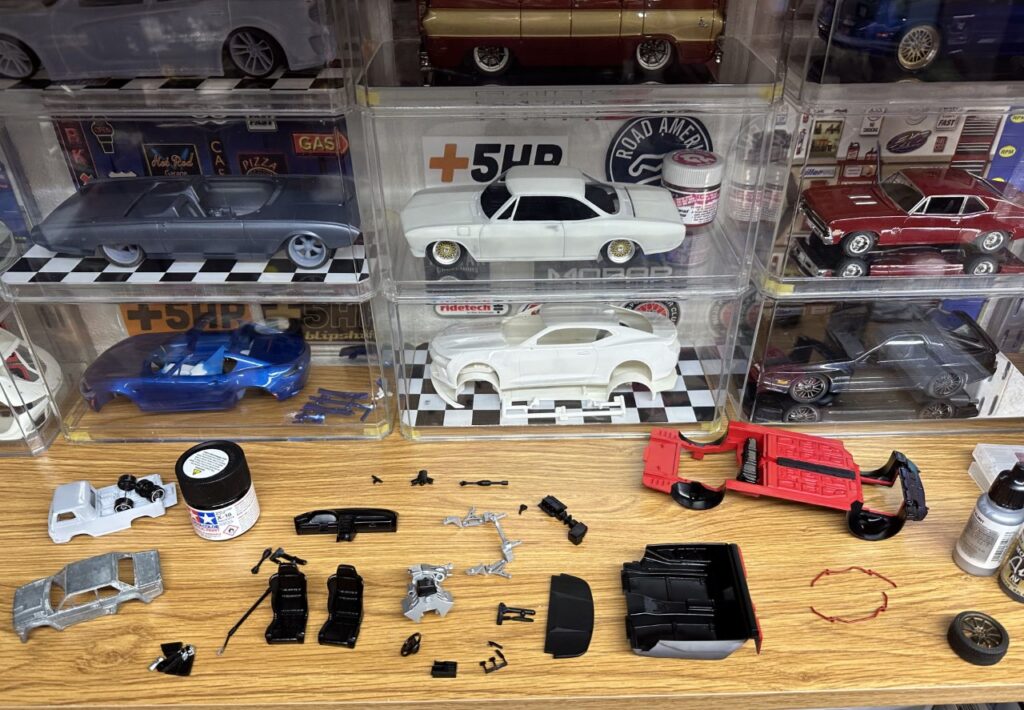
Back when I prepped the body, I prepped nearly all of the parts. Everything was attached to sticks, primed and painted appropriate colors. Additionally, the interior tub and chassis were masked and sprayed for details.
The color call outs for the shocks/springs are always black. I like to add an aftermarket look using colors. I’ll call this the Koni/Eibach upgrade.
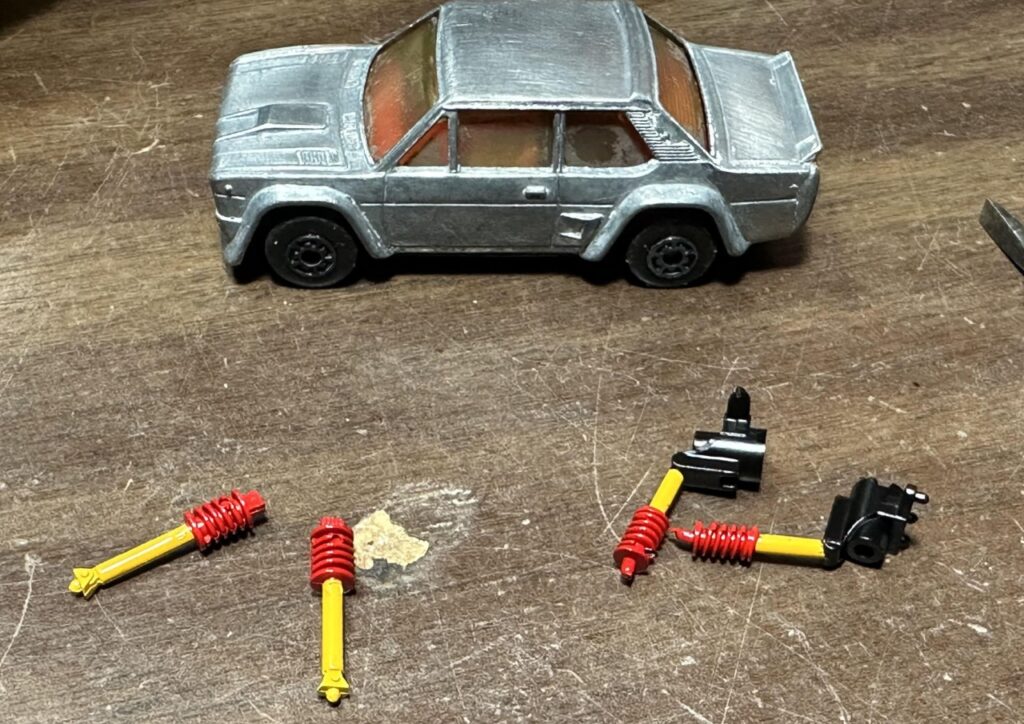
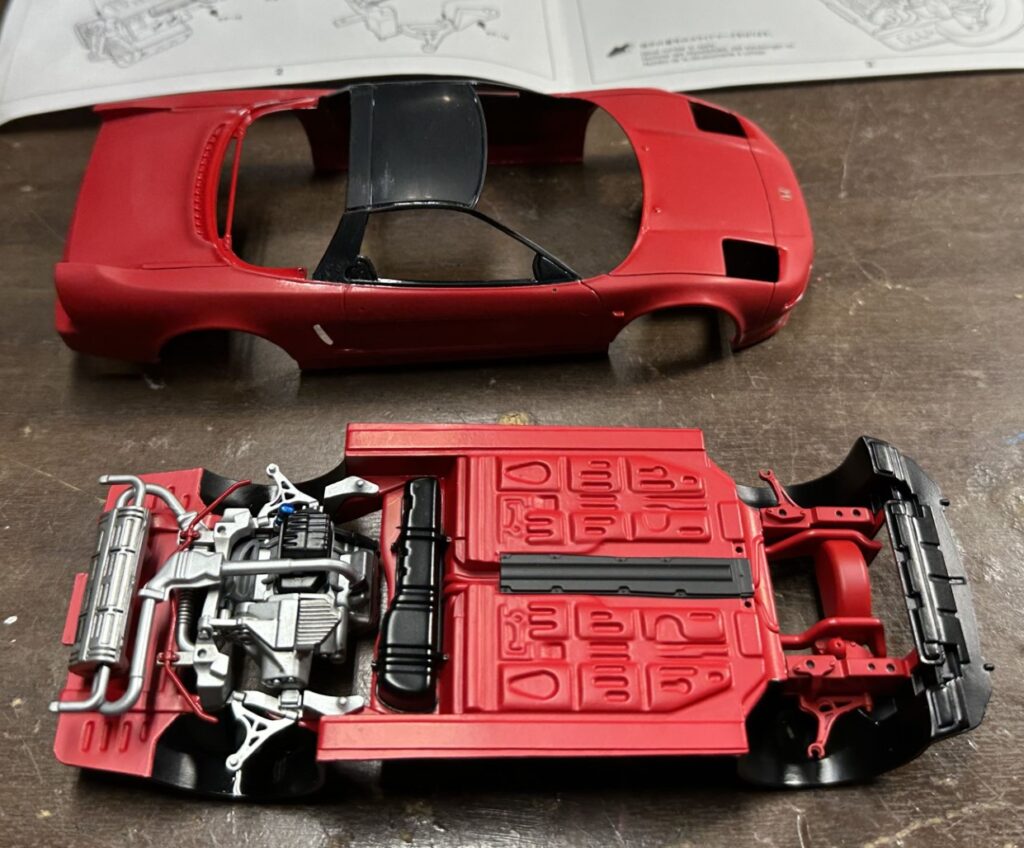
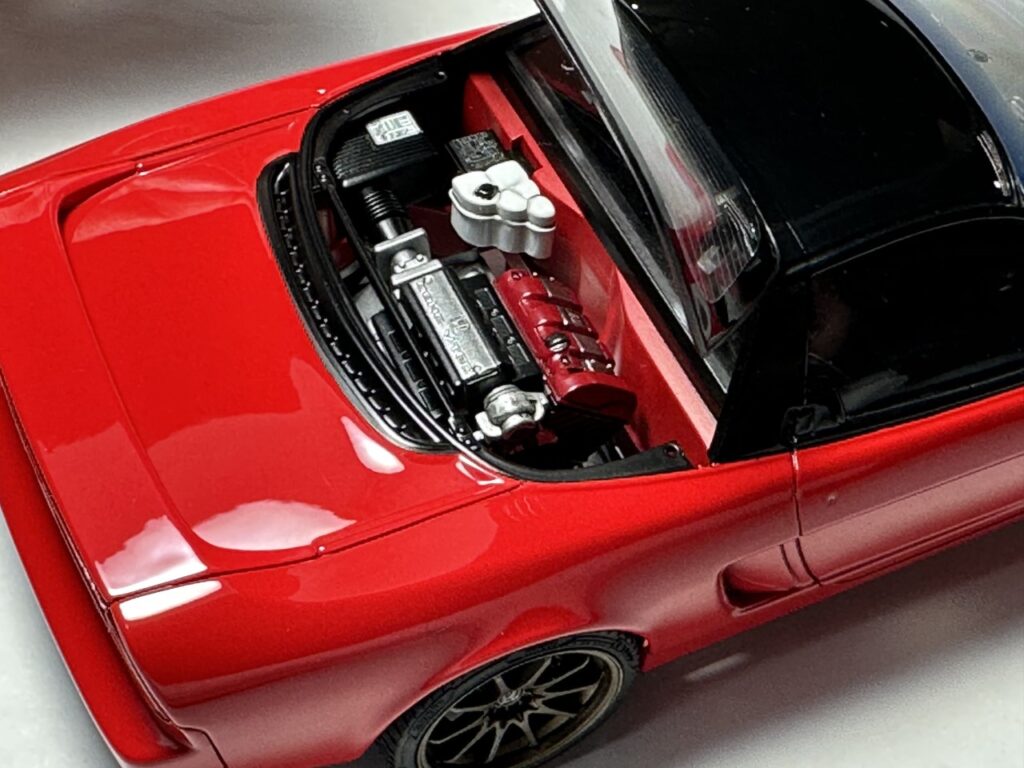
The engine came together very quickly. There was some minor work to smooth out the seam in the oil pan which was ultimately covered by the exhaust. I chose to paint the valve covers in Type R red just because I can! Once I detailed all of the parts, I attached it to the chassis along with the suspension.
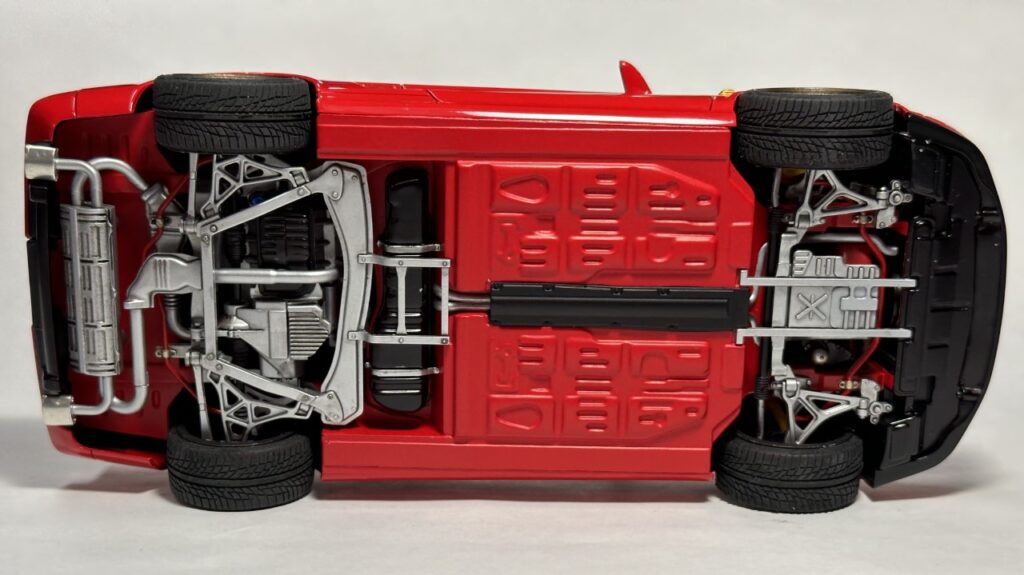
The chassis has a great deal of opportunity for detail and looks great once completed. Work still in progress in this picture.
Interior
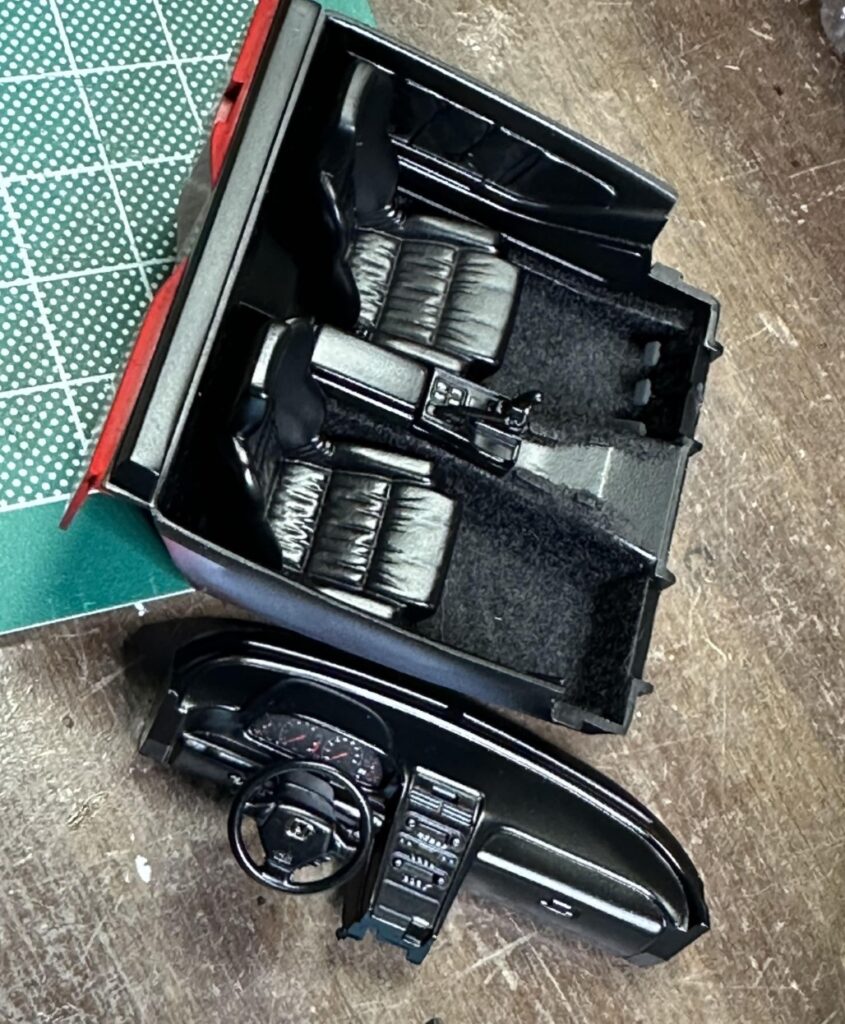
The interior was almost too simple. For my build, I chose the all black interior. Everything is painted satin black and I flocked the interior. I also used a Zoomon Logo to dress up the steering wheel. White paint was used to pick out the buttons on the dash.
Final Assembly
Once all of the parts were prepped, painted, detailed, etc, it was time to pull it all together. Since I was using aftermarket wheels and brakes, I needed everything else finished before I can get the stance correct.
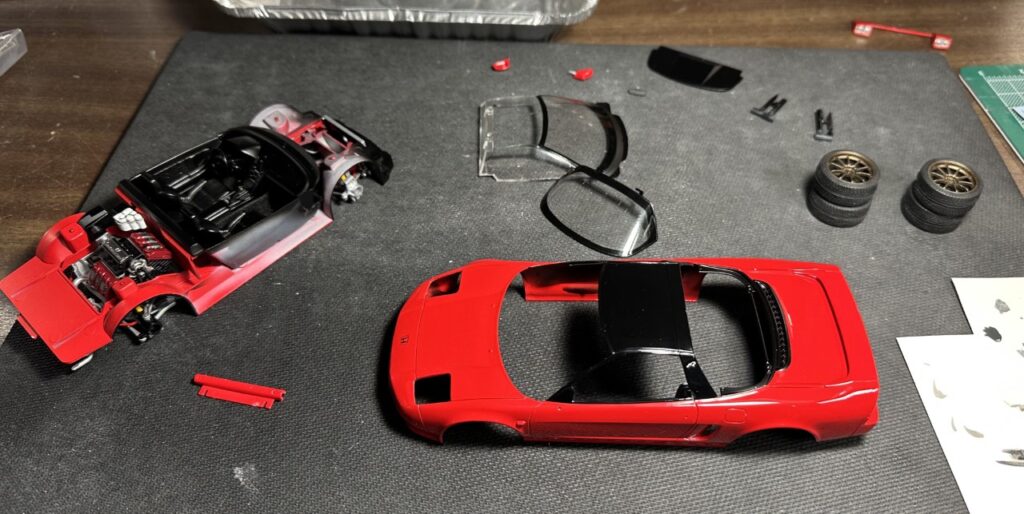
As you can see, the wheels needed a great deal of work before they were going to fit correctly.

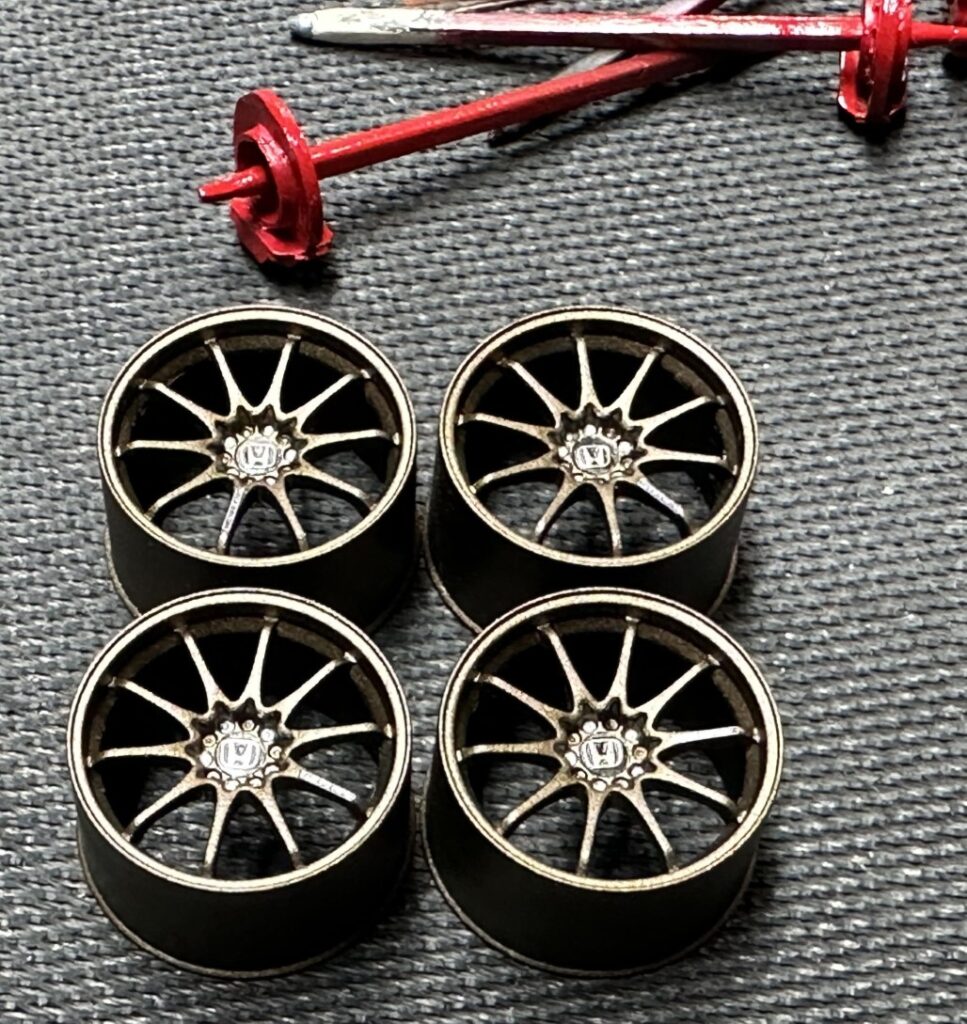
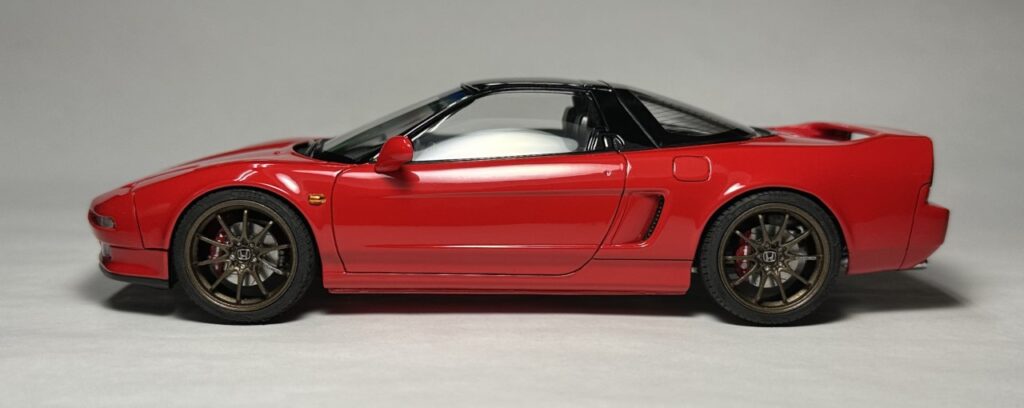
The wheels were already painted bronze and it was the perfect shade. I painted the center caps black and added Zoomon Honda logos. Volk decals were used on the spokes. Once dry, I sprayed the wheels Tamiya semigloss clear to seal everything in place.
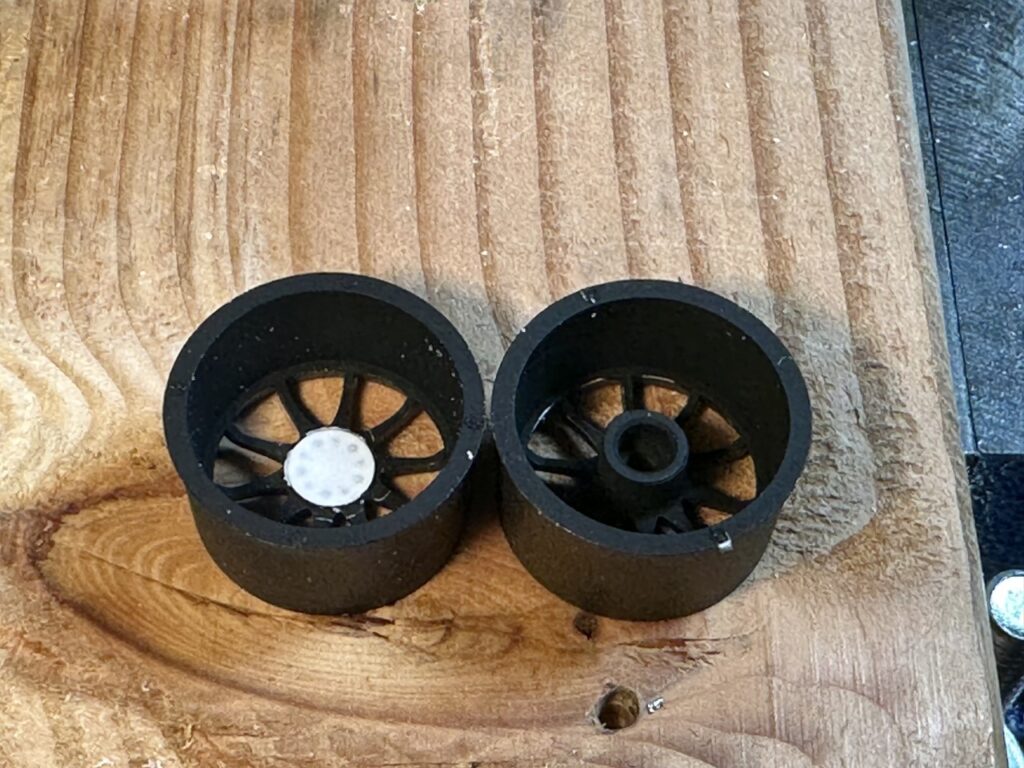
To get the offset correct, I used my drill press and a Dremel milling bit to shave down the poly cap sockets. If you look closely, I was very close to going too far. I also had to shave some of the spokes to ensure caliper clearance.
Having finished modifying the wheels and detailing the brakes, it was time to bring everything together.
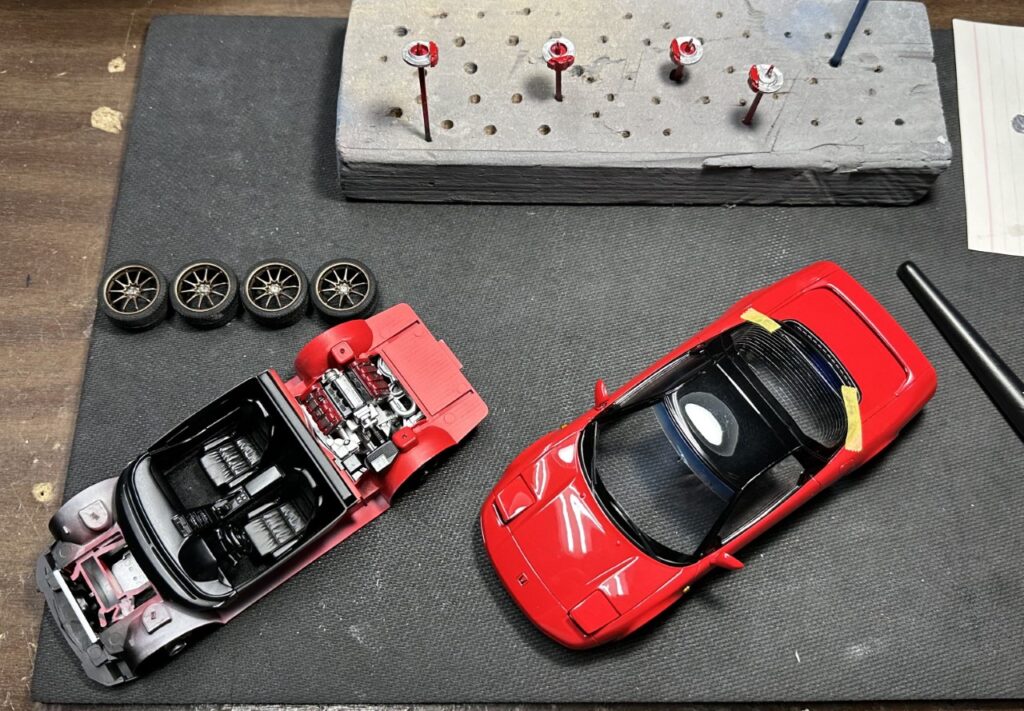
Attaching the wheels was more of a pain than I care to admit, but after a few attempts and adjustments, I got it just right. It was time to dust the interior, mark the year and bring the build across the finish line. The last piece I had to detail was the taillight panel.

Done!
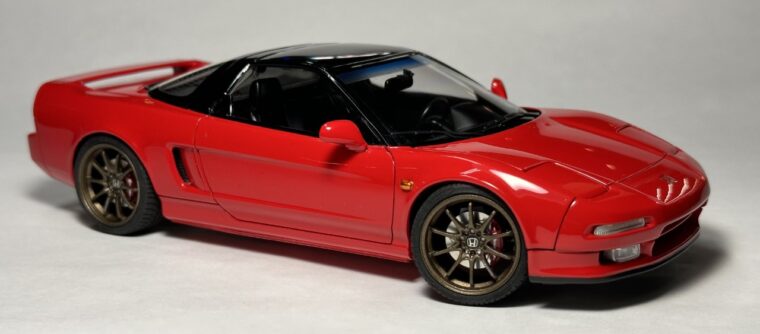
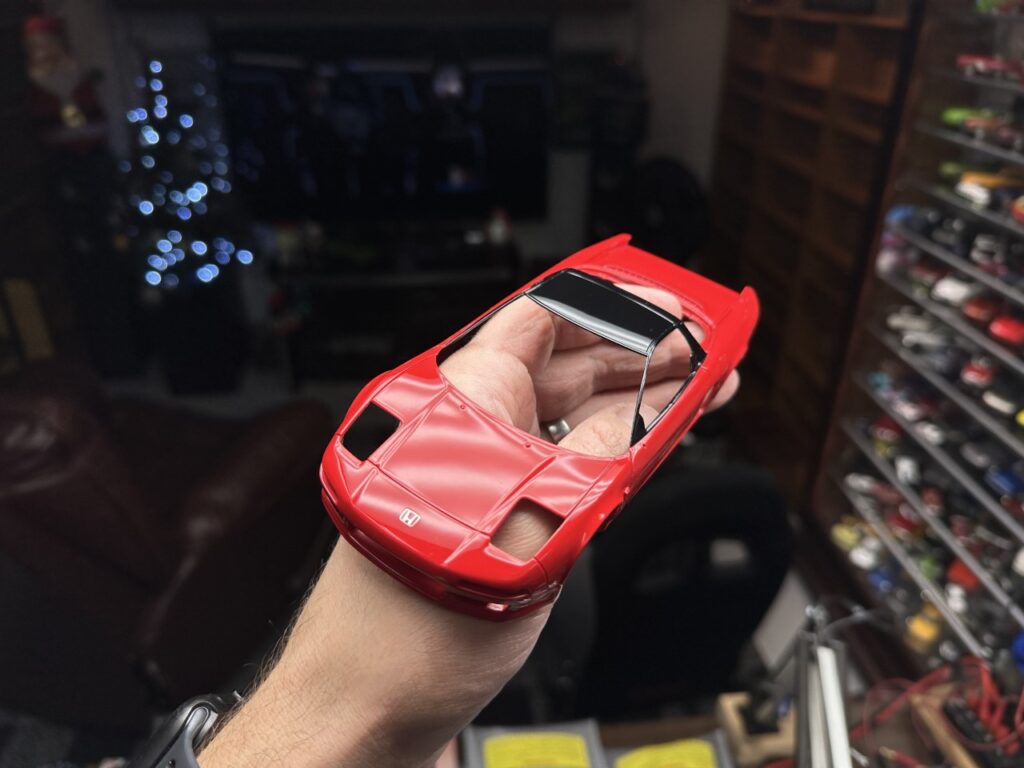
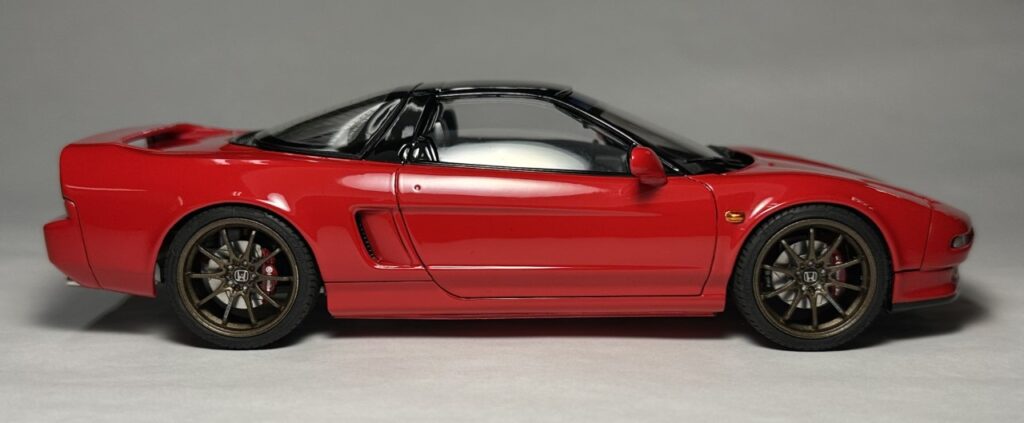
I’m really happy with this build. The Formula Red looks beautiful and everything fit together really well. The pop-up headlights open and look great in the up position.

The underside looks great as well! Too bad it’s not easy to see. I did my best to pick out all the details and used a wash over all of the silver parts.
Here’s a shot of the engine bay without the cover. As I mentioned before, I painted the valve covers red to look like Type R covers. The actual Type R has a red intake manifold as well but for me, the valve covers were more than enough.
Red and bronze go together so well. No one can change my mind!
Overall, I’m really happy with this build. It looks great on the shelf with the rest of my builds!