The Countach
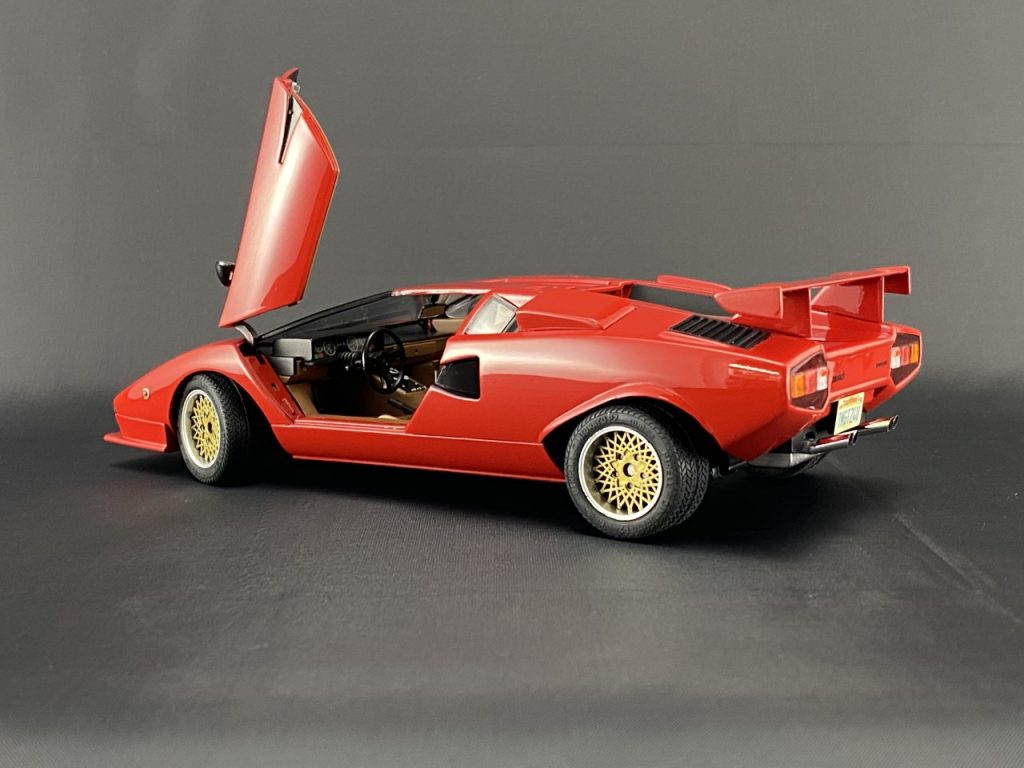
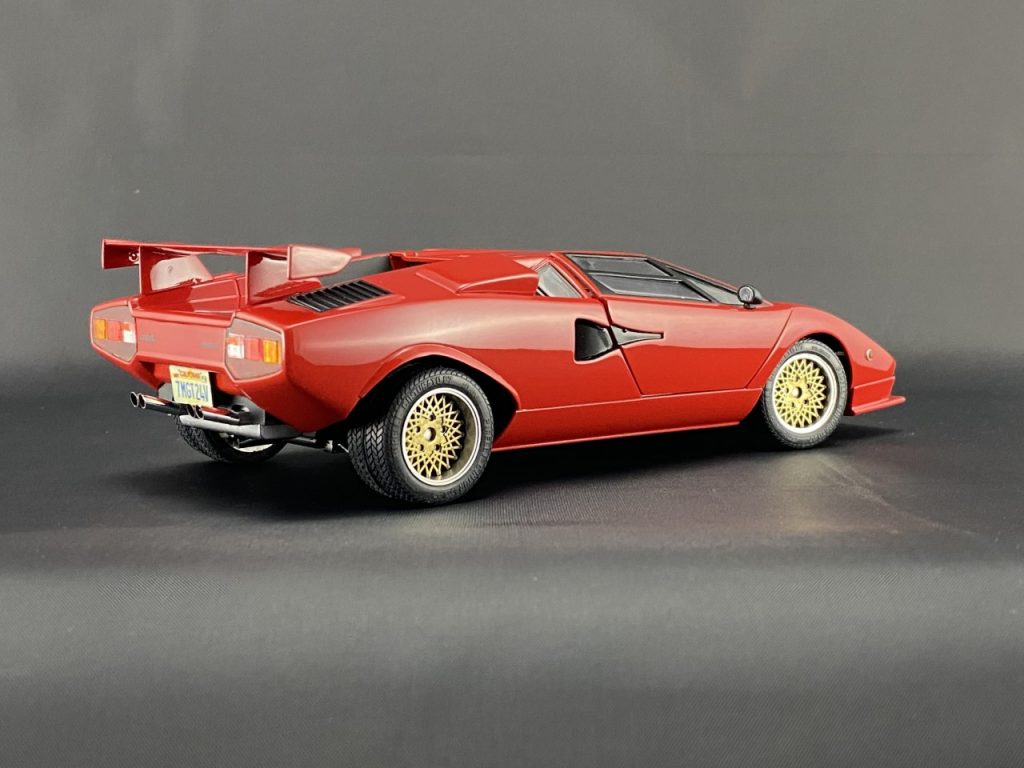
Several years ago, I bought this kit knowing I needed a Countach in my collection. I honestly can’t tell you why I selected this Fujimi kit. It’s a one-off custom version that was built in Japan. I had considered building it box stock, decals and all. In the end, Italian red won and this would turn out to be a solid decision. More on that later.
Beyond that, this kit is a simplified version from Fujimi. I did learn there is an “Enthusiast Model” version which explains why the hood and engine cover are separate pieces. It is a curbside but the rest of the kit detail is very good.

Prep work
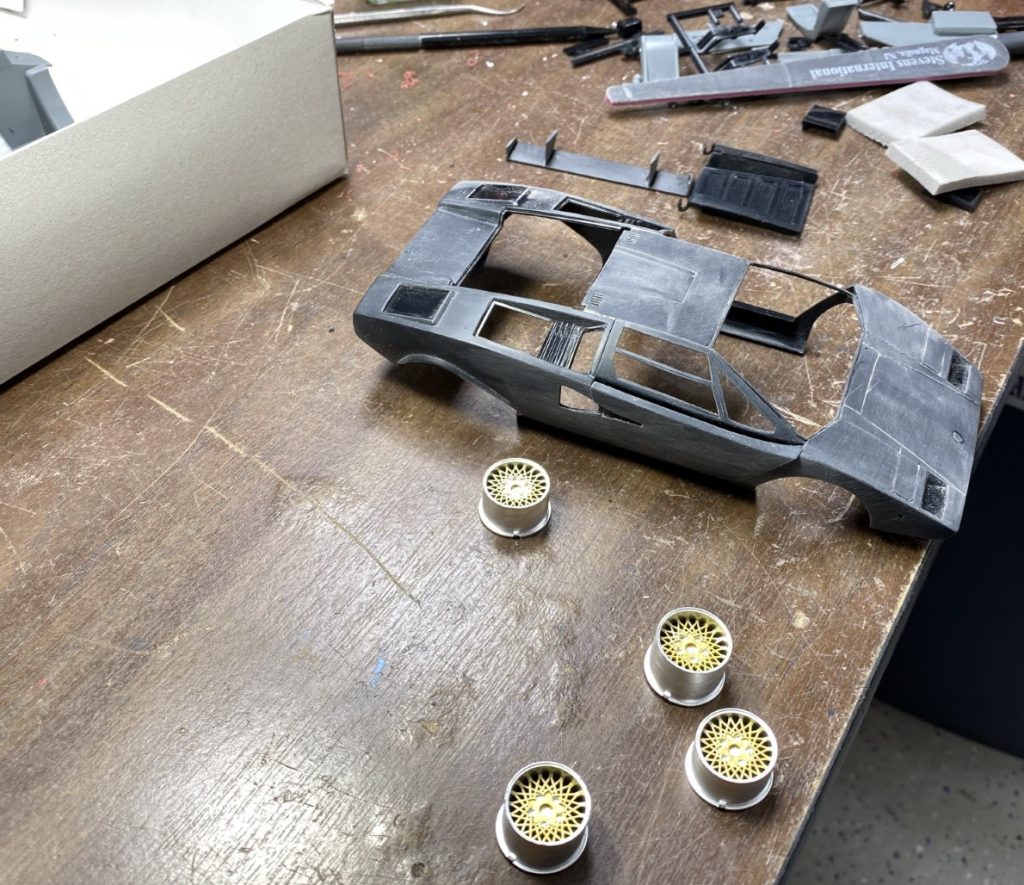
As I always do, I separated all of the parts for the build to remove mold lines and prepare them for paint. Since this kit is the basis of a far more detailed version, there are still many small pieces that had to leave on parts trees to avoid losing them and confusing their reference numbers. In some cases, I had to carve the part number on the bottom of the part so I could properly prep and paint them.
Considering the very thing A pillars, I had always been concerned about breaking them during the build. I was notorious for breaking skinny A pillars in my youth. Evidently, I’ve learned how to be gentle since the A pillars survived the build!

Interior
The interior is a relatively simple tub. The door panels are separate and will attach to the opening doors. The dash and other misc parts are separate and allow for easy detail painting. I flocked the interior then attached all of the individual pieces once they were painted. The instrument cluster decal revealed how impossible delicate the decals were. Trying to duplicate the intended paint scheme on the box, with all of the pinstriping would have been a nightmare! I’m glad I chose to paint it red with pinstripes!


Body
As I mentioned before, this kit was also packaged as a highly detailed EM kit. Even though this is a simplified curbside kit, the body is comprised of several parts. The door and outer door skin are separate. The scoops and ducts are also separate pieces. The wing is comprised of five pieces!
When possible, I attached or assembled components to help ease the painting process. The wing was assembled then drilled and pinned. This will allow for positive engagement and alignment when it is time for final assembly.
Once all of the prep work was complete, the parts were primed, sprayed with decanted Tamiya Italian red and sprayed with 2 part clear.

After curing for several days, the body was sanded and polished using 3M Perfect it II compounds and Dremel tool polishing disks. Once complete, I masked all parts that needed trim paint.

Part of the detailing process involved painting the recessed parts of the engine cover and body. Prior to committing to the work, I stressed over how to create a clean line with masking. What I finally decided to do was use tape and lay it along the edge of the recessed area. The tape did hang over the edge. While air brushing, I made sure to direct paint under that edge.

The end result was virtually flawless! I had a solid clean edge and I did it with very simple masking.


Final Assembly
After completing detail paint, it was time to pull everything together. With no engine to display, I glued the engine cover in place. Most of the vents and other scoops fit well with no issues. I was surprised to find the windshield glass is smaller than the opening. I used tape to suspend it in place and used Testors window glue to fill the gap.

The last detail to complete was painting the tail lights. I used markers to color them. I then masked the non-lighted portion of the sense and dusted black to create contrast.


The final piece required to finish the build was the front splitter. The piece fit fine before paint but was hopelessly not going to fit after. I had to reshape the inside to make it fit and in doing so, I scratched the paint. After repairing the damage, I resprayed primer color and clear and it was time to finish the build.

Complete


Final Thoughts
Reflecting on this build, thinking back to when I bought it and then a couple of false starts, I realized that I had quite a bit of anxiety around building it well. Like the Ferrari F40 I finished last year, I didn’t want to build it until I had the skillset to build it really well. At this point in my life, my skillset is where it needs to be for most challenges and I feel like I knocked this one out of the park! No broken A pillars, no egregious mistakes, finish is really smooth to name a few key points. Also, the doors almost fit perfectly! The kit poses well with the doors open and closed.
Given the complex shapes and volume of parts, I was very surprised by how well it all fit together. When it was time to join the body to the chassis pan, I found that the back of the interior tub fits snugly to the roof and the various pieces in that area. If this wasn’t made well, and built correctly (that’s on me) it would never sit right. This is a really great kit!
Completed: July 2020
