
This is a page that should have been written a long time ago. The e-brake is the most difficult element of the entire brake swap and require more time and research to try and figure out the best solution. Unfortunately, this page is going to revolve around suggestions rather than a definite solution.
If anyone has any better ideas, or a definite solution, please let me know as I would like to publish your efforts on this page along with credit to your work.
Make sure to check out the R33 solution at the end of this page.
Here’s what I have.
Tools
- Dremel tool w/ cutoff wheel
- Tap and drill 6mm x 1.00
- Locking Clamps (Vise Grips)
- Socket set
- Combination wrenches (box wrenches)
S13 Advantage
First, it’s important to note that S13’s have the advantage in that you can reroute Z32 cables in order to make them reach the e-brake t-bar. Dave Coleman covered this in SCC on his Project Silvia.
The S14 does not have the same advantage. To my understanding the cables will not clear the gas tank and make it to the t-bar.
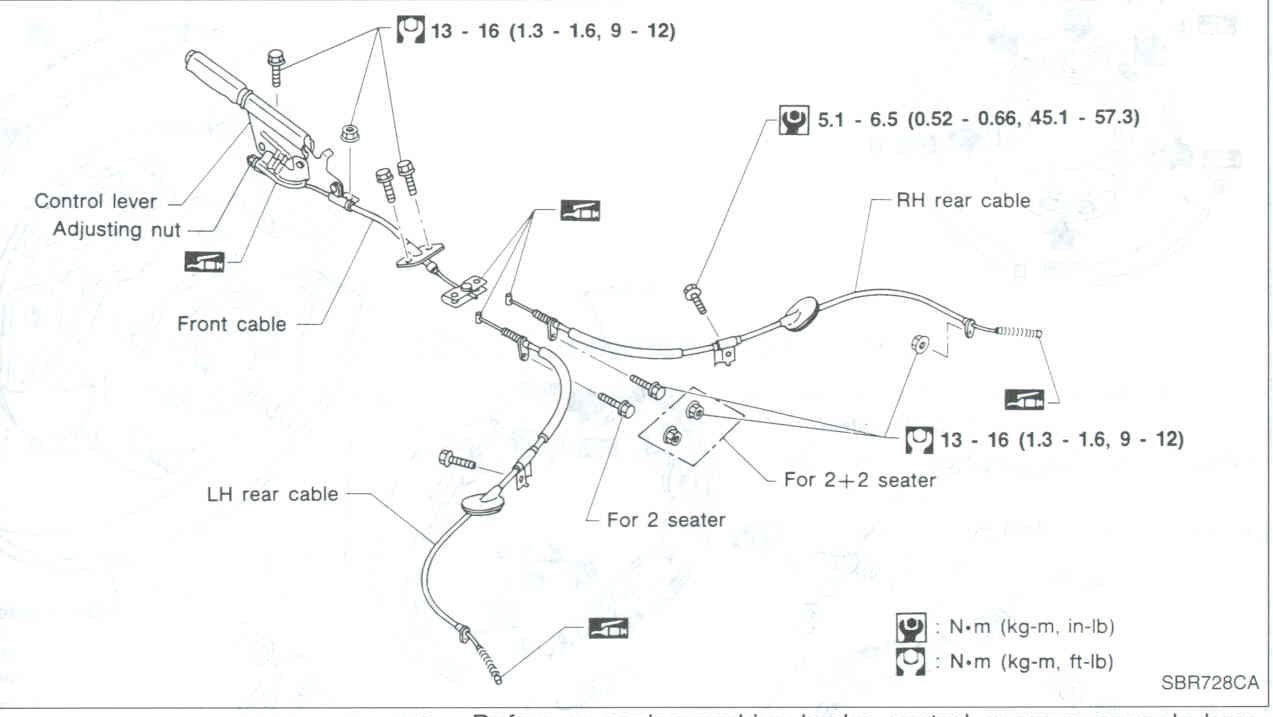
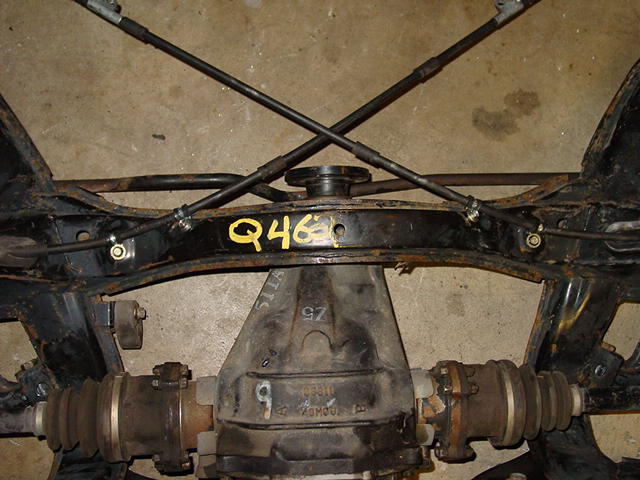
For reference, the 300zx e-brake setup:
Splice
My first idea was to splice the cables. There is one issue that is difficult to resolve. The cable needs to be supported on either end. If you look at the original setup, you will see that it is bolted to the body in the front and bolted to the caliper on the other. This is difficult to duplicate when you do a splice.
If you’re willing to give it a shot, read on!
For starters, I refer to this as the t-bar. The cables go from this to the rear wheel.
The best place for the splice is about 6″ away from the brake hub. I had originally tried to do the splice close to the t-bar. There is no way to properly support the cables without creating a bracket.
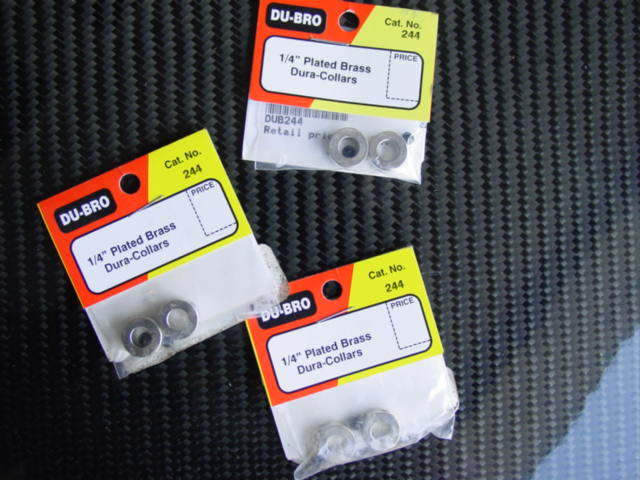
I used model airplane wheel collars to tie the two lines together. You will need 1/4″ collars or something similar to it. If you use the Du-Bro collars, pick up 8-32 bolts as the set screws that are included are not long enough.
I used a combination of stock 240 cables and stock Z32 300zx cables. 2+2 cables are longer, but still not long enough for the project. Since you will be cutting the cables, it does not matter which you use.
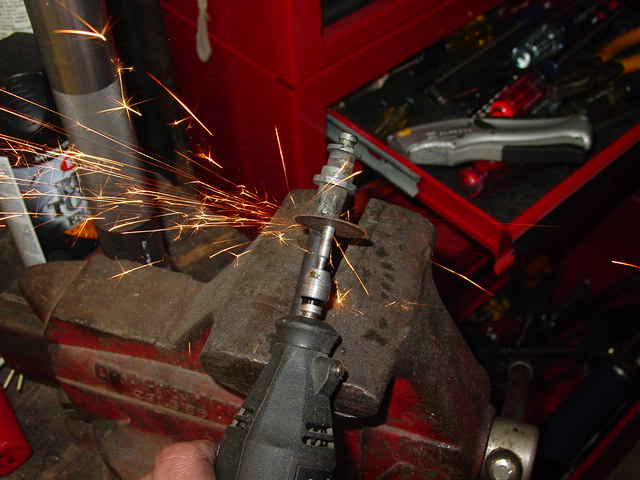
You’ll need to cut all of the cables to length. I prefer a Dremel tool with a cut-off wheel to do the work. It will give you much cleaner cuts.
For the Z32 section, cut off the keeper.
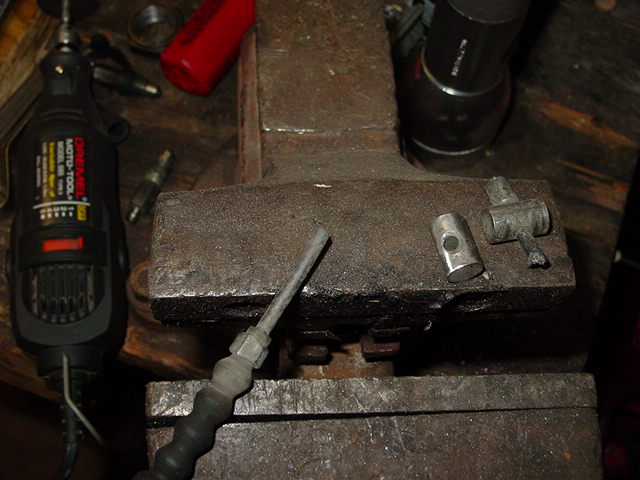
Pull out the cable, and cut the tube to length.

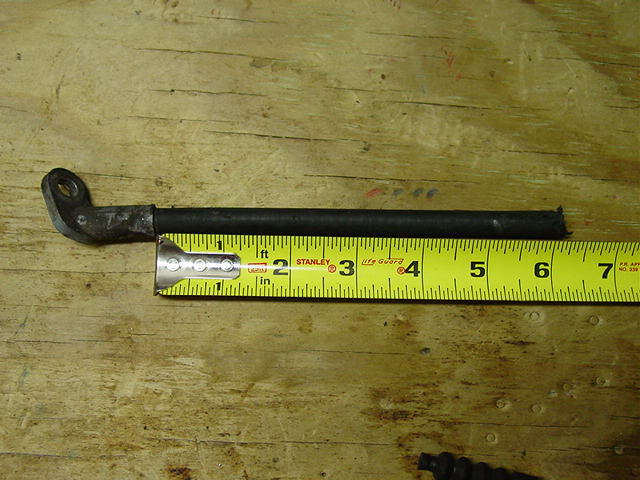
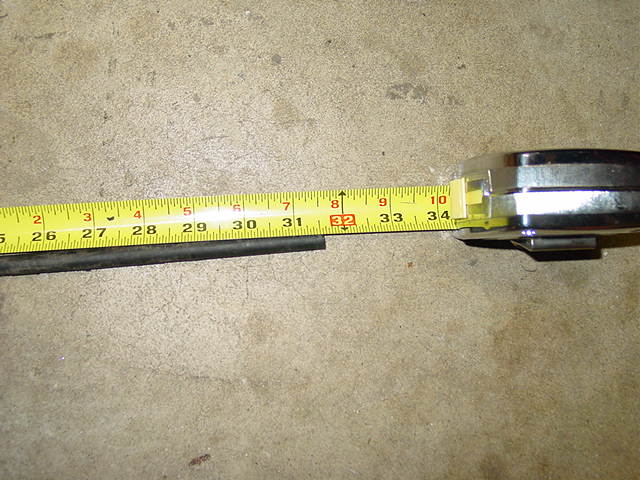
I cut the rear section to approximately 6″.
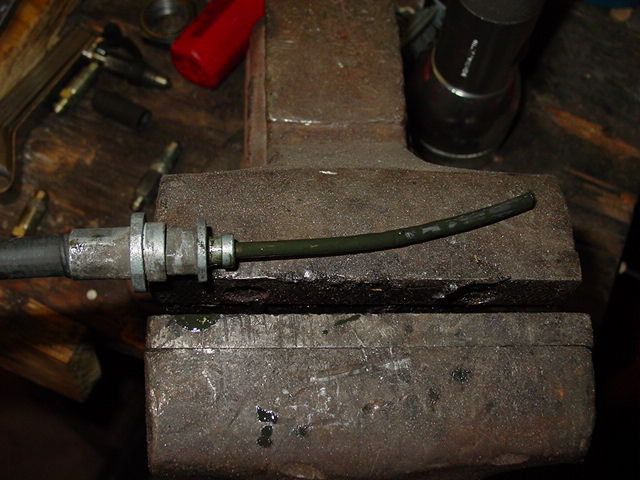
For the front section, you will need to cut the rear section of the cable. Cut off the end, and pull out the cable as you did for the rear section.
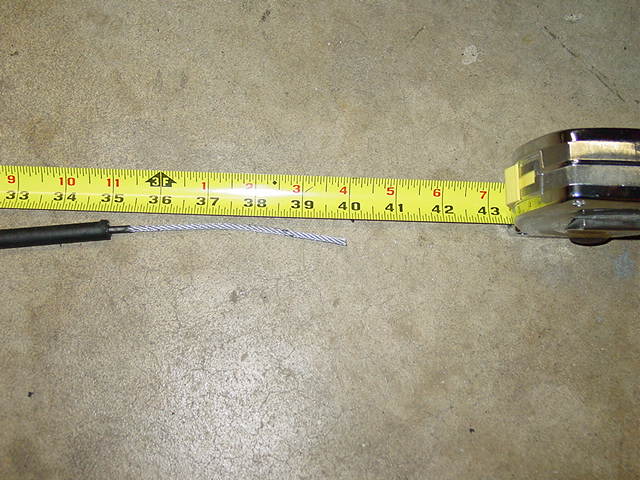
You will need to cut the tube to approximately 31″.

Once you finish cutting the tubes, you will need to slide the cables back in and cut it to length. You’ll want about 5-7″ Once you cut the cable to length, you will need to strip back the black plastic sheathing. Removing the sheathing, so be patient.
At this point, attach the rear portion of the cables to the hubs
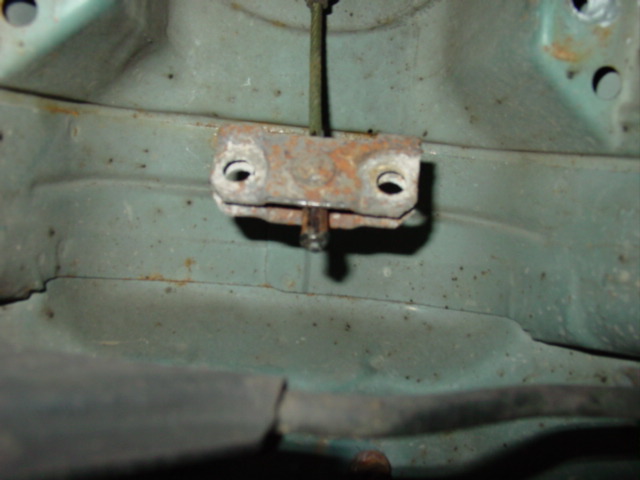
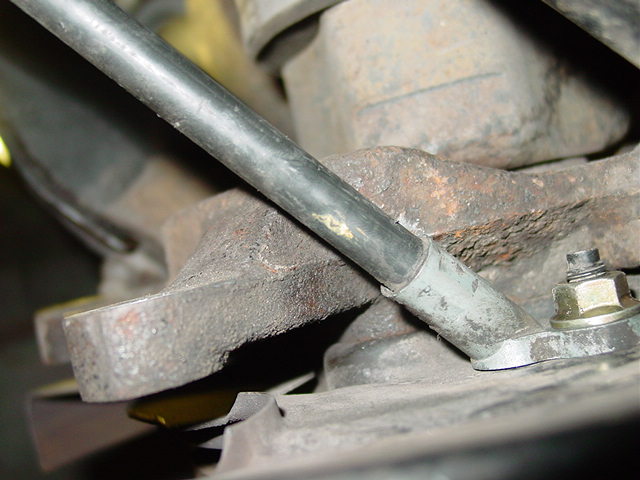
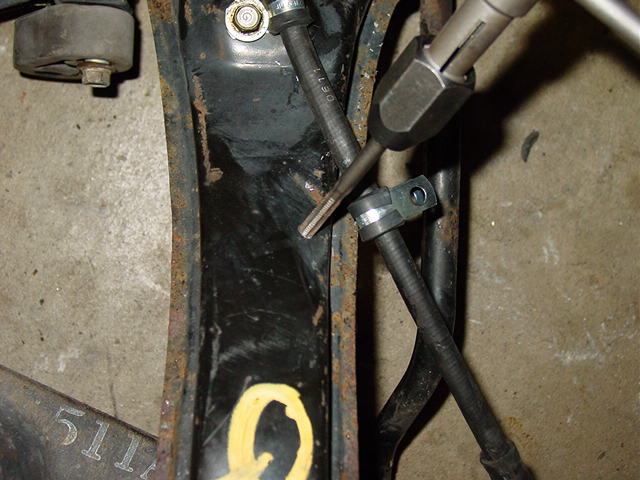
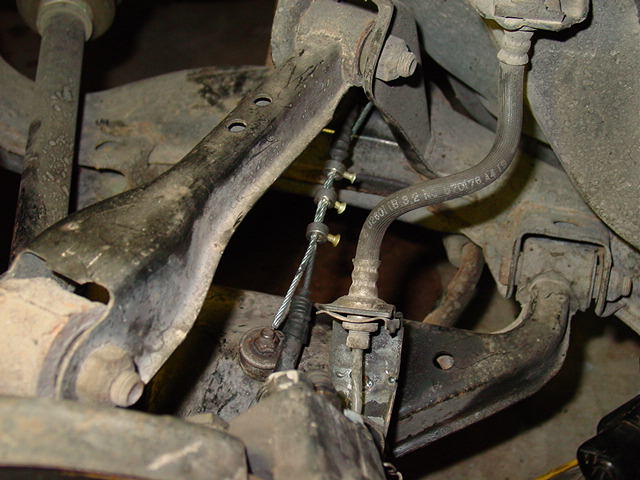
The front portion of the cable will need to be attached to the sub frame. I’ve shown you the process with the sub frame removed, but it can be done without removing it.

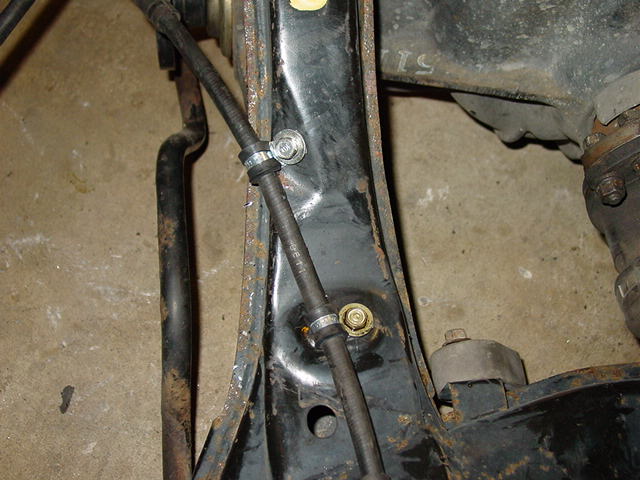
In order to support the cables, you will need to use .5″ insulated clamps, Summit Racing part number: SUM-G1882. The sub frame already has a drilled and tapped hole that you will need to use to mount the cable. Since I had the sub frame out, I added a second pair of holes using a drill and tap. The tap size is 6mm x 1.00. The second pair of clams is not necessary.
When installing the clamps and forward portion of the cables, do not completely tighten the clamps as you will need to adjust the length of the cables (especially if you have removed the sub frame)

Attach the cables to the t-bar. Install the sub frame (if you’ve removed it). Once everything is back in, you will need to tighten the clamps. The length of the cables and where you attach the clamps is more of a matter of feel than an exact measurement. You’ll be able to tell once you get in there.
Before you create the splice, you will need to completely loosen the adjustment screw on the e-brake handle. This is important in that it will help you get the last bit of slack out of the cables once everything is together. Make sure the handle is in the disengaged position as well.


This is the hardest part. I had to go through this process twice before I really had the tension correct. You will need a few locking pliers, or Vise Grips, to do this. You have to get as much slack out of the cables as you can, then hold it while you do the splice. Pull the slack out of the front cables and clamp the line. For the rear portion, you will need to relieve the slack in the cable as well as preload the brake shoes. This is done by feel. Pull on the cable until it stops, clamp the cable and then check to see if the rotor can move. If it cannot, then you are ready to move on (don’t worry, you will get some of the slack back once you remove all of the clamps).

The last part of the process is to slip on the collars, and pull the forward portion of the cable as tight as you can, and tighten at least one of the clamps. After that, tighten the rest of the clamps.
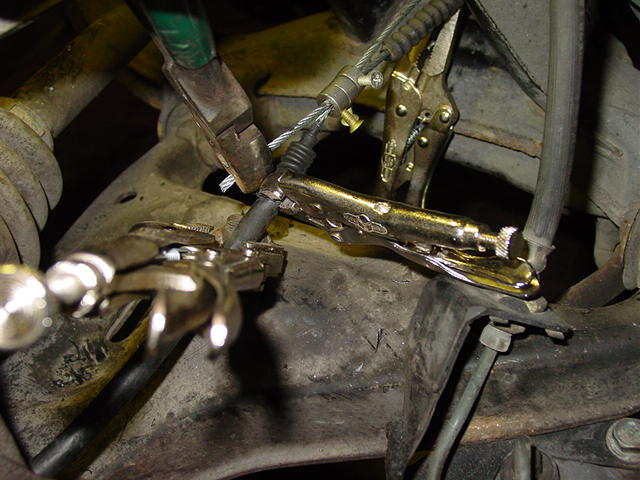
This is what you should see once you’ve removed all of the pliers and what have you. You will probably need to tighten the adjustment on the e-brake handle as well as adjust the drum brake itself to get the rest of the slack out of the line. You may even need to come back and tighten the cables by the splice as I’ve already described once you’ve put a few miles on the setup.

The R33 Solution.
I understand that the Skyline R33 cables are long enough to reach the T-bar by rerouting the cables through the sub frame as you would on the S13. I have seen a few shops who have been selling R33 cables for around $120. If anyone can confirm this, please let me know.
As I’ve said, the best setup has a properly supported cable. If the R33 works as I’ve read, it is the #1 solution. It allows proper support of the cables with a factory made cable.
cvc9216 from Zilvia confirmed that the R33 GTS cables will work. Thanks!
cdlong from Freshalloy also included that the R33 cables can be factory installed (as in routed through the original location). Thanks for the info!