Aesthetics aside, swapping the steering wheel removes a great deal of mass that tends to numb steering feel. Back in the day, steering wheels tended to be over-sized and housed comically large air bags. Swapping to a smaller and lighter aftermarket wheels allows the driver to easily feel the impact of losing tracking and wheel lock-up.
I do need to add this disclaimer that disabling safety equipment on a street driven vehicle is not recommended and should only be done so for off-road use only.
The mechanical portion of this swap is fairly straight forward. The challenging portion of this swap involves the wiring required to retain the horn and cruise control. This write-up is specific to the ’92-’95 Civic, but is very similar to just about any honda/acura on the road up to the early 2000’s.
Tools Necessary:
Socket set
Wire cutters
Wire crimper
Soldering iron
Hand drill and drill set
Torx set
1/4″ wide brass strip (purchased at local hobby shop)
You may want to disconnect the battery and wait about 15-30 minutes before you start this process. You risk having the airbag deploy and cause serious injury if you don’t disconnect the battery.
The 5th gen civic was equipped with a passenger’s side airbag from ’94-’95. If you want to completely remove the airbags, you will need to find a dash board from a ’92-’93 civic. You will not need to do the swap, but it will make for a cleaner final product.
If you plan to swap the dashboard to a ’92-’93 non-airbag dash, scroll down the page to the dashboard swap section.
Steering Wheel Swap
If you aren’t going to swap out the dash, or you have a driver’s side airbag only civic, then you can start here with the steering wheel swap!
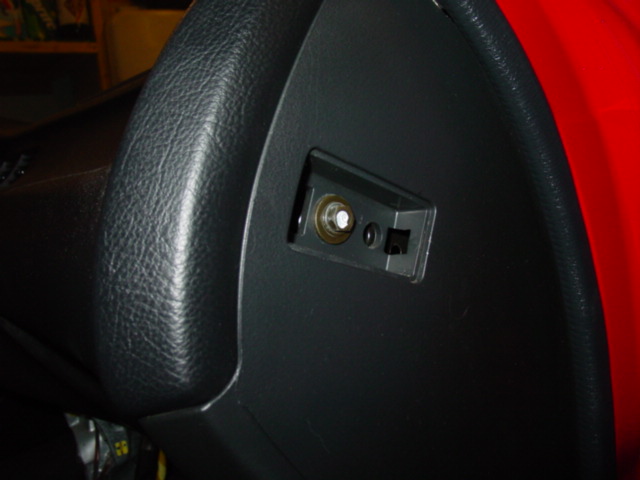
Start by removing the caps and torx screws on either side of the steering wheel.
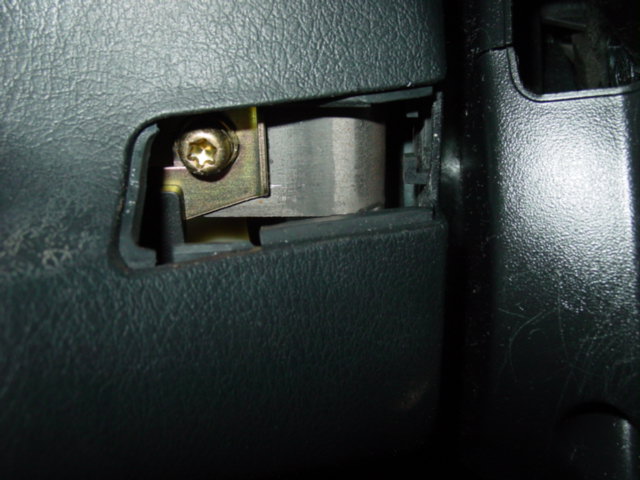
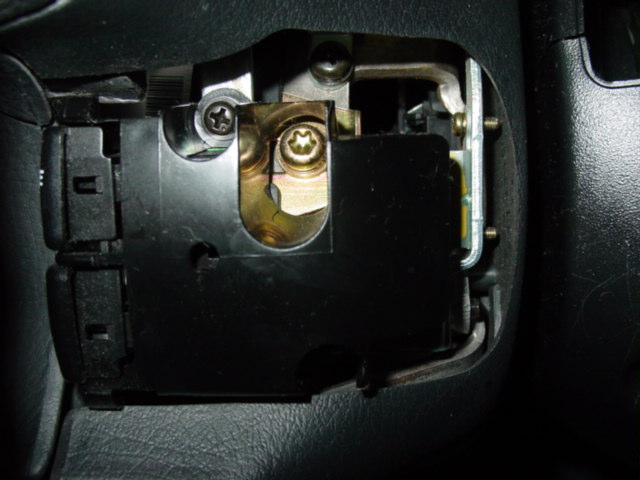
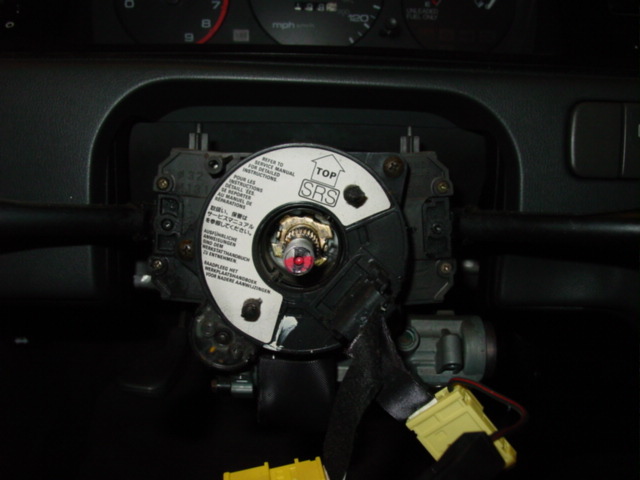
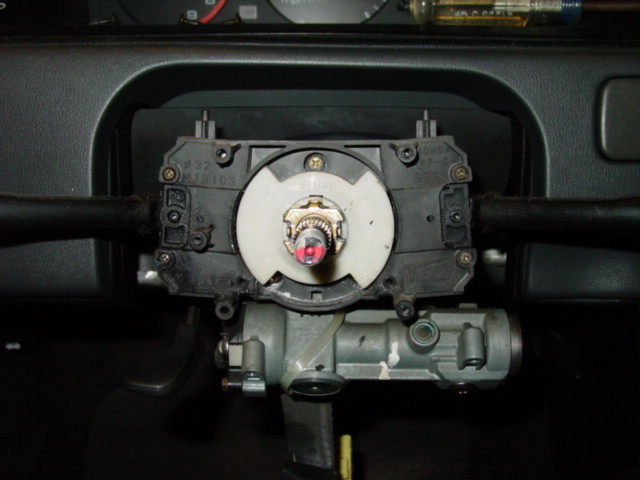
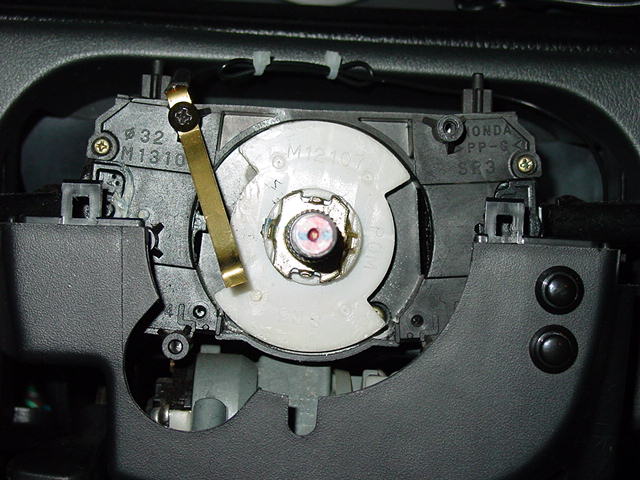
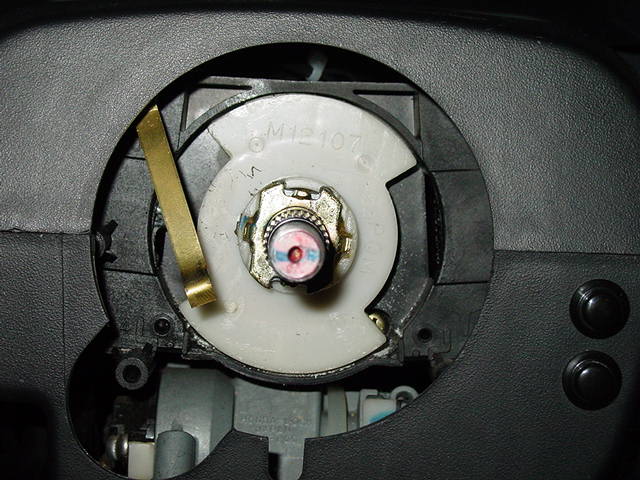
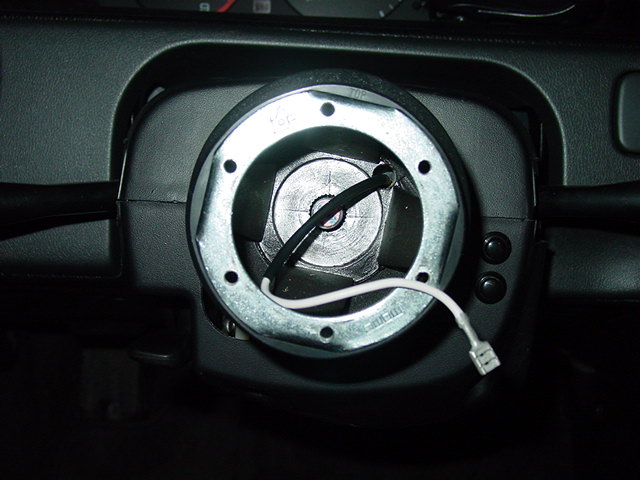
Remove the cap and torx screw on the left side.Remove the cap and torx screw from the right side.With the screws out, the airbag is ready to be removed.After you remove the airbag, remove the 19mm bolt in the middle. Removing the wheel is as easy as wiggling it until it pops off.Remove the steering column cover by pulling out three screws located on the bottom.Remove the spiral cable by removing 3 screws.You will find that the wiring harness works it’s way under the column to a clip you can find under the dash.
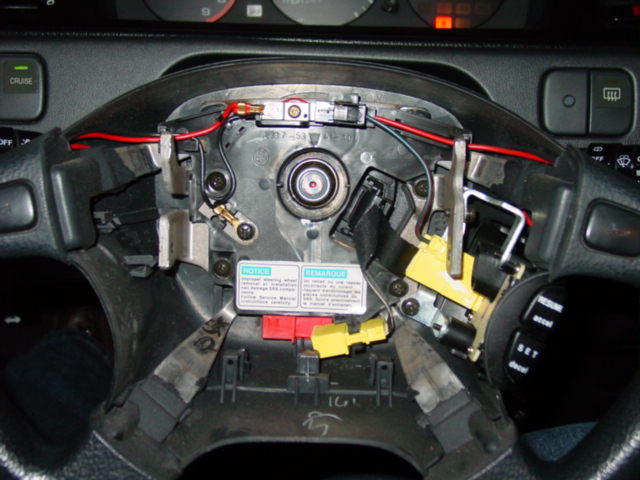
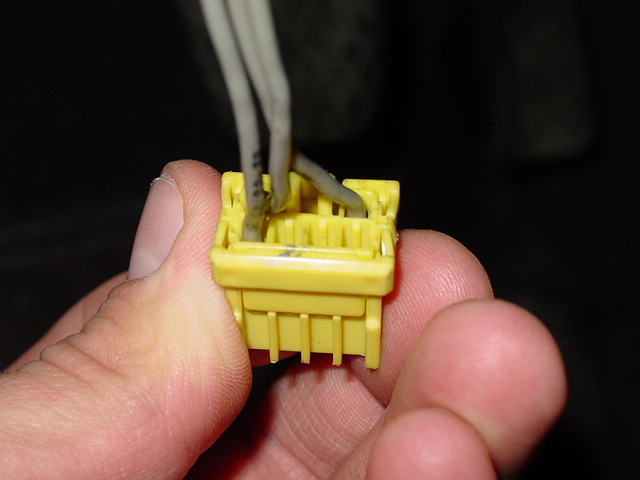
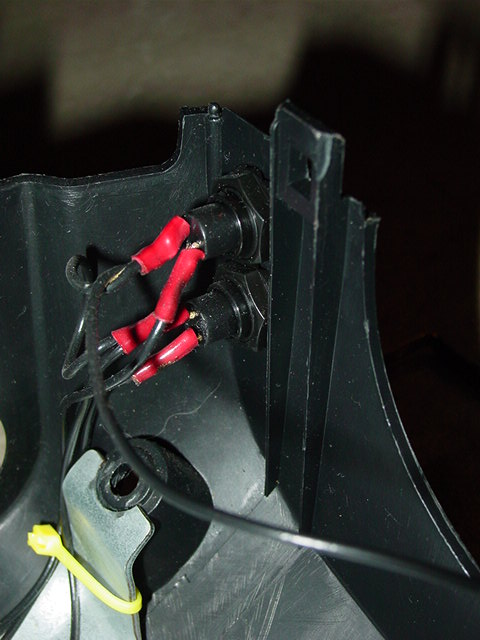
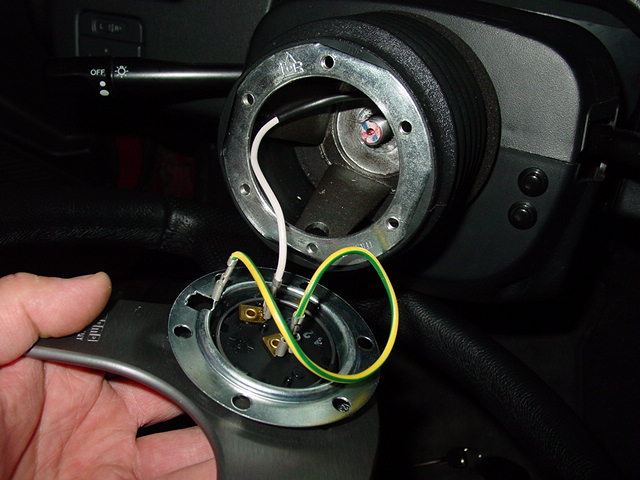
If you didn’t pull the entire yellow airbag harness, you may want to do it now. If you want to retain the horn and the cruise, if so equipped, you’ll need to modify the wiring.
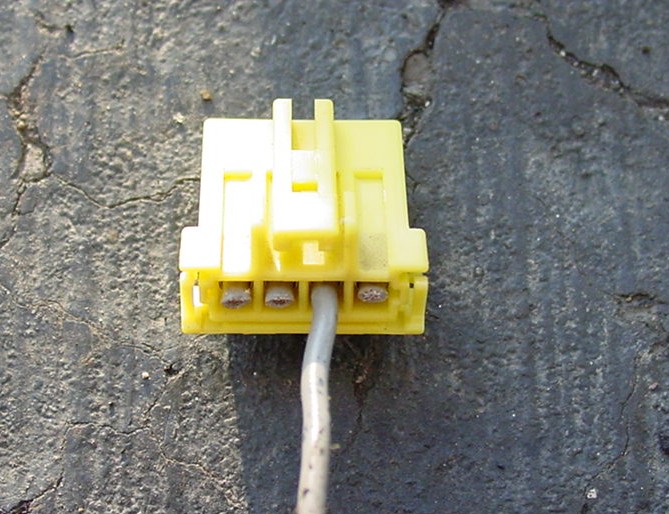
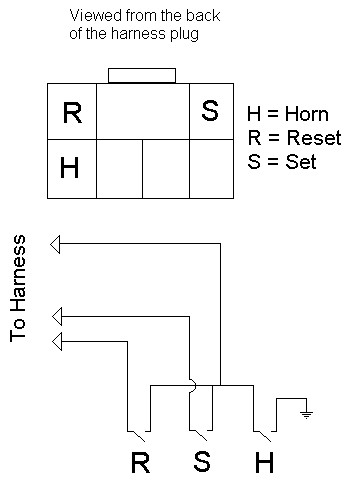
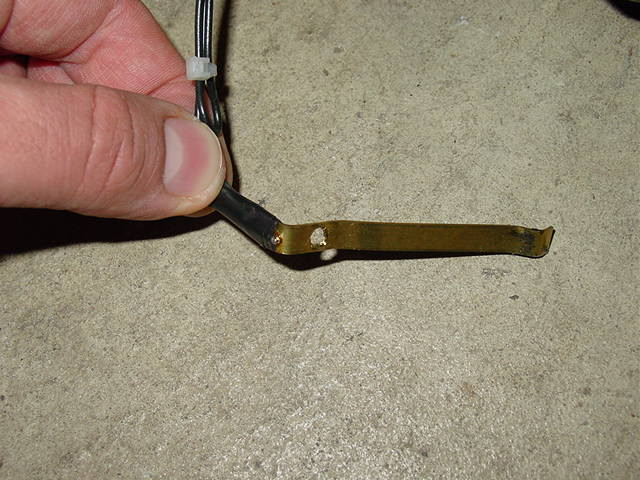
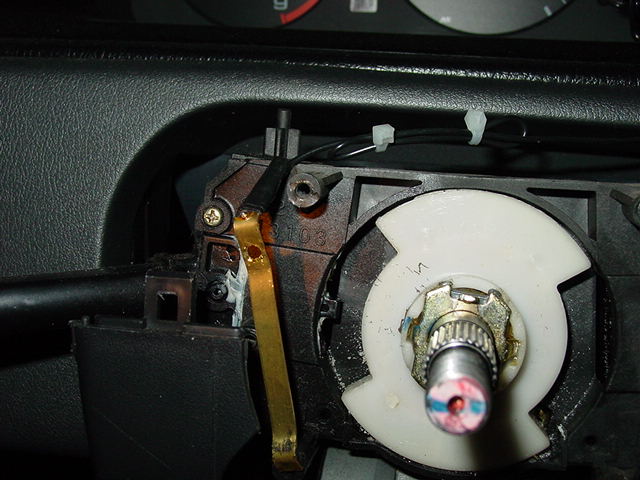
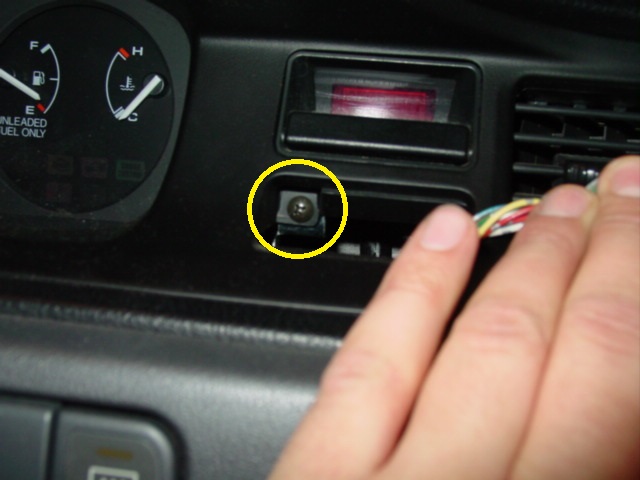
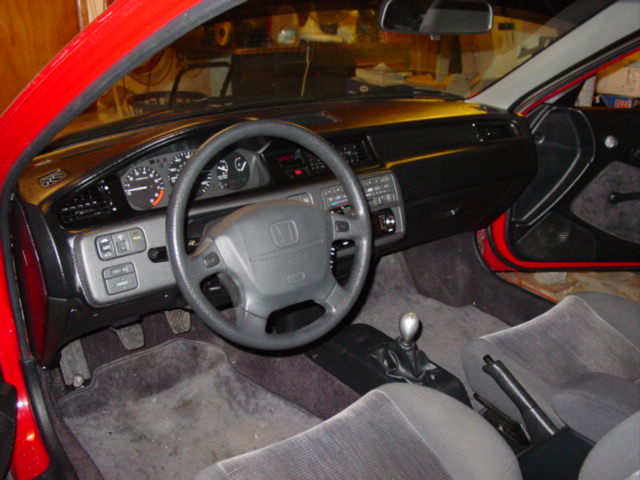
The yellow airbag harness attaches to a plug found on top of the fuse panel.The entire airbag harness consists of gray wires. Using the Helm manual and a multimeter, I was able to determine which wires were necessary for the horn and cruise functions. As you can see, all you need is 3 wires, 1 if you are only wiring a horn (see the diagram below for the horn wire).This picture is of a Civic without cruise control. The single wire shown is all that is necessary for the horn.The breakdown of the wiring necessary for the buttons and horn are shown in the following wiring diagram:Using the provided wiring diagram, you will be able to properly wire two buttons for the use of cruise and the horn.Leave slack for the horn wire. Solder this wire to a strip of 1/4″ brass stock. The brass strip should be bent and drilled as shown.With the buttons wired, and the horn’s brass strip attached, you should have something that looks like this.You will be able to use one of the holes that secured the original wire loom.Screw the strip in as shown. The back of the entire momo hub is contact area, so placement of the brass strip is not entirely critical.Reattach the halves of the steering column cover.Install the hub. You may need to use trial and error to determine the center position of the steering wheel. Do this in a parking lot or somewhere else away from traffic.Once you center the hub, you can attach the steering wheel. Wire the horn according to the manufacturer’s instructions.The final produce is worth the effort in both appearance and function!
Dashboard Swap
If you want to go all out and get rid of the passenger side airbag, you’ll need to find a ’92-’93 civic dash. Below is the outline for swapping out the dash. (An alternative to the swap is to buy an air-bag cover from Password JDM)
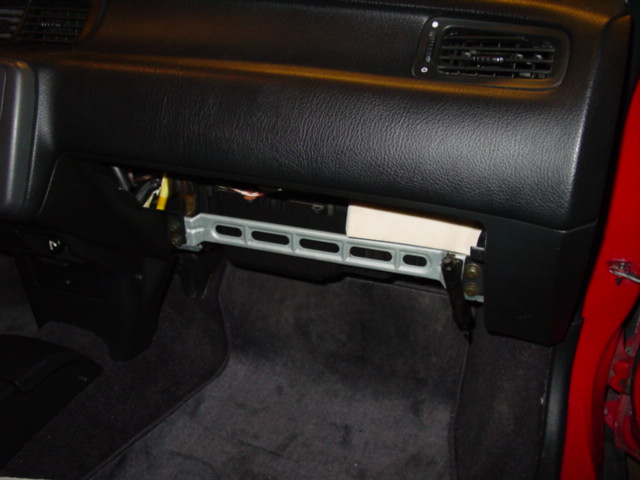
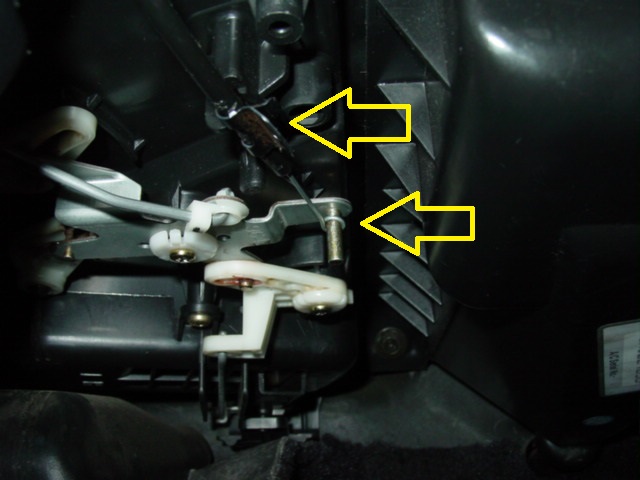
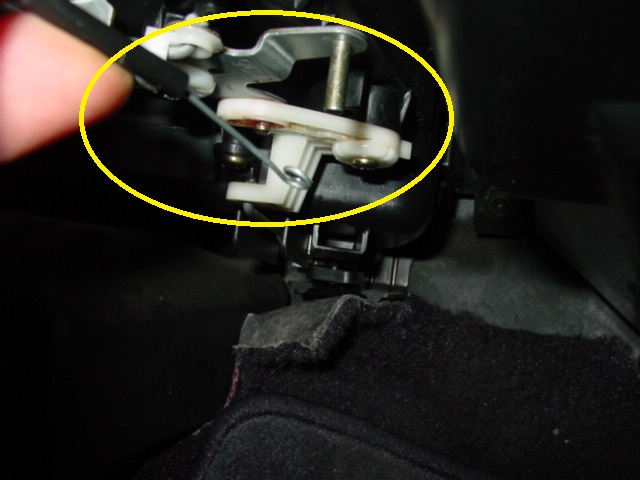
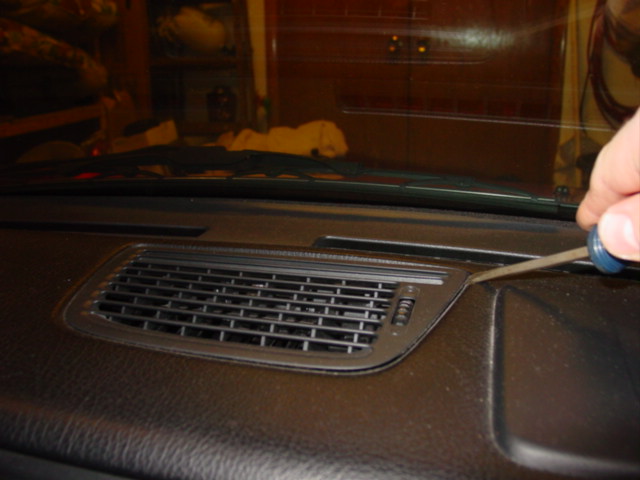
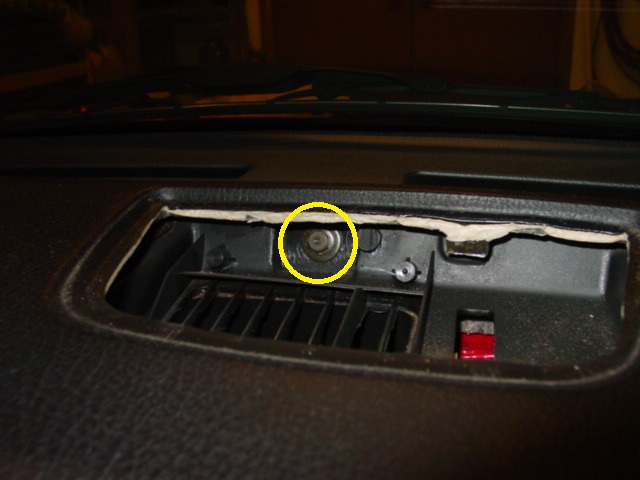
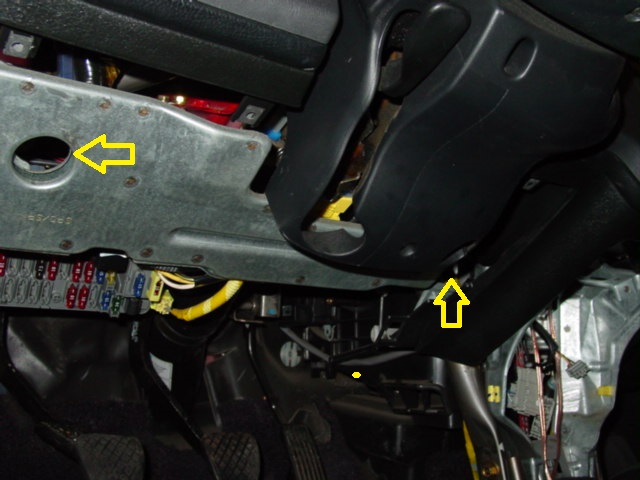
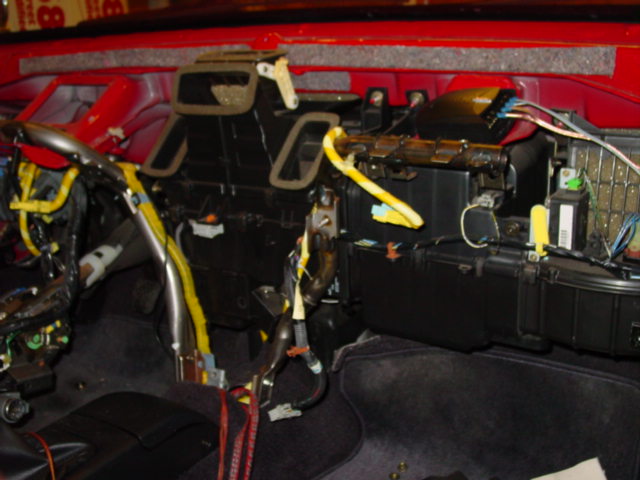
Start by removing the glove box. There are two small bolts under the box as well as one screw located on the right side.You will need to remove the climate control linkage which is found behind the glove box.This is accomplished by pulling the black tube out of it’s clip and then sliding the control wire off of it’s post.Remove the console below the radio. There are two screws under the radio and one on each side. There is also one harness plug that must be disconnected before you pull the console out.Once you have the console out of the way, you will see a large harness plug. This is the wiring for the climate control. It needs to be disconnected just as I’ve shown in the picture.There is a plastic cover on each side of the dash. Pop them out to gain access to the screws behind them. Remove the screws and set them aside.Removing the top dash vent can be tricky. The vent is very easy to break if you do not know how to remove it. Slowly pry the side closest to the windshield until it is all the way out.With the top vent out of the way, you can remove the single bolt that you will find.Looking under the dash, where the glove box used to be, you will see a cover held in by two plastic screws. Remove these screws to gain access to the airbag wiring and mounting bolts.With the cover out of the way, disconnect the yellow air bag harness plug. Also, remove the two nuts located on either side of the yellow plug.Remove two screws on the right of the glove box opening.Remove the single bolt found near the floor behind the console that was removed earlier.Remove the plastic cover under the steering column by removing three screws, two on the left and one on the right. Next, remove the metal knee bolster. There are two holes in the bolster. If you look into each hole, you will see a bolt. There are two that you need to remove.
After you remove the metal bolster, you will need to drop the steering column.
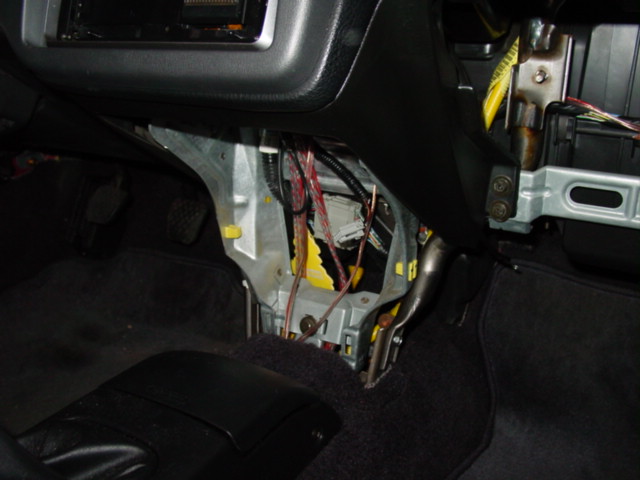
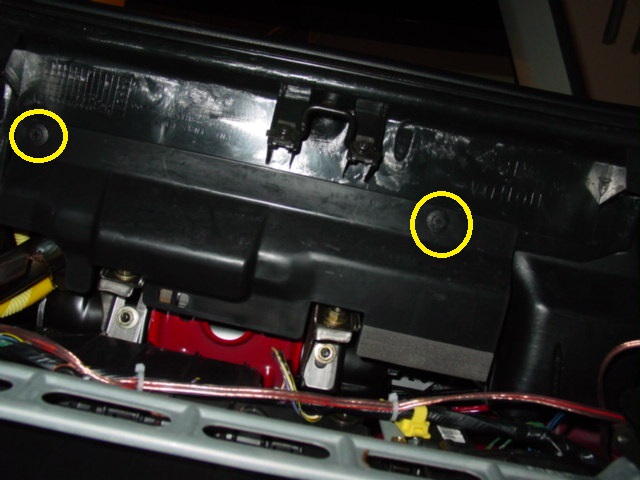
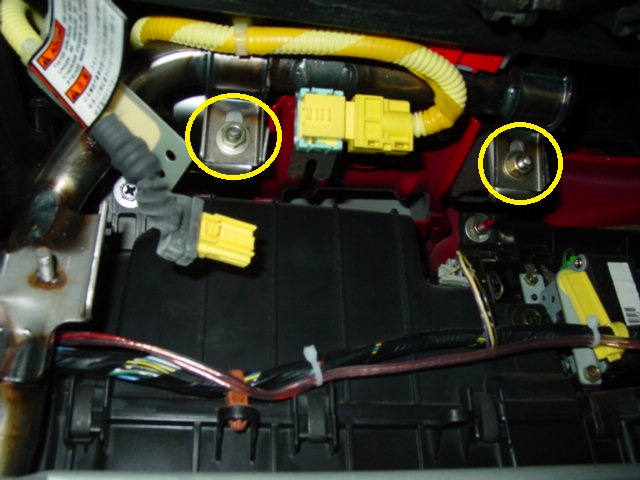
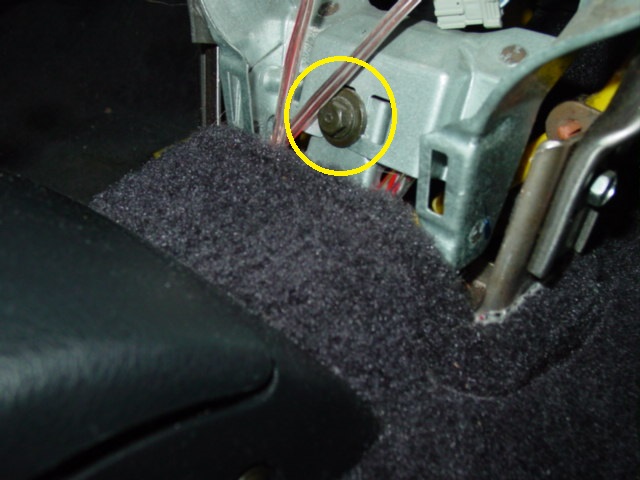
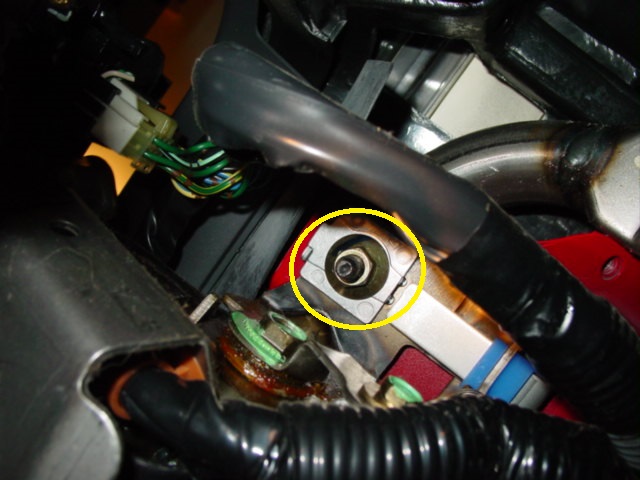
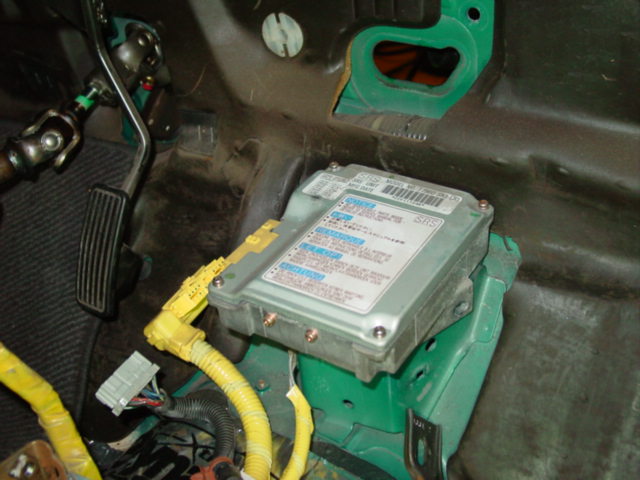
Remove the nut on both sides of the column.Remove the bolts on the lower part of the column. Take care to keep the nylon spacers in order when you remove the bracket.The last bolt that needs to be removed is near the fuse panel.At this point, the dash can come out. The dashboard harness plugs into the chassis harness just above the fuse panel. As you pull it away, take care to disconnect the ground wire that attaches to a metal tab behind the cluster. Watch or any other connectors you have missed.The yellow harness is the airbag harness. You will need to remove and modify it to get the horn and cruise control to work.Take a moment to remove the airbag computer. The computer is located in the center of the car near the firewall. You will need a torx bit to remove the computer.
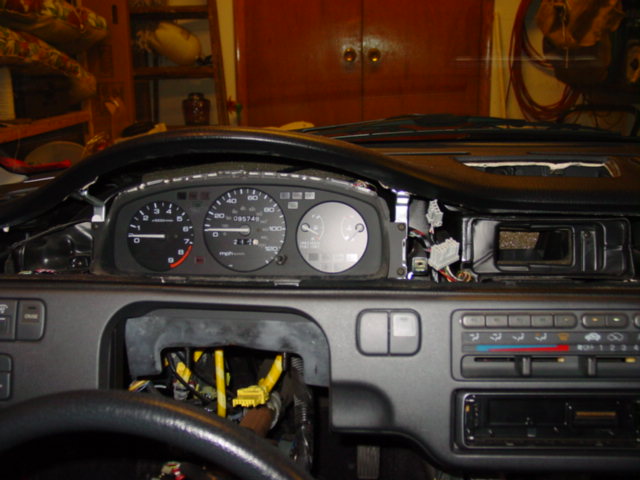
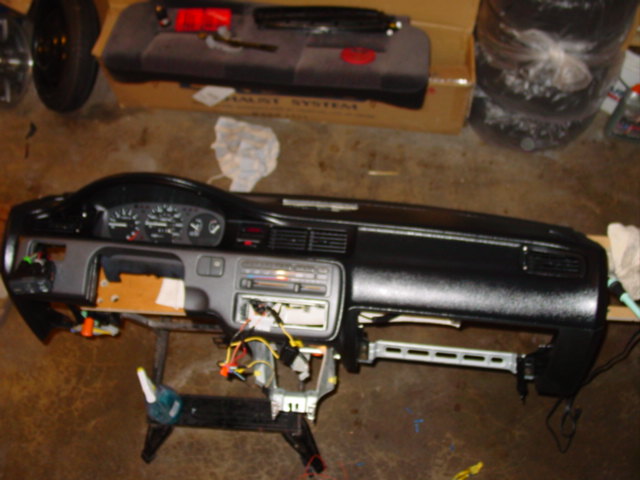
With the dash out, you can easily remove the cluster bezel and all other hardware that needs to be transferred to the new dash.
Pop the hazard button by prying it out with a screwdriver. Under the button is a screw that needs to be removed. There are two more screws that need to be removed just above the instrument cluster.With all three screws removed you can pry out the bezel around the instrument cluster. Do so carefully as you can break the plastic. Remember to unplug the clock if you have one.
With the wiring removed and the dash out, you will need to transfer all for the wiring and hardware to the new dash. There is a harness for the instrument cluster and buttons in the dash, a harness for the radio and climate control.
There are two more small vents that need to be transferred. These are easy to break and should be removed by squeezing the clips from behind.
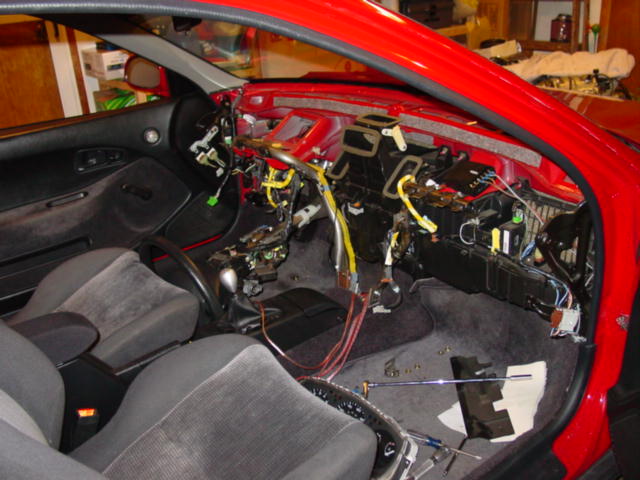
Here is a shot of what you should have before you drop the dash back into your Civic.
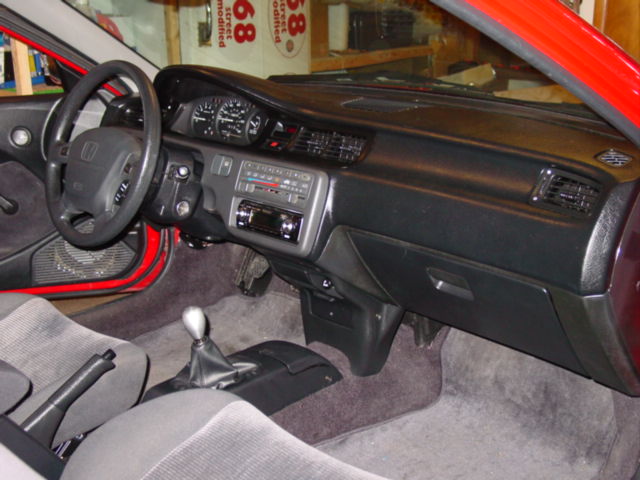
At this point, slide the new dash into place and reverse the removal process.