Replacing Nissan’s Brake Switch
Recently, my wife’s 2008 Nissan Altima wouldn’t start. Press the brake, press the start button. Nothing. It didn’t even try to crank. I had changed the battery a few months earlier and felt confident that it wasn’t the issue. A quick search online pointed towards a faulty brake switch. Pumping the brakes while pressing the start button would result in a start, but that’s no way to live especially considering the fact that this is the same switch that lights up the brake lights! No switch, no brake lights.
While I was at work, my wife stopped by the dealer and they confirmed the issue. I had called ahead and confirmed that they had a new brake switch in stock. Although I was able to price out cheaper replacements, we needed to get her back on the road quickly and safely. She picked up the new brake switch and headed home.
A quick way to confirm whether or not your starting woes are related to the brake switch is by pressing the brake and checking for brake lights. If the brake lights aren’t coming on or they are flickering, then you know you have a bad switch.
The part number of the switch listed for our Altima is 25320-AX00C
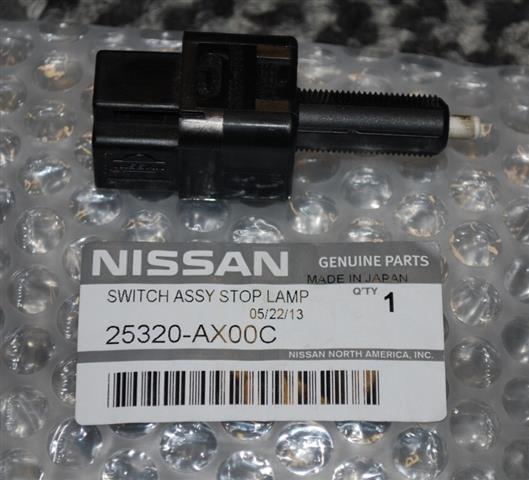
It turns out that this is the same brake switch used in quite a few push button Nissans and Infinitis. Here is a listing of the part from a parts supplier that also lists alternative part numbers and the vehicles in which it is used.
How easy it is to change the brake switch? It is about as easy as checking the oil.
Tools necessary:
- None
Let’s Begin
For starters, it is probably not a bad idea to secure the vehicle by setting the parking brake or chocking the wheels.
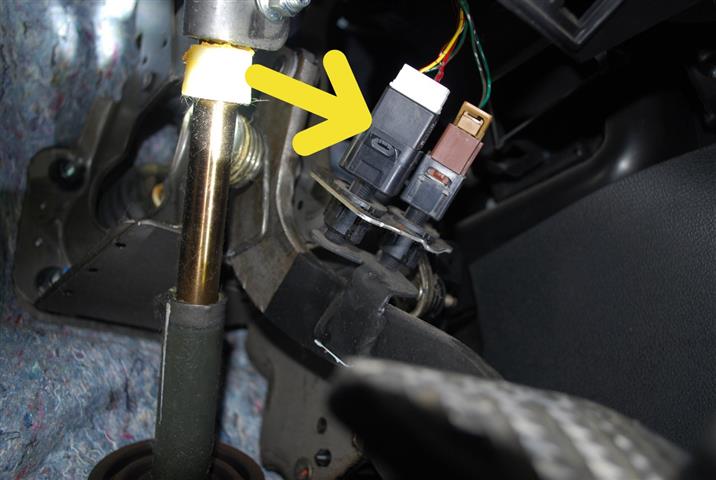
Looking under the dash, look for the brake switch. It is the larger of the two switches over the brake pedal.
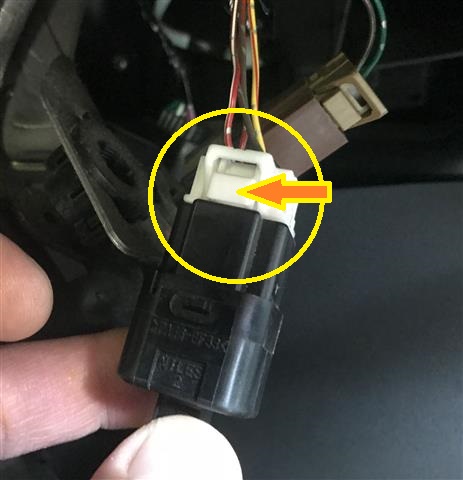
Start by removing the plug on the brake switch. This is accomplished by squeezing the button/tab on the side of the connector.
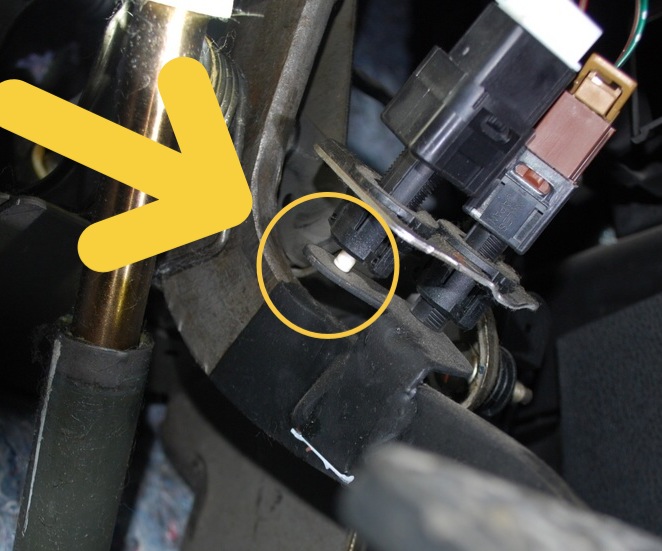
Once the wire is off, turn the brake switch counterclockwise until it pops out of the mount.
It doesn’t matter if you remove the connector first, then the brake switch. It may be easier to release the connector if the switch is still attached. Decide what works best for you.
Installing the new switch
Holding the new brake switch in the same orientation, press it into the opening and watch to make sure the button is fully depressed without moving the brake pedal itself. Turn the brake switch clockwise until it stops.
Reattach the plug. Test for brake lights and ability to start.
Celebrate
Pat yourself on the back for a job well done.