Recently, my wife’s 2008 3.5SE Altima was due for new spark plugs. Having swapped plugs on her old 2003 3.5SE, I was familiar with the process and ordered plugs and an upper intake manifold gasket. Very quickly, I learned that there was a slight difference. The newer VQ35 and QR25 engines use a very narrow plug. The plug uses a 14 mm socket rather than the typical larger options. Not only is the plug 14 mm, but the spark plug hole is much narrower preventing me from using a standard 14 mm deep well socket. After sourcing the proper socket for the job, I decided to do a write-up on the work.
Note: The FSM for the Altima shows that the QR25 4 cylinder engine requires the same 14 mm socket. The QR25 spark plug operation is considerably easier since the plugs are located on the top of the engine. Scroll down to the section describing the plug change for pointers.
See the end of this write-up for torque specs.
Tools and Parts Necessary
Metric Allen Drivers
Metric Socket Set with extensions
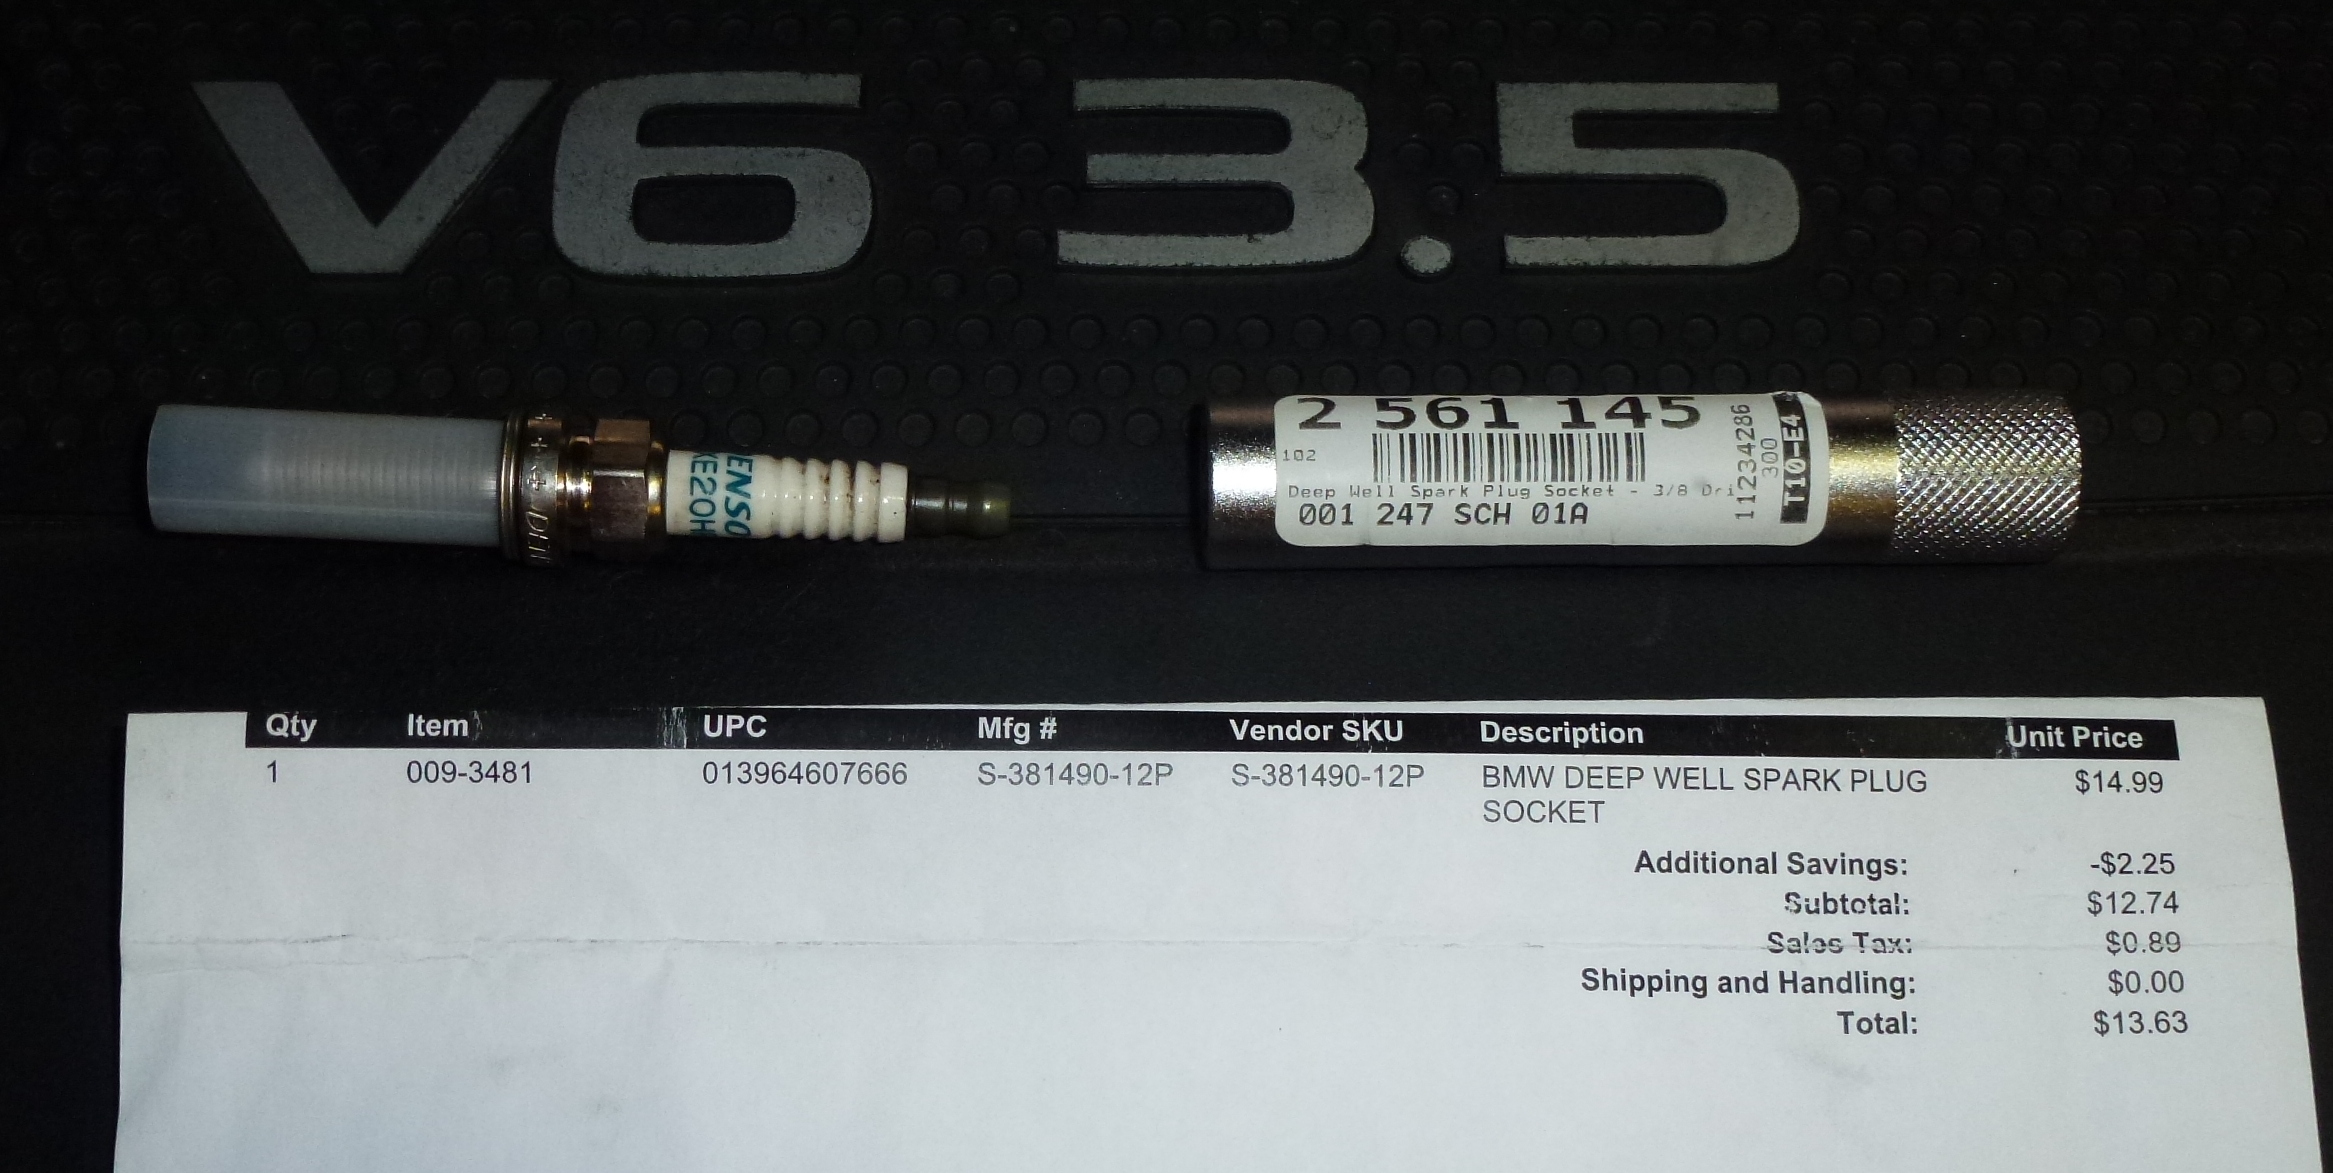
14 mm Deep Well Spark Plug Socket #S-381490-12P
Various pliers
6 Spark plugs for the VQ35 Denso FXE20HR11
4 Spark plugs for the QR25 Denso FXE20HR11
Upper intake manifold gasket Nissan #14032-JA10A
Throttle body gasket Nissan #16175-JA10A
Anti-seize
The most important part of this maintenance is buying the correct tool for the plug.
The spark plug used on both the 4 cylinder and 6 cylinder engines, is a unique 14 mm size that is not covered by the standard spark plug socket sets. I found an inexpensive solution to the problem at Craftsman. It is a tool labeled as a BMW Deep Well Spark Plug Socket. I ordered mine at a local Sears. You can order yours online using the numbers I’ve provided in this picture. As an added bonus, this socket uses a magnet to hold the plug rather than a rubber sleeve.
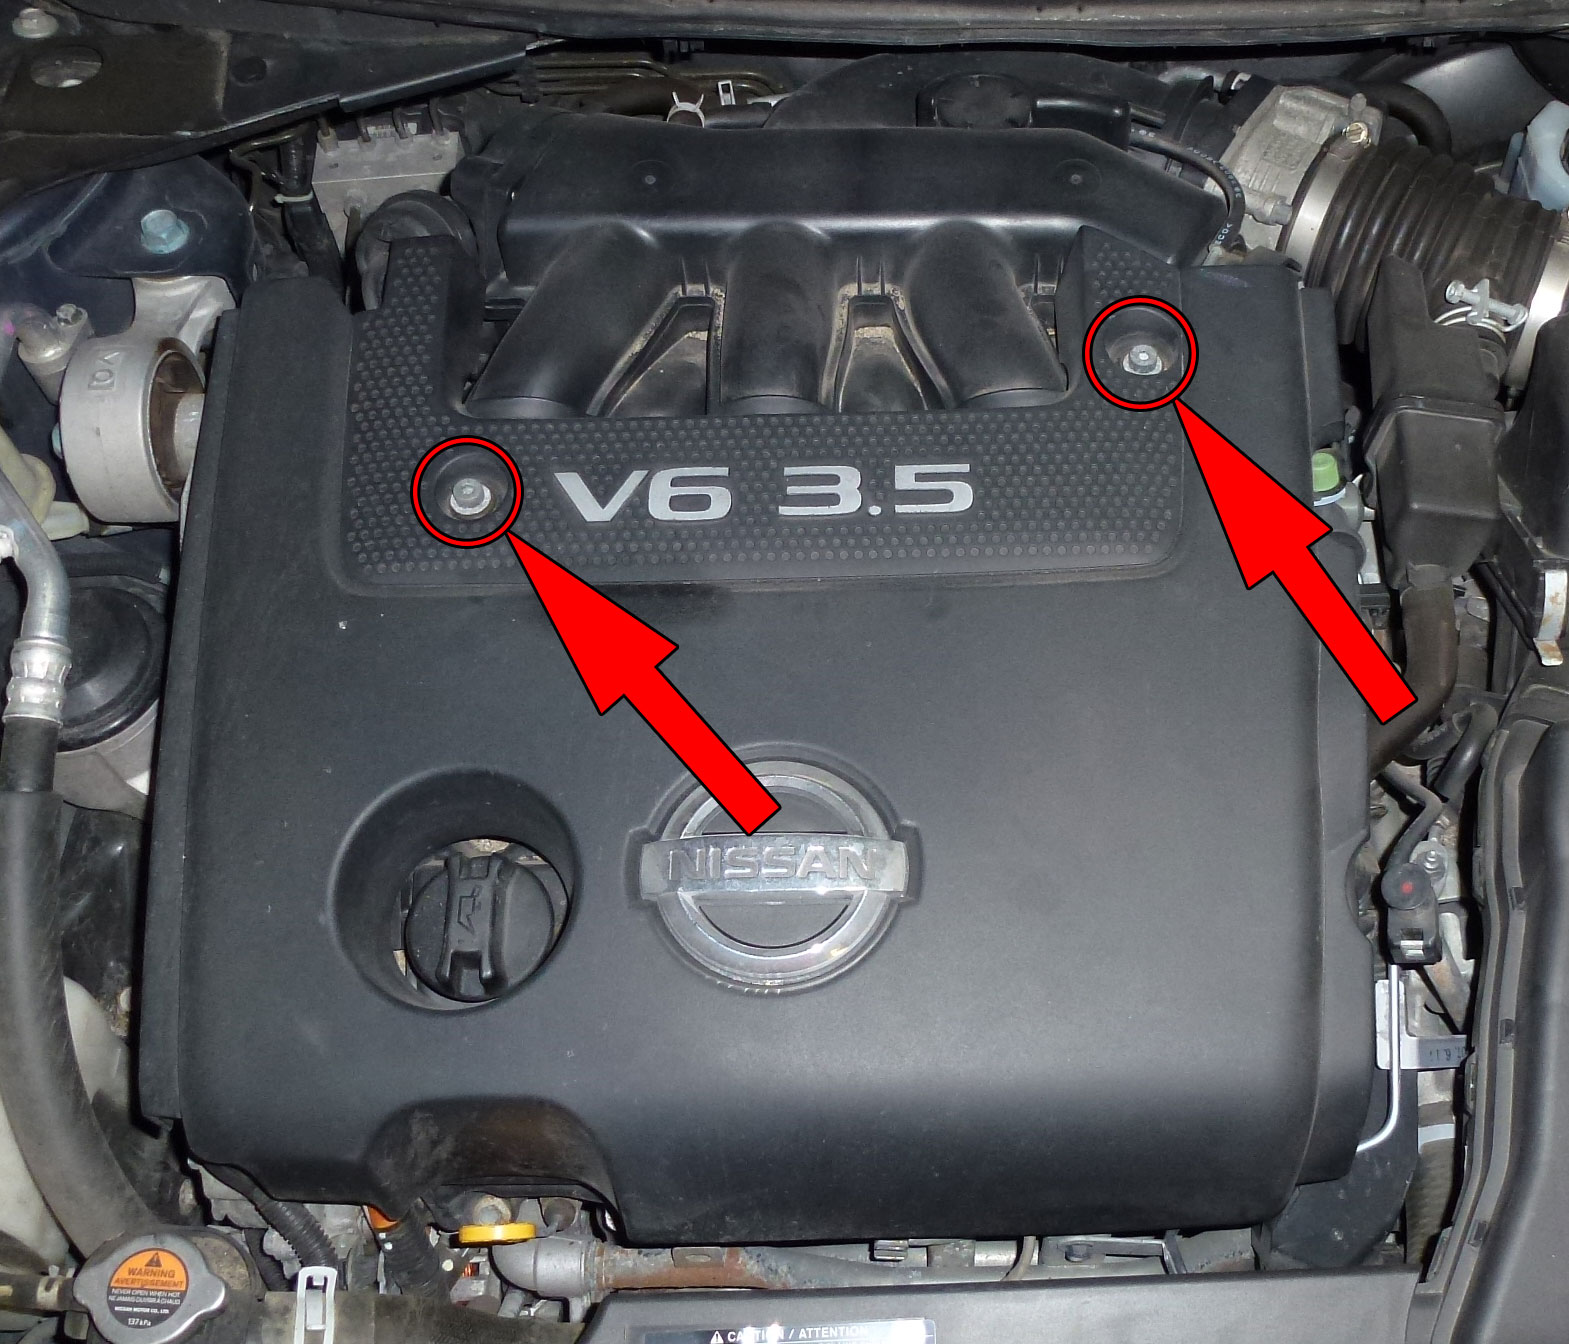
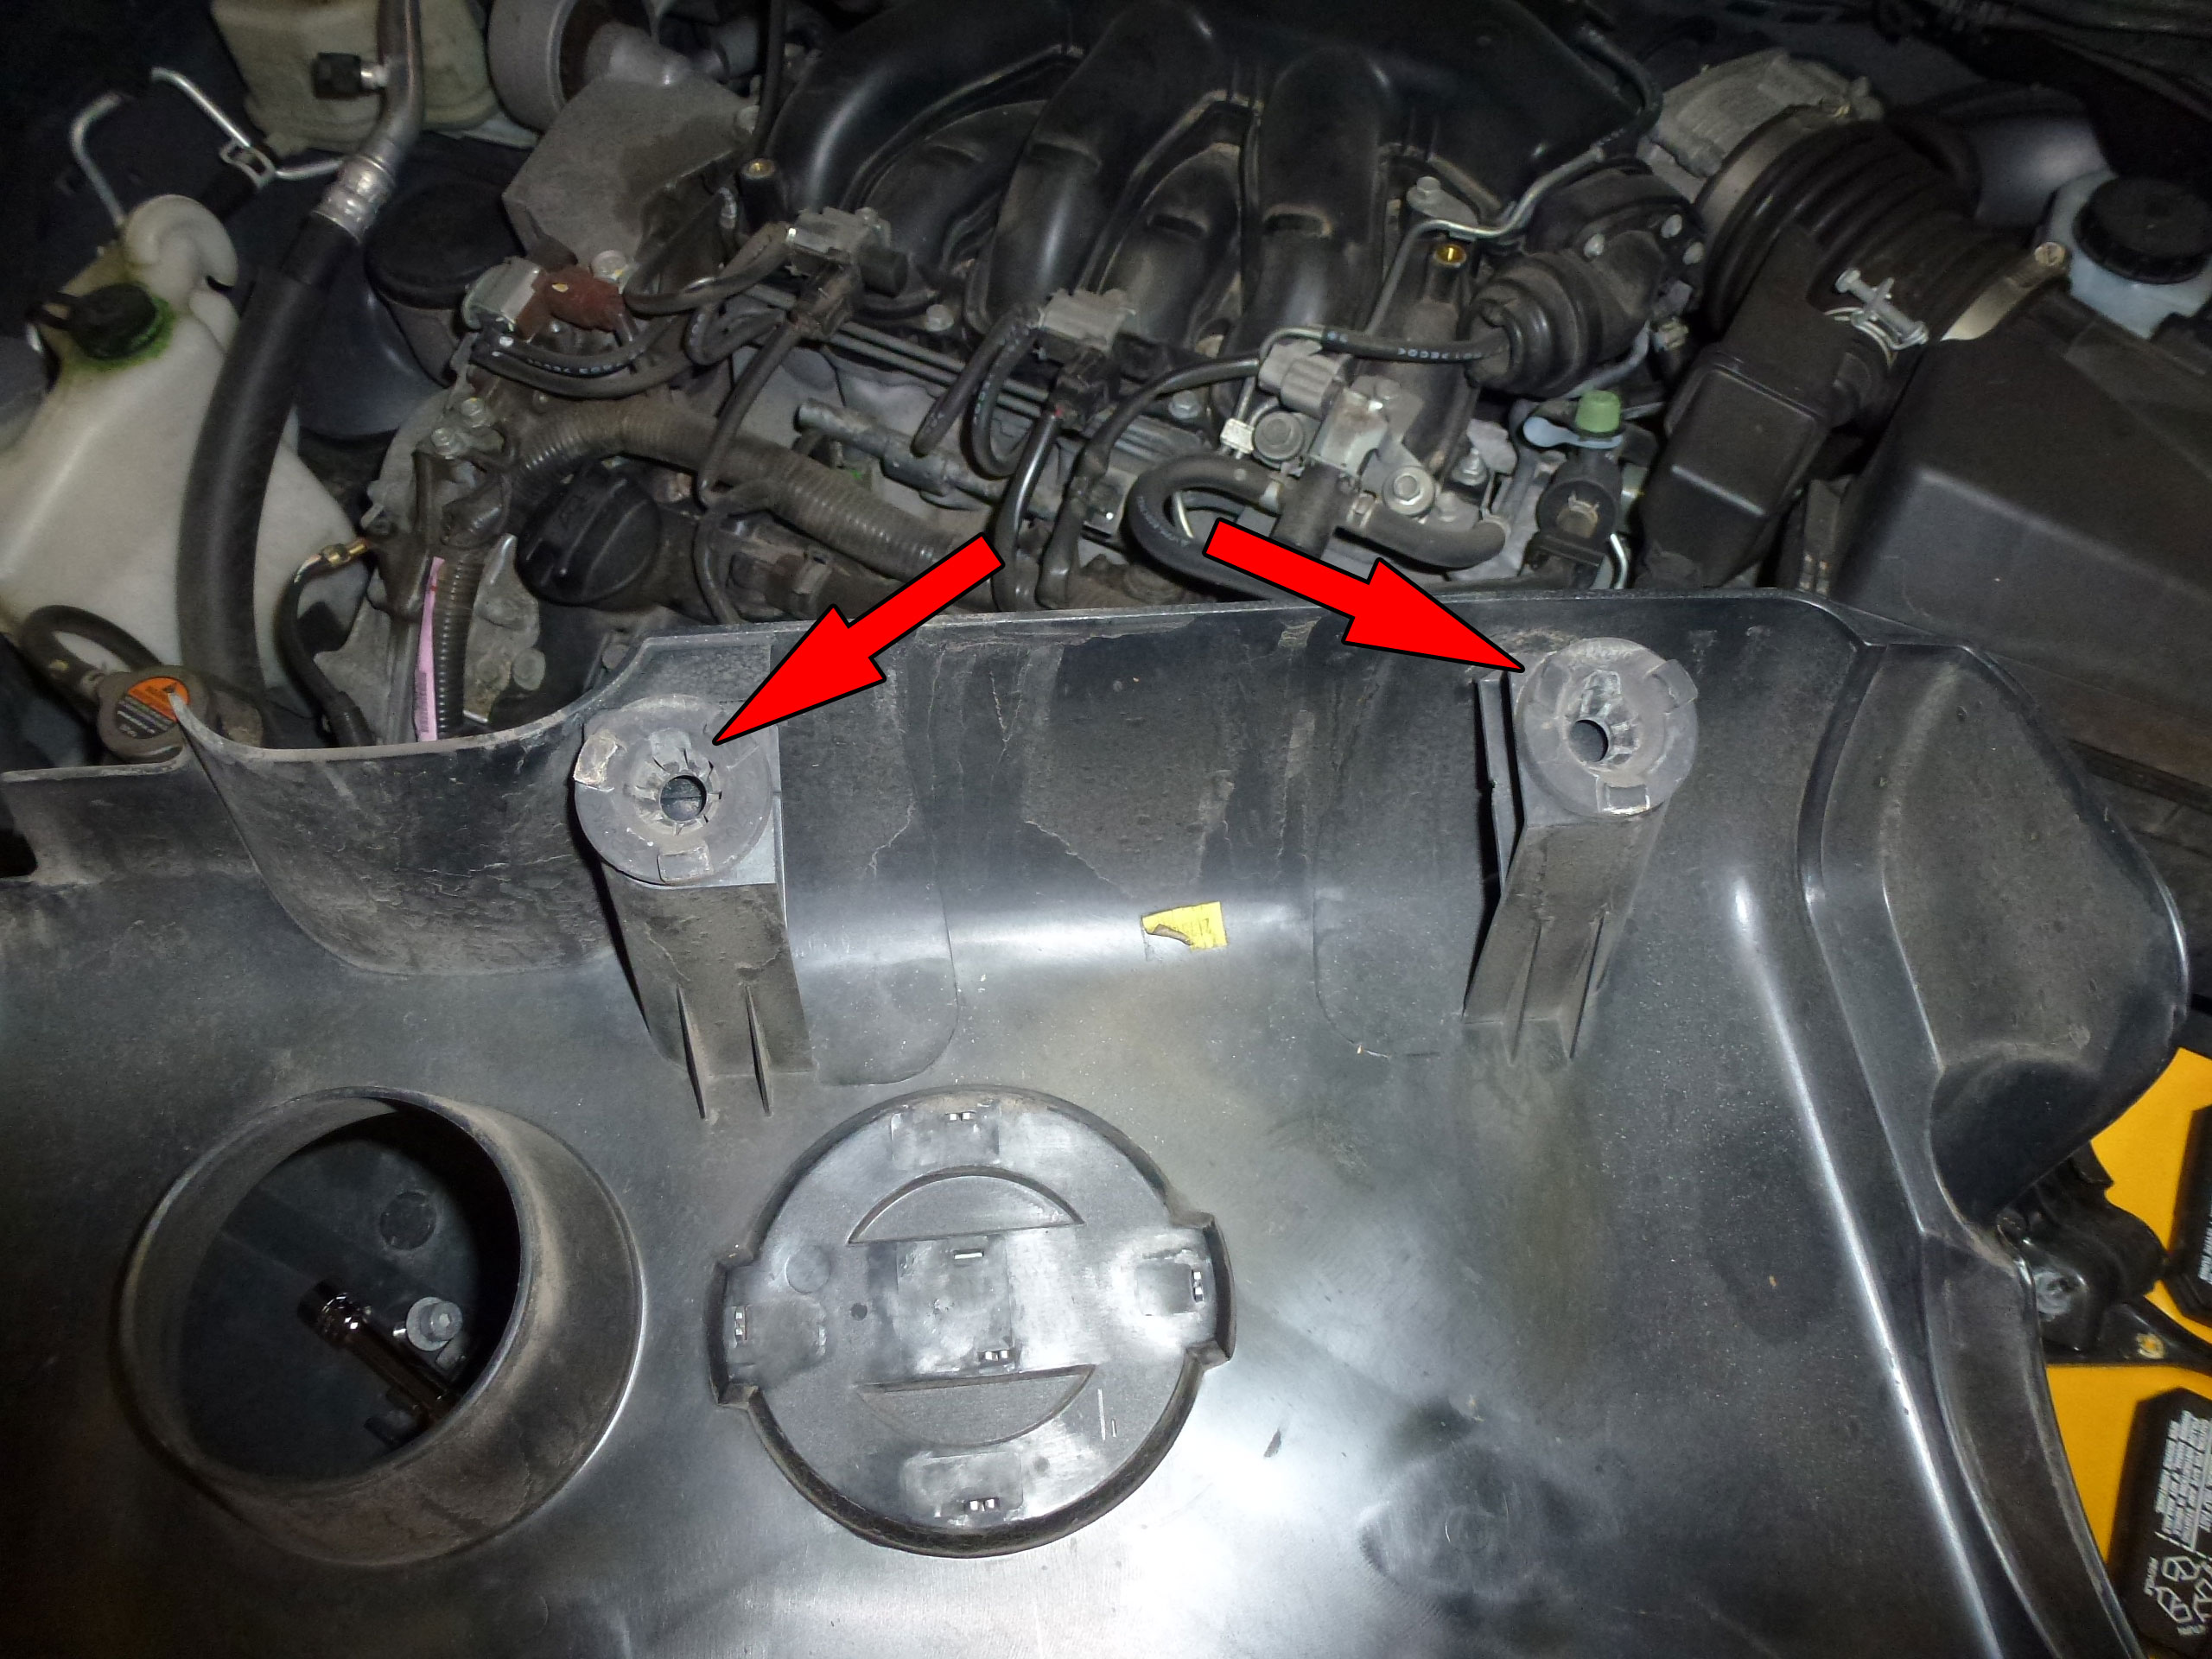
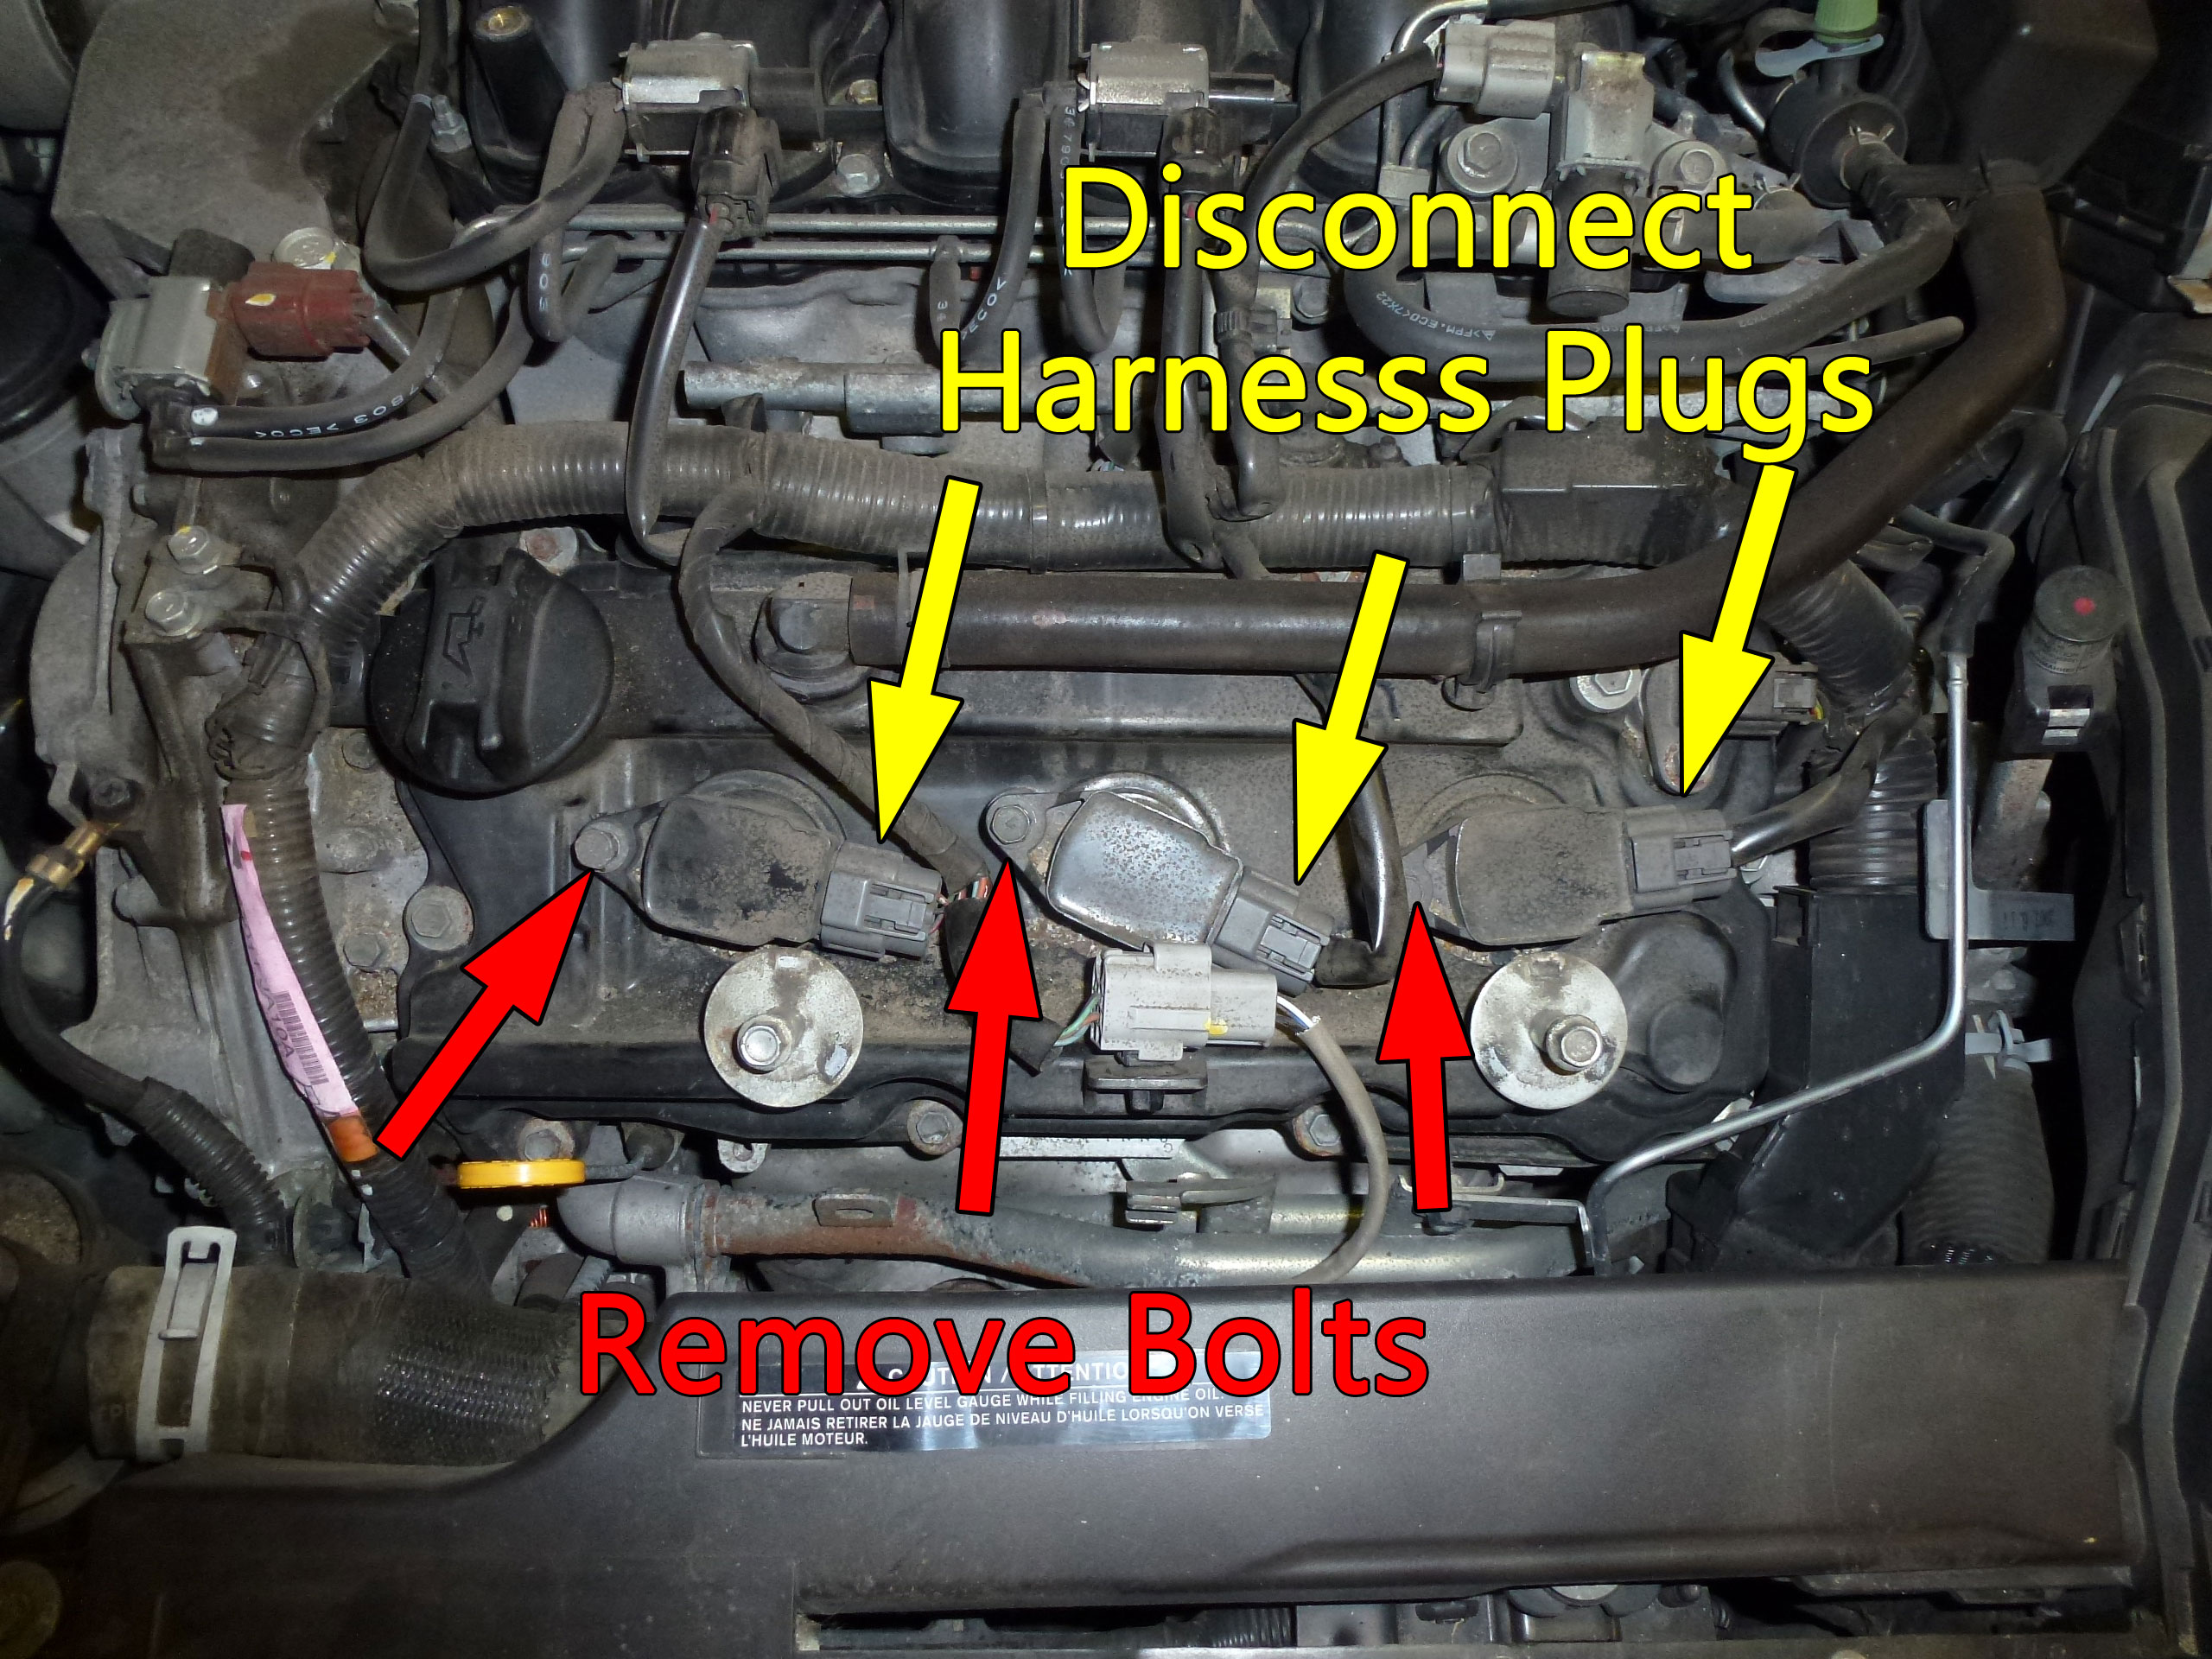
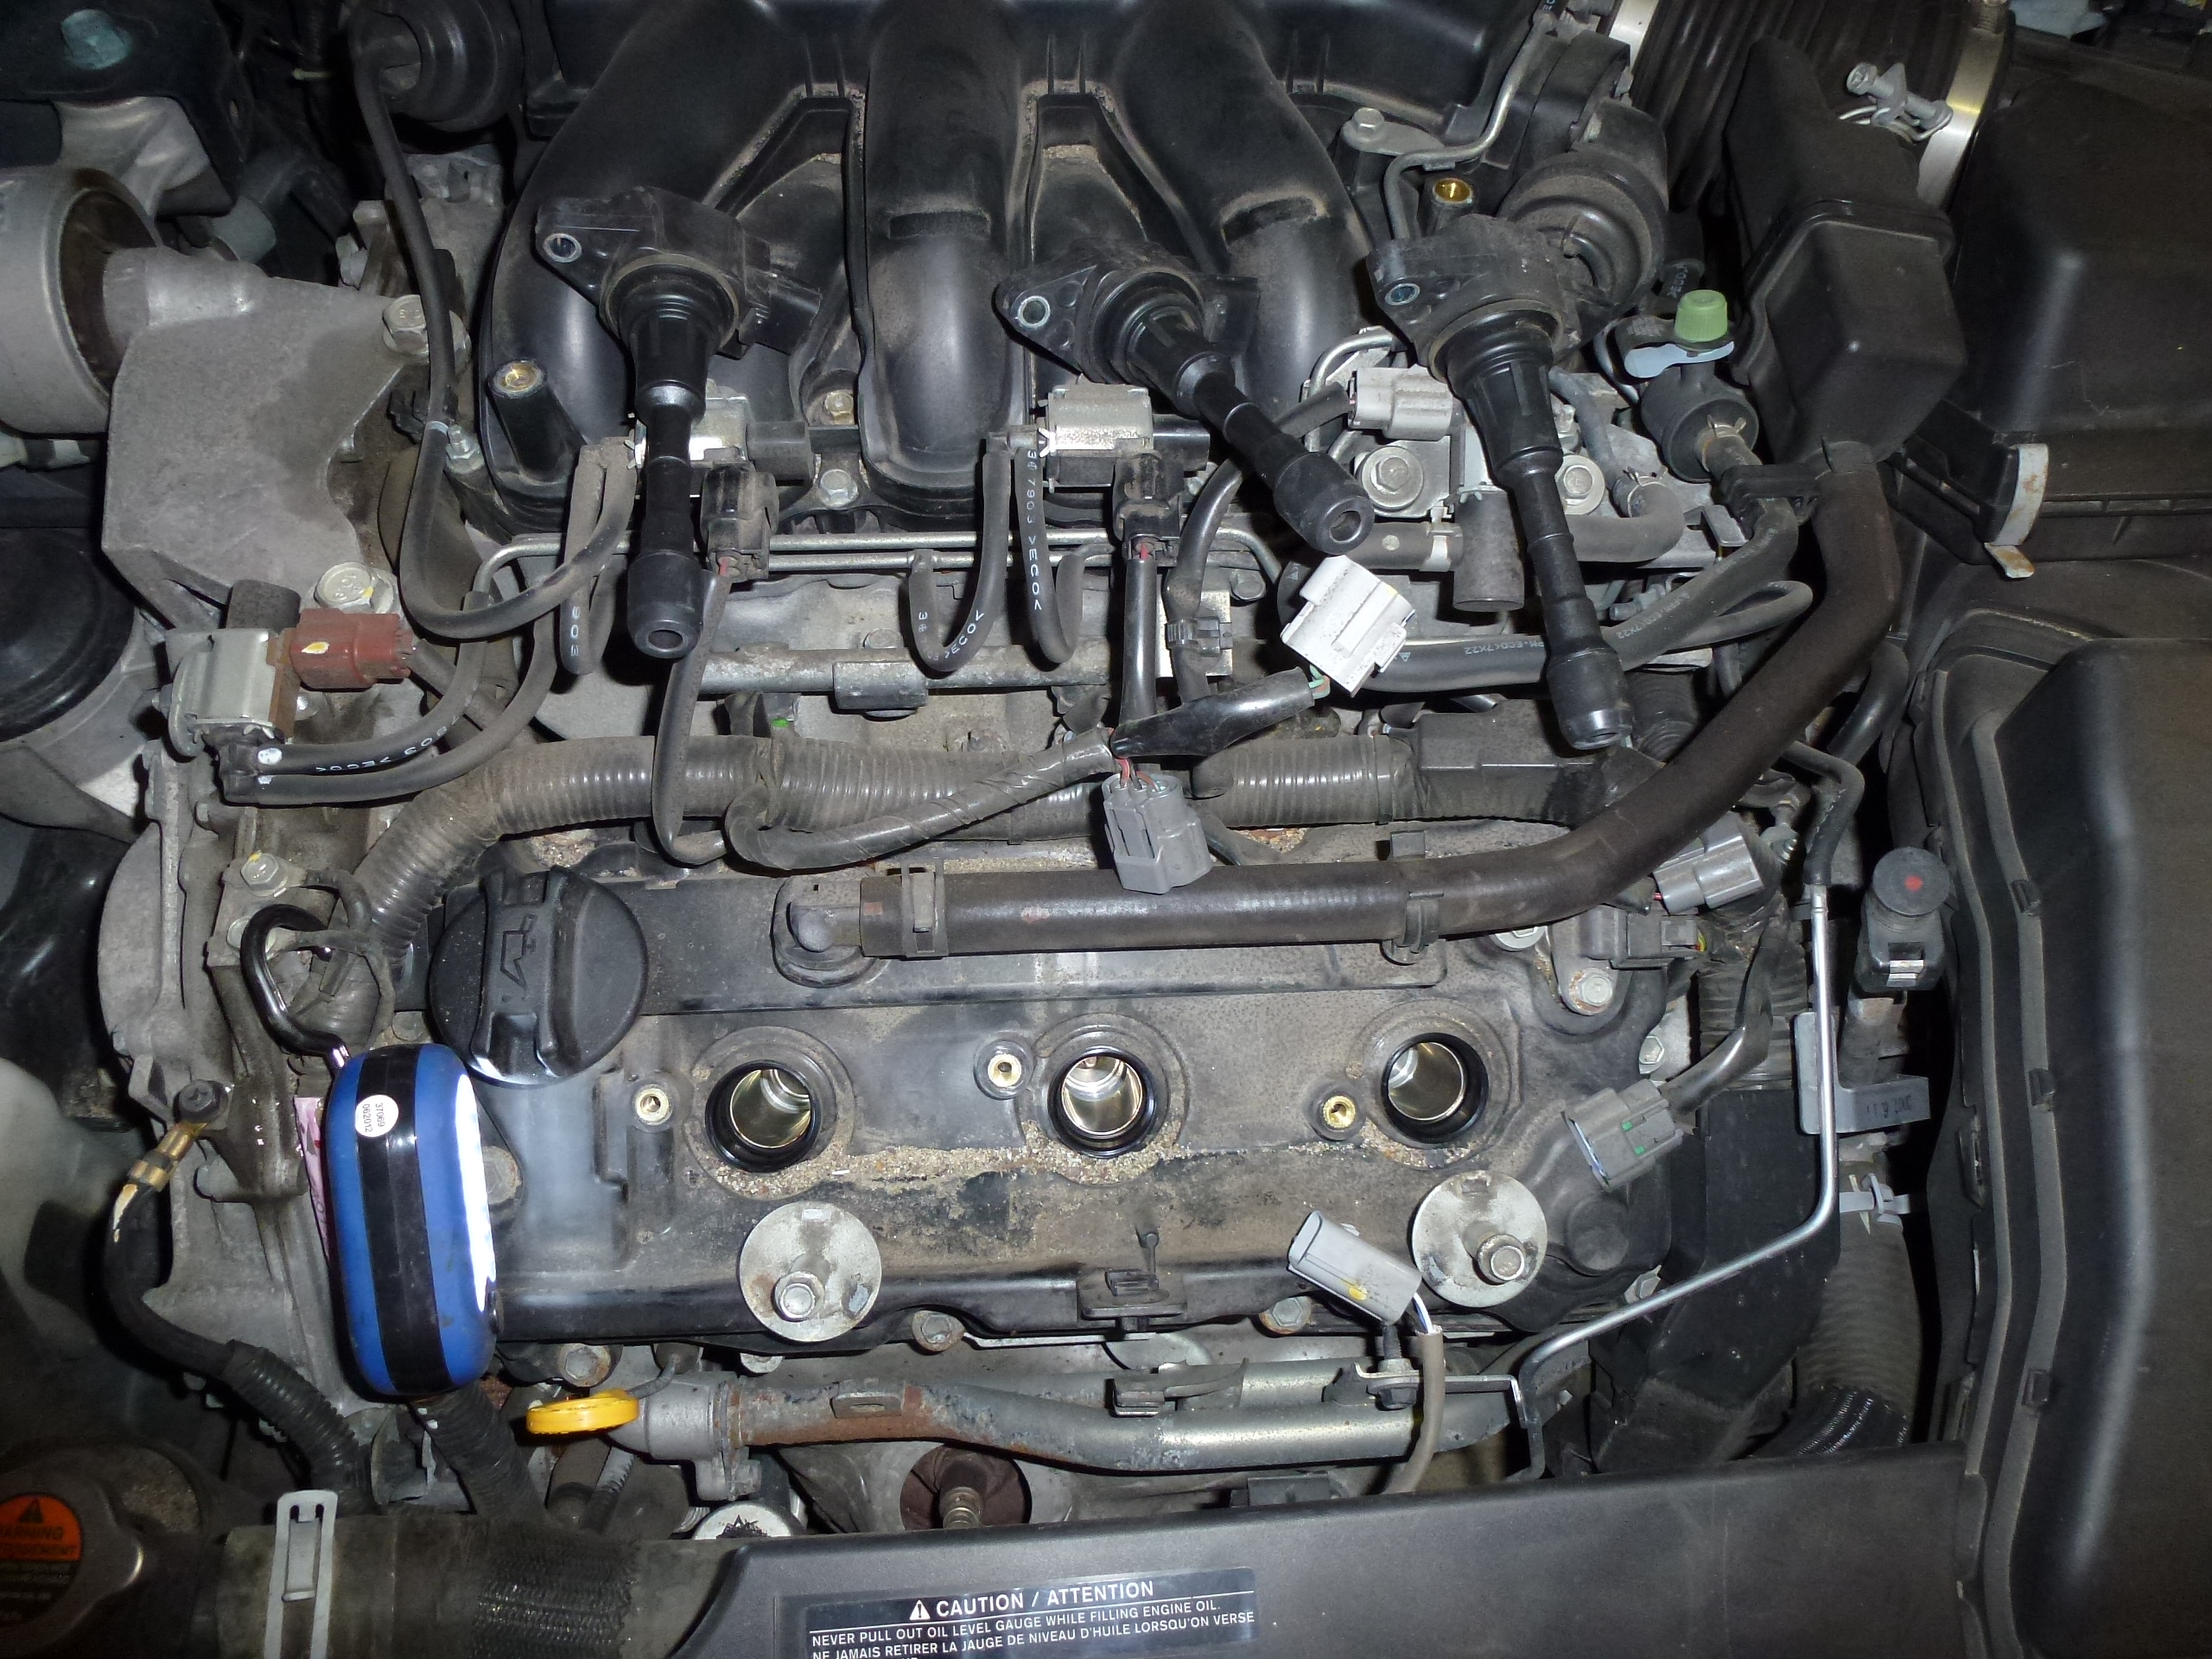
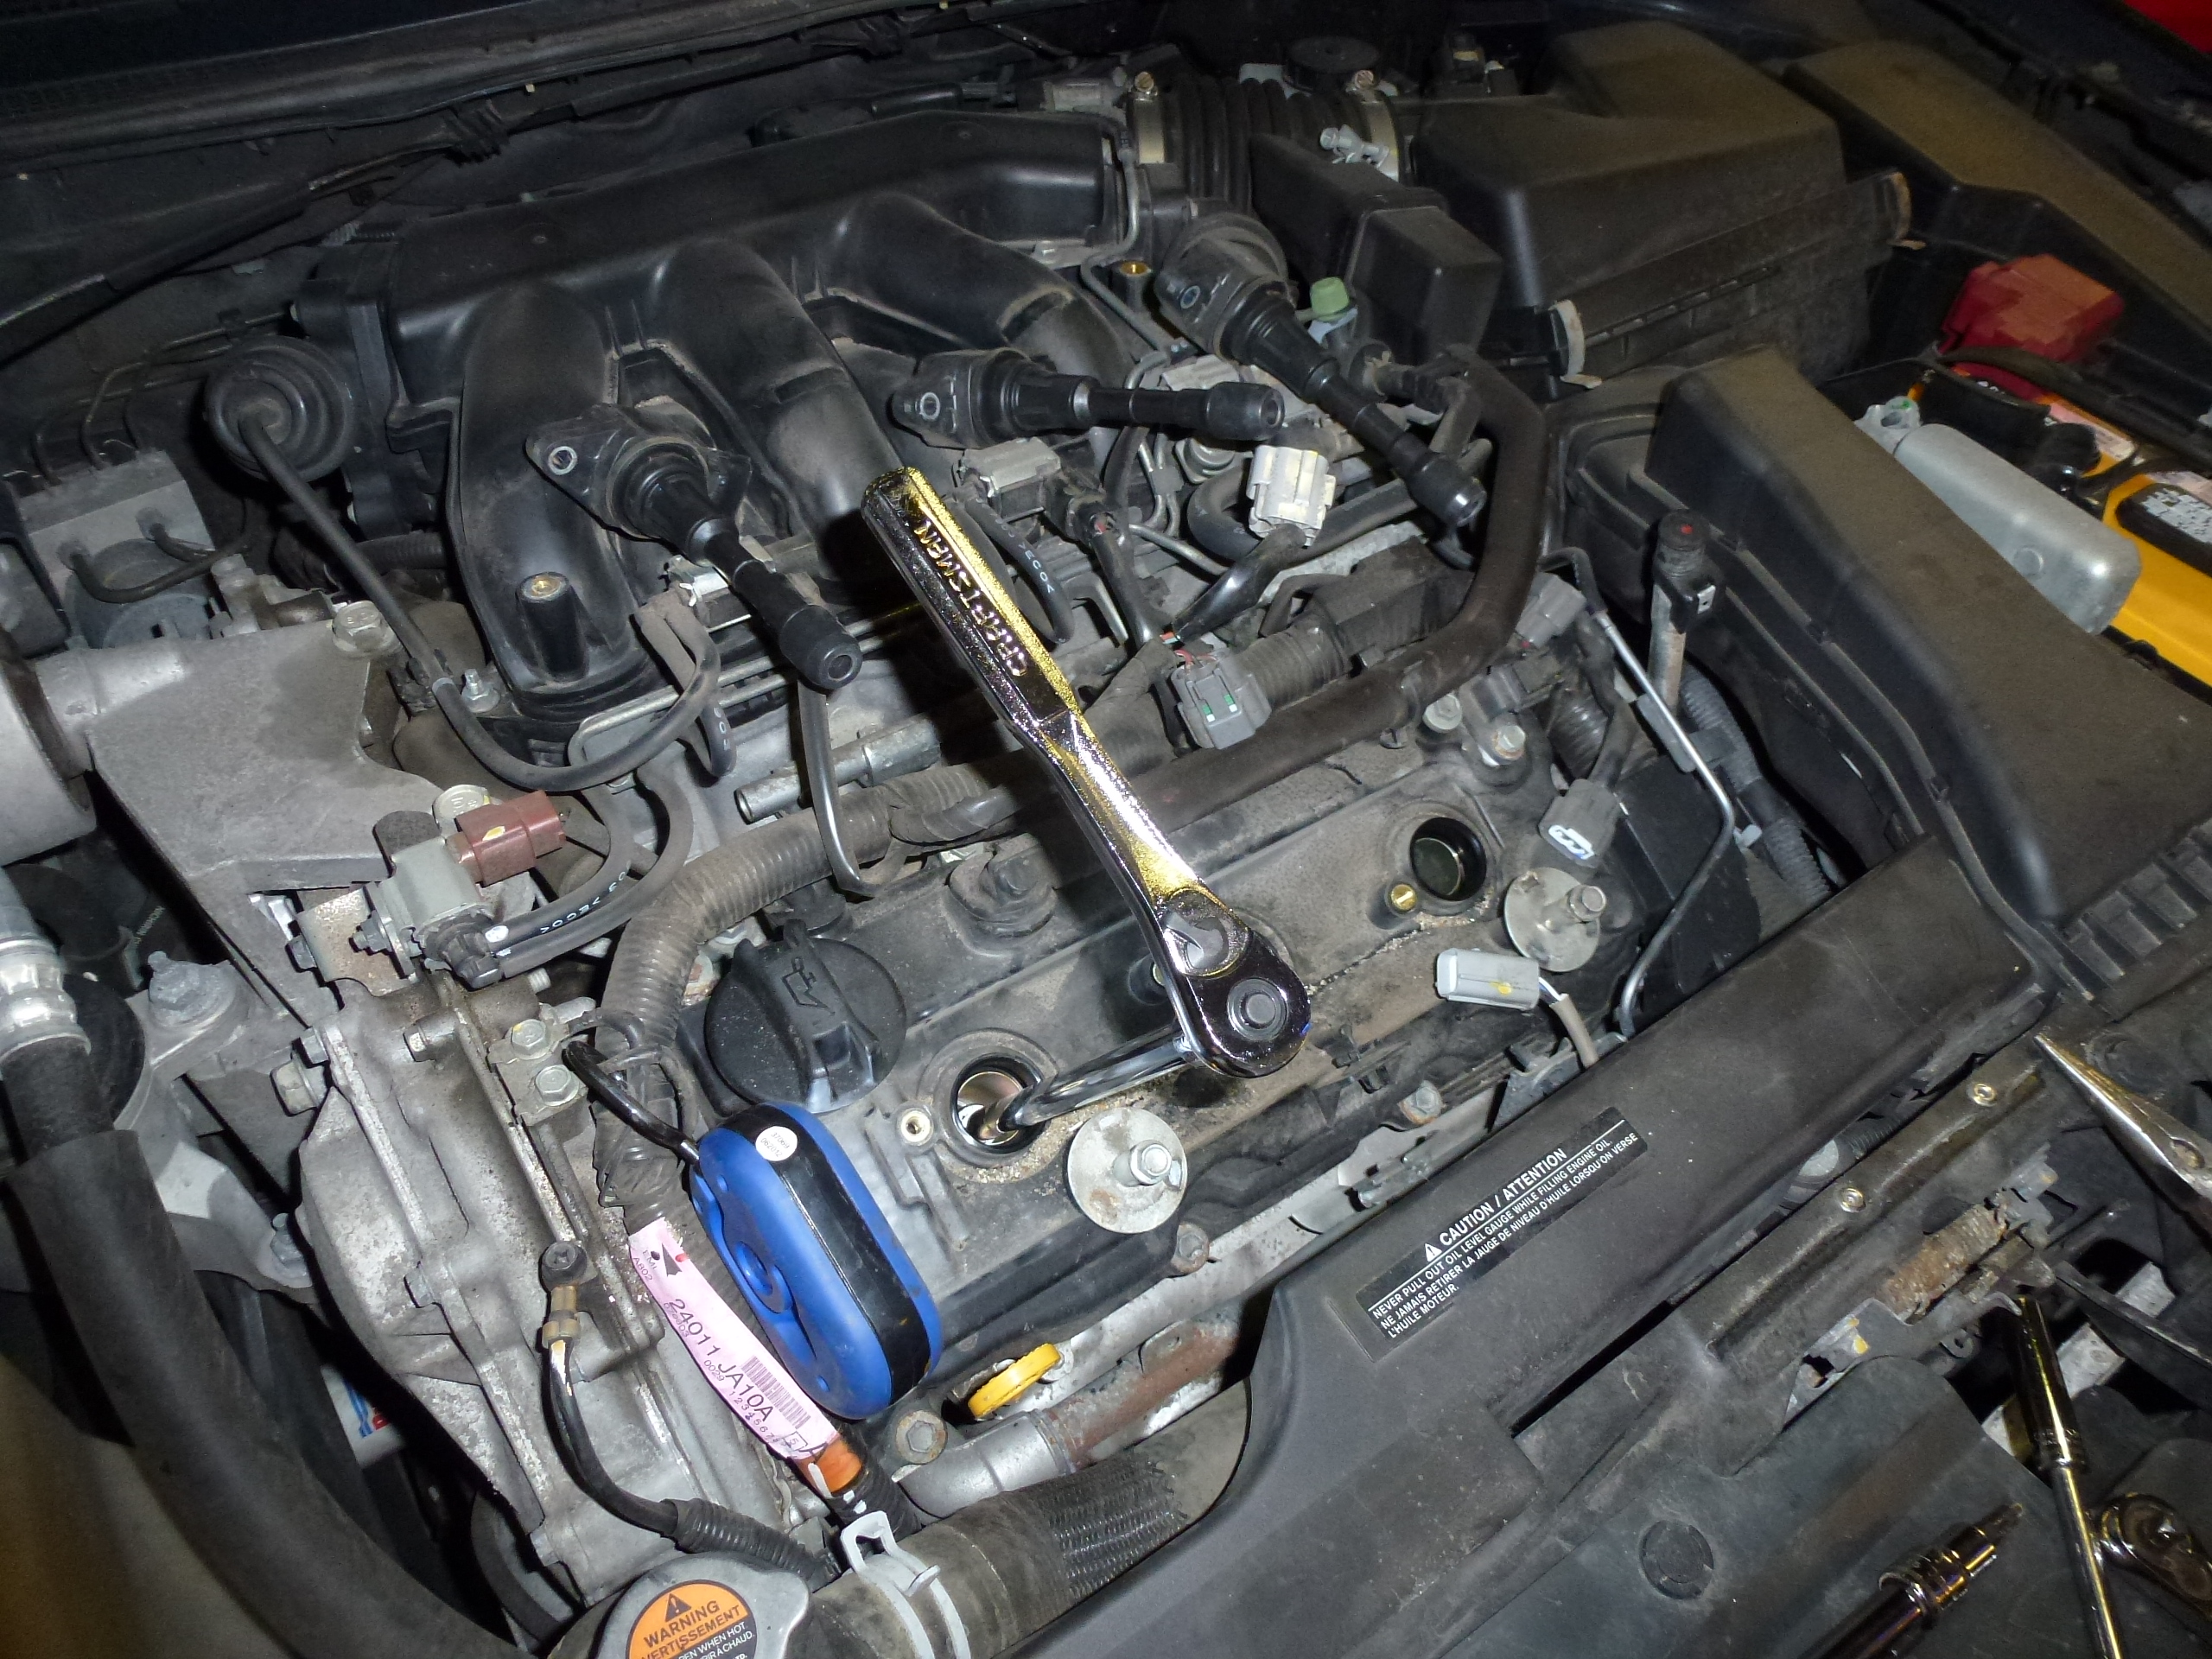
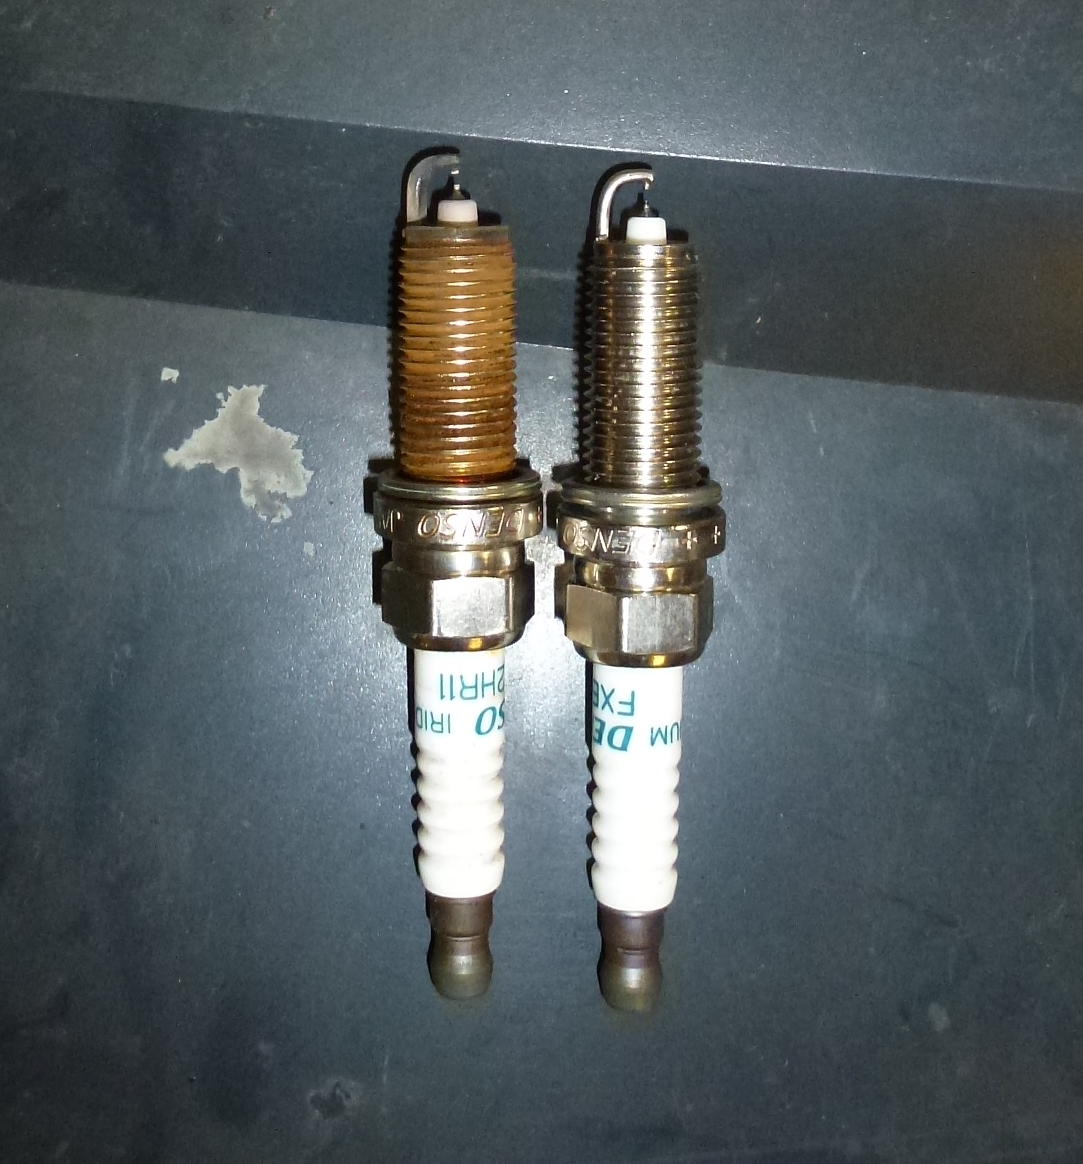
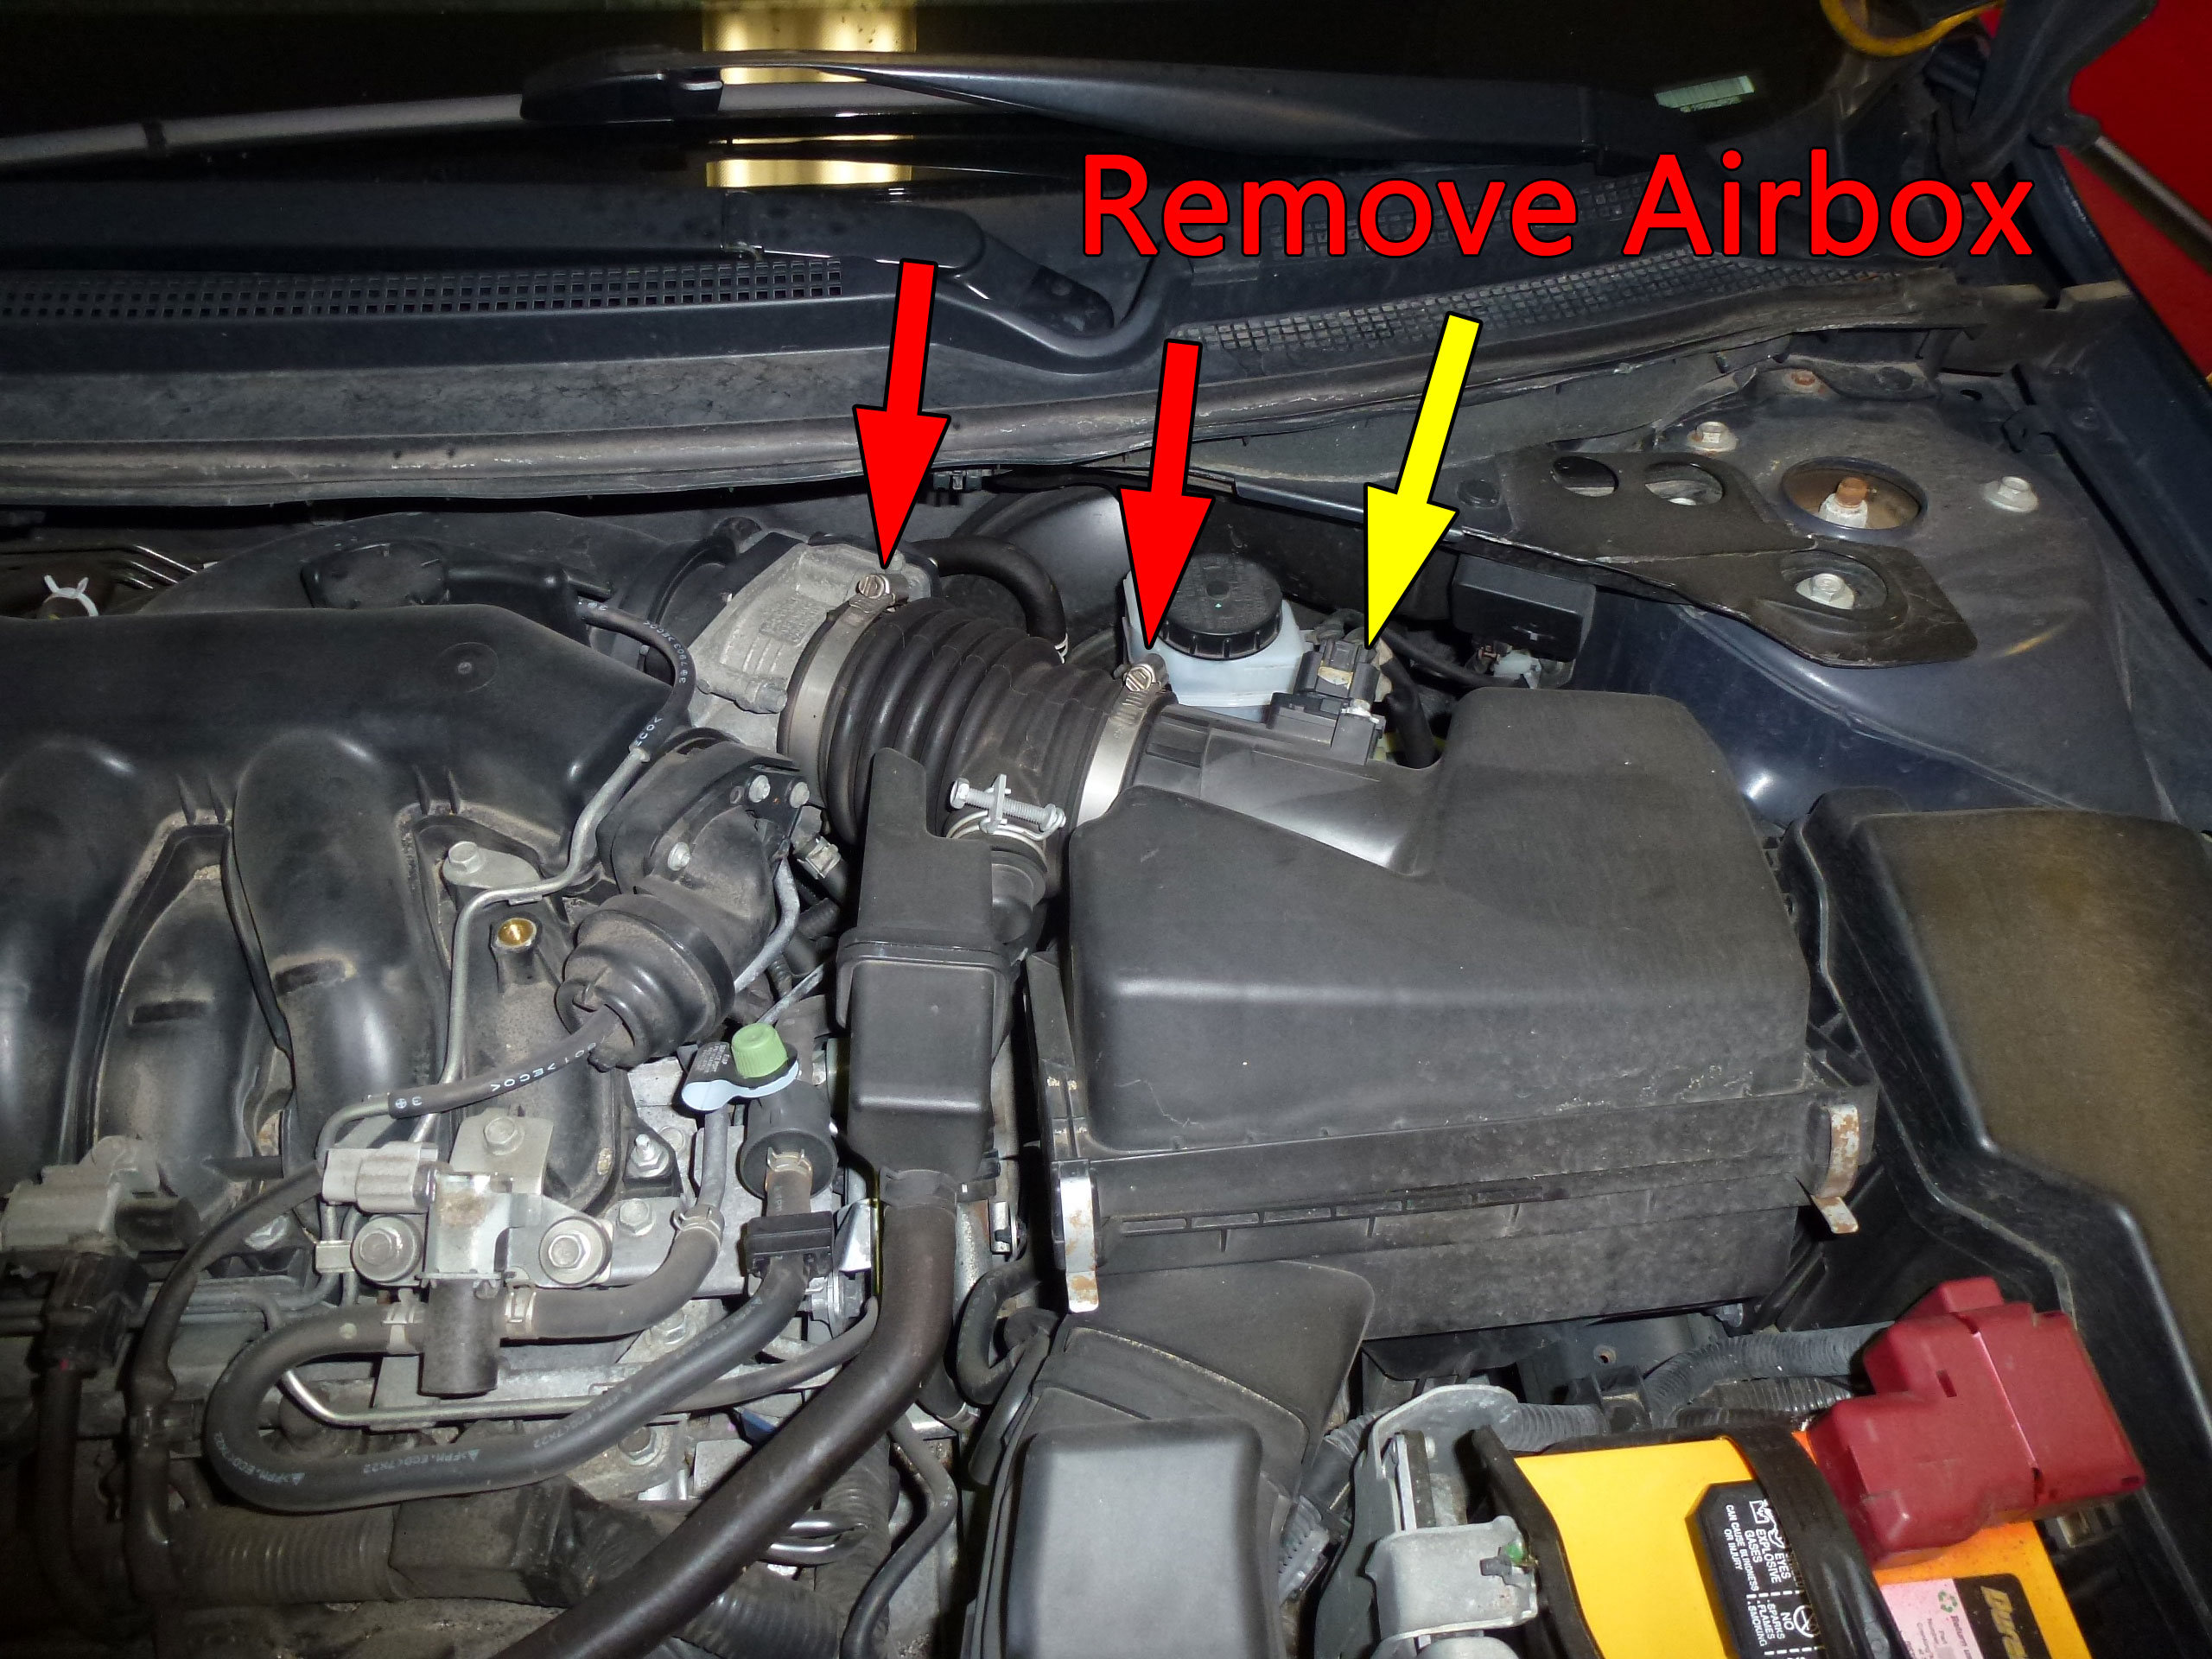
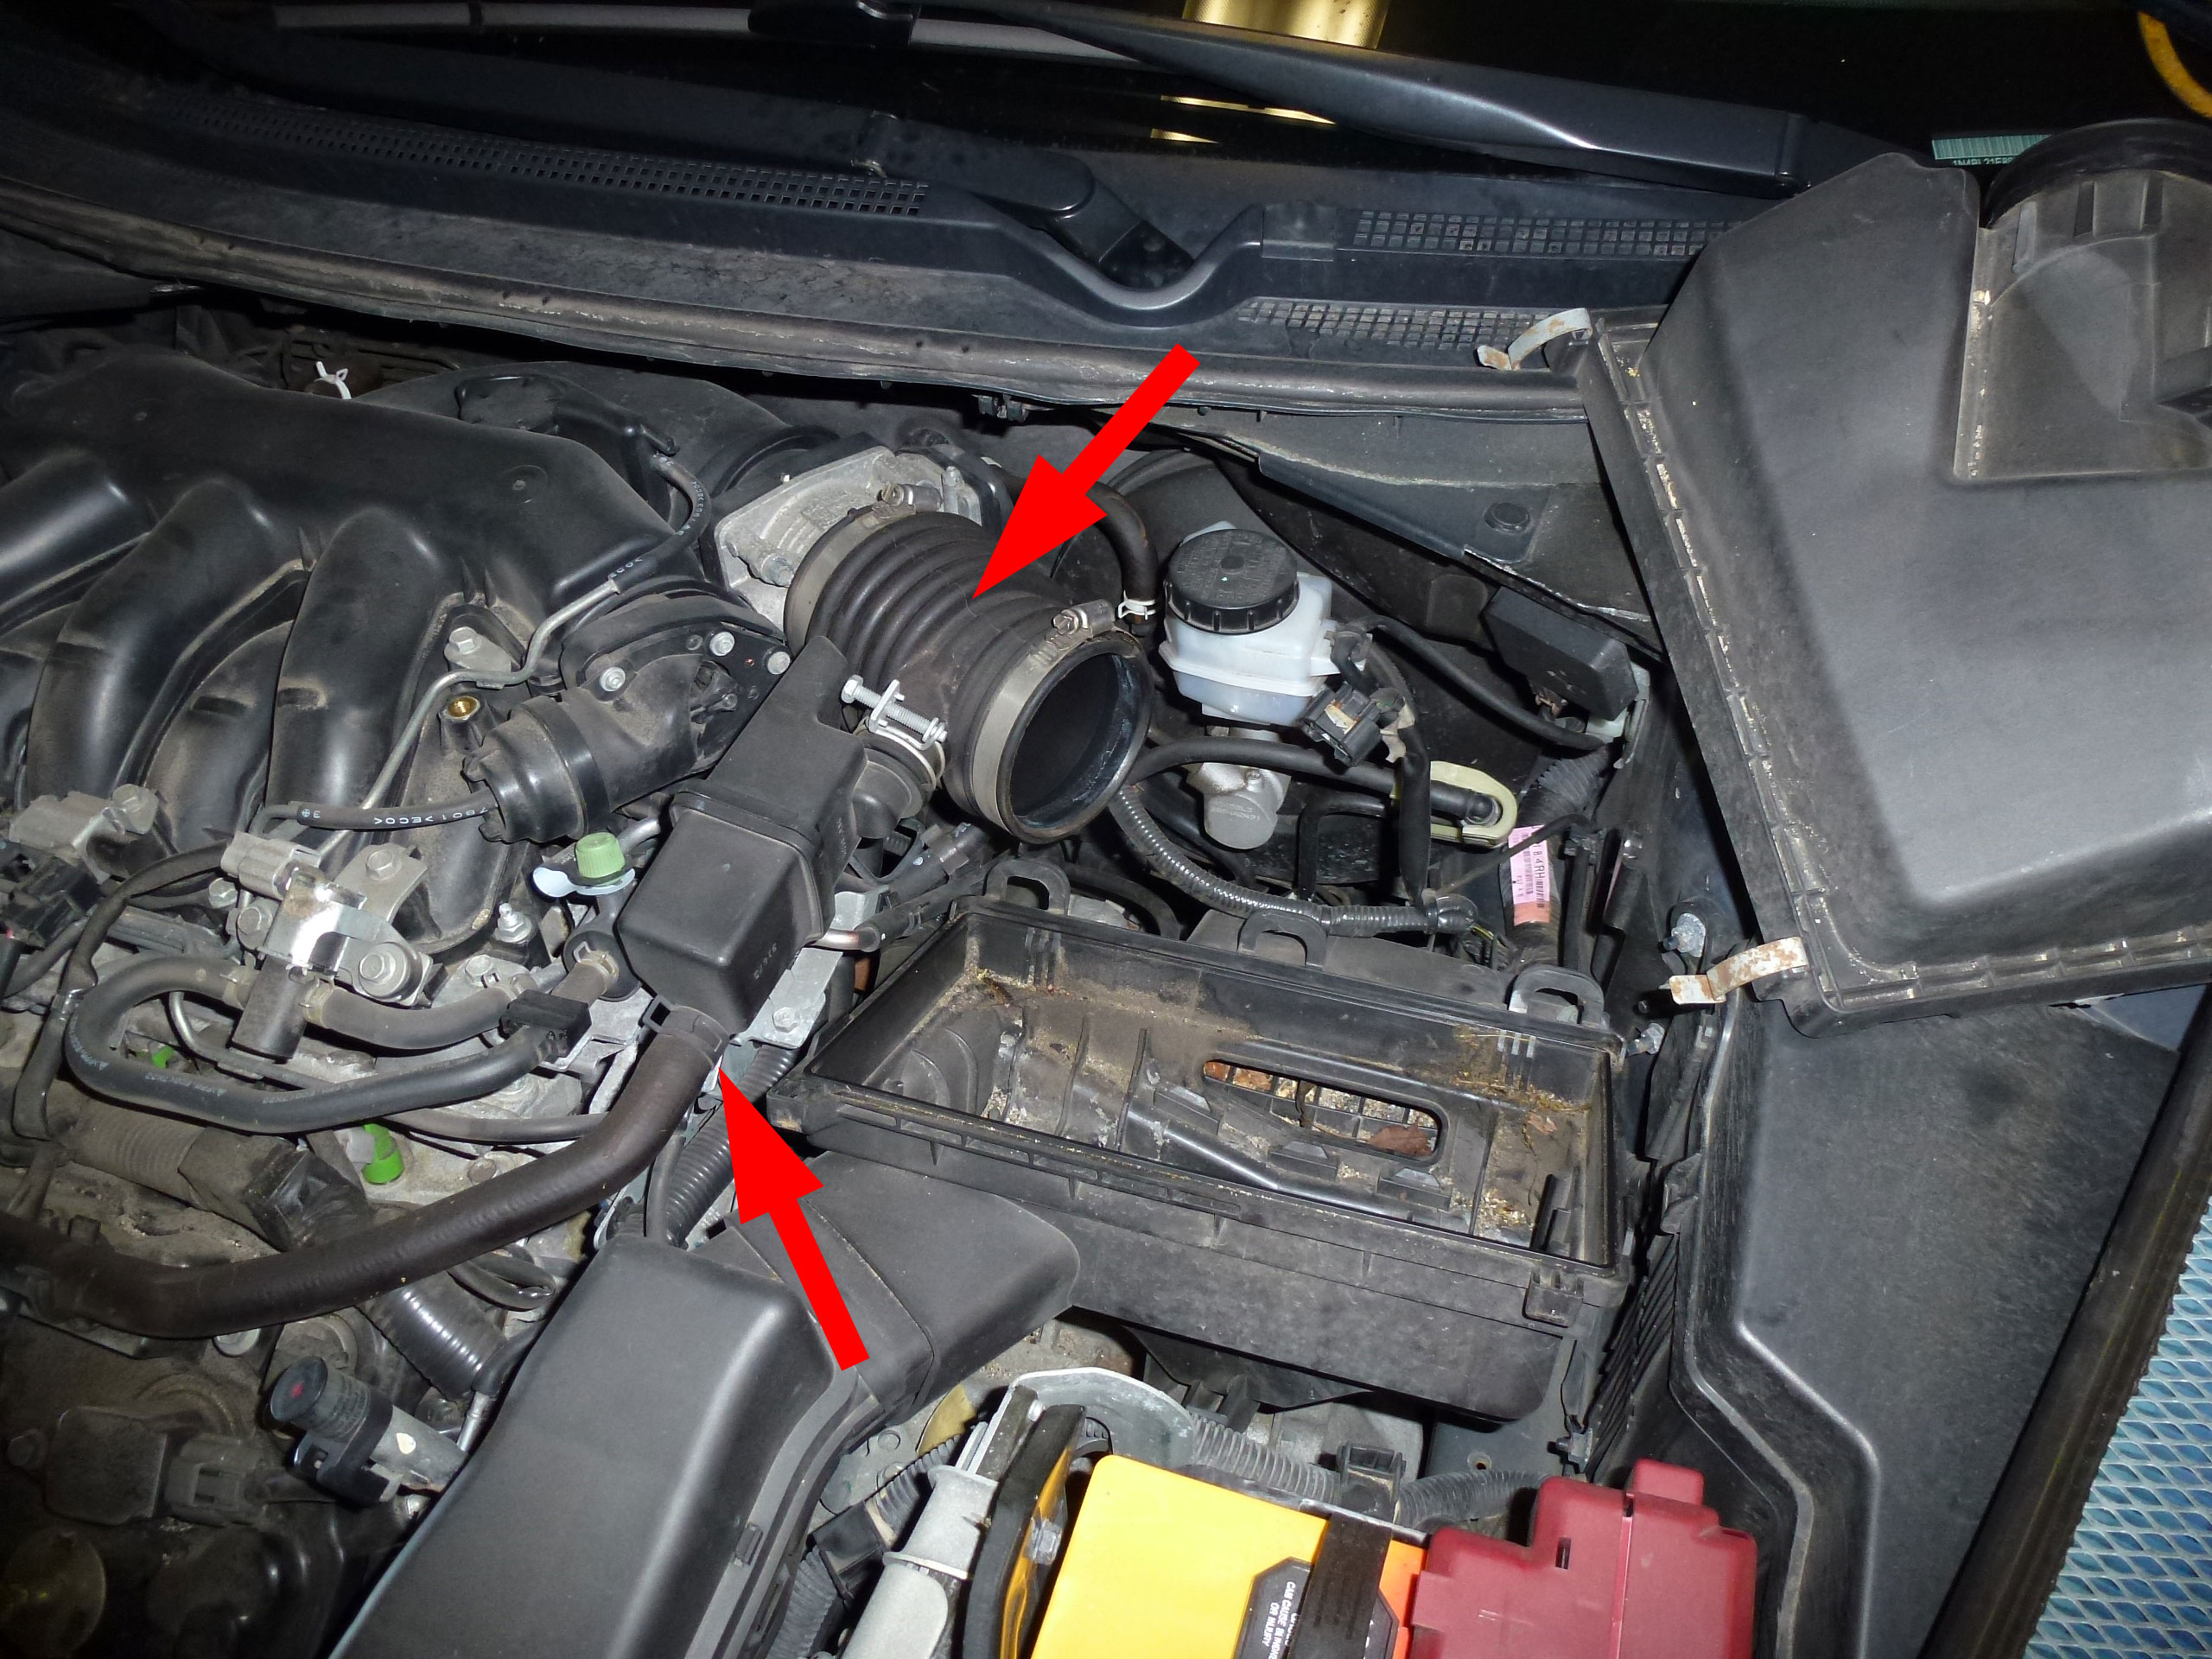
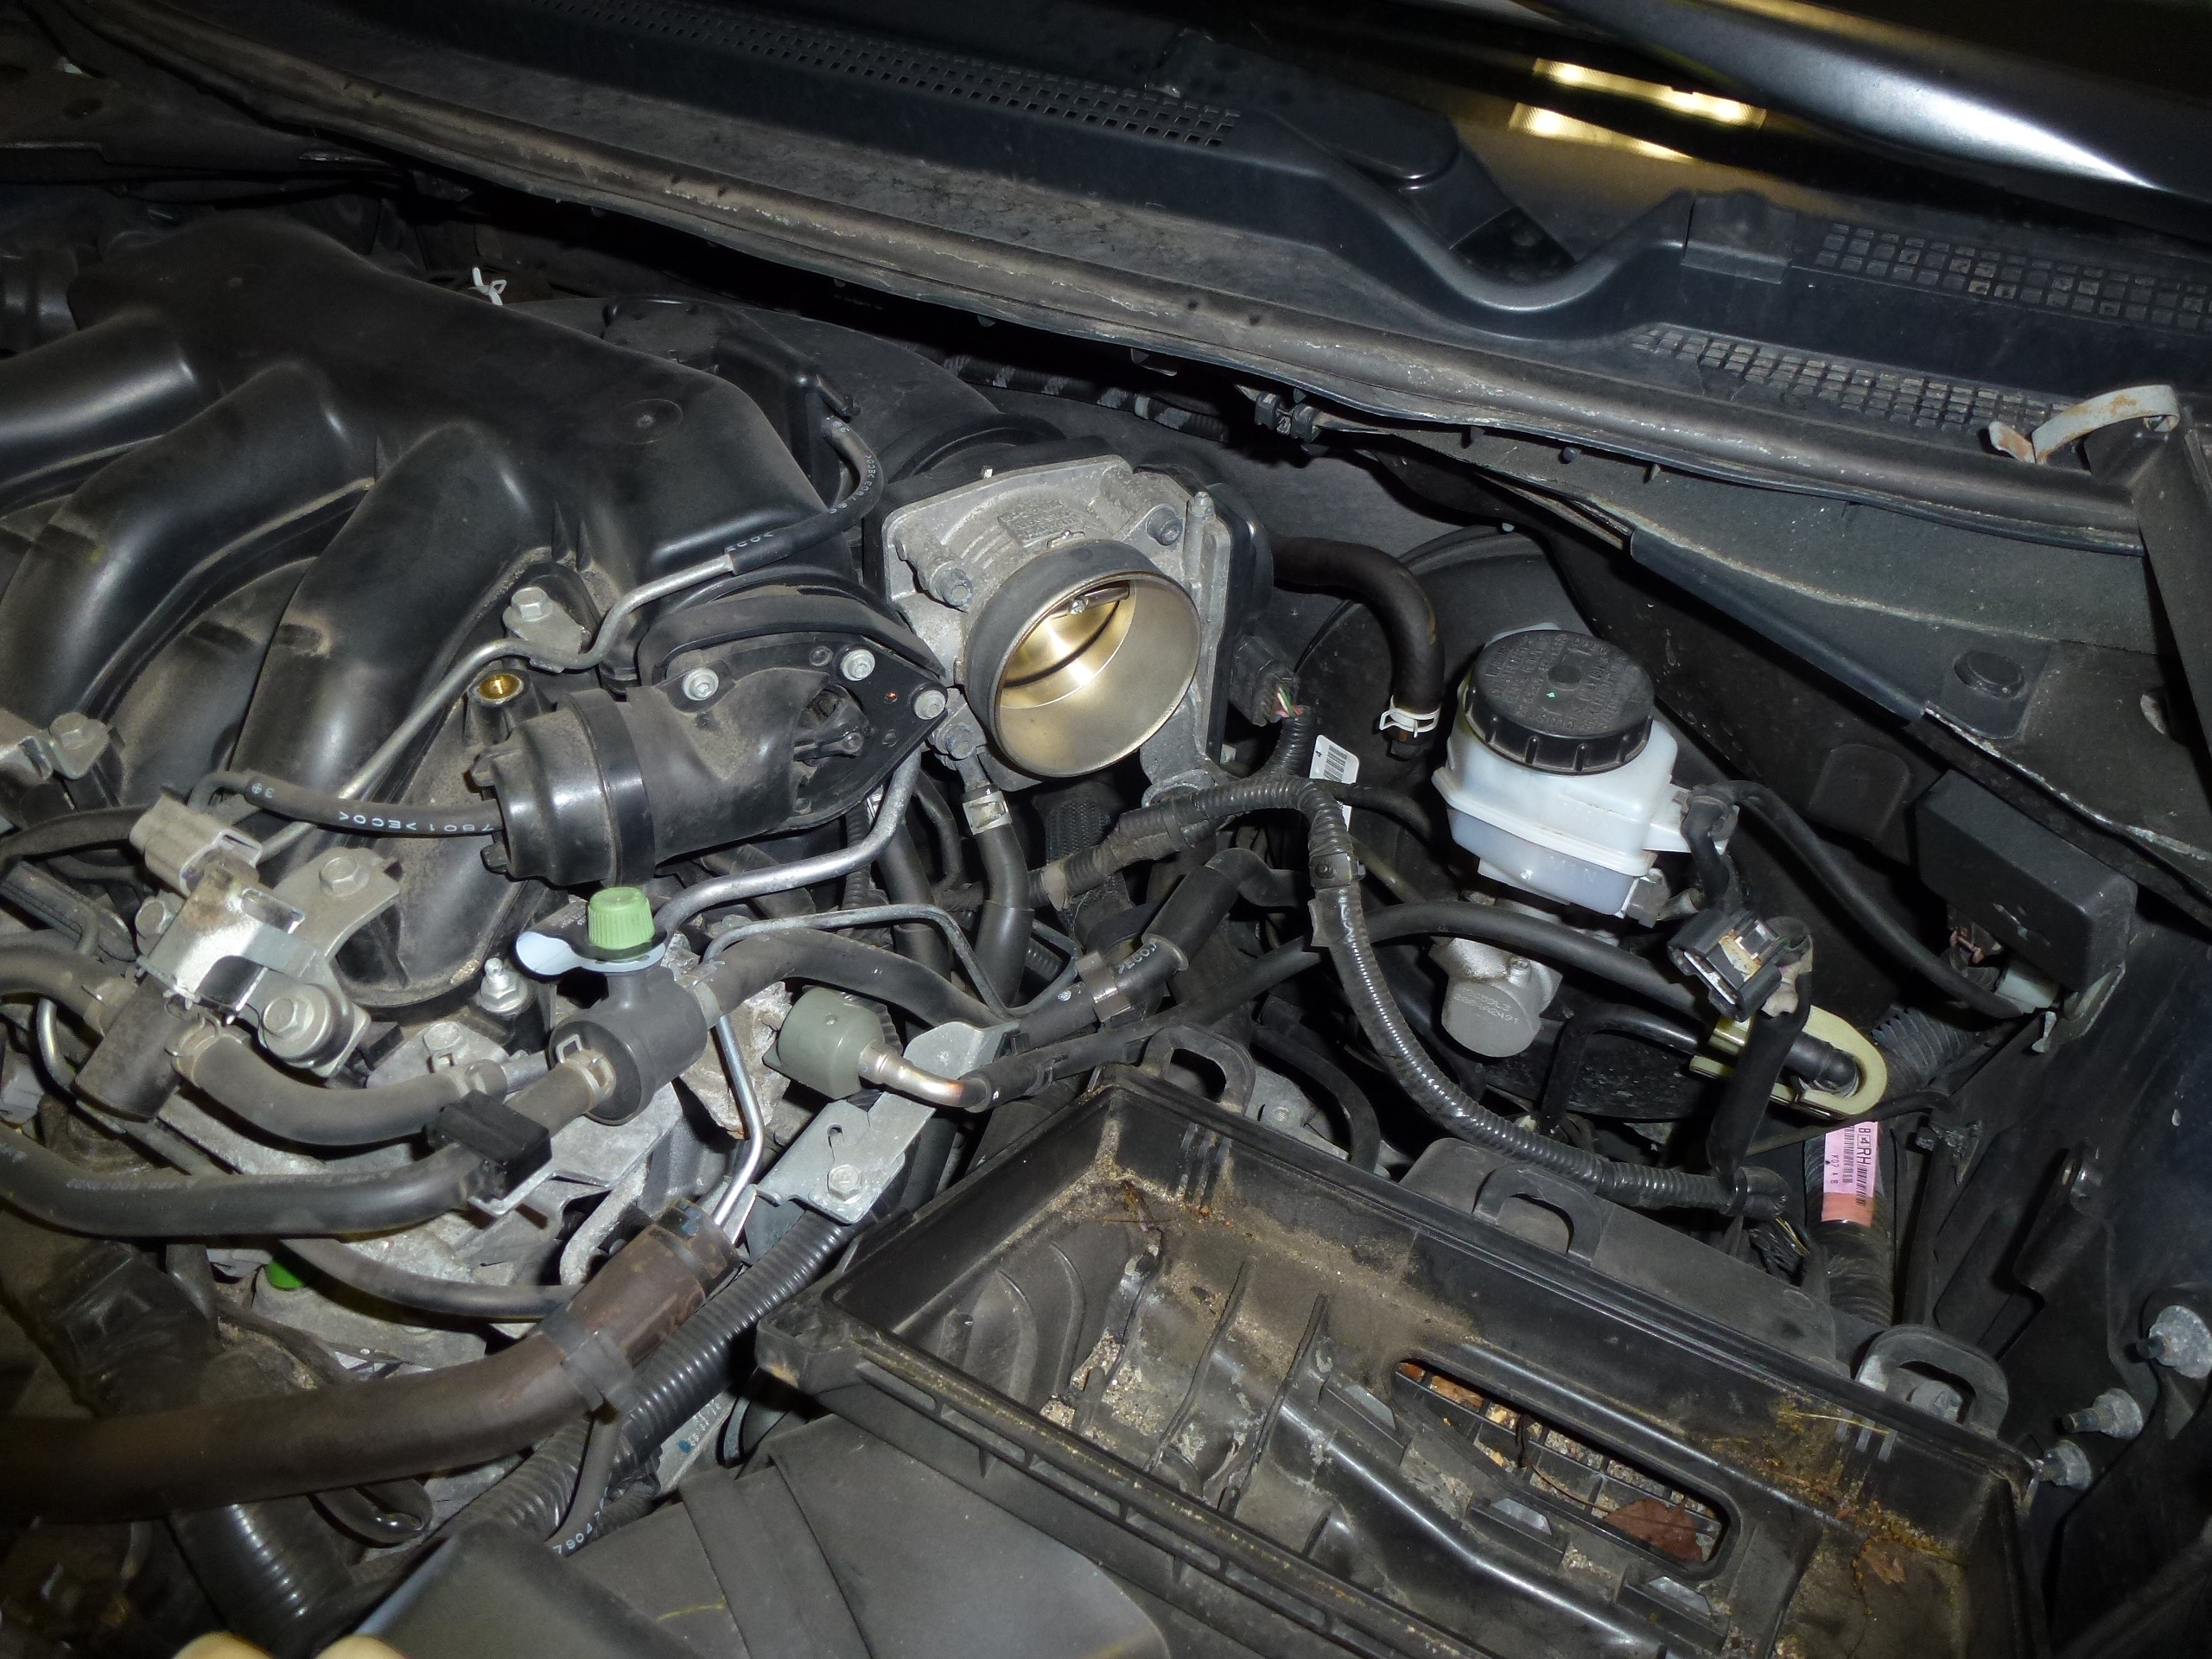
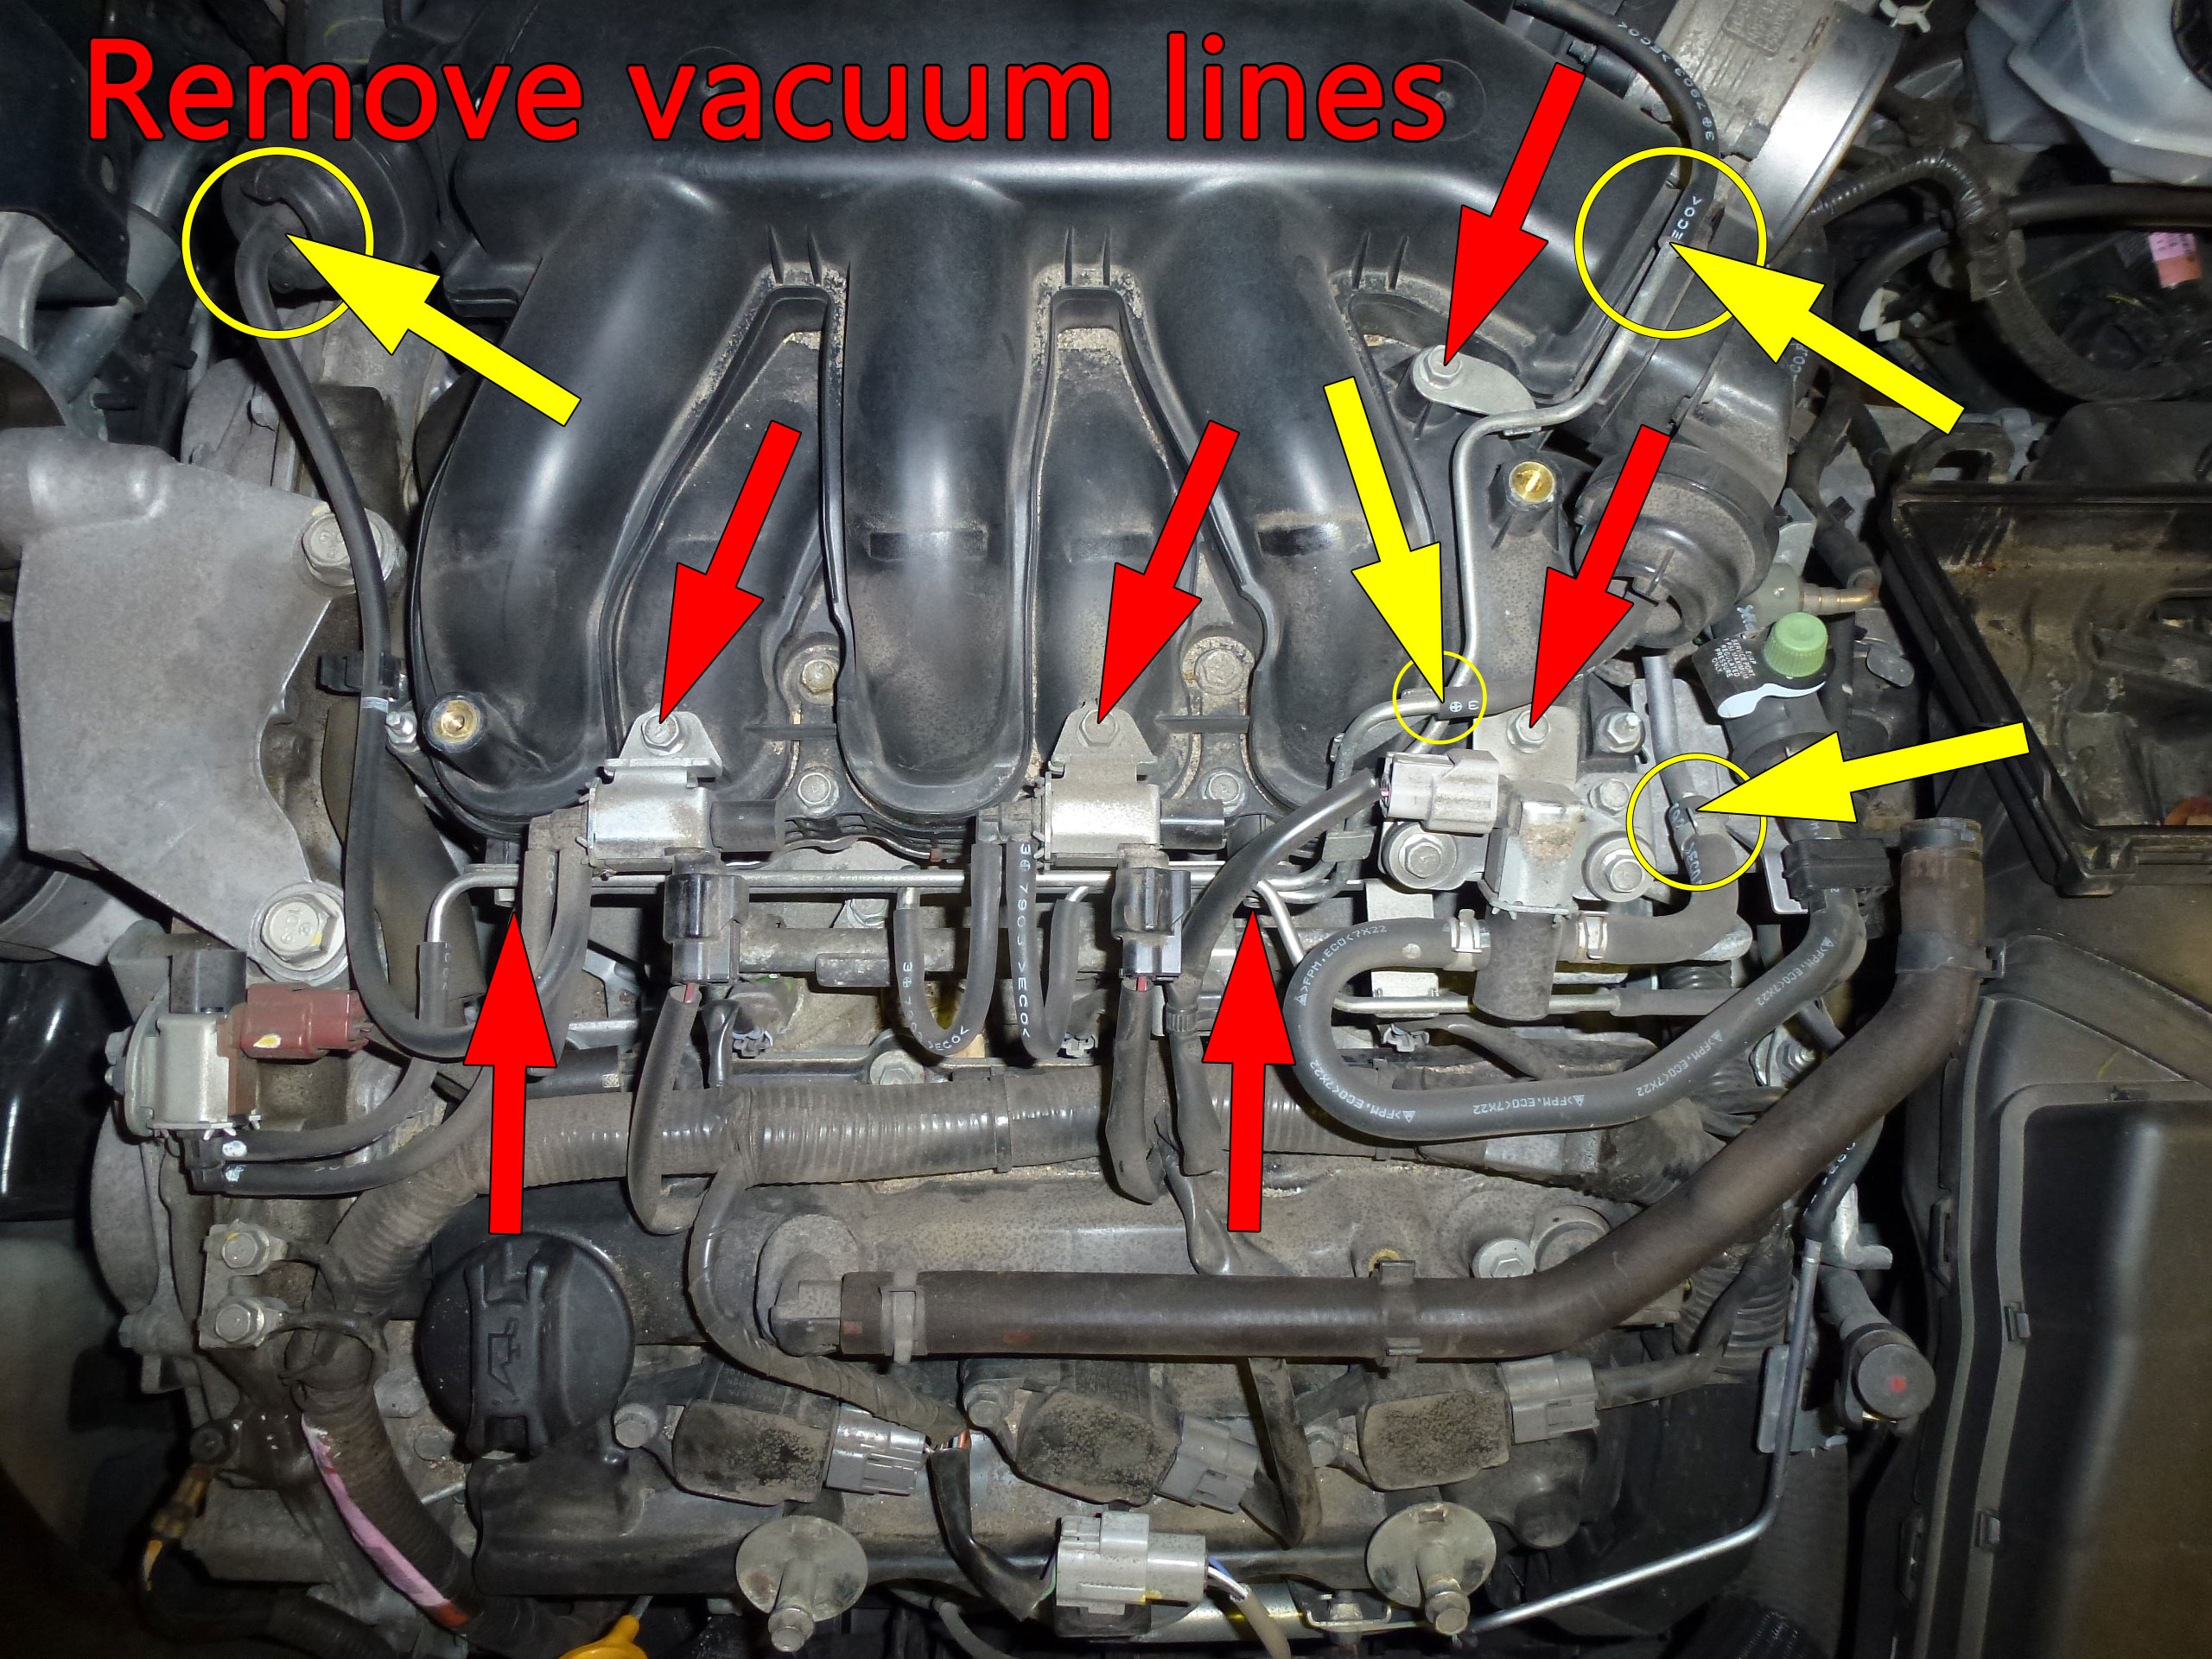
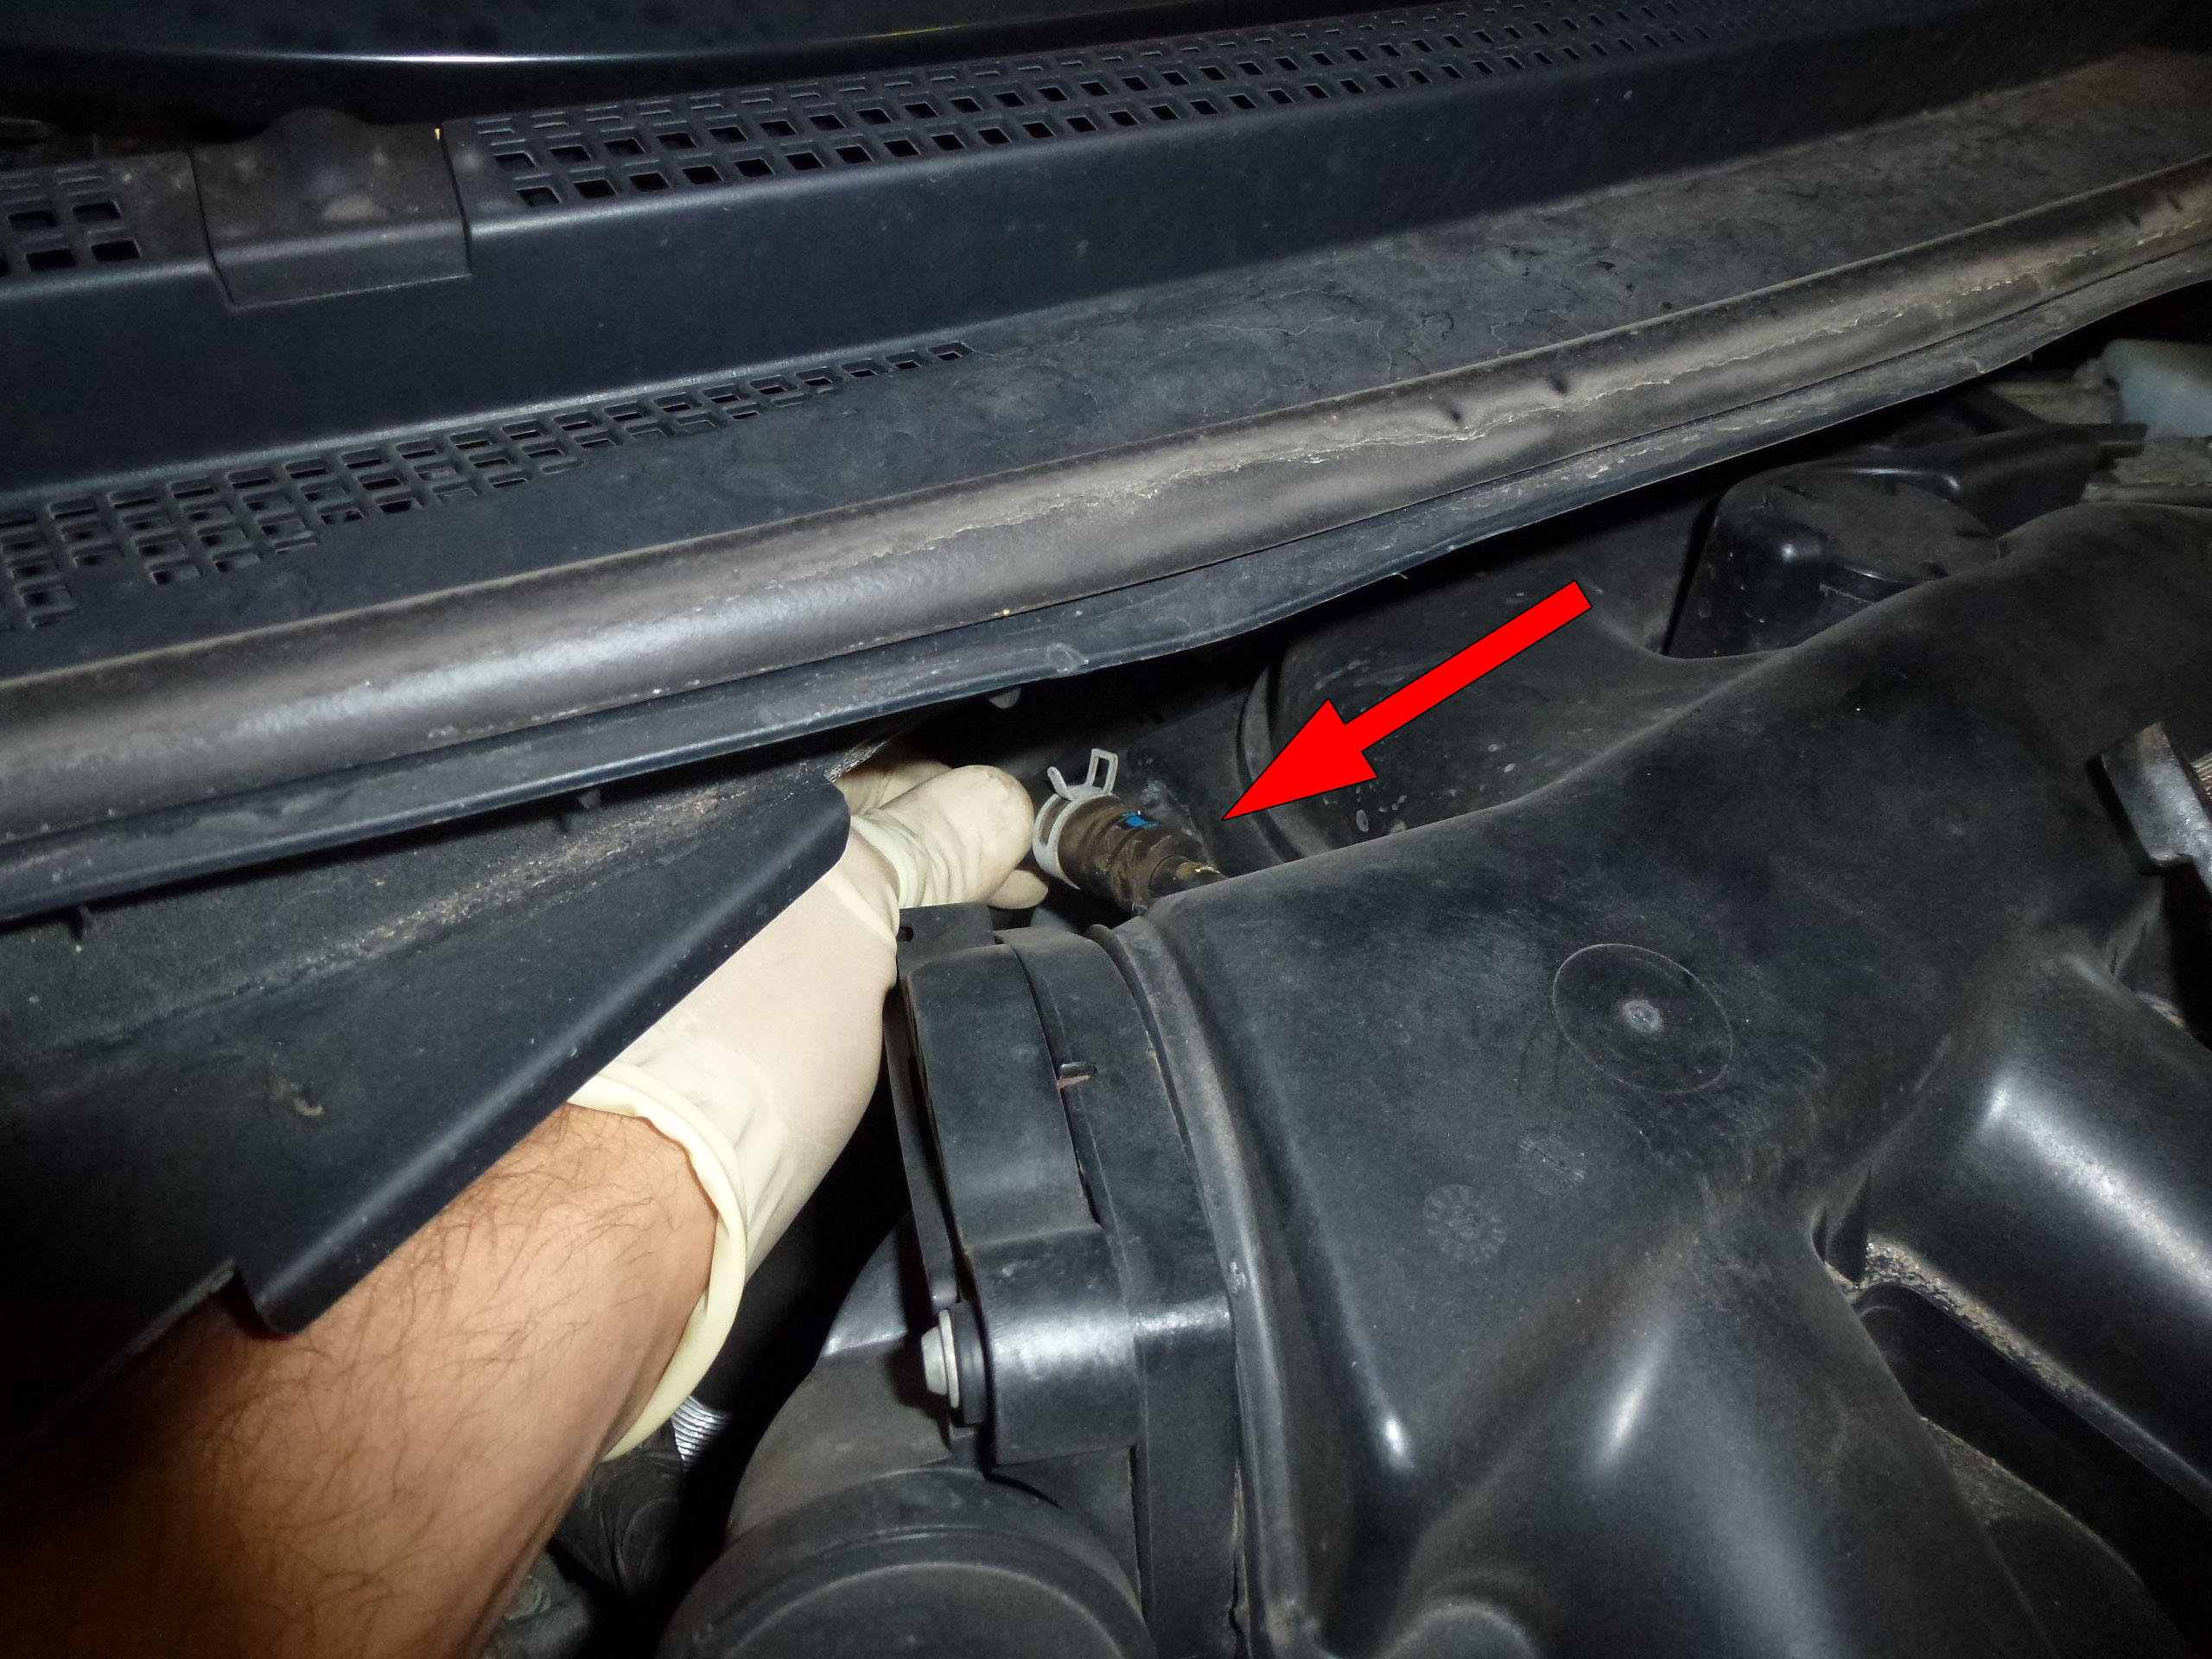
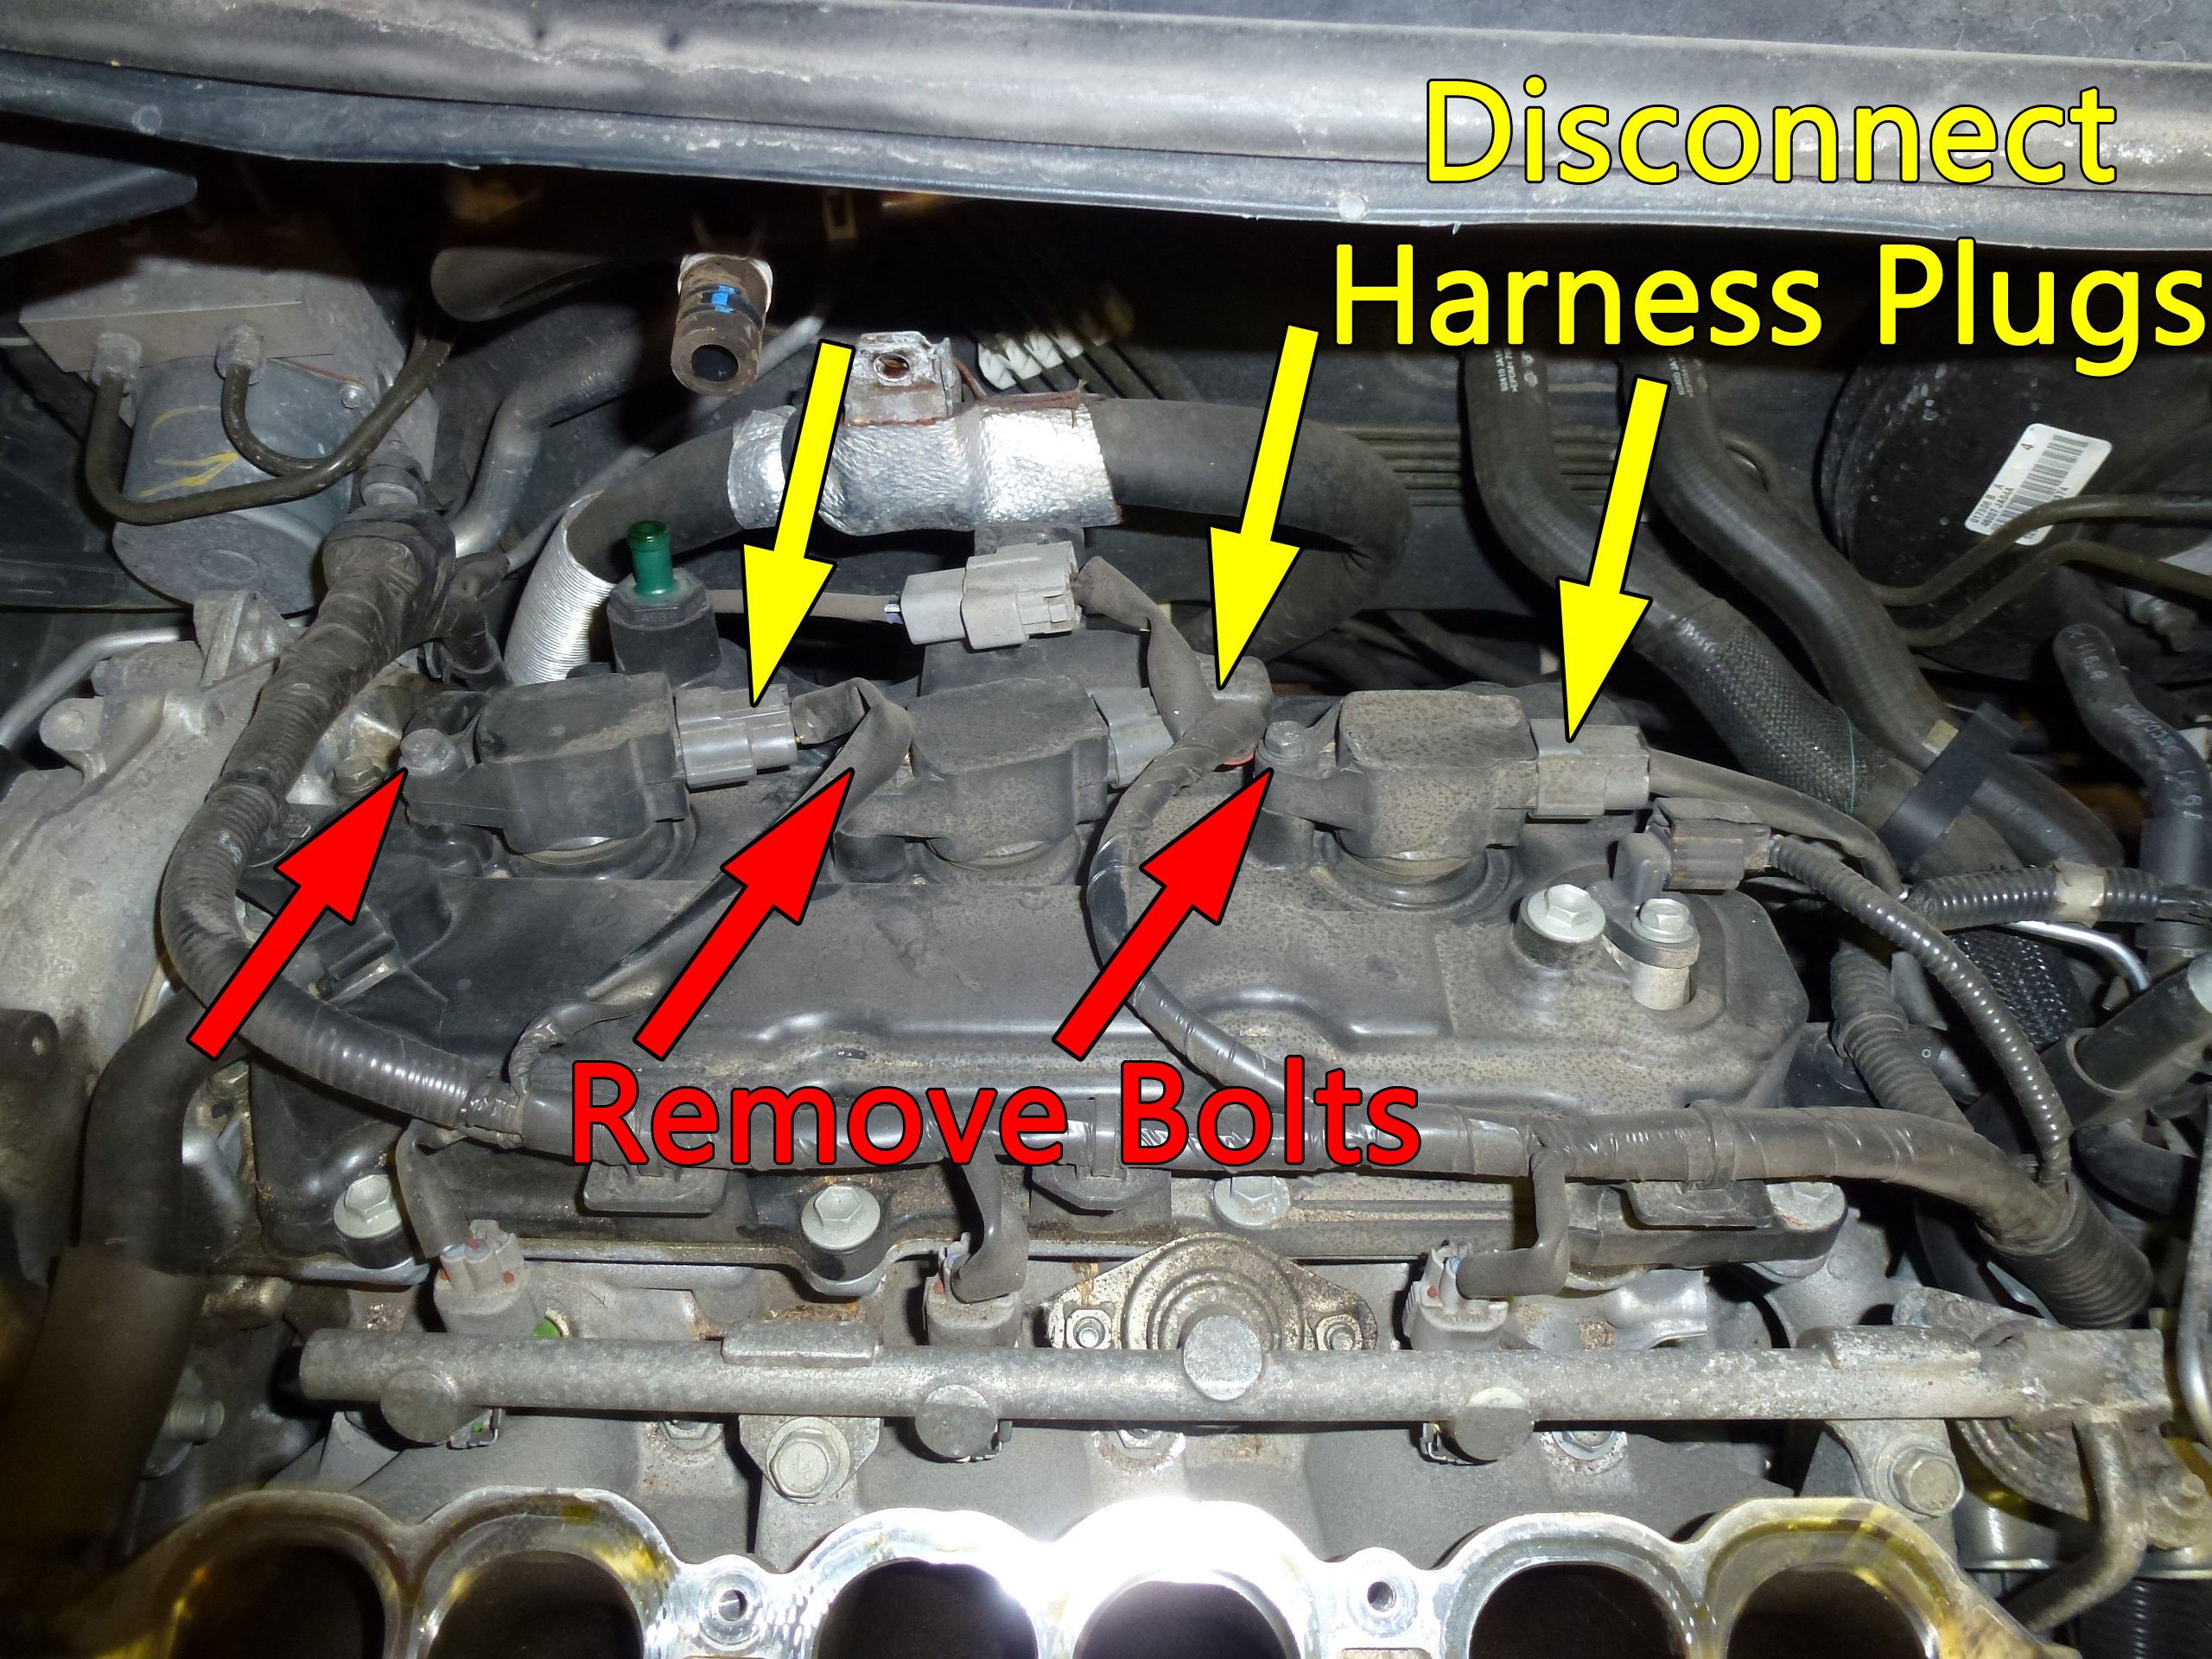
Start by removing the engine cover. Remove two allen bolts.The cover is also held in place by these two rubber grommets. To remove the cover, pull up using your hands.After removing the cover, start by swapping out the front three plugs. Unplug the three harness plugs then remove the bolt that secures the coil to the valve cover.Pull the coil packs out and set them aside.Using the special socket, an extension and a ratchet, remove the plugs. They will be a little stiff and squeak as the work their way out. Put a dab of anti-seize on the new plug and thread into the head. Tighten the plugs to 14.5 ft-lbs of torque for the VQ35 and 14 ft-lbs for the QR25. Pop the coil packs back into place, install the bolts and reattach the harness plugs.110,000 mile plug on the left, new on the right. the gap was still perfect on the old plug.With the easy part out of the way, it’s time to make room to reach the rear plugs. Sorry, the is no other way. Remove the air box cover. Loosen the two hose clamps and disconnect the air temperature sensor.Lift the cover out of the way. Disconnect the vacuum line on the bottom of the air intake assembly and remove the intake hose.This is what you should see once you have the air intake and air box out of the way.Now it’s time to get serious. This area looks rather busy with all of the vacuum lines, wiring, etc. It’s not as bad as it looks. Start by removing the 4 vacuum lines indicated in yellow. I like to take pliers and rotate the vacuum line on the fitting to break it free first. After the vacuum lines, remove the 6 bolts marked by red arrows. With the bolts and vacuum lines removed, move the vacuum line “manifold” away from the intake manifold.
With the bolts and vacuum lines removed, move the vacuum line “manifold” away from the intake manifold.
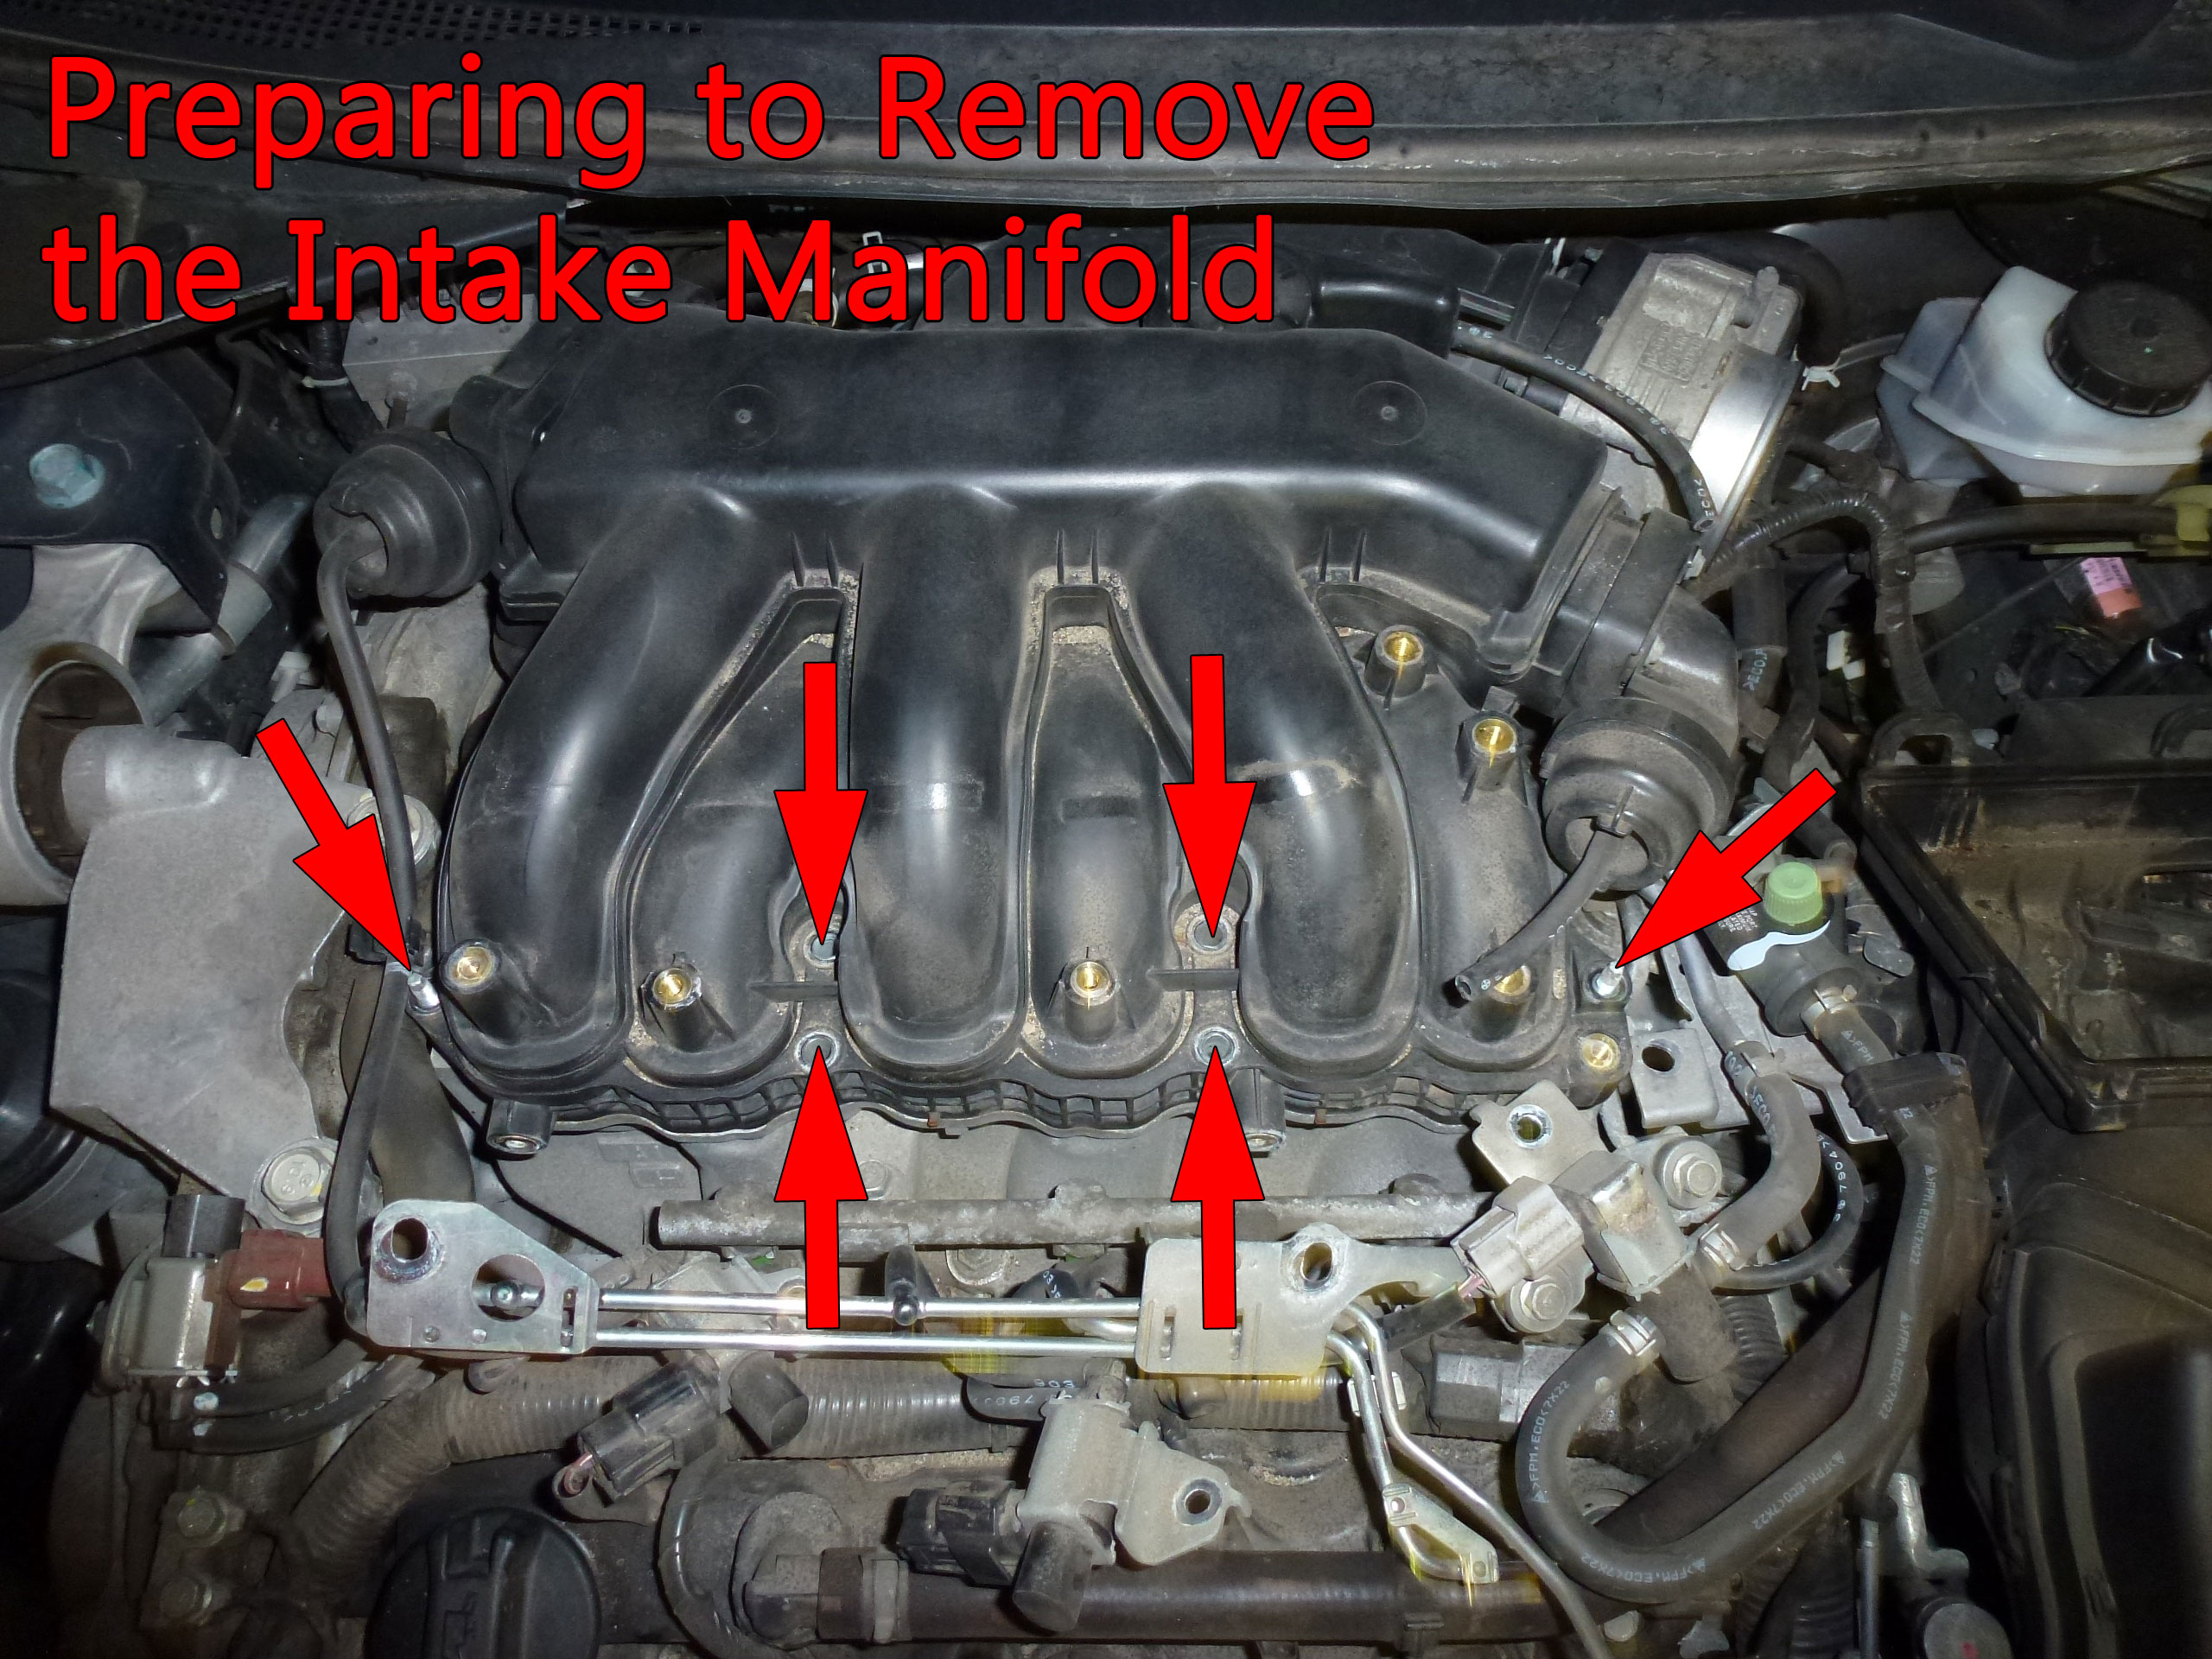
Remove the bolts and nuts that attach the upper manifold to the lower manifold. The outer two fasteners are nuts and the other four are bolts.
At this point, there are a few more steps to work through before the manifold can be removed.
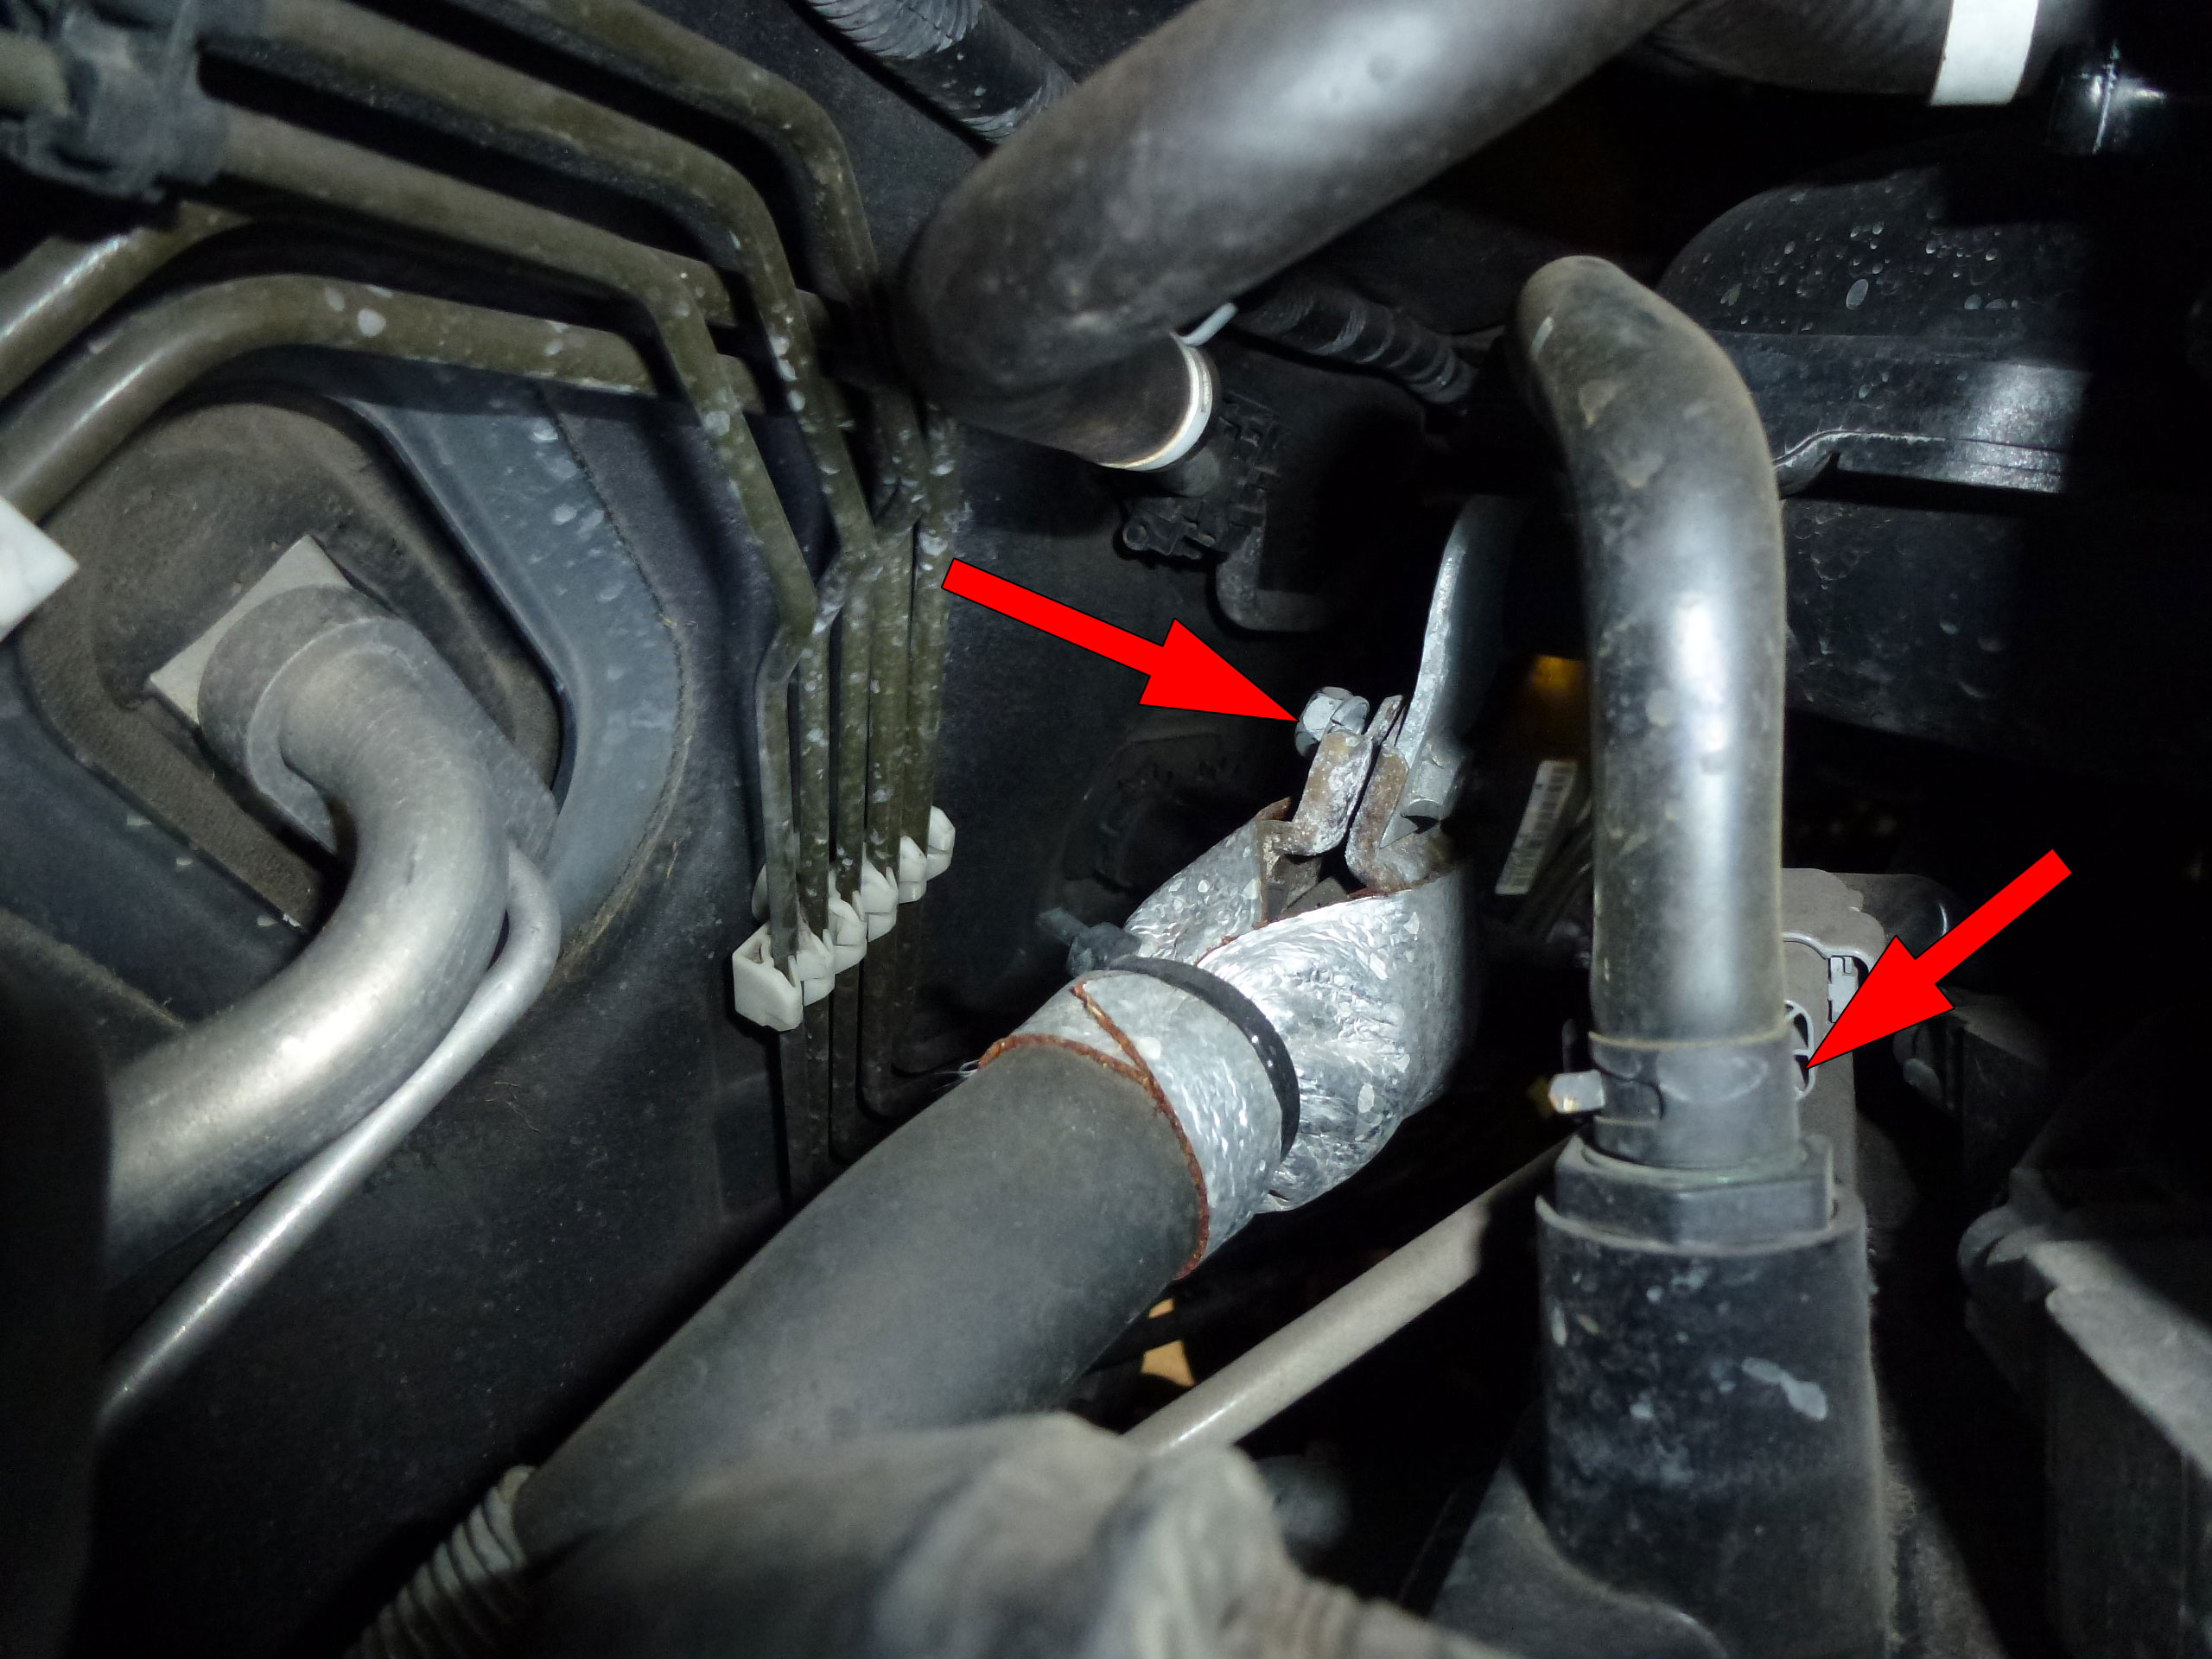
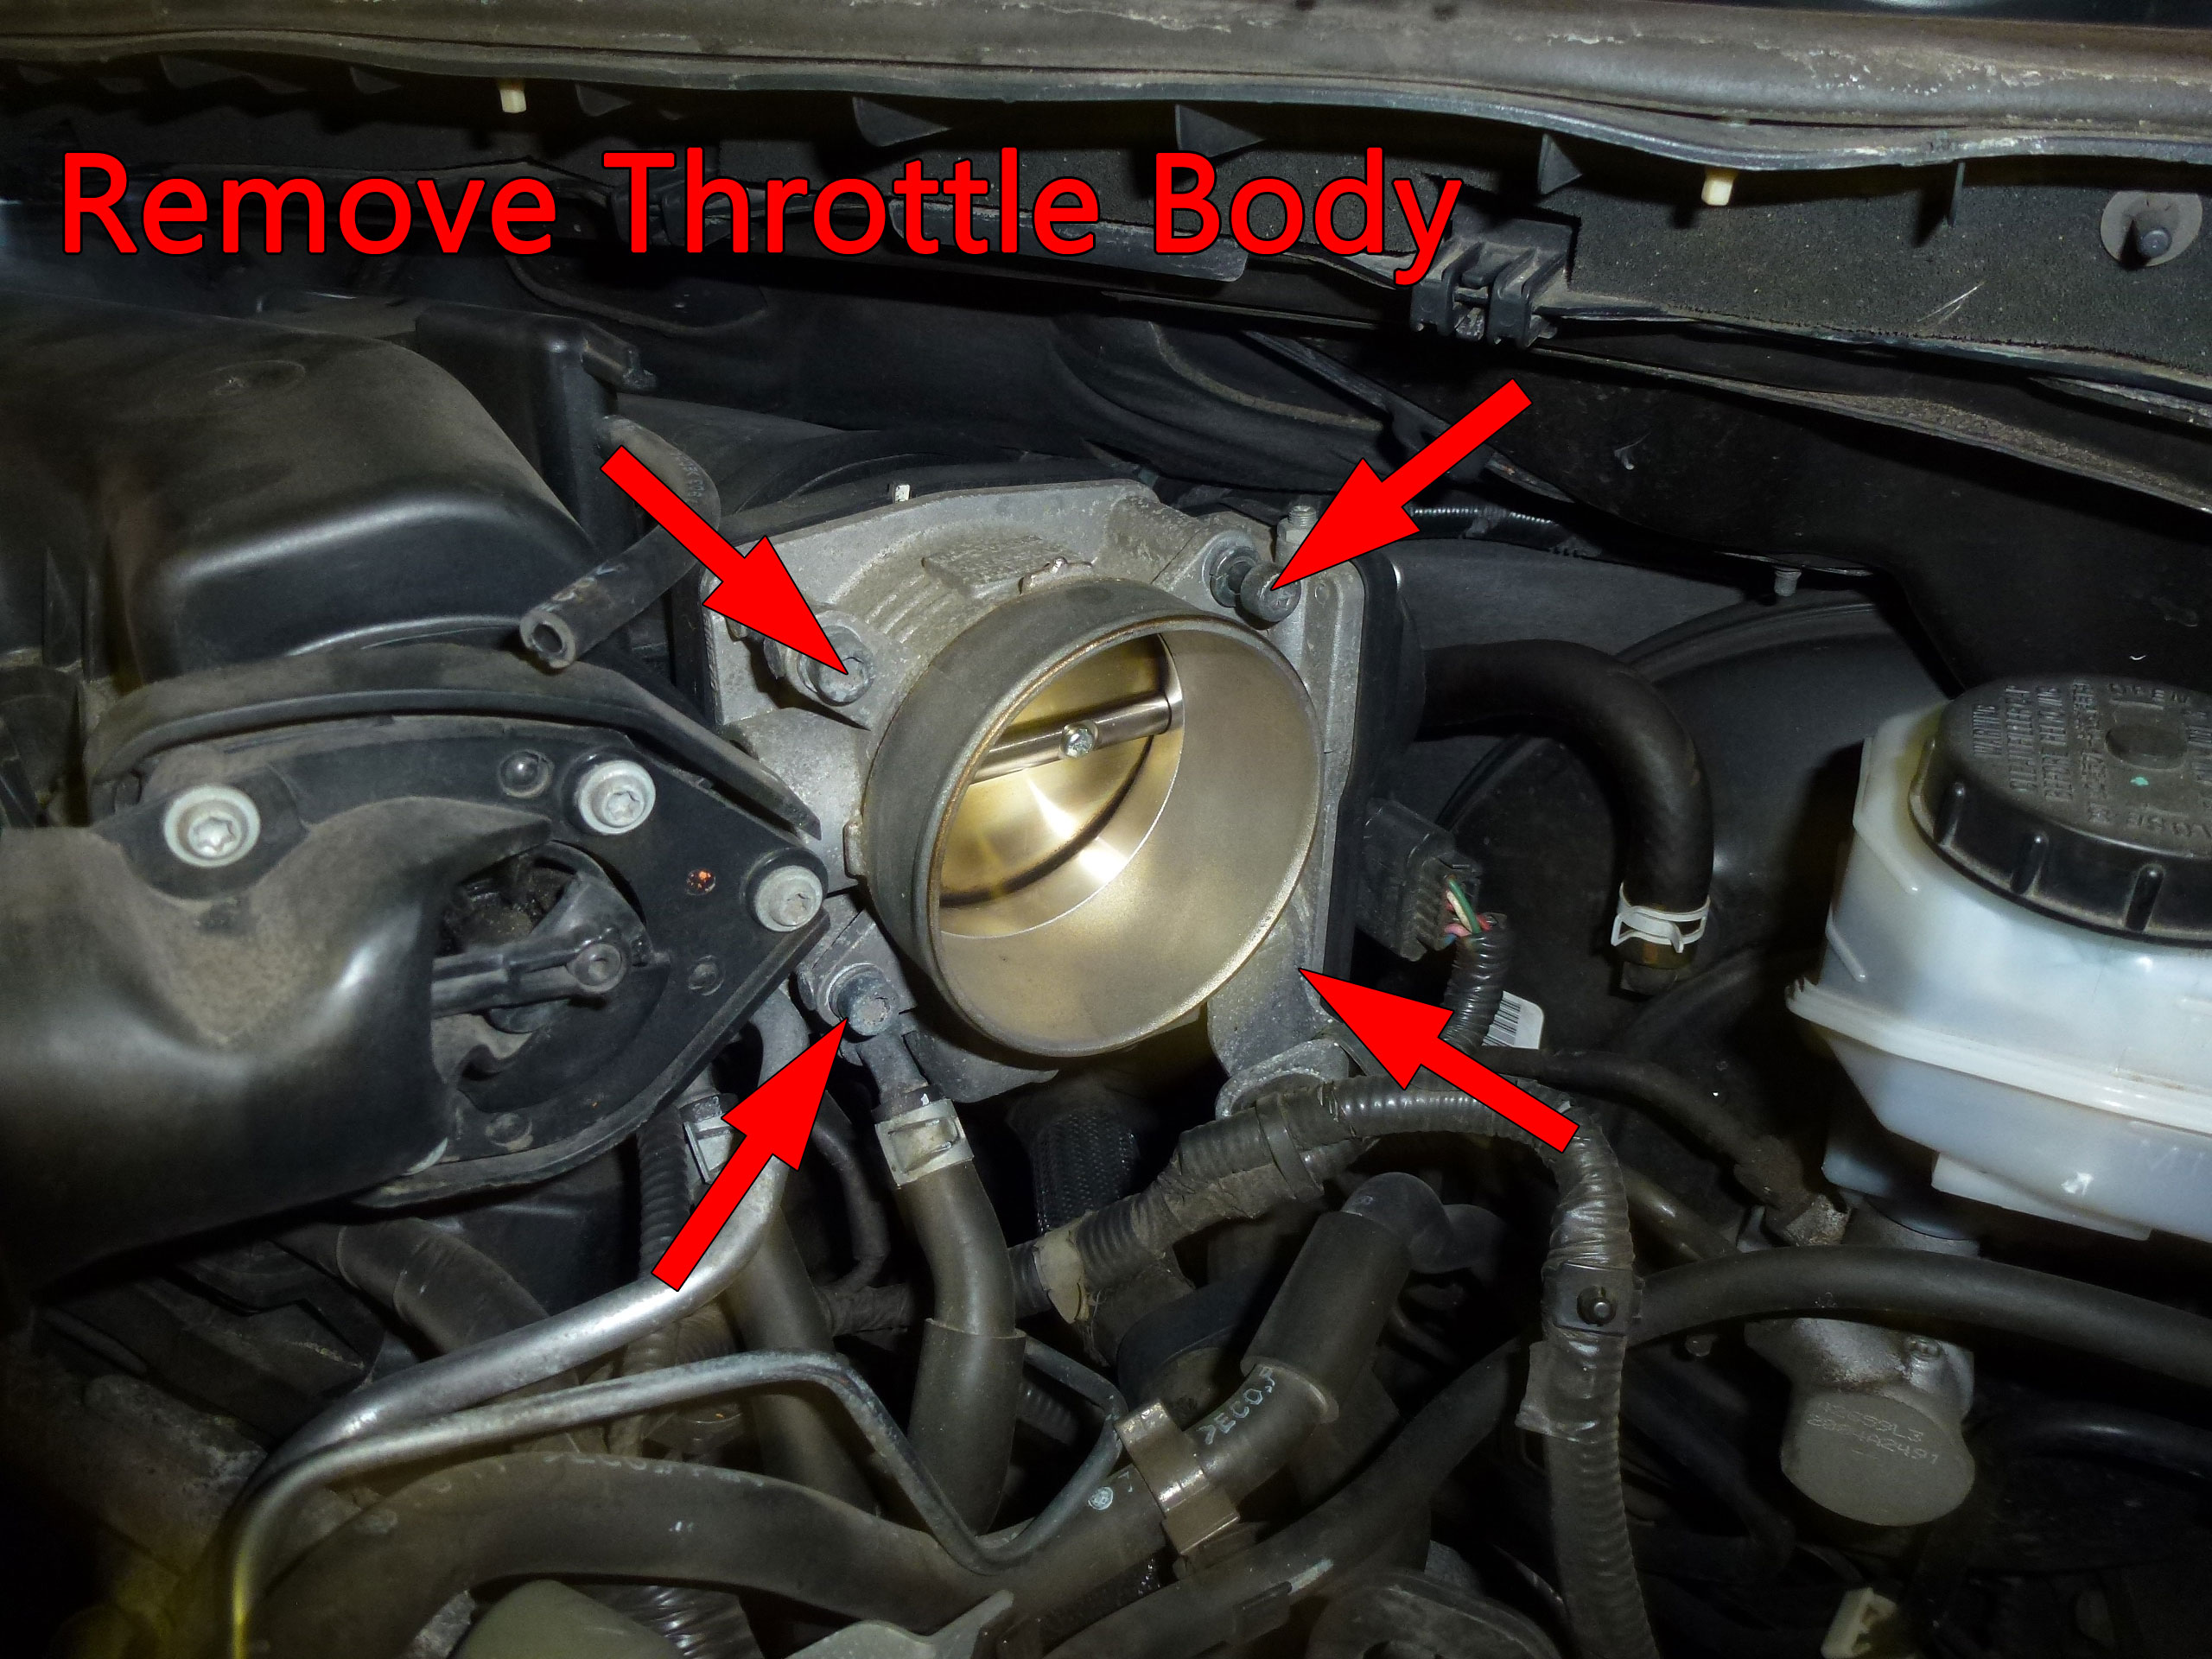
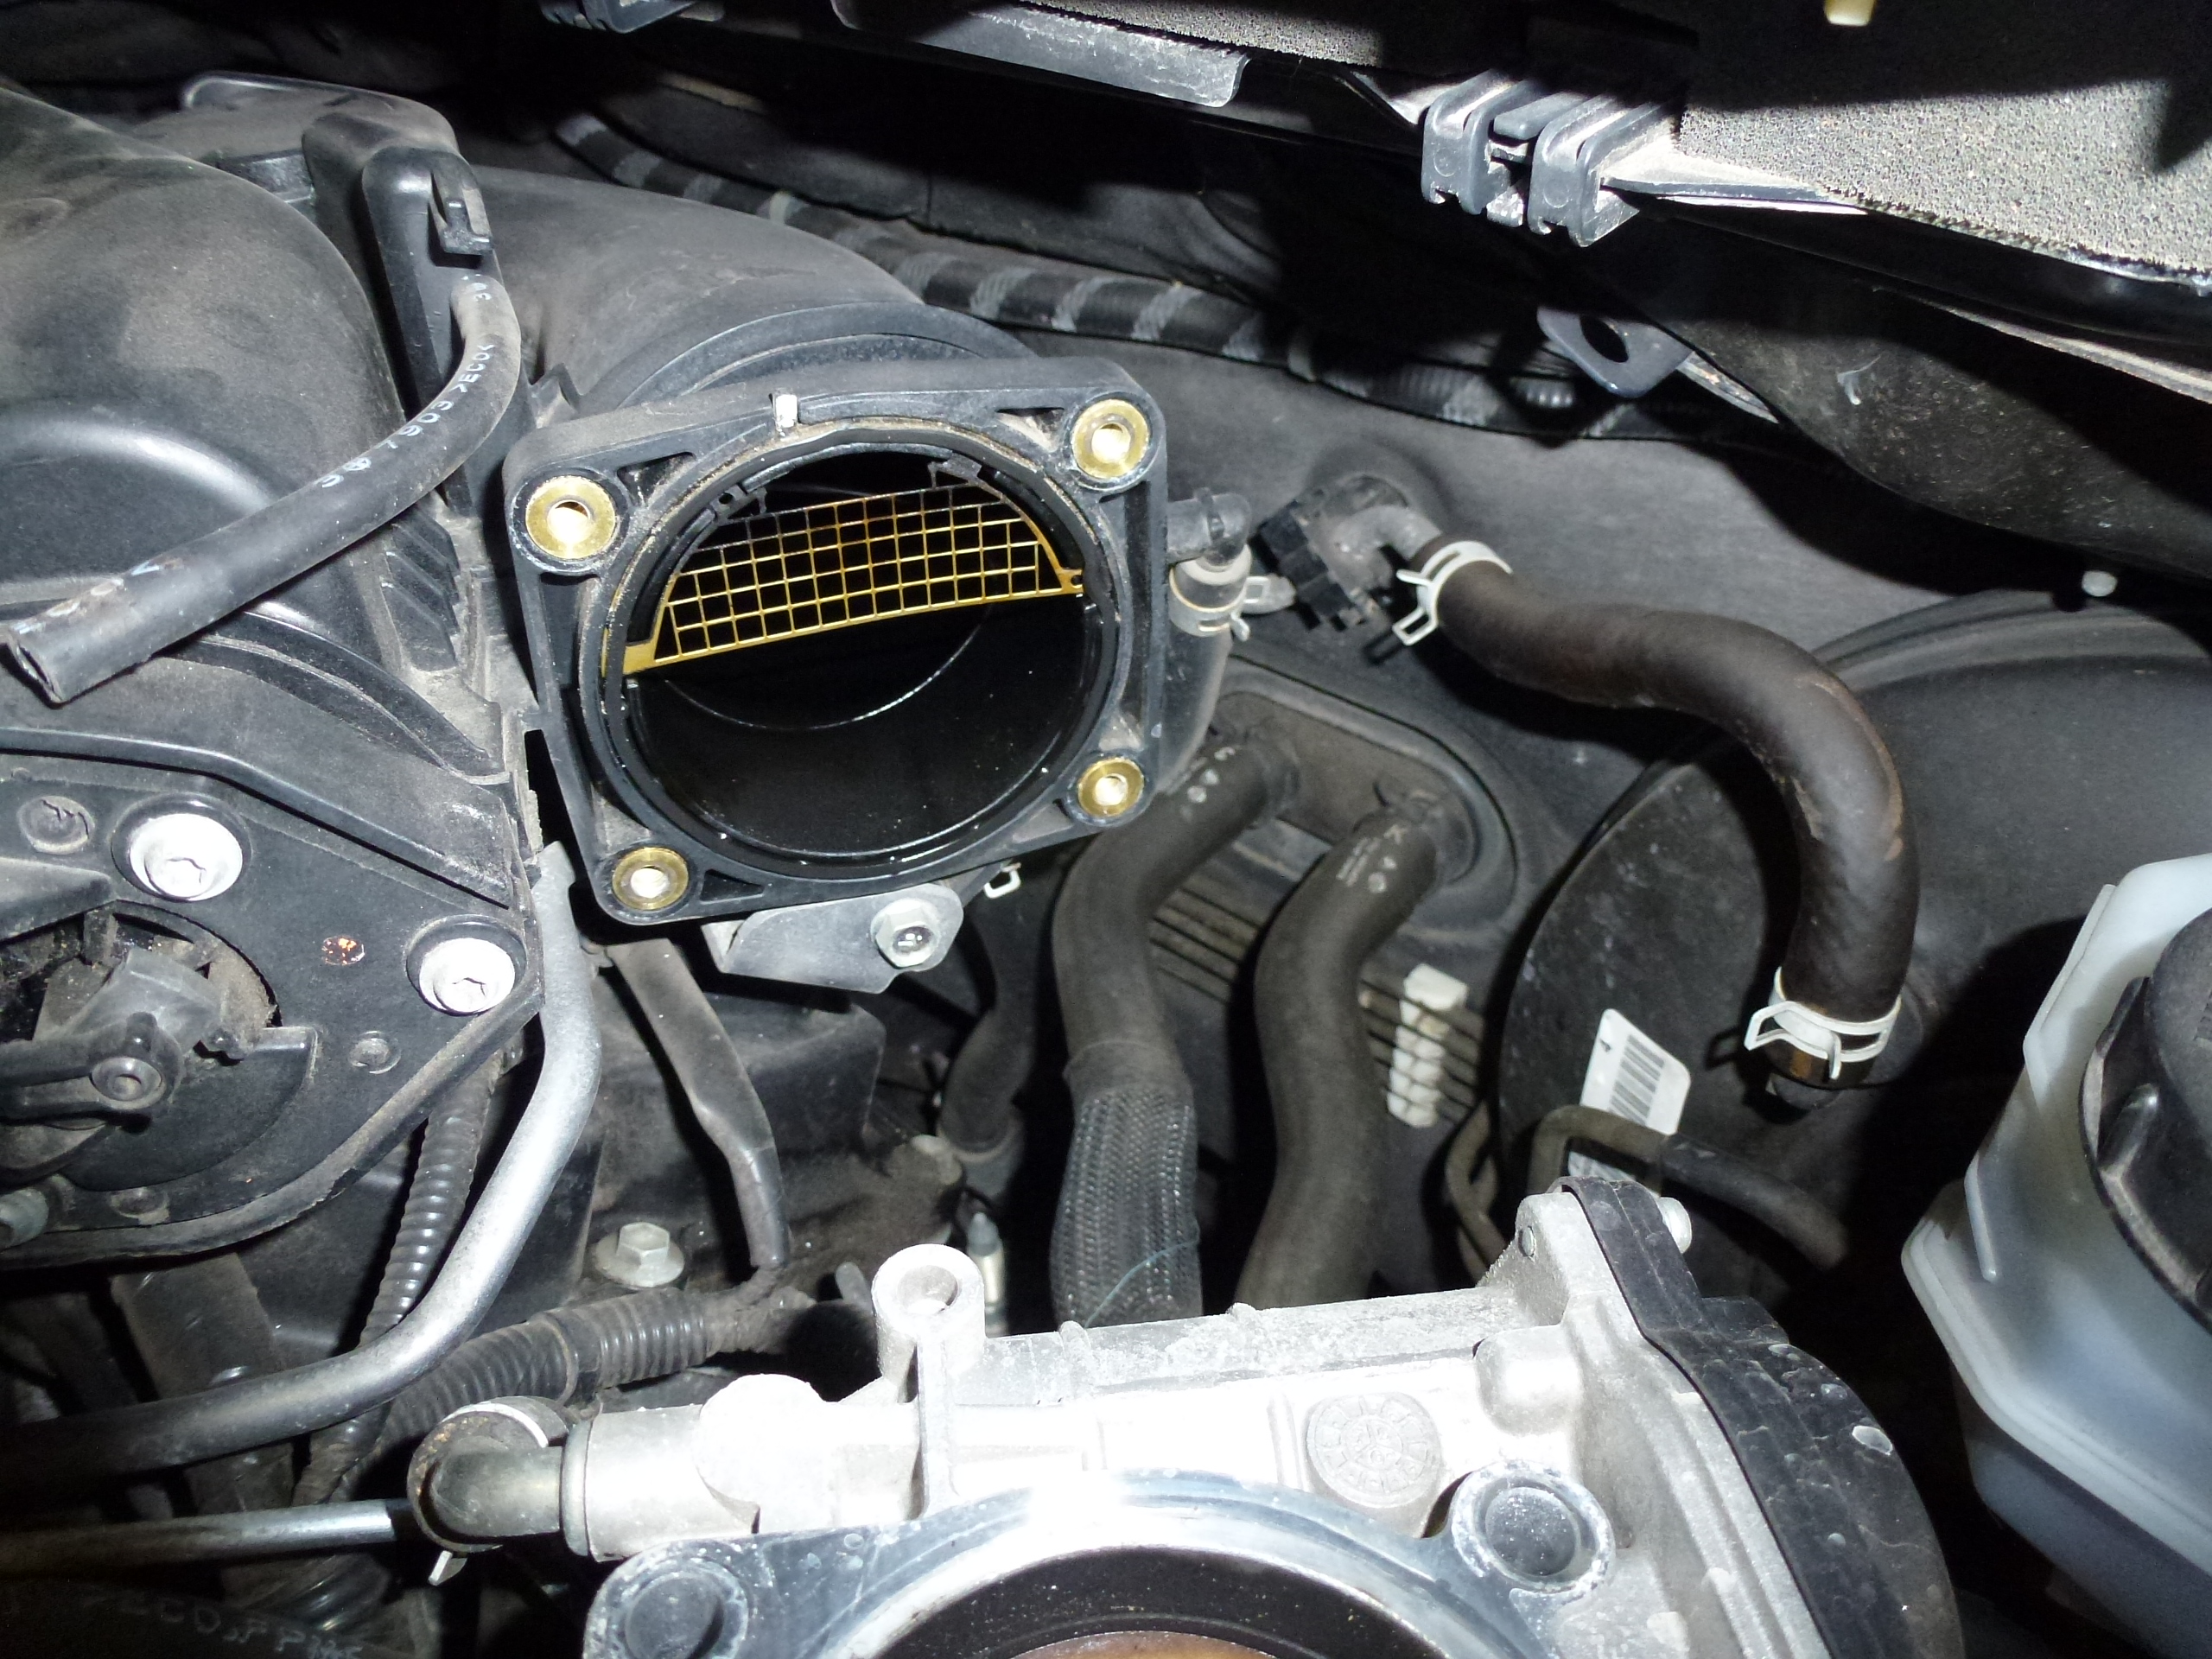
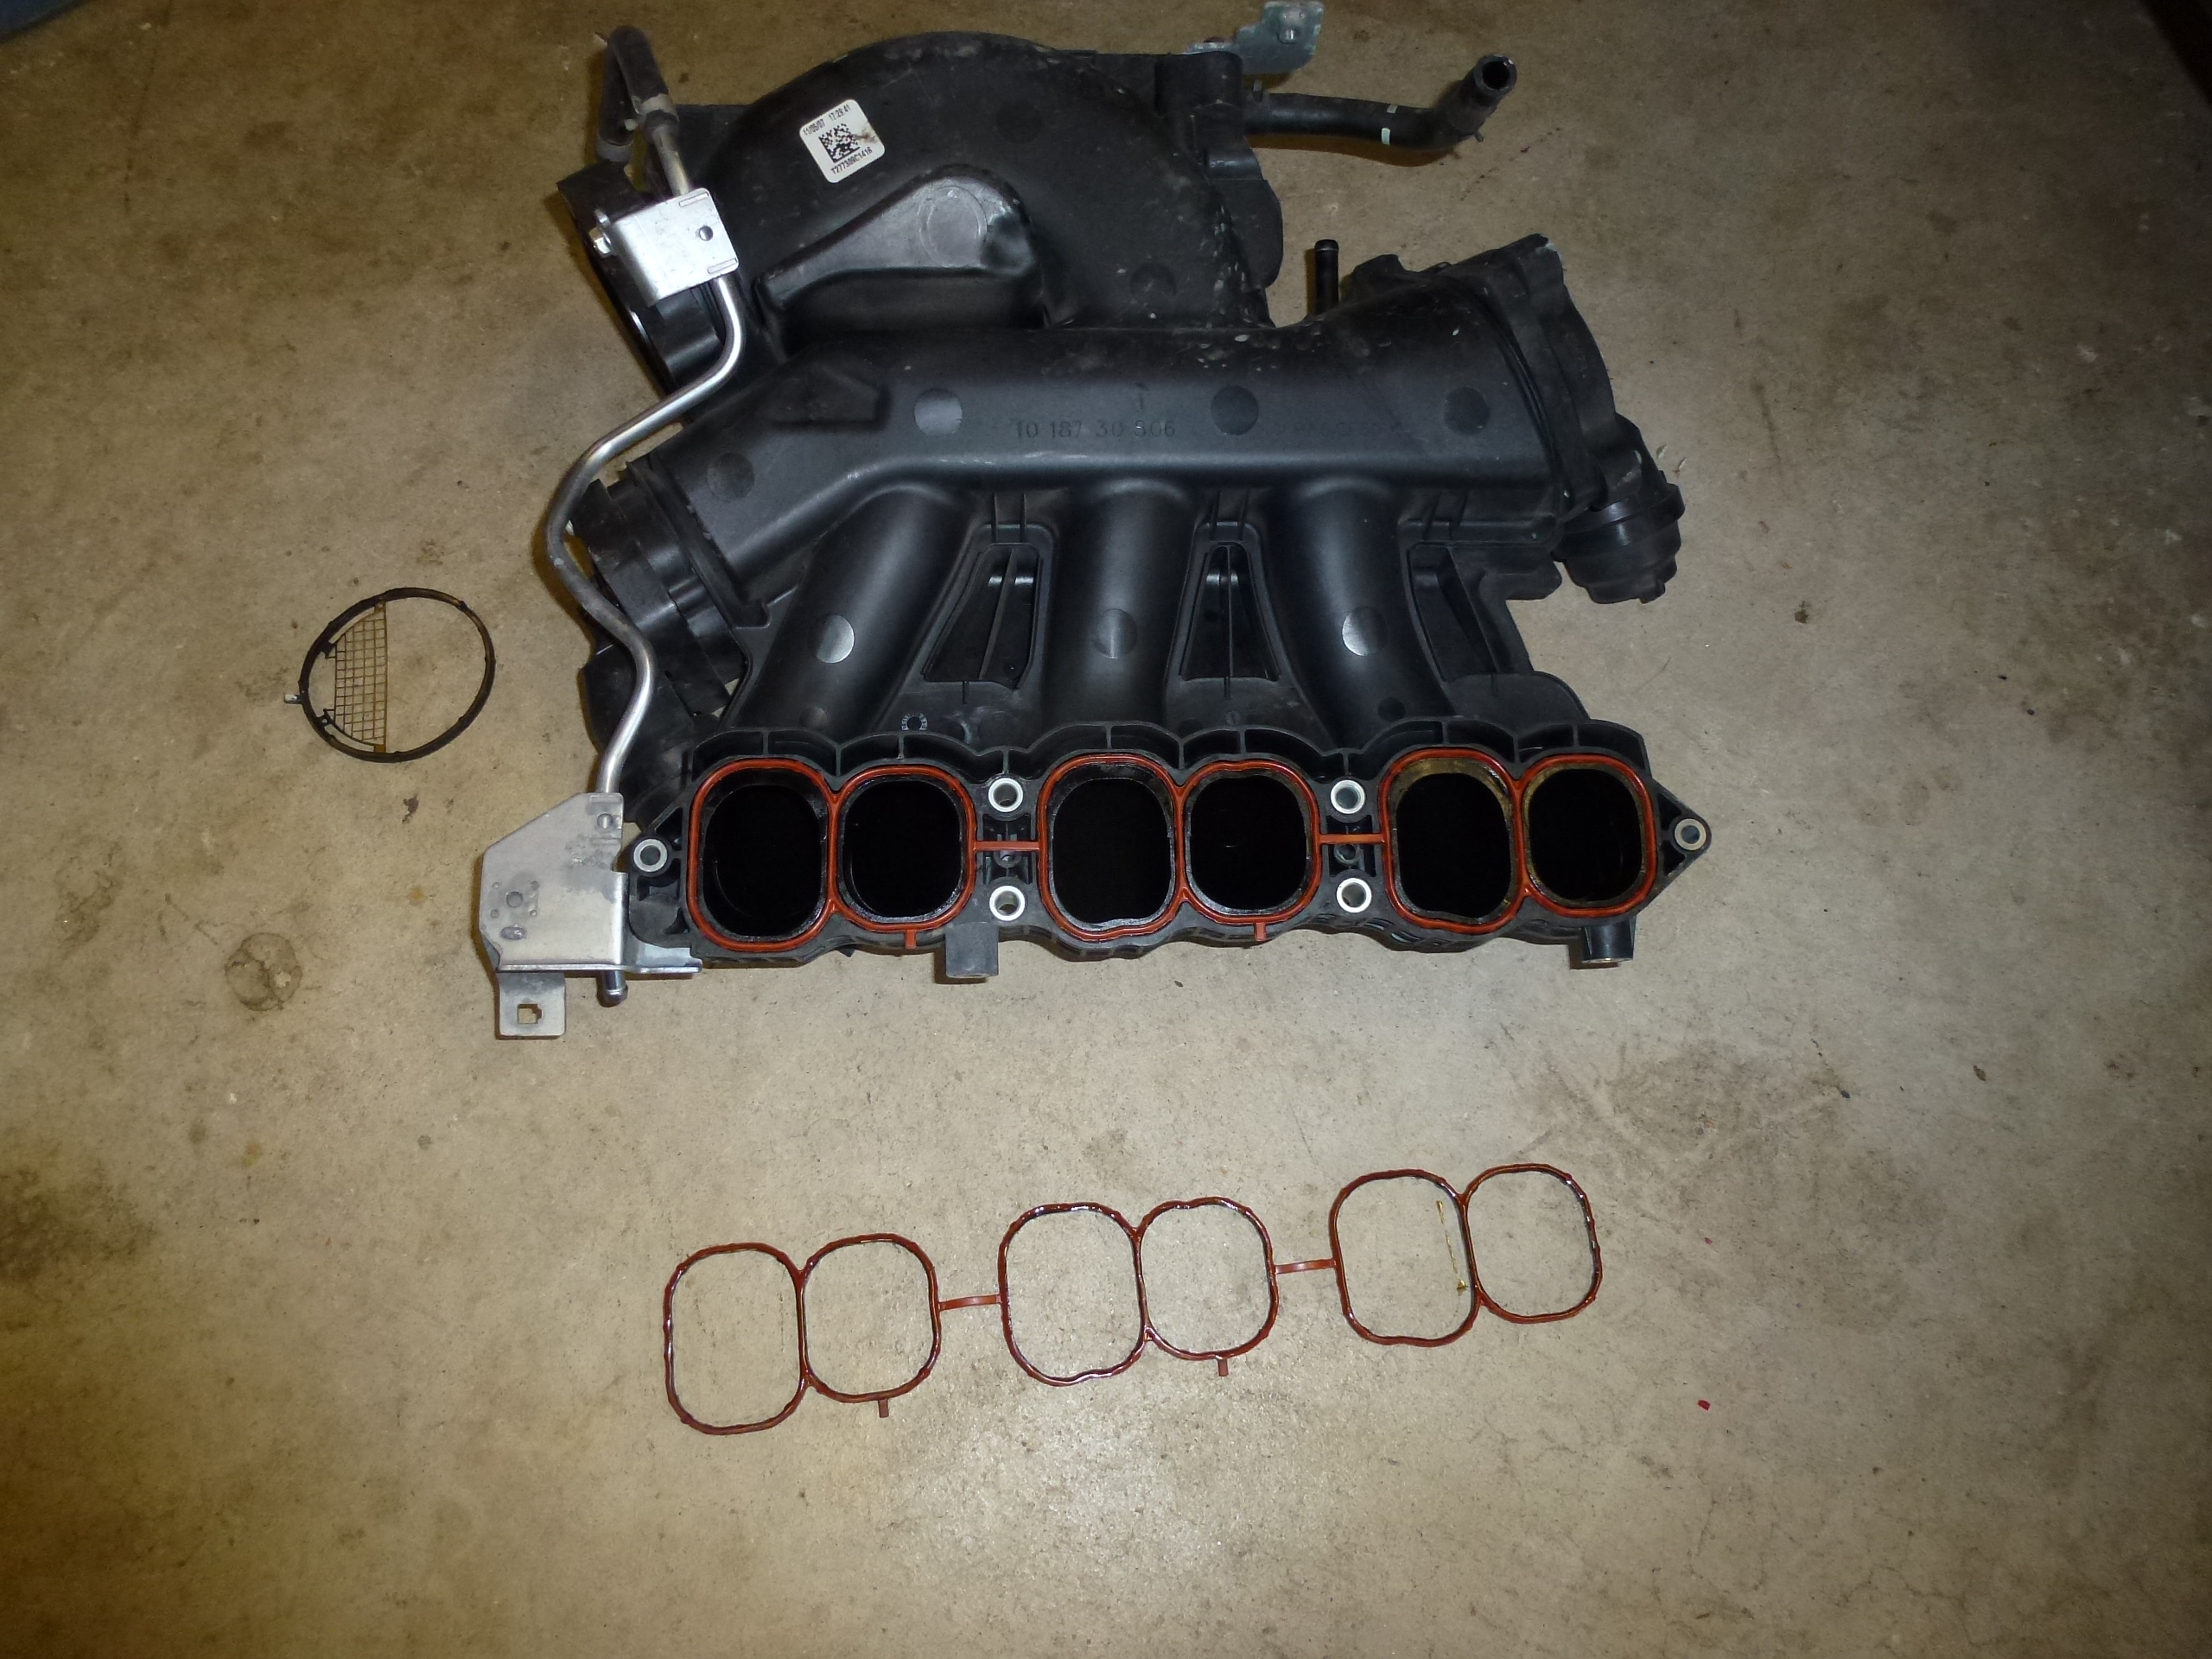
Remove the vacuum line from the back of the manifold by moving the clamp and twisting with pliers before removing.Remove the bolt that supports the power steering line and remove the vacuum line, both marked by red arrows.Remove 4 allen bolts that attach the throttle body to the manifold. It’s easier to remove the throttle body in order to avoid having to drain the coolant and remove the lines that feed it.Lay the throttle body down.If you haven’t missed anything, the upper intake manifold can be lifted out. Remove slowly and check for anything that may still be attached.Now you can easily reach the rear plugs. Follow the same steps used for the front three plugs. Remove the bolts, disconnect the harness plugs, remove the coil packs, swap out the plugs and put it all back together.With the plugs finished, reinstall the manifold. Follow the removal instructions in reverse order. If you bought new gaskets, this is a good point to replace them. I can say that at 115,000 miles, the gaskets were still pliable and could have been reused. They are relatively inexpensive, especially compared to the cost of the plugs so why not change them?A shot of the new throttle body gasket installed.
Torque Specs:
Spark plugs 14.5 ft-lbs
Upper intake manifold: 8 ft-lbs
Throttle Body: 6.2 ft-lbs
Coil pack: 5.2 ft-lbs
Torque sequence on the manifold:
—–3—-2—–
5————–6
—–1—-4—–
A quick outline for reassembly:
Use the two studs on the lower intake manifold to line up the upper intake manifold and slide it into place.
Install nuts and bolts to secure the manifold.
Reattach throttle body with 4 allen screws.
Reattach 2 vacuum lines and power steering bracket on the back of the intake manifold.
Set the vacuum line “manifold” in place and install 5 bolts.
Reattach 4 vacuum lines.
Slide the intake tube back into place and attach large vacuum line.
Install the air box cover, tighten hose clamps and reattach the air temperature sensor on the air box.
Pop the engine cover in place and install 2 allen bolts.
Now that it’s done, you won’t have to worry about it for another 100,000 miles!