Crankcase Venting
Block venting is a topic that’s been well covered and doesn’t need further explanation by me. If you want to read a great write-up about venting, check out Moto IQ’s article here.
Disclaimer
I will start by saying that this should only be done for “Off Road” use since the process is circumventing the emissions system. If you chose to pursue this project, it is possible to close the circuit by connecting a line from the catch back to the air intake.
Justification
Those who are familiar with the earlier Honda engines will recall the black breather can that fits into the back of the engine block. Best case scenario, the can will start leaking and forever ooze oil from the back of the block. Changing o-rings will not help the problem. The can acts as an oil separator for the PCV system and cannot simply be eliminated.
The next problem involves sucking oil back into the intake manifold during hard corning during track events. During corning, oil can get trapped in the can momentarily and eventually pulled into the intake. The result is a James Bond like smoke screen until the engine could clear its throat. The problem usually surfaced if the oil level indicated from half way between the marks on the dipstick or higher.
Solution and What NOT to do.
Eliminating the stock breather canister solves the persistent oil leak and the oil in the intake during hard corning. There are endless options from fully venting the block to simply adding a catch can to the existing system. For the purpose of this article, I will cover how to fully vent the block.
Preparations for installation
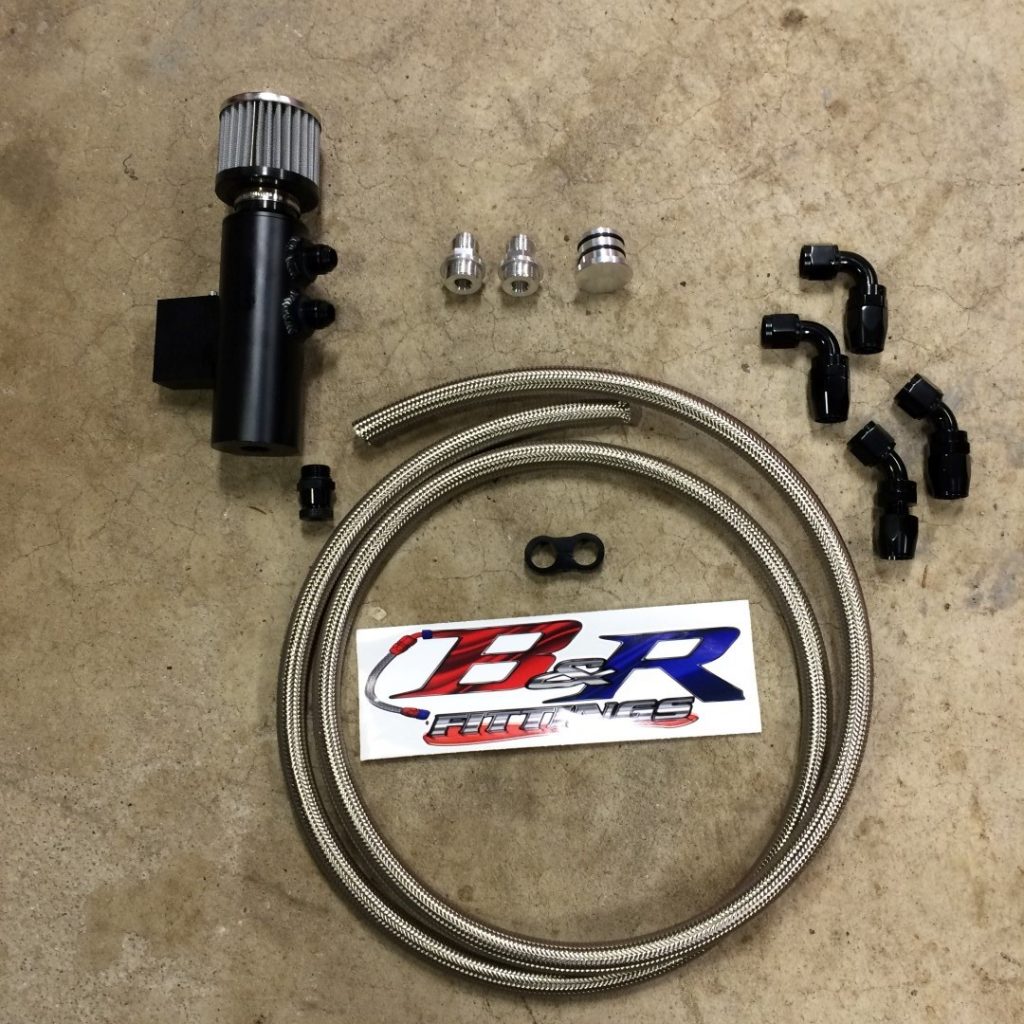
Parts and Tools Required
- Breather kit
- Either 1/8 NPT plugs or rubber caps to plug the existing fittings.
- 1/8″ MPT tap if you decide to use threaded plugs
- 1/8″ x 3/4″ x 3′ steel bar stock to make a plug bracket (if you need a plug)
- Basic hand tools: Plyers, screw drivers, sockets and wrenches
- Possibly jack and jack stands.
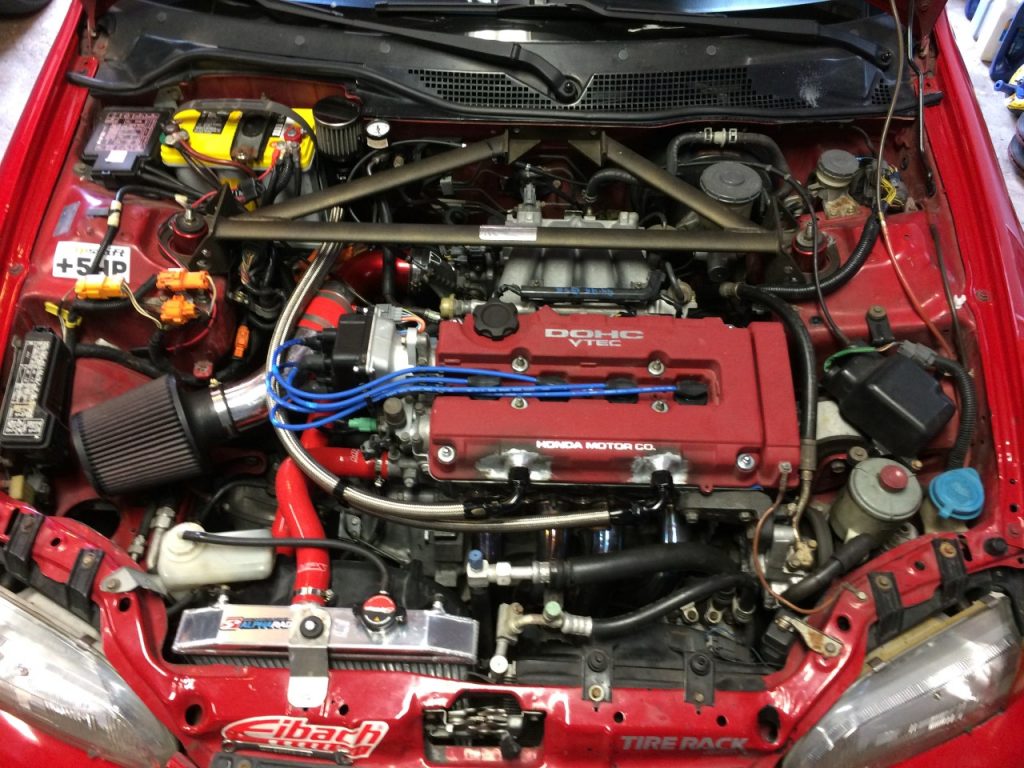
Once you’ve picked your breather kit and get your tools together, start by removing the canister on the back of the engine and all of the associated vacuum lines. As you work your way through it, keep track of fittings that need to be plugged.
Attaching Fittings
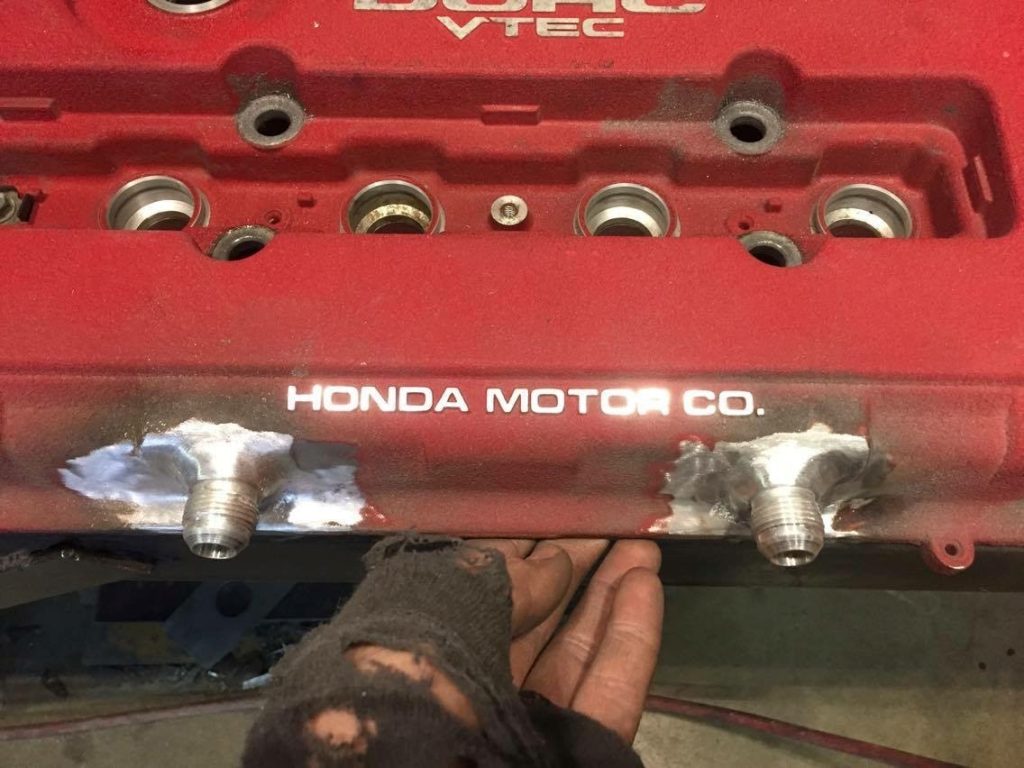
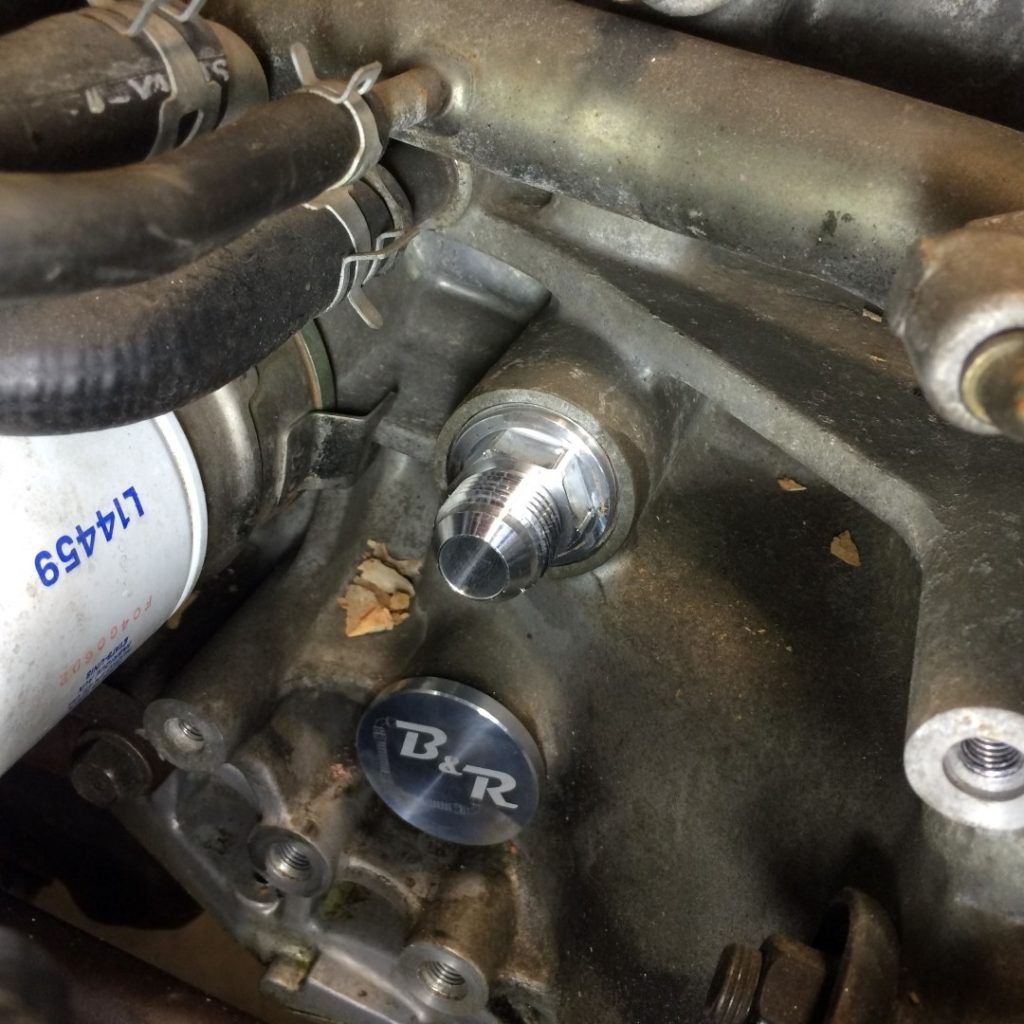
The most effective way to vent is to have fittings welded to the valve cover. There are options for simply drilling holes and bolting fittings in place. Either way, when done properly, the fittings will utilize the original baffle plates and prevent excess oil from escaping the engine.
Once the fittings are attached, it’s time to decide where to attach the catch can. Originally, I had attached it to the firewall. This is a very typical installation and it is fairly straight forward. My only issue is that crank case smell works its way into the interior.
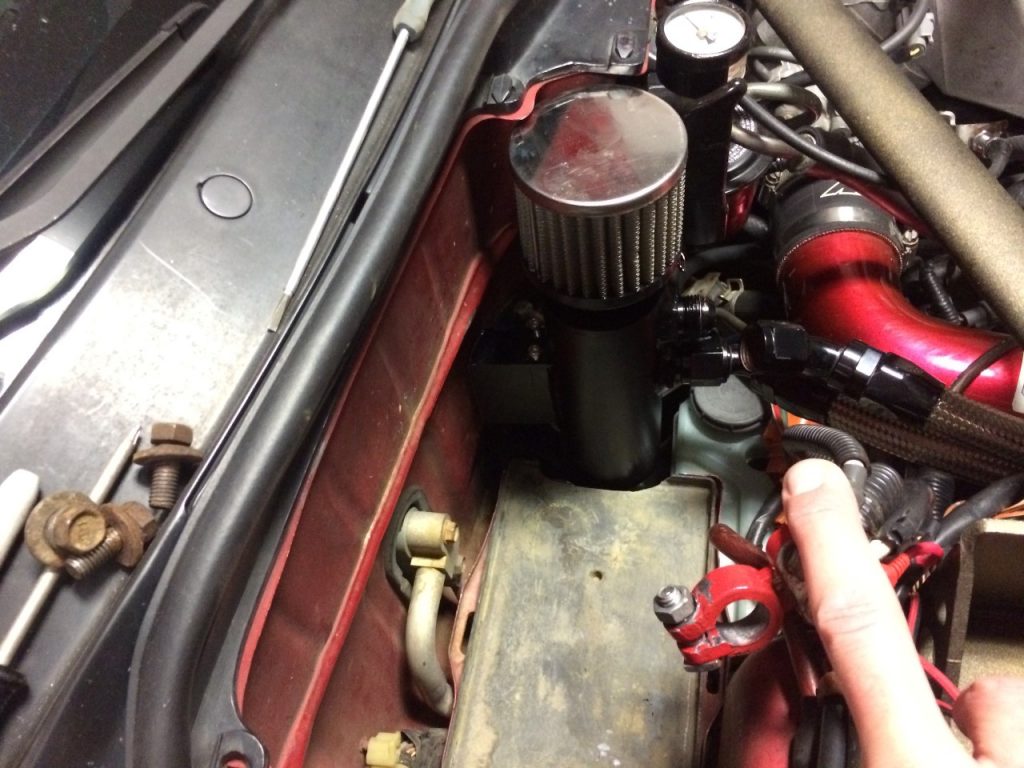
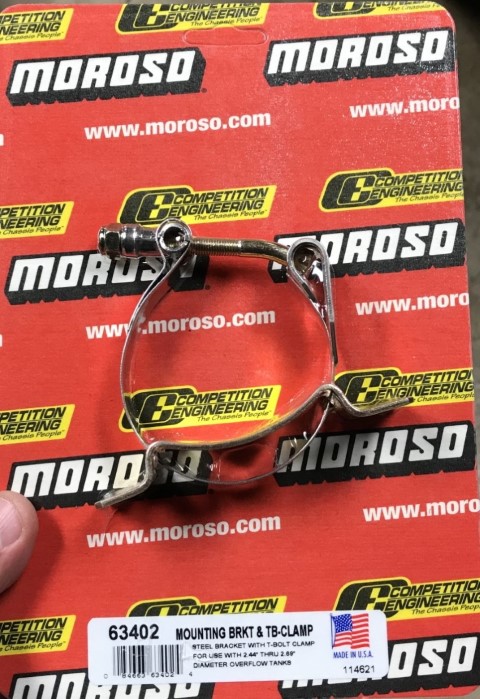
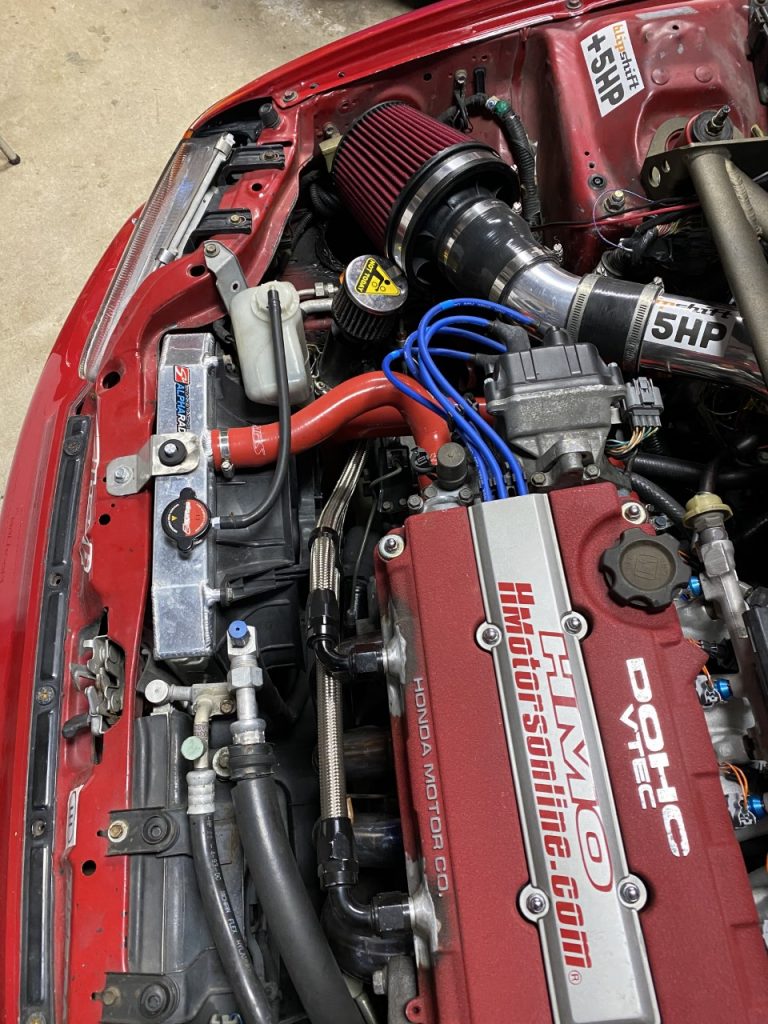
The process to finishing the can installation and hose routing is relatively simple. After a season of smelling the inside of the engine, I decided to move the can towards the front of the car. To allow for easier positioning, I removed the built-in mount of my catch-can. I bought a mounting bracket from Moroso which gave me the flexibility I needed to mount the can down by the transmission mount.
The new location resolved the crankcase smell and prevents oil from getting trapped in the hoses.
Plugging the Holes
Bypassing the original block venting will require plugging a few fittings in the intake manifold, valve cover and possibly the block. Your options include rubber caps, which is the easiest, or threaded caps. The threaded caps are a more permanent solution that will not fail if done correctly. However, you need to ensure proper clean-up so shavings don’t end up inside the intake manifold.
Plugging the Block
It is worth noting that a B20 or a later engine block that didn’t use the black breather canisters. In that case, your project is complete. If not, you’ll need to plug the hole in the back of the block. There are several companies that sell an o-ring’ed plugs that slip into the hole. Installing it is as simple as removing the breather canister and slipping in the plug.
Or is it?
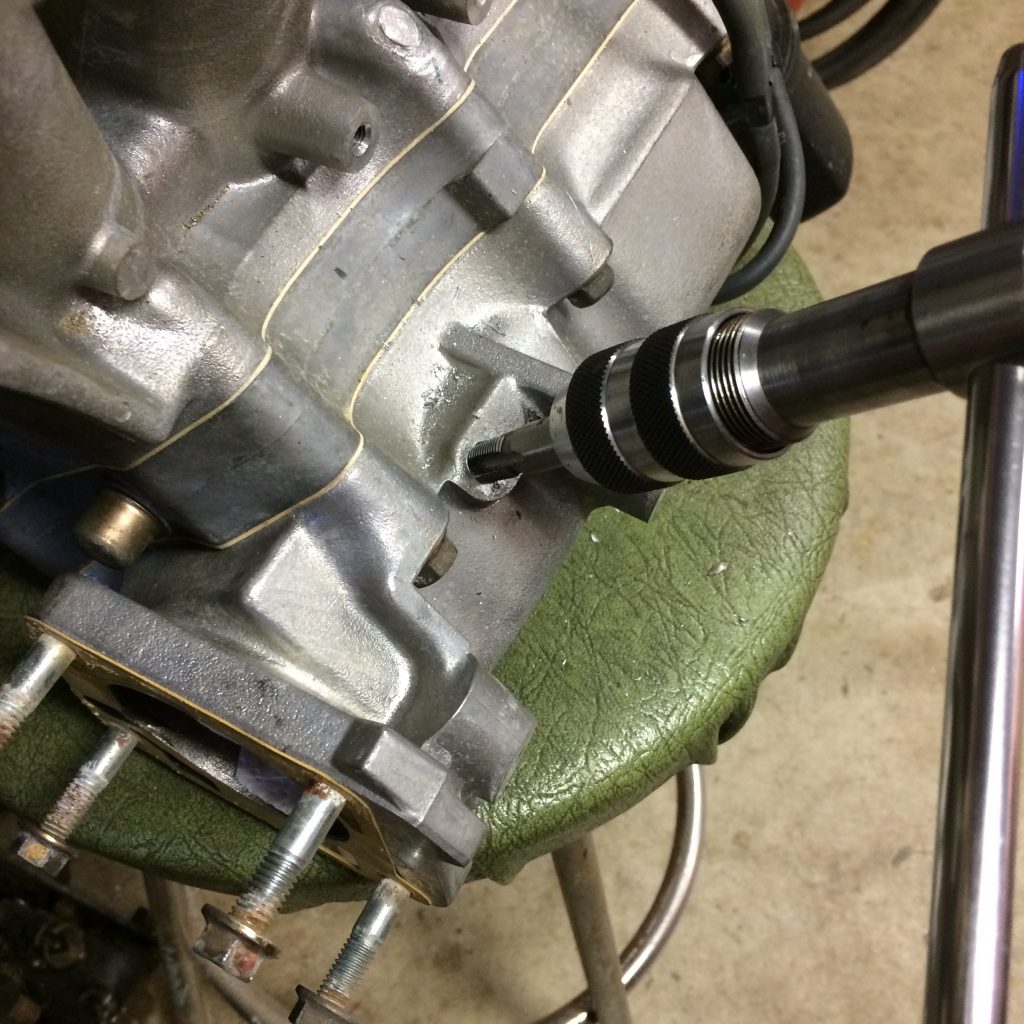
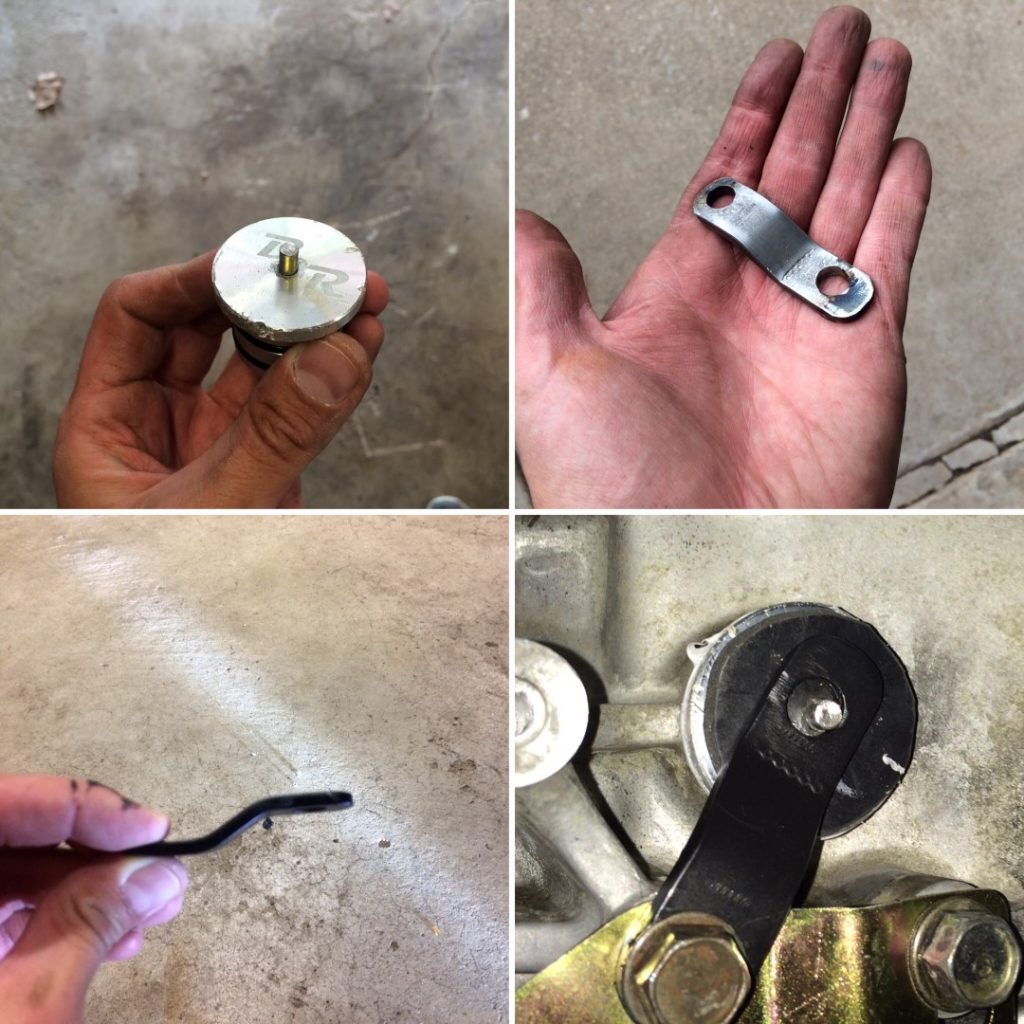
It is important to note that I was skeptical regarding the ability for this plug to stay in place. Most do not include a bracket. I decided to trust it and I had no issues for about a month. During one of my runs at an autocross, the plug popped out. Fortunately, the aluminum plug gleamed in the sunlight and I was able to find it and put it back in for the ride home.
Now confirming that a bracket was necessary, I decided to make one and use the exhaust manifold mount just under the hole. Using a stick of bar stock from the hardware store, a 3′ x 1/8″ x 3/4″ piece, I started by bending a “z” shape into the end. I cut a 3-4″ piece and drilled holes into each end. Paint the part for corrosion resistance. As an added layer of protection, I added a stud to the plug itself to prevent the bracket from slipping over time. I drilled a hole (not all the way through) then added threads with a 6mm x 1.0 tap. I secured a bolt in place with thread-lock and cut off the bolt head.
Now it’s ready.
Once the plug and bracket were ready, I pushed the plug into the back of the block and used a header/manifold bolt to hold it in place. For overkill, I made a rubber pad to act as a cushion between the bracket and the plug. I was concerned that temperature changes would put lateral pressure on the plug and encourage leaking….like I said, overkill.
Do Not Do This!
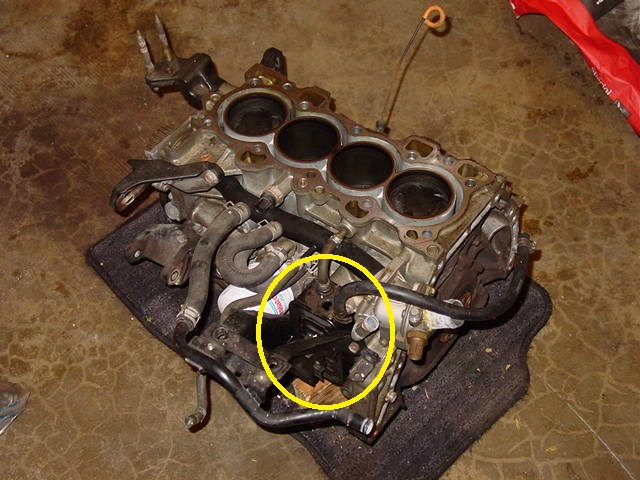
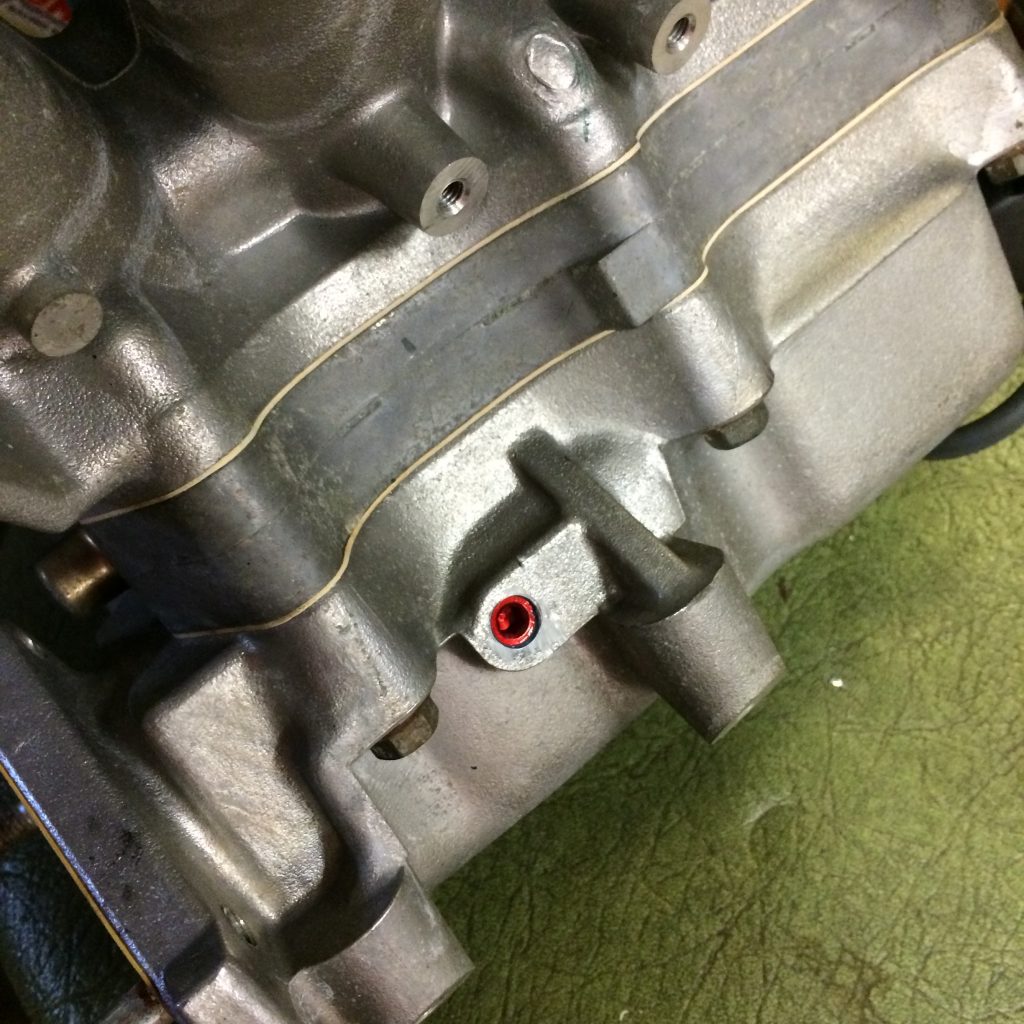
Originally, I used a back-of-the-block venting kit. These blocks offer this unique opportunity for venting. I liked the idea of a clean, bolt-in solution with no drilling required.
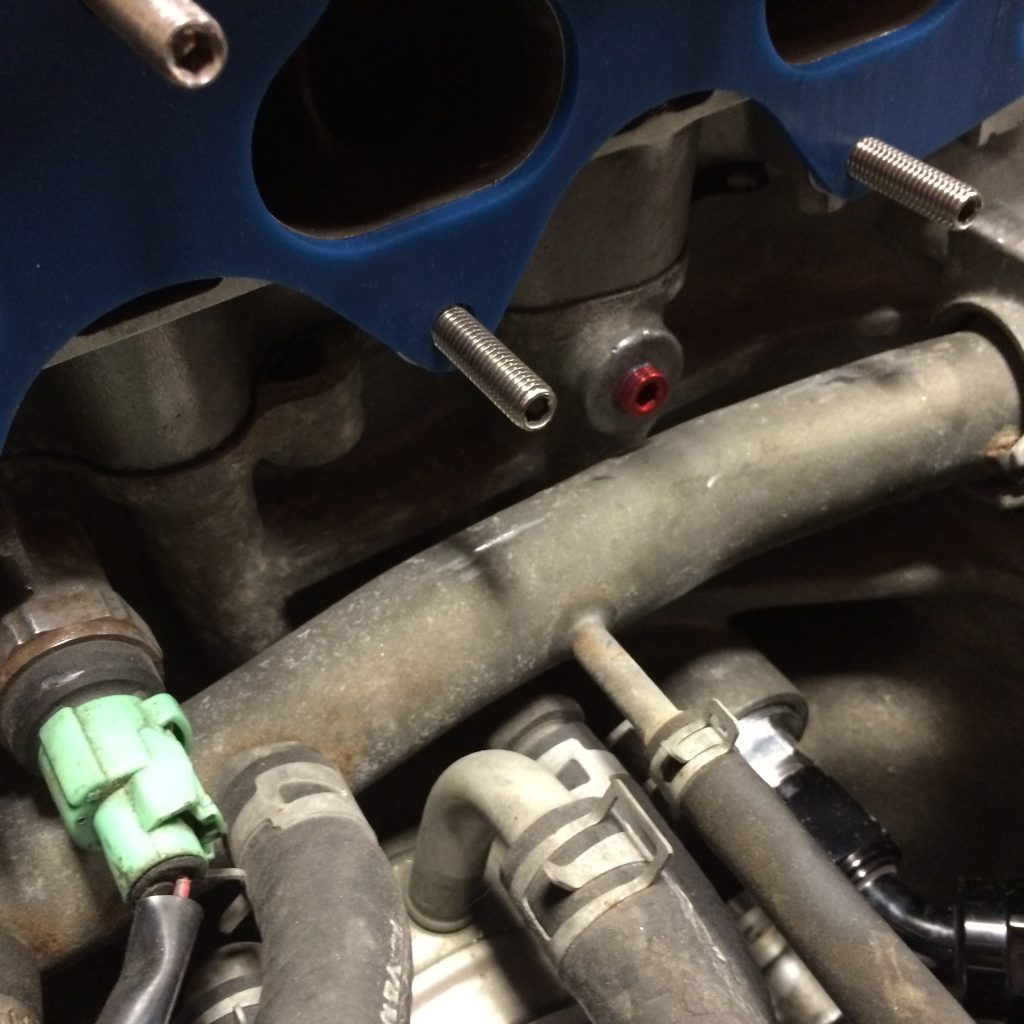
Why this is a bad idea. If you scroll back to the top and review the picture of the short block, you can clearly see the holes where oil drains back to the oil pan from the head. This oil passes over those plugs and the original breather can. During aggressive driving, oil will get sucked into the hoses attached back there. At my first autocross with this setup, I managed to pump more than 2 quarts from the engine in less than 8 runs! I’ve also seen others have the same problem during track days.
Even so, the kits are still available for this option. Don’t do it. Please.
Conclusion
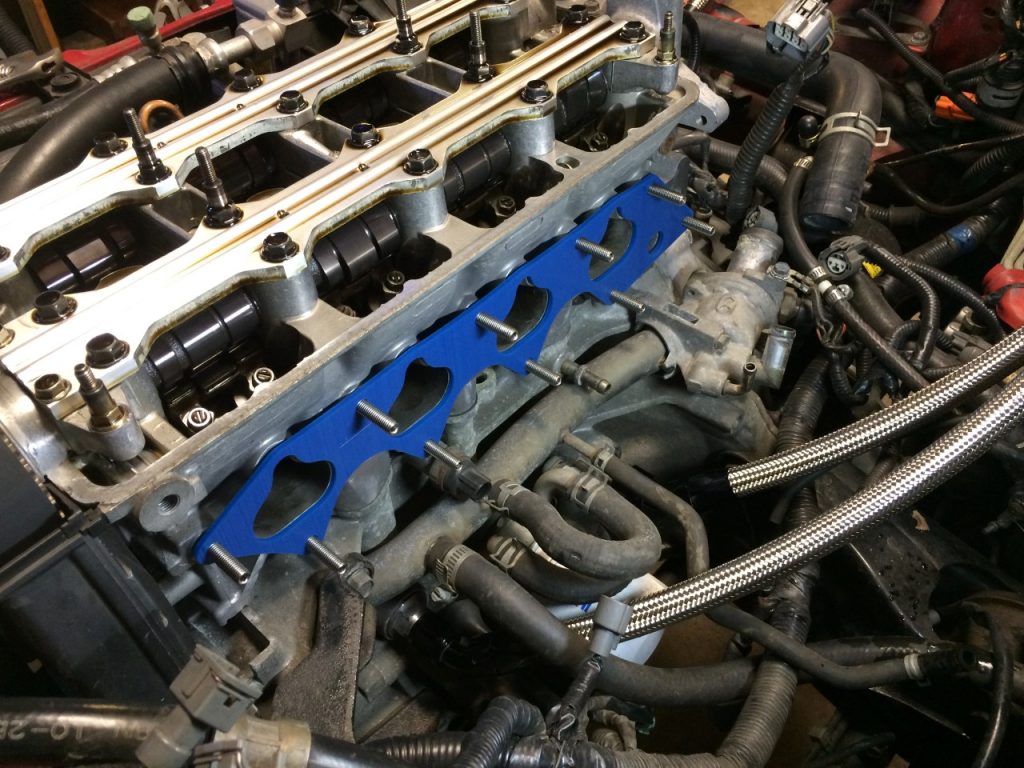
As I’m sure you’ve noticed, I had removed the intake manifold to give me better access for the back-of-the-block plugs. I did learn that it was unnecessary. Even so, by this point, you shouldn’t even be considering the back-of-the-block option! Aside from that, if you plant to tap and plug the fittings on the intake manifold, and you struggle to control the shavings, you may want to consider removing it.
Satisfied!
Installing a breather kit may be beyond the scope of a simple bolt on project. There are options for simplifying the process however there is no way to thoroughly eliminate oil consumption through the factory system without complete separating the crank case vent. Having finished this project, and struggling through the growing pains, I’m completely satisfied with the results.