
300ZX Brake Swap
Why do this swap? What are the benefits? The primary purpose is to improve the overall braking performance. This is accomplished by installing larger rotors and calipers. The Nissan Z32 300ZX provides the 240SX enthusiast an OEM option that is considerably less expensive than aftermarket kits. When I originally wrote about this brake swap in 2002, the only cost effective route was to buy used parts. Now we have sources like RockAuto.com that sells re-manufactured calipers at prices lower than used calipers cost over a decade ago. Other options available today include e-brake adapters, 5-lug conversion hubs, braided SS lines for the front and back to name a few.
Click on the links below to take you to specific sections of this write-up.
- Brake Comparison
- Front Brake Swap
- Rear Brake Swap
- Master Cylinder Upgrade
- Emergency Brake Cables
- Brake Pad Replacement
- Driving Impressions
- Alternatives
- 5-lug conversion, S13 and S14
- Part Number List
Brake Comparison
Rear:

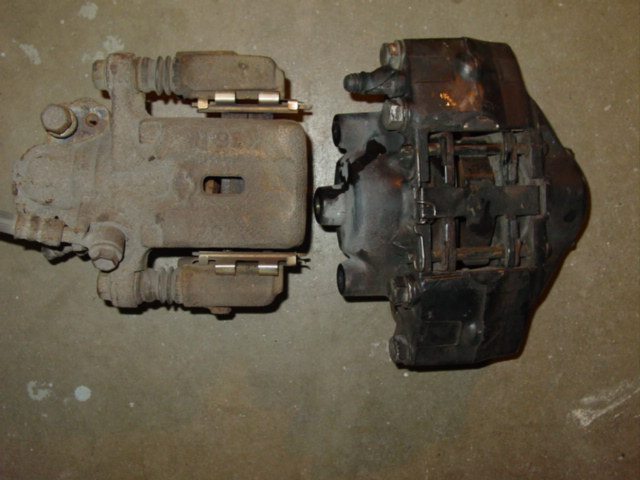
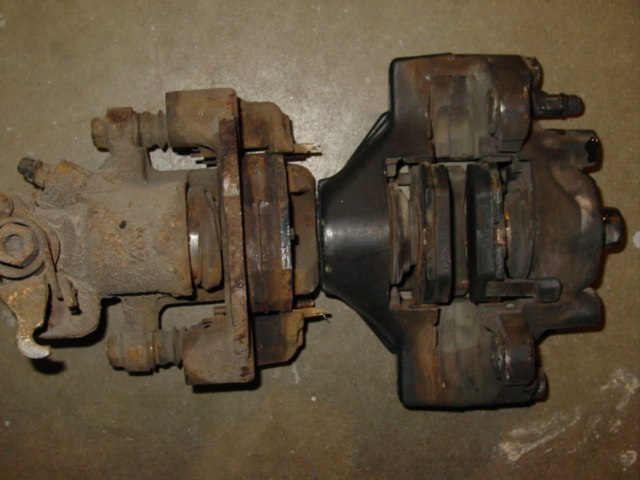
The rear brakes start out as a 10.2″ non vented rotor with a single piston caliper. Upgrading to the 300ZX equipment awards you
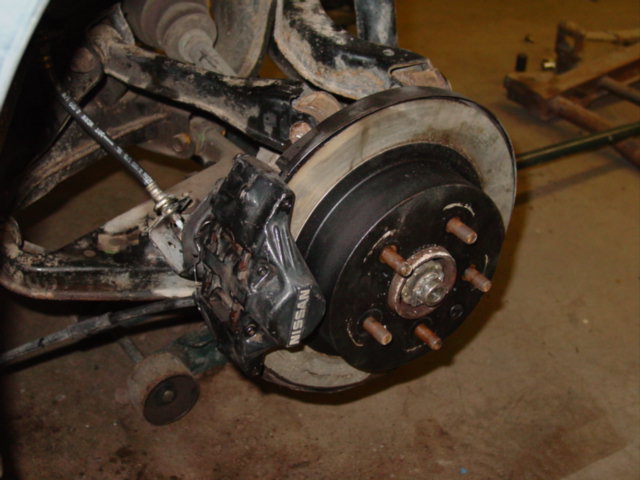
with an 11.6″ vented rotor with a separate drum e-brake and a 2 pistons caliper.
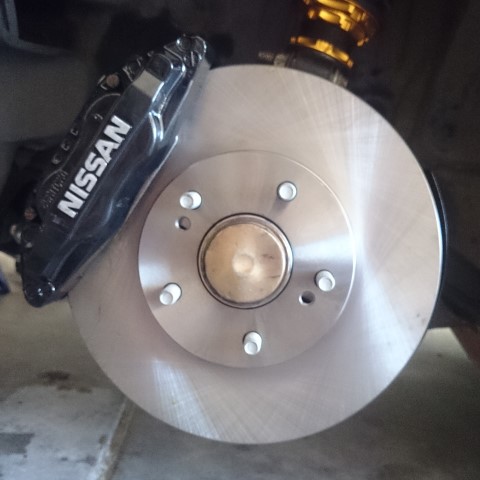
Front:


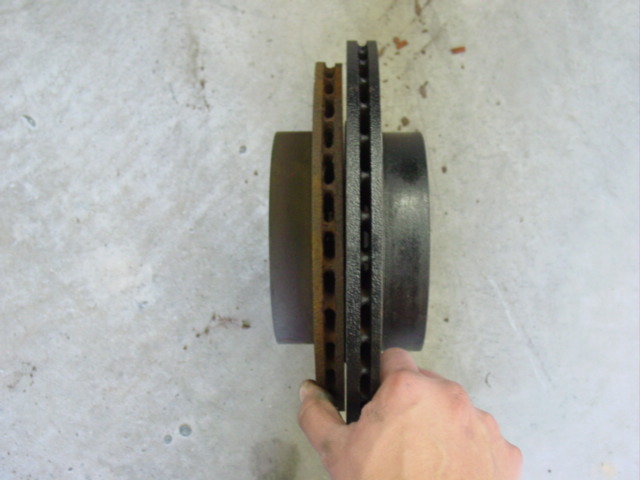
The front brakes start out as a 9.8″ vented rotor and single piston caliper. The 300ZX offers an 11″ rotor with a massive
4-piston caliper.
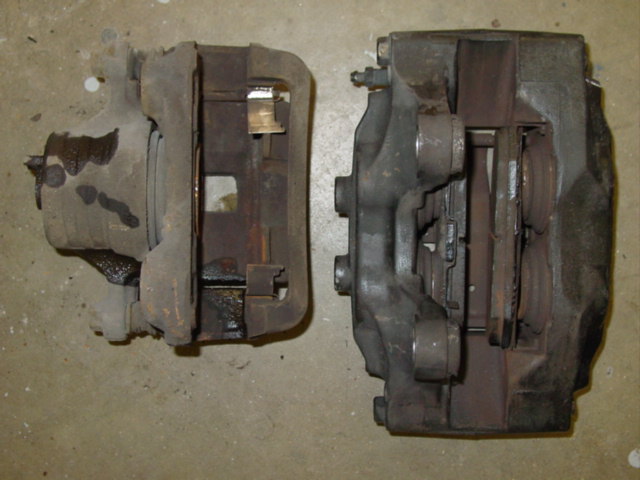
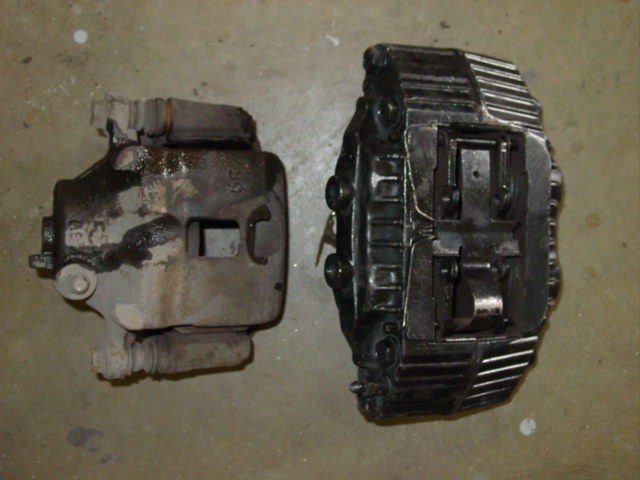
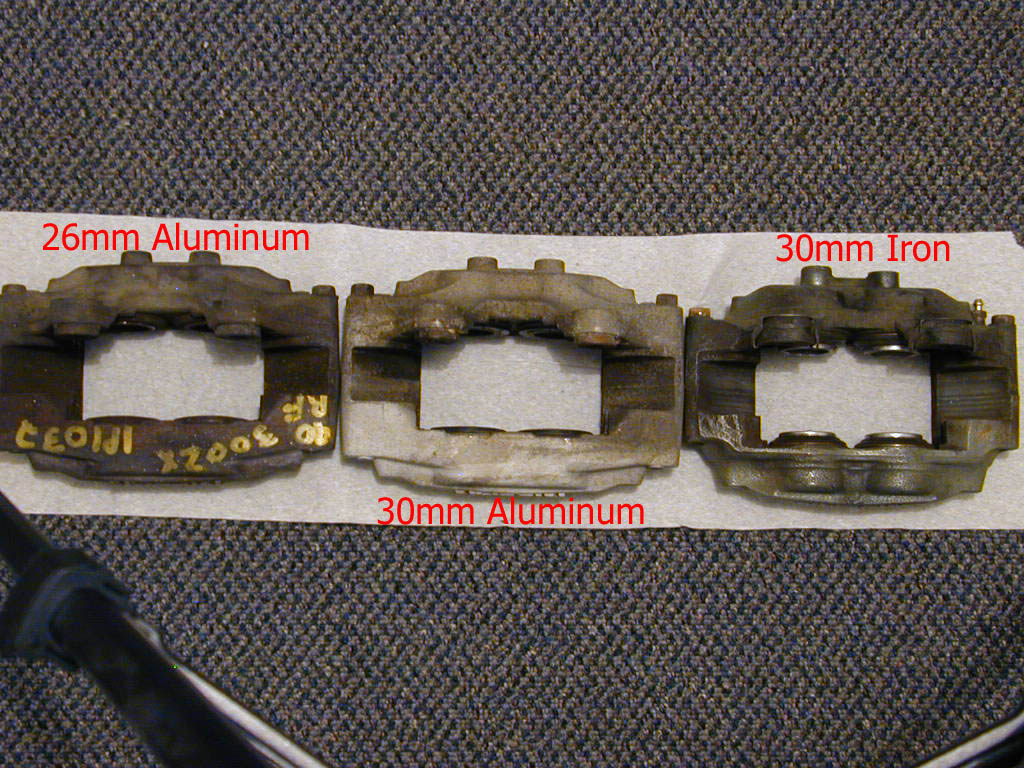
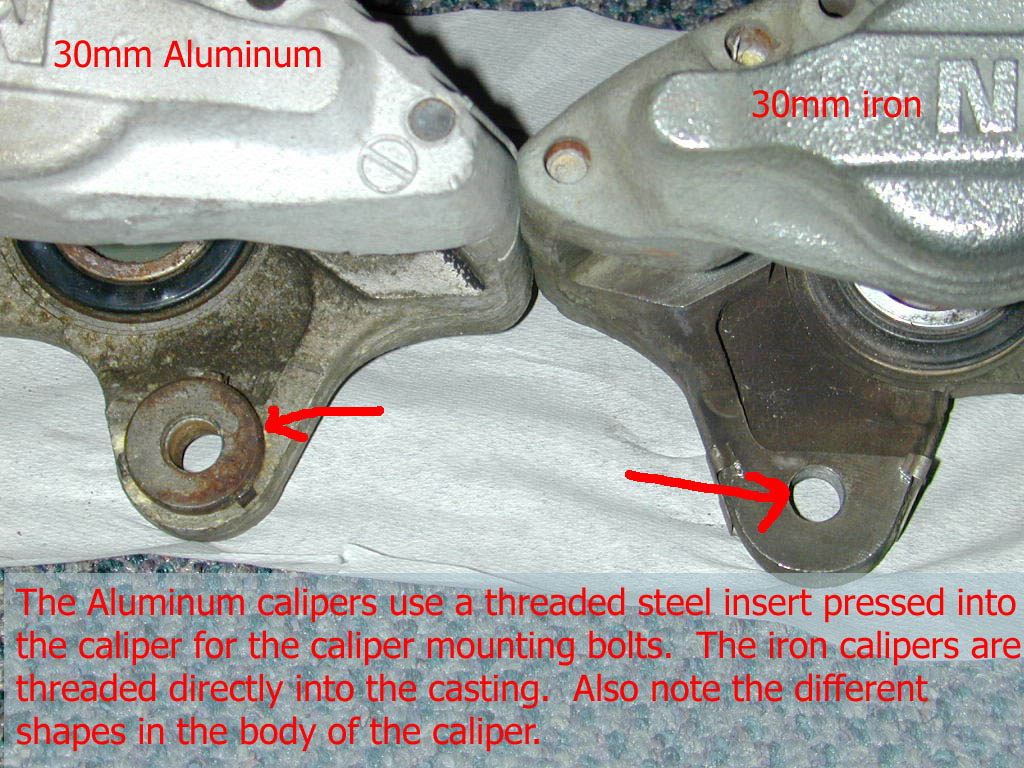
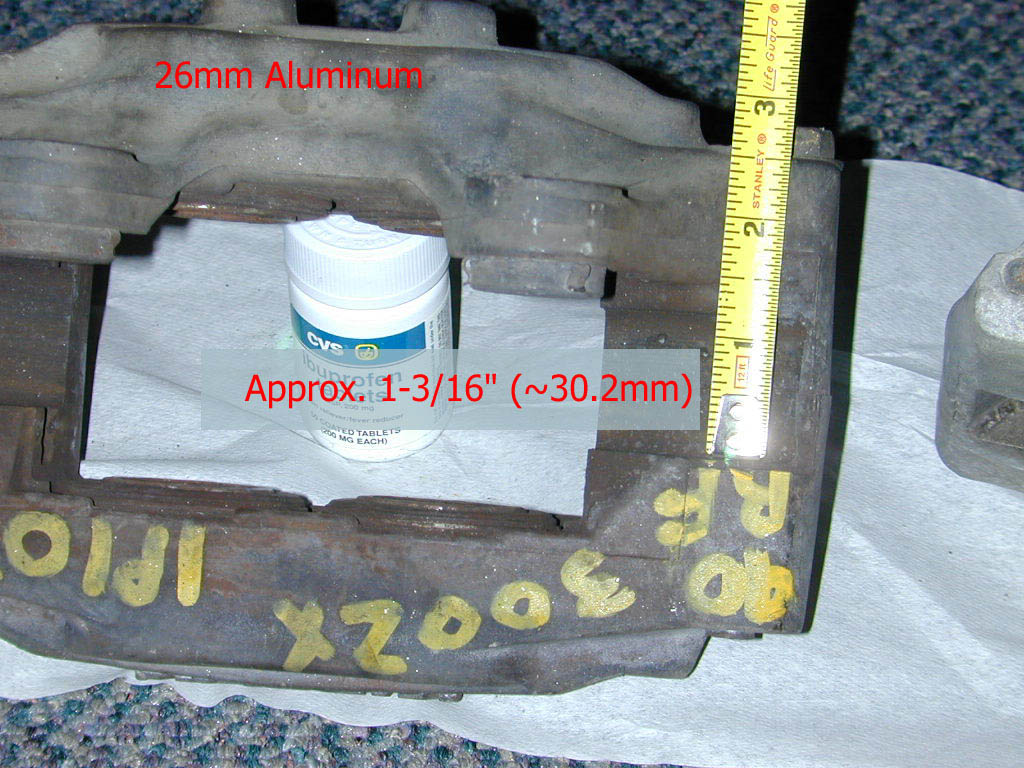
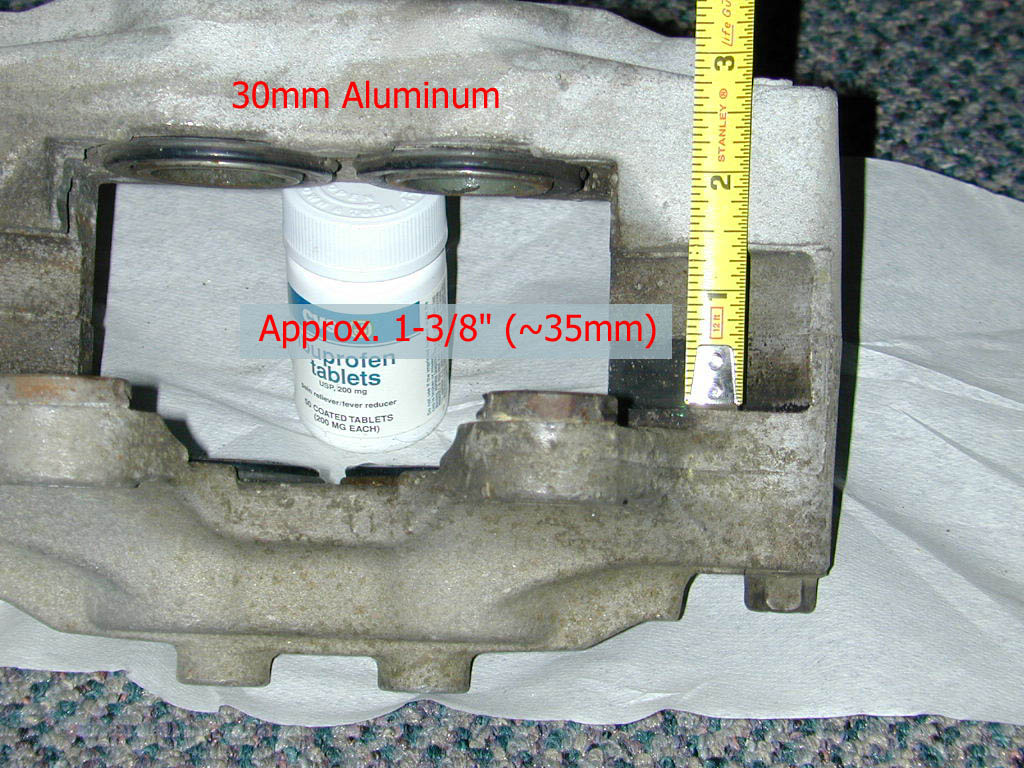
Before you go out to buy parts, you need to decide which front calipers you would like to have, or which calipers you may already
have. Here is information and pictures regarding the difference between calipers prepared by Asad Aboobaker:
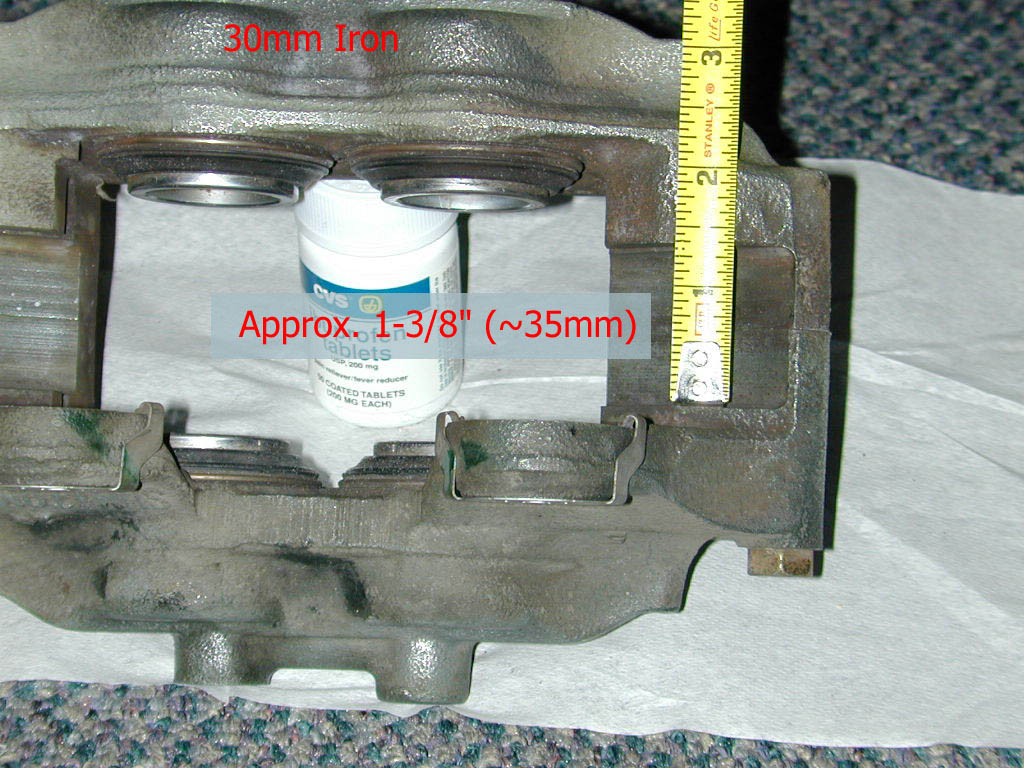
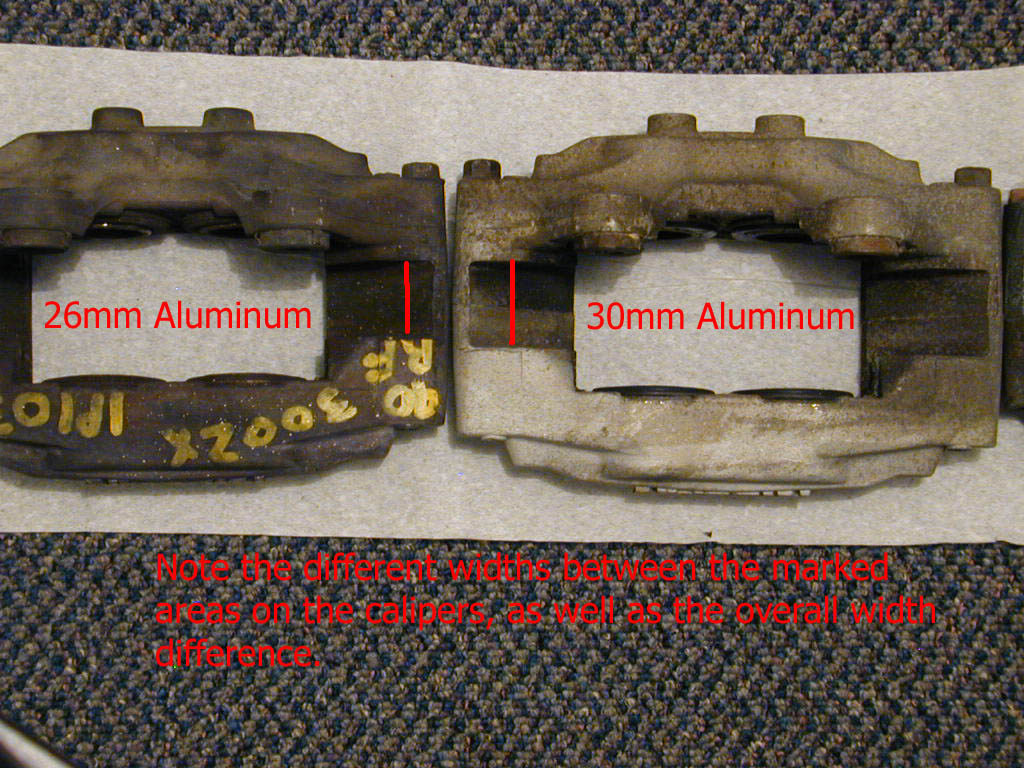
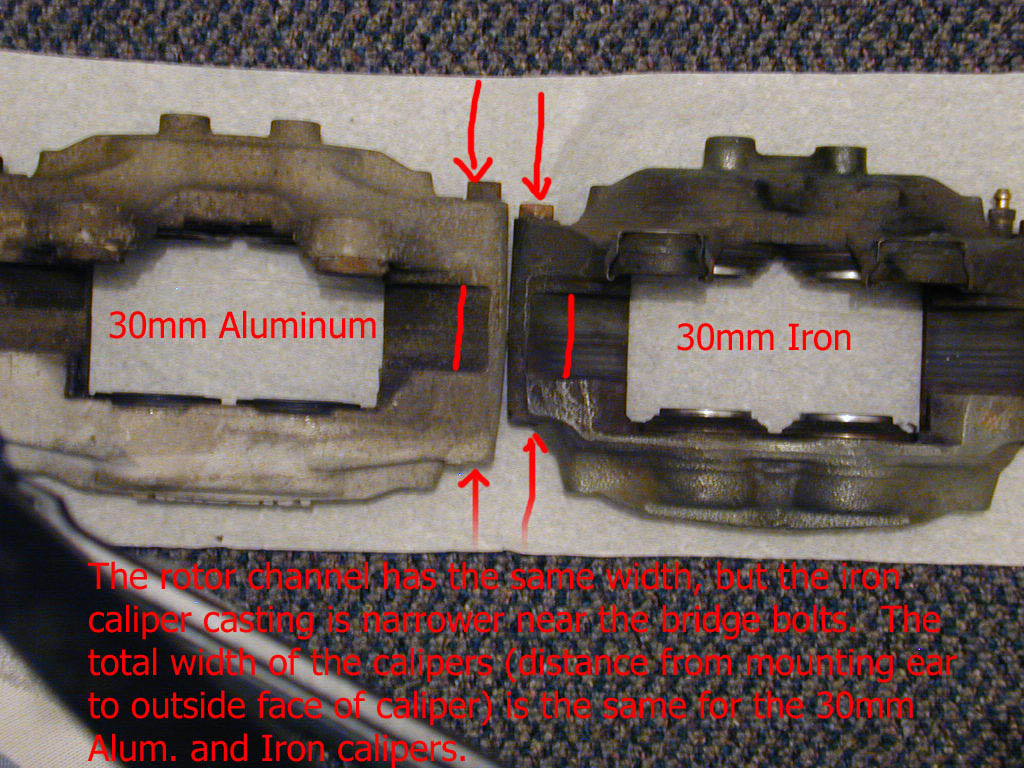
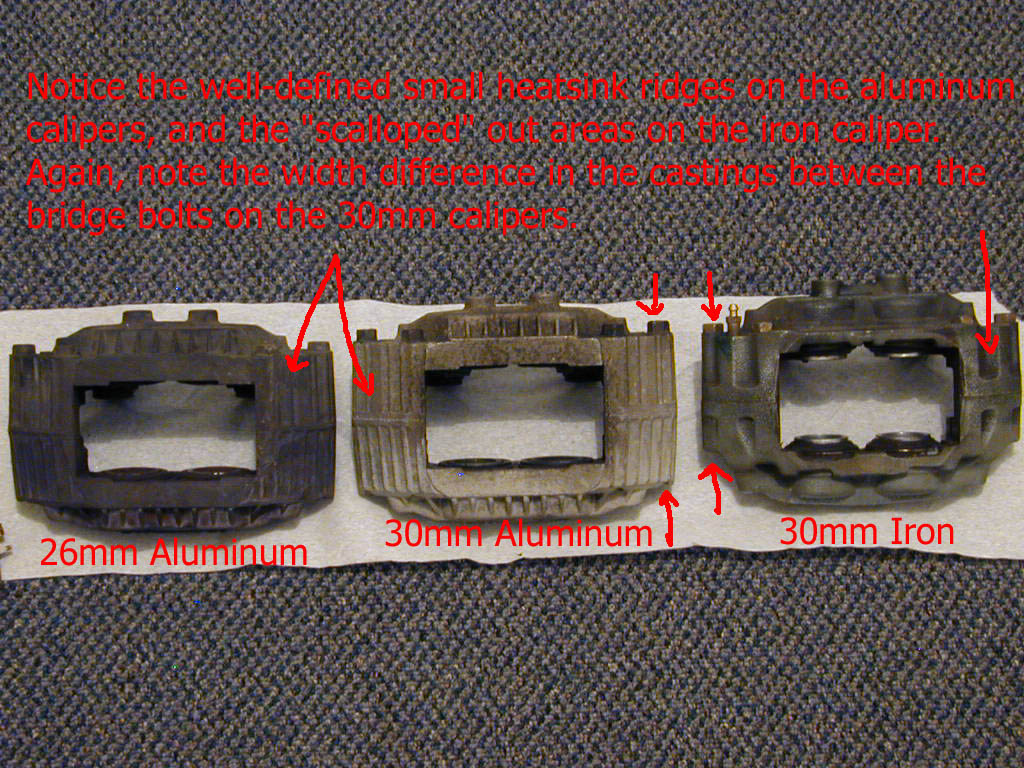
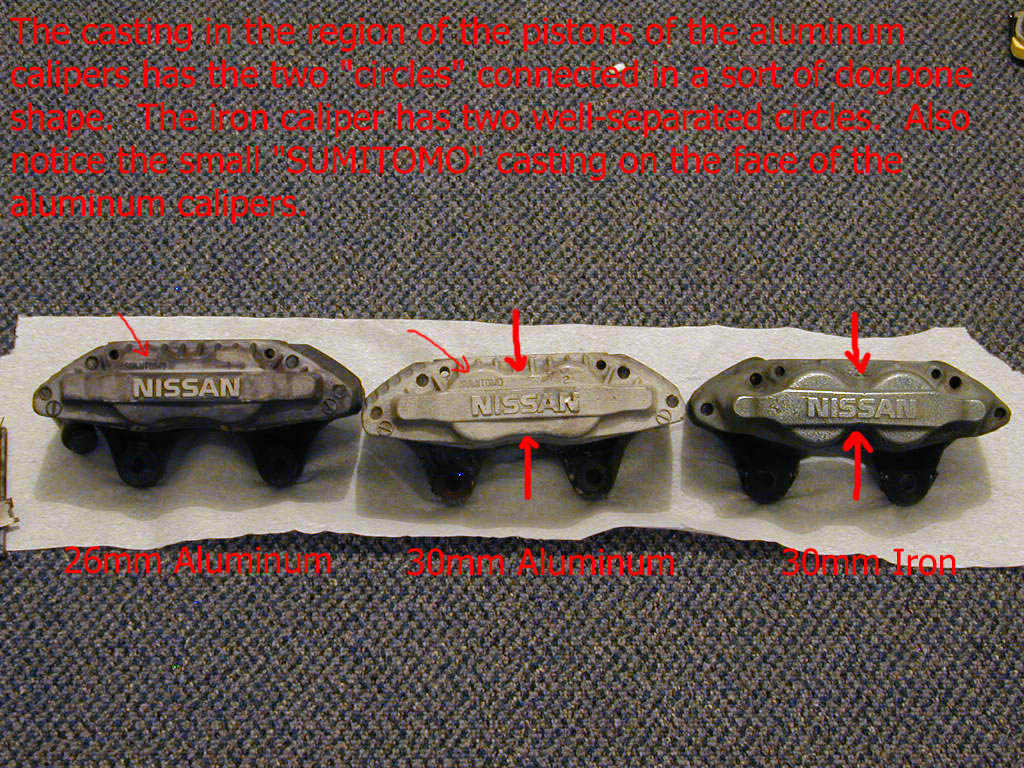
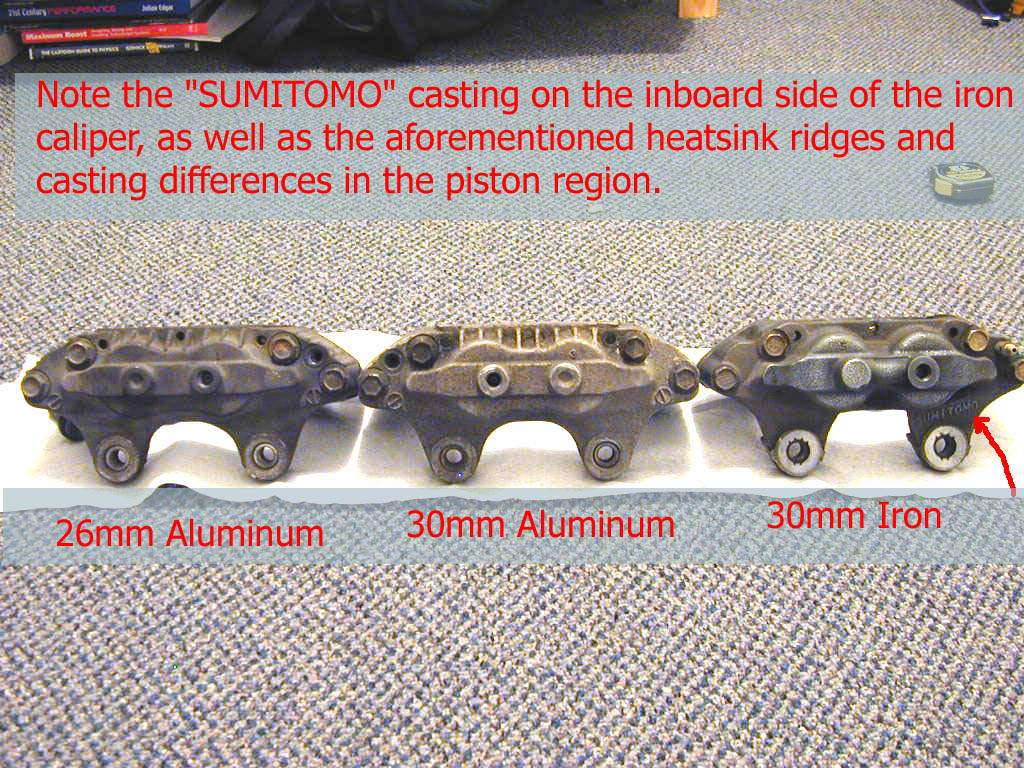
The following is a comparison of some different Z32 300ZX brake calipers. The “26mm Aluminum” calipers were used ONLY on 1990 non-turbos. They used a 280mm x 26mm rotor. The “30mm Aluminum” calipers were used on 1990 Twin-turbos and ALL 1991-1992.5 300ZX’s (both turbo and non-turbo alike). They used a 280mm x 30mm rotor. The “30mm Iron” calipers were used on ALL 1992.5-1996 300ZX’s (both turbo and non-turbo alike). They also used the 280mm x 30mm rotor. Of course, the easiest way to tell aluminum from iron is to use a magnet, but I hope this helps some people trying to figure out what they’ve got/are getting if buying with just a picture for info.
Before you get started, you’ll need the following tools:
- Socket Set (you’ll need some big sockets too, 22mm, 32mm)
- Combination Wrenches (box wrench)
- 10mm flare nut wrench
- 12mm 1.25 pitch tap and die
- Bubble flair tool
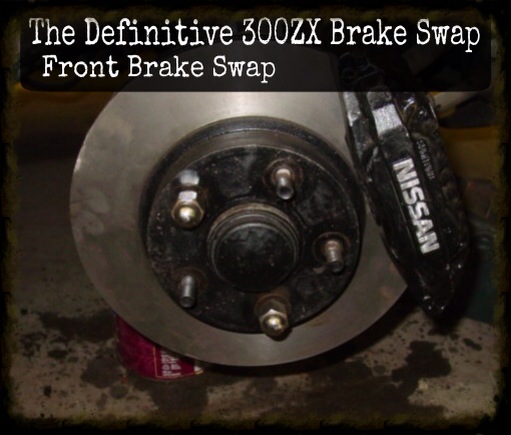
Front Brake Swap
Parts Necessary
- 300ZX or Skyline Rotors
- 300ZX or Skyline Calipers
- SPL parts or PDM racing SS brake lines
This part of the project is going to be the easiest.

Start removing the brake hardware by pulling the caliper. This is done by removing the two bolts on the back side with a 19mm socket. You will need to remove the brake line at this time. Disconnect the brake line at the chassis mounting point
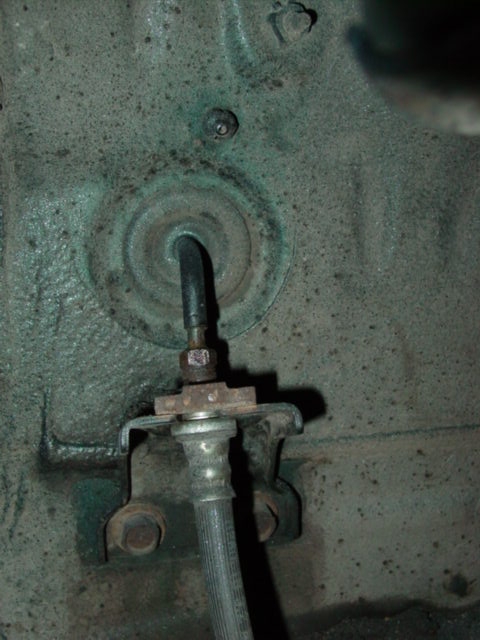
You will want to put a pan under the car to catch the oil that will be oozing out of the hard line on the chassis. Once you get the caliper out of the way, pull off the rotor. You may need to use a hammer to persuade the rotor to come off.
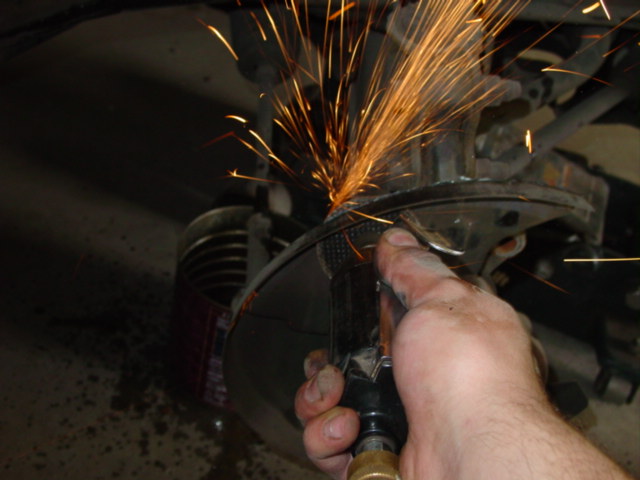
After you remove the original hardware, you will need to decide whether or not you want to keep the splash shield. The splash shield’s main purpose is to keep water away from the rotor. You don’t need this, so you can remove it. However, I chose to keep it. You will discover that the splash shield is too small for the new rotors. I removed the outer edge using an air cutting tool.
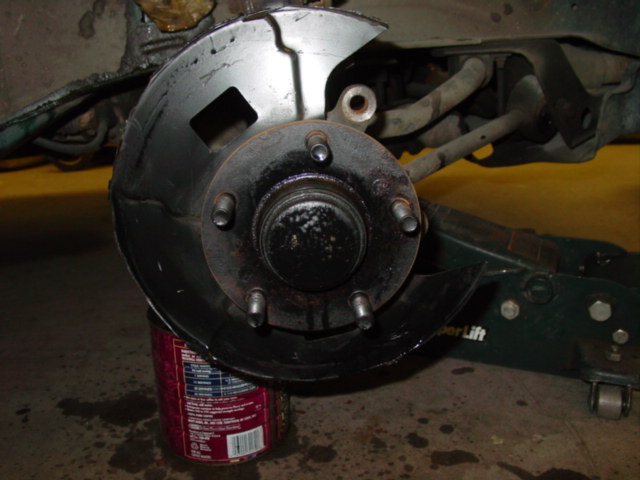
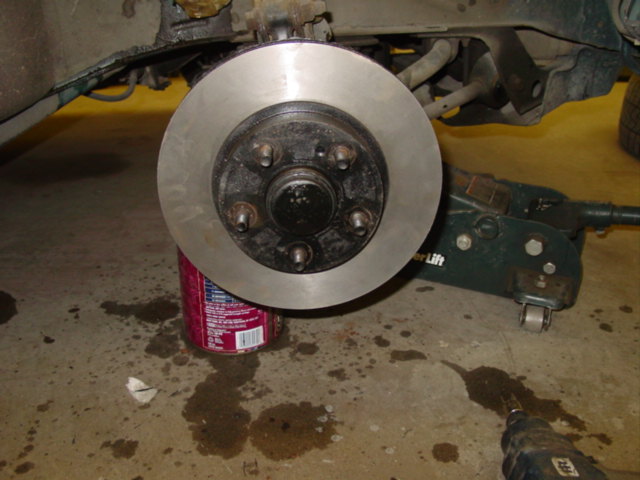
If you have removed the splash shield, slip on the new rotor. If you cut the outer edge, you will need to bend back the back plate to allow for proper clearance before you can go on with the rest of the installation.
Once the rotor is in place, you can install the calipers. If you look closely, you will see that both calipers are almost identical, except for the fact that he bleeder screw can be either on the top or on the bottom depending on which side you attach the caliper. Obviously, bleeding the brakes will be easier if the bleeder is on top. Arrange your calipers to make sure the bleeder is on top.
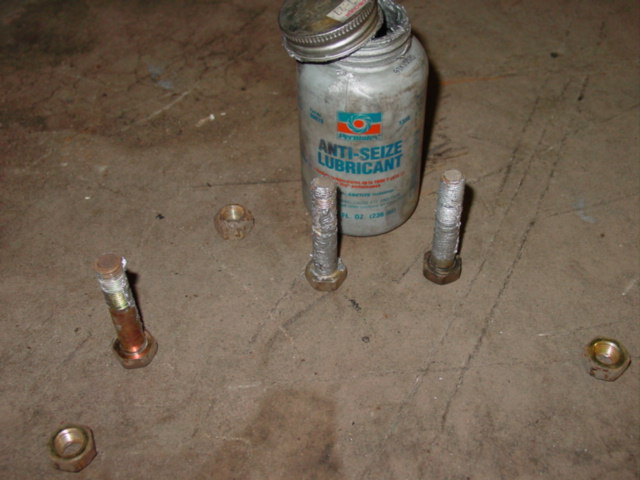
I would suggest running a tap through the threads. A 12mm 1.25pitch tap is what you need. Also, using the same sized die would help with cleaning the threads on the bolts. Nissans like to hold on to their caliper bolts! Make sure to use plenty of anti-seize on the bolts when you reinsert them.

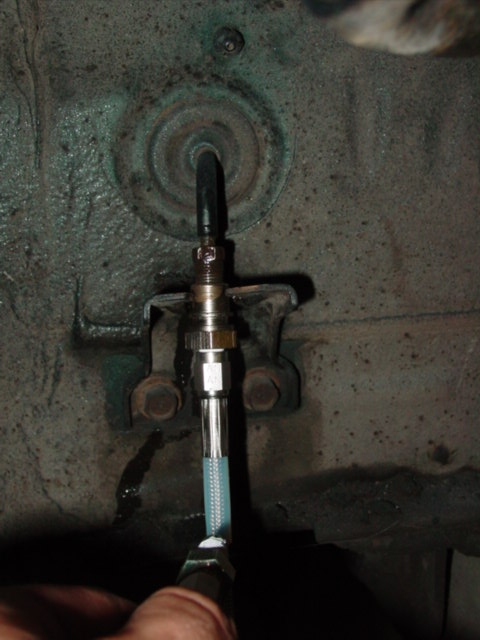
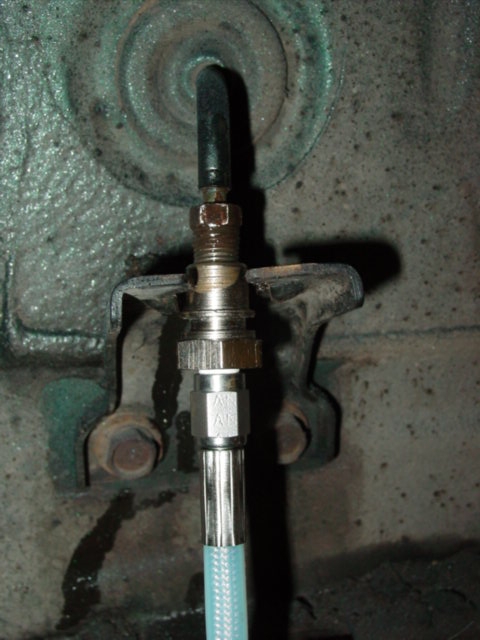
With the calipers in place, it’s time to attach the brake lines. You do not want to use the 240’s lines. People have used the stock banjo fitting with a shorter bolt, but it is not the right fitting for the 300ZX caliper. The 300ZX caliper does not have the tabs to hold the banjo fitting in place. Without the tabs, the banjo fitting can spin and loosen the bolt. I was able to get the 300ZX’s stock lines and installed them for the sake of illustration. Note the bleeder location.
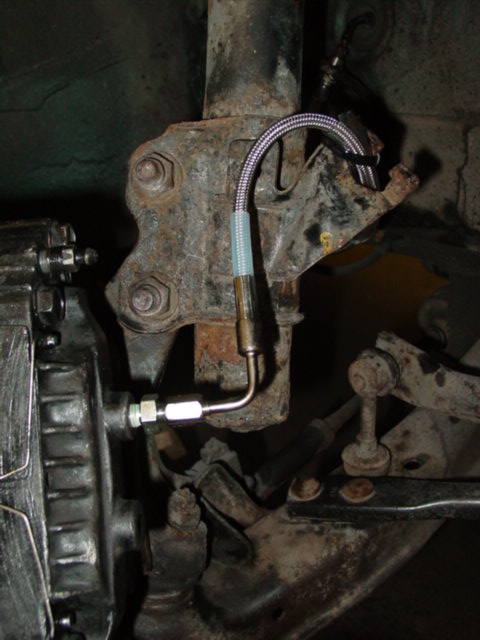
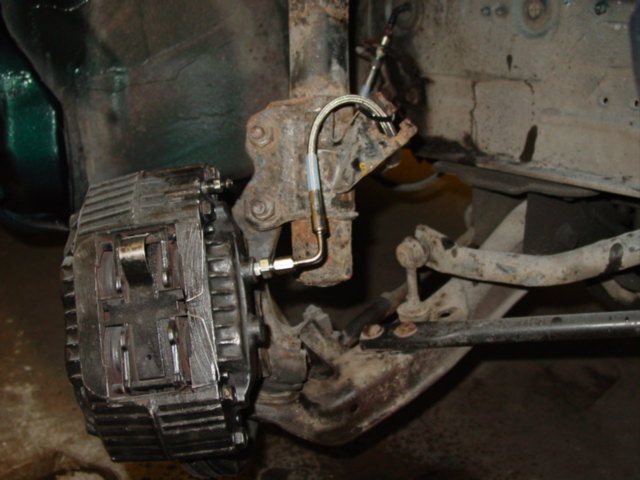
Using the 300ZX lines is a nice way to save some money, but I wanted to go with stainless steel lines. PDM offers stainless steel lines that will make the conversion easier and more effective than standard rubber lines. Installing either line is as simple as attaching one end to the caliper and the other to the hard line on the chassis. See pics below.

If you are only installing the front brakes, then bleed the brakes using your favorite bleeding method. If not, continue with the rear swap process.
Rear Brake Swap

The rear brake swap is not impossible, but it can be difficult. I wouldn’t try it unless you have some decent experience under your belt. The reason for this “disclaimer” is that it requires nearly the complete disassembly of the rear suspension. Some believe that this swap isn’t necessary to complete an effective brake upgrade on the 240, but I wanted to go all out as well as have a complete swap to write this article!
Parts Necessary
- non-turbo Z32 e-brake/splash shield setup
- non-turbo Z32 or S14 hubs if doing 5-lug swap
- calipers
- rotors
- R33 skyline GT-S e-brake cables or my crazy splice swap here
- SPL Parts or PDM Racing SS brake lines
Some people have been able to utilize the aluminum 300ZX upright, but it requires shocks with the correct lower mount. (SCC used JIC’s shocks with the aluminum uprights)
I’ve talked to many people regarding turbo vs non-turbo rear parts. Calipers and rotors are the same, however the e-brake hardware and hubs are different. You will need to find non turbo hardware.
Start by removing the calipers and the brake lines. For now, disconnect the e-brake hardware and move it aside. Then remove the rotor.
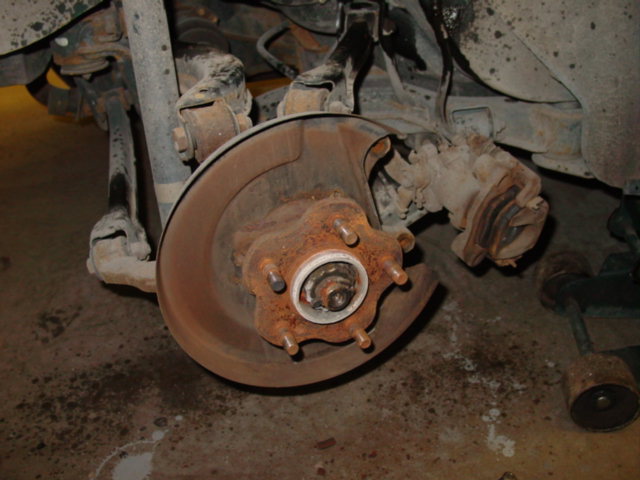
Remove all of the control arm bolts

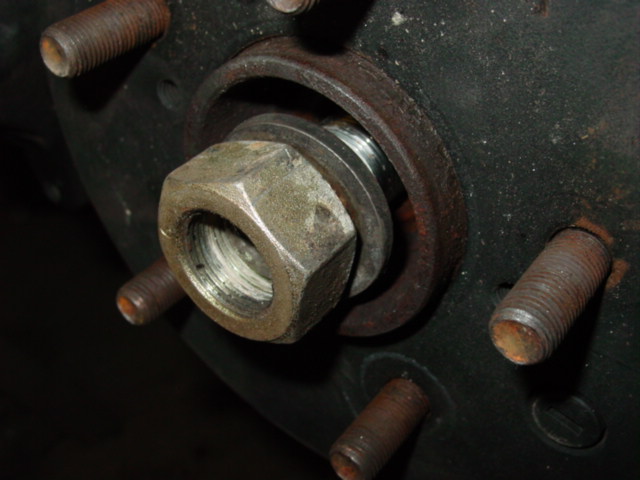
You will need to pull out the axles. Do so by removing the big nut on the end and sliding out the axle.
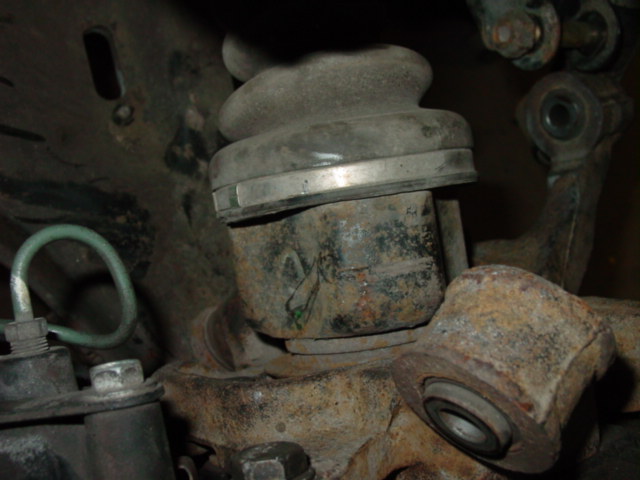
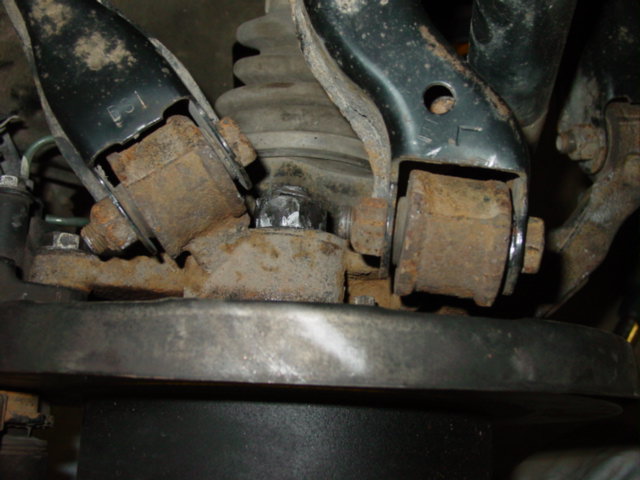
At this point, you need to remove the nut that holds the lower ball joint. Do this with a 22mm socket. You may need a ball joint popping tool to remove the knuckle.
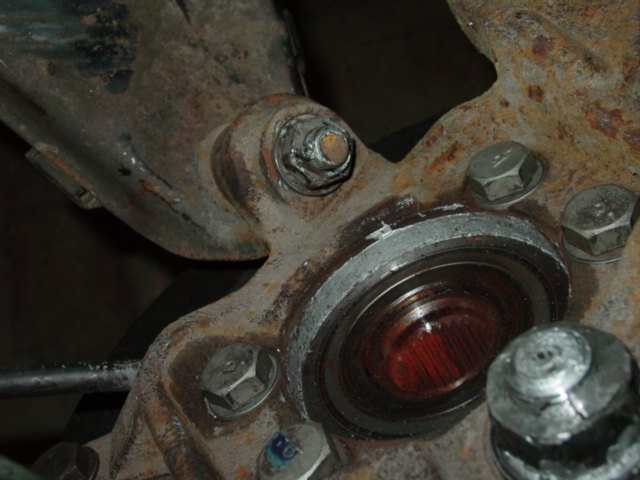
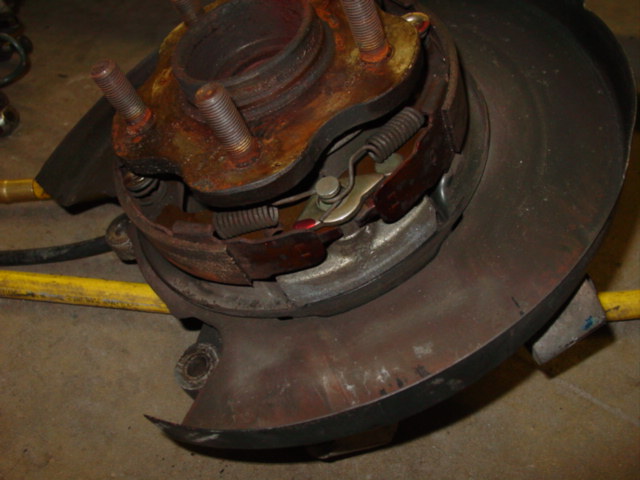
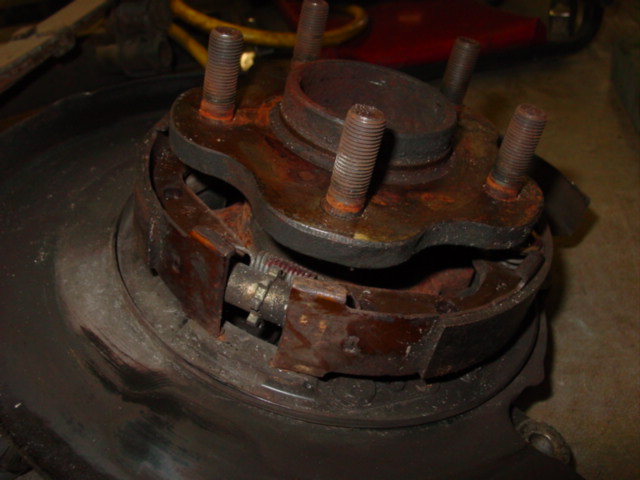
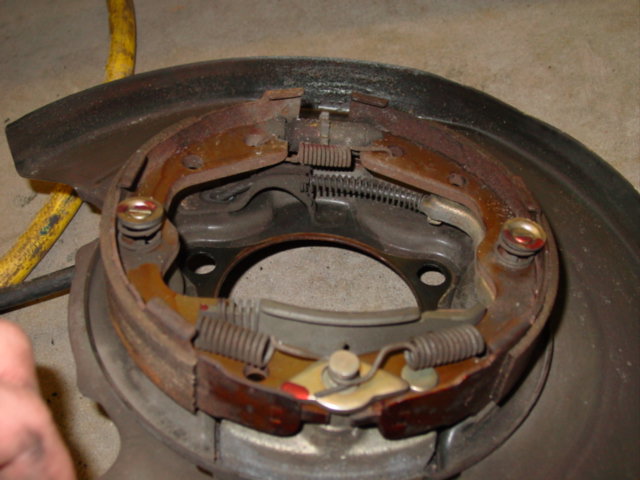
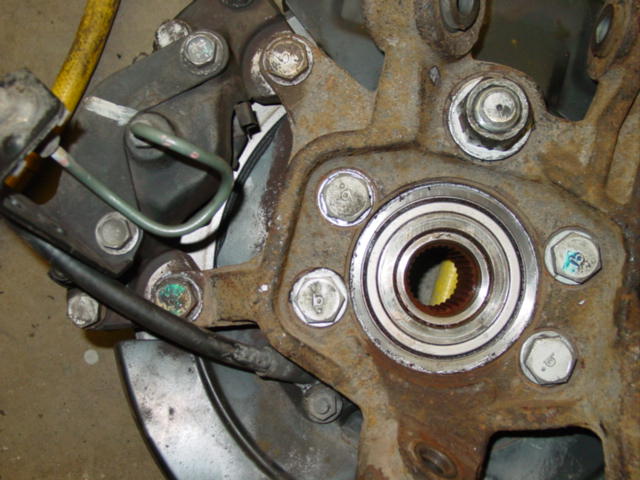
Once you have the knuckle out, you will need to change the backing plate. This is accomplished by removing the hub/bearing assembly.

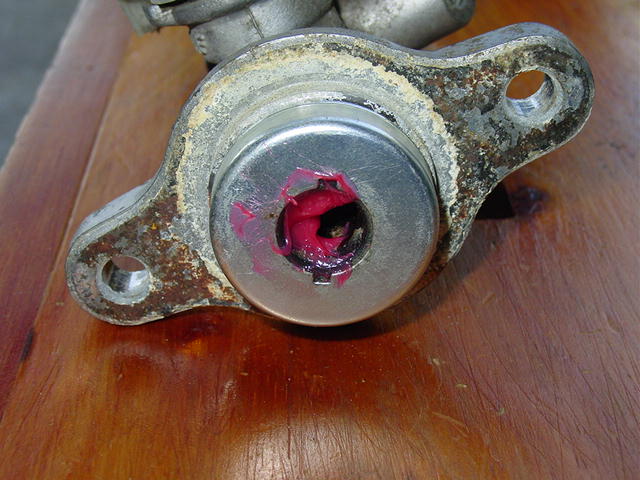
As you will see, there is a large hole in the original knuckle. This hole is used by the e-brake/backing plate hardware. The chances of this working smoothly are pretty slim. The hole has
probably corroded over time and needs to be cleaned. A dremel tool with a grinding bit should do the trick. If this doesn’t work then you can use the big nut and an impact gun to act as a press. Make sure the holes are lined up properly. If you get them off center, the rest of the hardware will not bolt on properly and it’s very difficult to pull apart (I wouldn’t know about this….<cough>) Alignment is much easier if you place the hub/bearing assembly in the middle and slowly thread it’s bolts in while you tighten the large nut for the e-brake hardware. Make sure all of the nuts and bolts are tight.


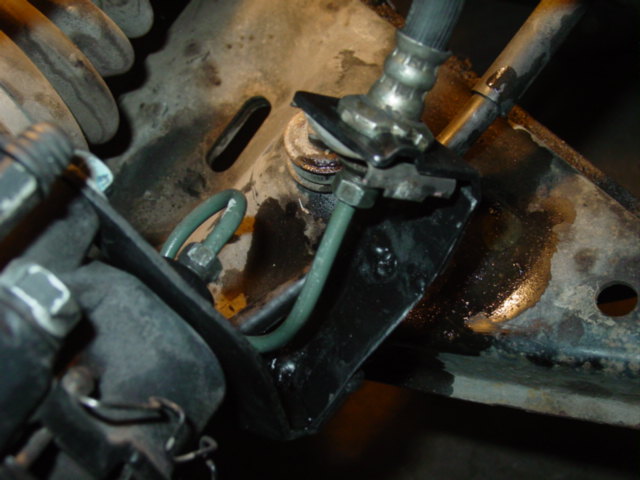
Although it is possible to install later, the e-brake lines of your choice should be attached to the new backing plate you just installed. This will create problems while manipulating the assembly, but not for too long. You can wait to install the caliper hardware until after the knuckle is on the car, or you can do it before hand.
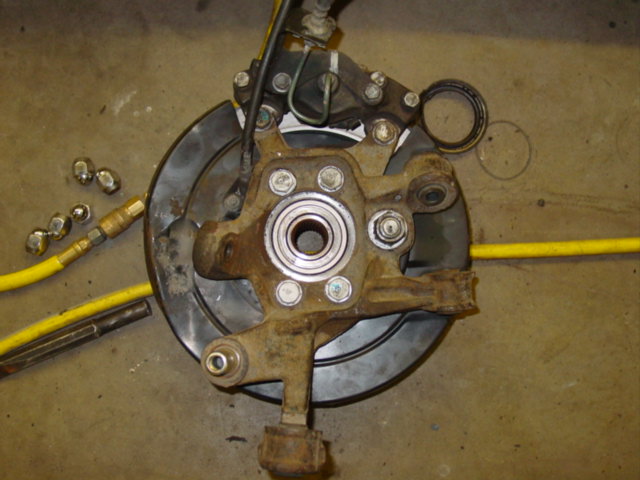
Begin reinstalling the knuckle. First, you will need to pass the e-brake cable through the sub frame (if already installed). Let the cable rest on the sub frame for now. Next, attach the lower ball joint, slide the axel back into the bearing, and reattach the rest of the control arms. With everything in, you can install the rotors and calipers, if you haven’t already done so. I would strongly suggest using some anti-seize on every bolt that you replace. It will make it easier to take apart in the future
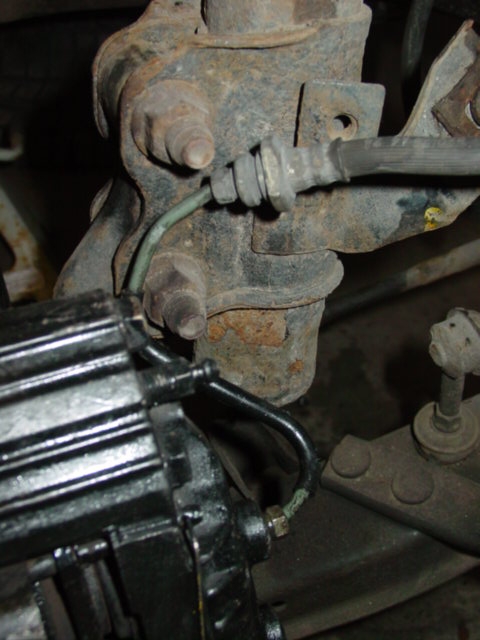
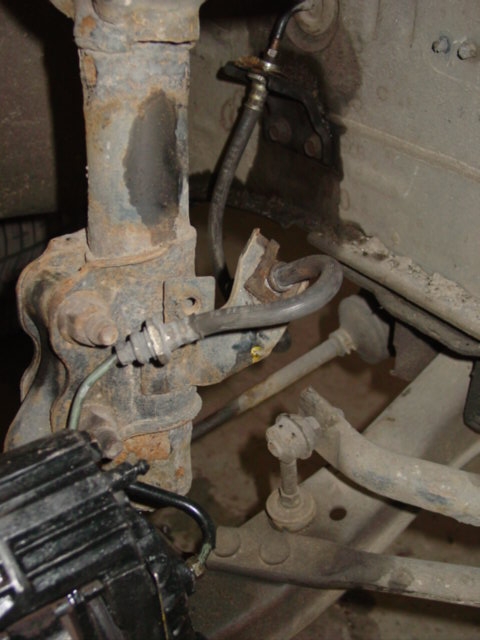
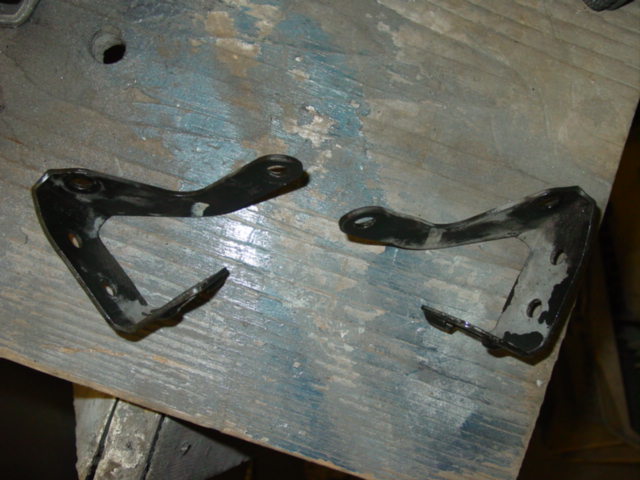
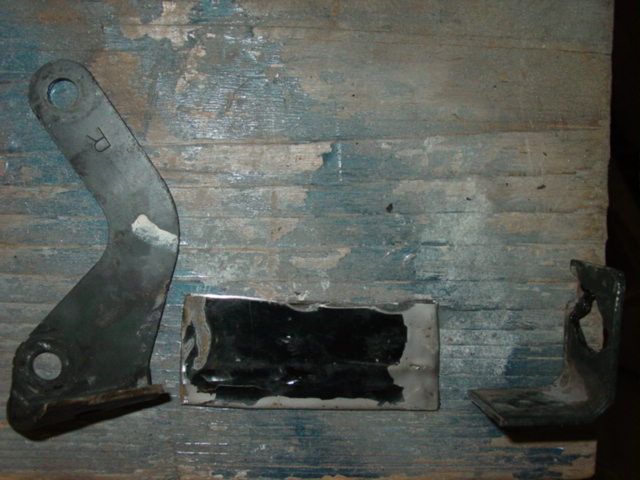
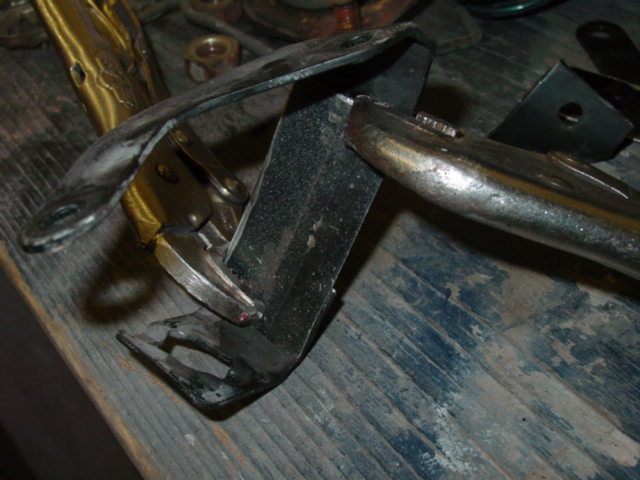
Since I had the stock 300ZX brake lines, I decided to make them work in this application. The calipers need the same fittings as those in the front. In order to utilize the stock hardware, it is
necessary to modify the bracket that holds the brake line. I cut the bracket in half using a cutting wheel and then welded a 3″ section of sheet metal to each end. This gives you the extra 2″ necessary to allow the brake line enough slack to reach the hard line on the chassis.

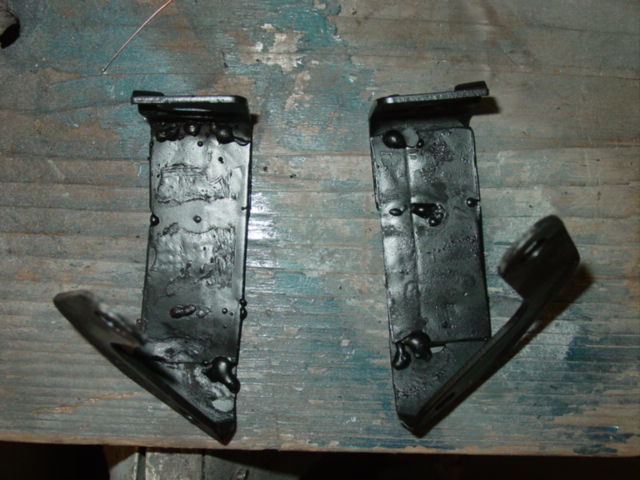
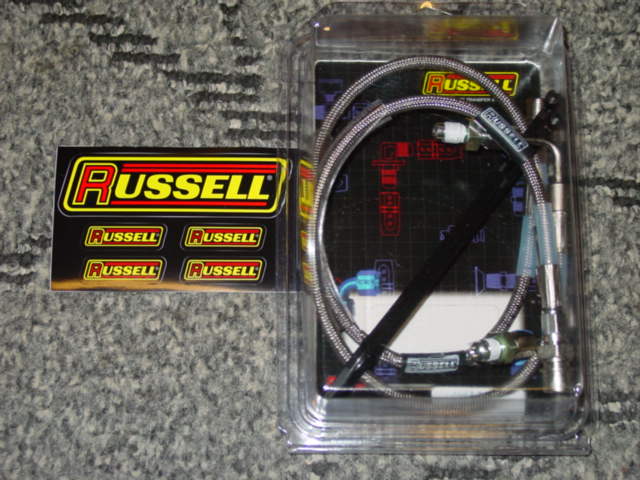
Ideal, alternative setup:
PDM racing and SPL Parts offers rear conversion lines that will be much easier to install and require no fabrication!
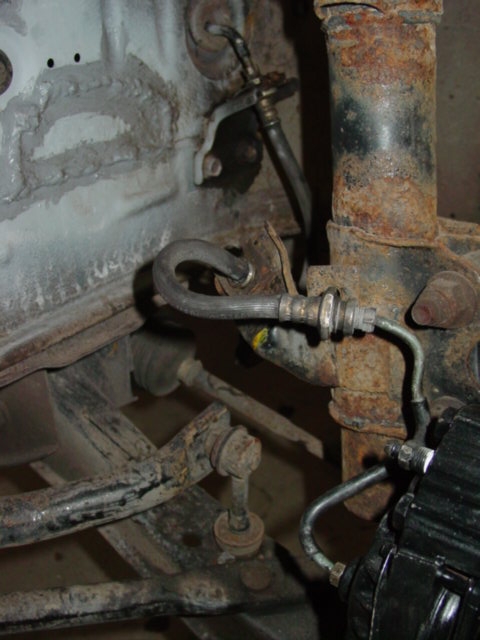
The completed rear setup:


Master Cylinder Upgrade
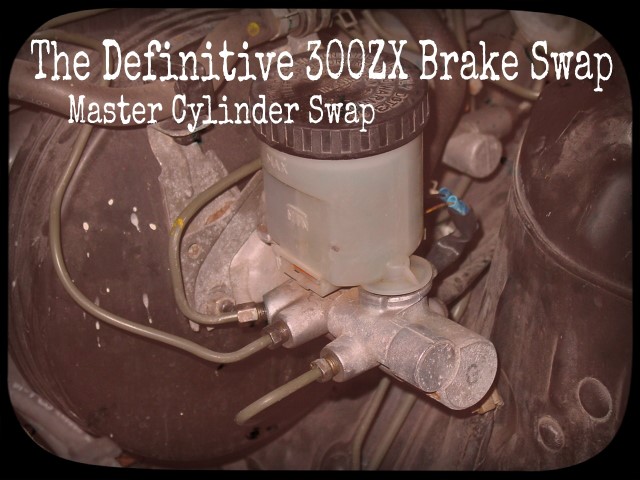
One of the more important aspects of the swap is upgrading the Master Cylinder. The pedal feel on the 240SX is weak with the stock brakes, but feels even worse with 12 pistons worth of brakes. In order to do the swap, all you will need is the master cylinder from a 300ZX. The proportioning between a turbo 300ZX and NA 300ZX is the same. If there is any concern, make sure to pick up the master cylinder that works with the calipers you are using. The brake booster is not necessary although it is a worthy addition.
There are a few different options from which to choose. Check out the parts listing page for the details. The 17/16″ MC with a manual trans equipped 240 brake booster can be a bit stiff. The manual trans equipped 240 has a smaller stock MC than an automatic equipped 240SX. The automatic equipped 240SX brake booster offers more assistance. Using the automatic’s booster along with either the 1″ or 17/16″ MC will offer the same advantages of a larger MC but with an easier pedal.
Another options is to swap the 300ZX booster along with the master cylinder. See the end of this section for details.
One of the questions that always comes up is the proportioning of the 300ZX MC vs the 240’s MC and the effect of using the 300ZX MC with stock 240 rear brakes. Below are a few excerpts from FreshAlloy members:
The way OE proportioning valves work is that the front and rear line pressures go up by the same amount until the pressure reaches the so-called “split point”. At this point, the rear pressure increases at a lower rate than the front pressure (with the proportionality factor given by the reducing ratio).
Now the reducing ratio for the Z32 and 240sx MC’s are the same (0.4), so the only difference is the split point. The Z32’s
split point is lower than the 240sx, so above the split point, the Z32’s rear line pressure will always be lower than that of the 240sx.
What this is saying, is that there is no way the rear brakes are going to lock up first by swapping in a 300ZX MC while using Z32 front brakes and stock 240 brakes in the rear.
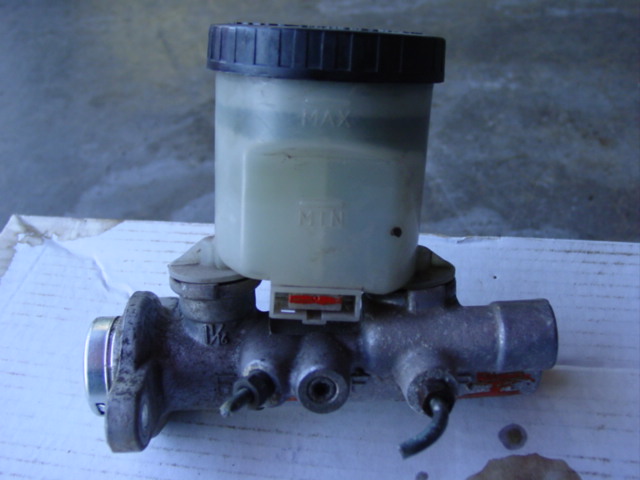
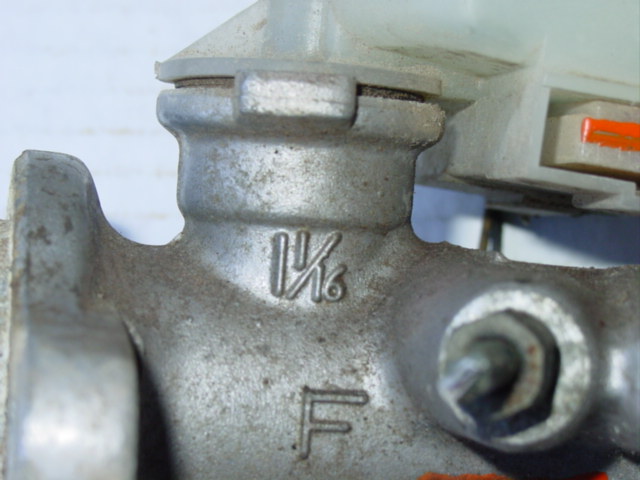
All that said, I chose the 1 1/16″ MC for my swap.
Parts Necessary
- Master Cylinder
- Brake Booster (optional, read below)
- Brake Fluid
Tools Necessary
- Jack and Jack Stands
- Metric sockets and wrenches
- 10 mm Metric Flare Nut Wrench (optional but useful)
- Allen Drives
- Cutting tool (Dremel, air cutoff, etc)
- Hammers and a small punch
- Flaring tool
Please note, there are multiple combinations of parts that will give you the results for which you are looking. A brake booster from either a 300ZX or an automatic equipped 240SX will give more assist requiring less pedal effort. I have received emails from people that complained about the pedal effort being too high when using the 17/16″ MC. Using the smaller MC’s or bigger boosters will help reduce pedal effort while maintaining the better pedal feel of the upgrade.
Also, you may want to consider using a 15/16″ MC (if you had the 7/8″) for a mild improvement with no modifications necessary.
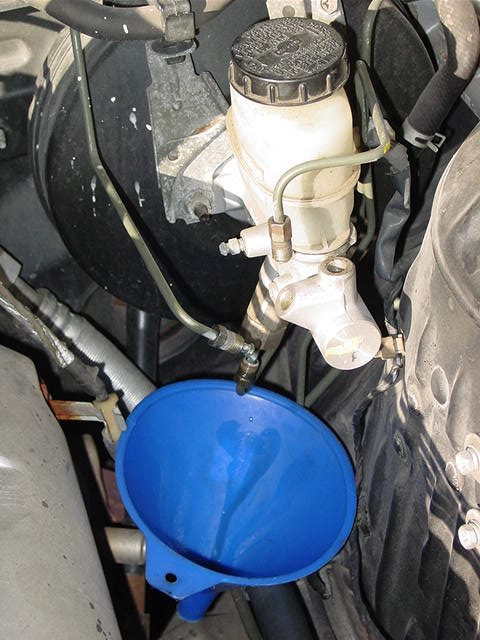
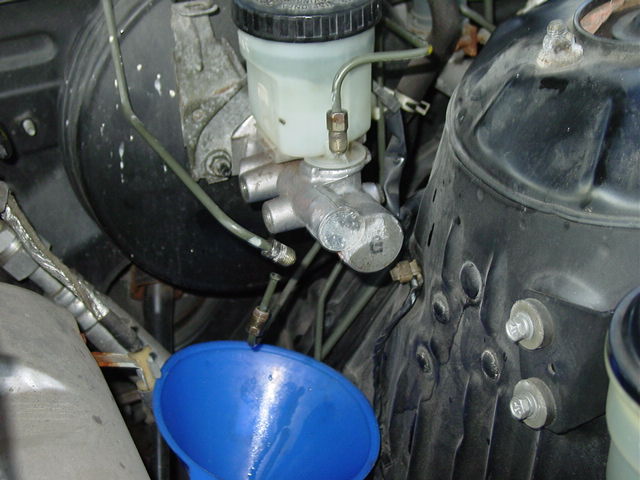
Take a moment and set up a funnel and drain pan to allow the master cylinder to drain. Remove the brake lines and allow the master cylinder to drain. Avoid spilling brake fluid on paint as it is highly corrosive. You may want to mark the lines front and rear to avoid any confusion down the road.
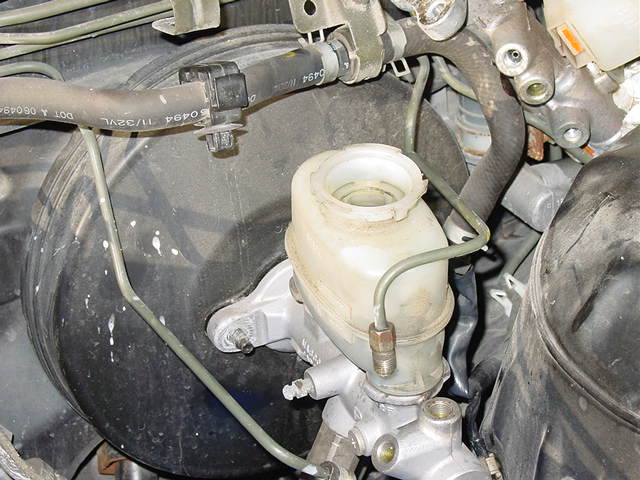
Remove the two bolts that attach the master cylinder to the booster.
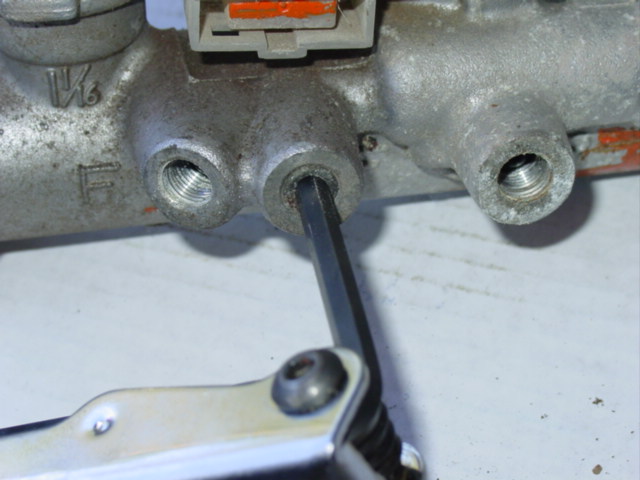
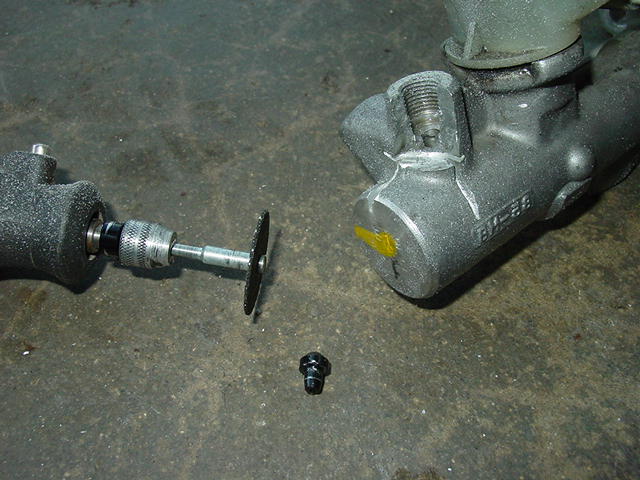
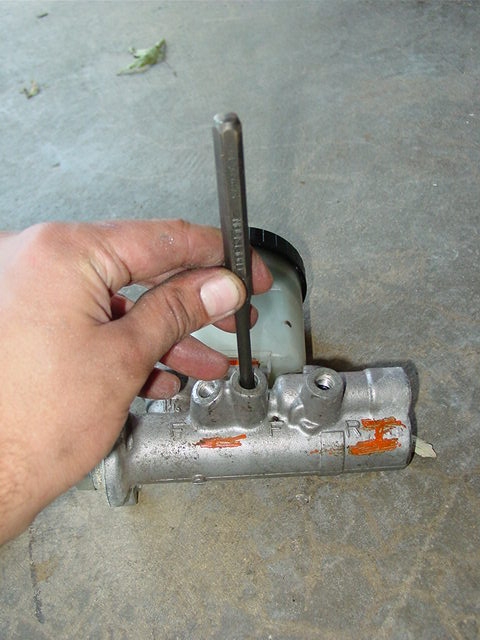
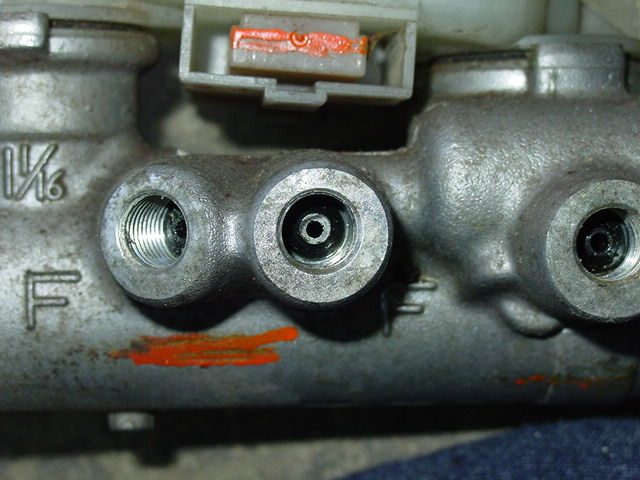
Regardless of whether or not you have ABS, the 300ZX master cylinder will work. If you do not have ABS, you will need to remove the plug from the second front brake line port, illustrated below. If you have ABS, you do not have to remove the plug. In that case, skip to the master cylinder installation. Typically, a standard allen tool will be more than adequate to remove the plug. In some cases, it appears that remanufactured master cylinders have a 5 sided allen plug. You will need to find a way to remove the plug possibly using an undersized 6-sided allen tool.
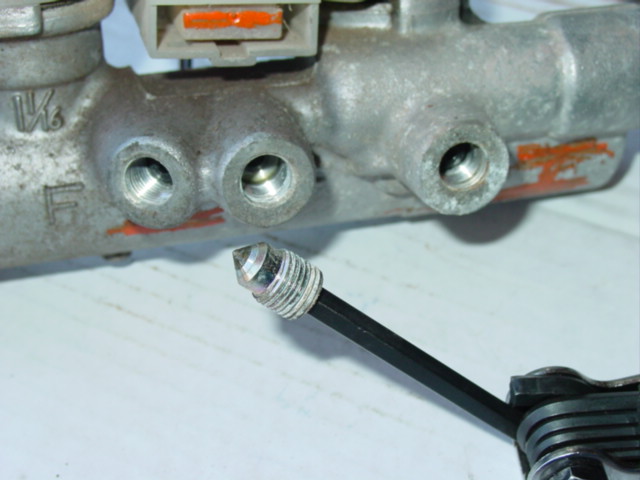
You will notice that the plugged hole is missing the proper flair fitting. You have two options to resolve this issue, the first is a rather simple fix. You will need to find a bubble flair tool to put a flair in the line that will work without the missing fitting.
The second option is to remove a fitting from the stock 240 MC and use it in the new MC. The fittings are pressed into the master cylinder and cannot be removed without destroyed the 240’s master cylinder. Use a cutting wheel to cut out the small fitting. Be careful not to cut into the fitting.
Take the fitting that you just pulled from the old master cylinder and carefully insert it into the 300ZX master cylinder. Using a small punch, tap the fitting into the master cylinder. You may need to use sand paper to grind down the fitting to make it fit.

With the new fitting in place, it’s time to install the new master cylinder. Before you install the master cylinder, take a moment to flush the reservoir with brake cleaner. This will not be necessary with a new master cylinder. Place some grease in the hole of the master cylinder and install it on the 240’s booster.
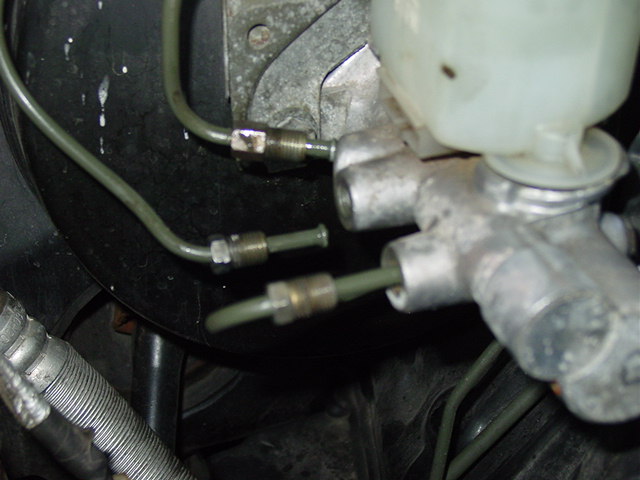
With the 300ZX master cylinder in place on S14’s, you will notice that the brake lines are no where near the right locations. S13 brake lines will line up without any modifications. (S14 pictured)


You can carefully bend the lines to meet with the new locations (again, with ABS, you will only be using a front and rear line) Make sure you do not kink the lines.
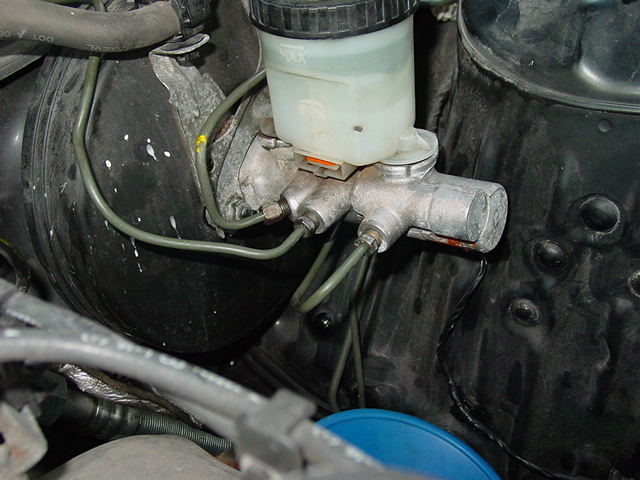
With the lines bent, it’s time to thread them into the master cylinder.
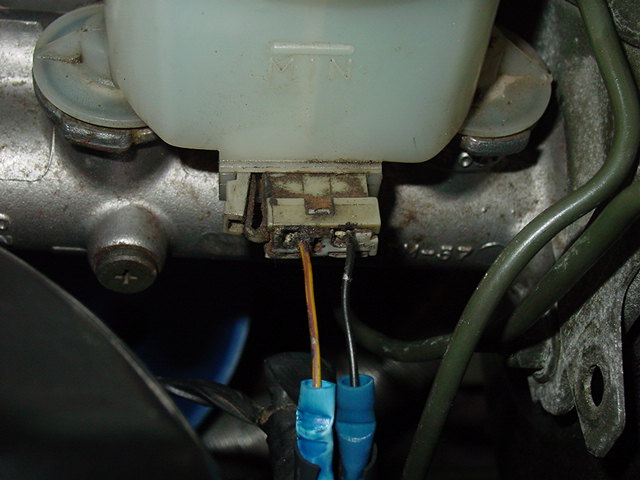
With the lines installed, you need to take care of one last modification. You will need to attach the brake fluid level wiring to the new master cylinder. I salvaged the plug that was used on my master cylinder. You can also use standard female blade connectors to do the same task. I spliced the new plug onto the existing wiring.

Before adding any fluid, make sure that the brake light on the dash stays lit when the ignition is turned on. After adding fluid, make sure the light turns off.
If the master cylinder is the only modification you are doing, you will need to thoroughly bleed the brakes. Start by gravity bleeding the entire system, and then use your favorite method of bleeding to finish the job.
FYI: Gravity bleeding is the process of opening all of the bleeders and letting the fluid drain out. This is especially helpful when you’ve installed a new master cylinder.


Note: Doriftomodachi from Zilvia.net discovered that is possible to swap the fluid reservoir from the original master cylinder. Swapping the reservoir allows you to use the original fluid level wiring without having to splice wiring.
If you have ABS, you do not have to remove the plug. In that case, skip to the master cylinder installation.
Emergency Brake Cables
After years of stalling on this section, I’ve gathered all of my pictures and notes and assembled my best efforts. I thought this topic needed it’s own section:
Click on the picture to get to the page

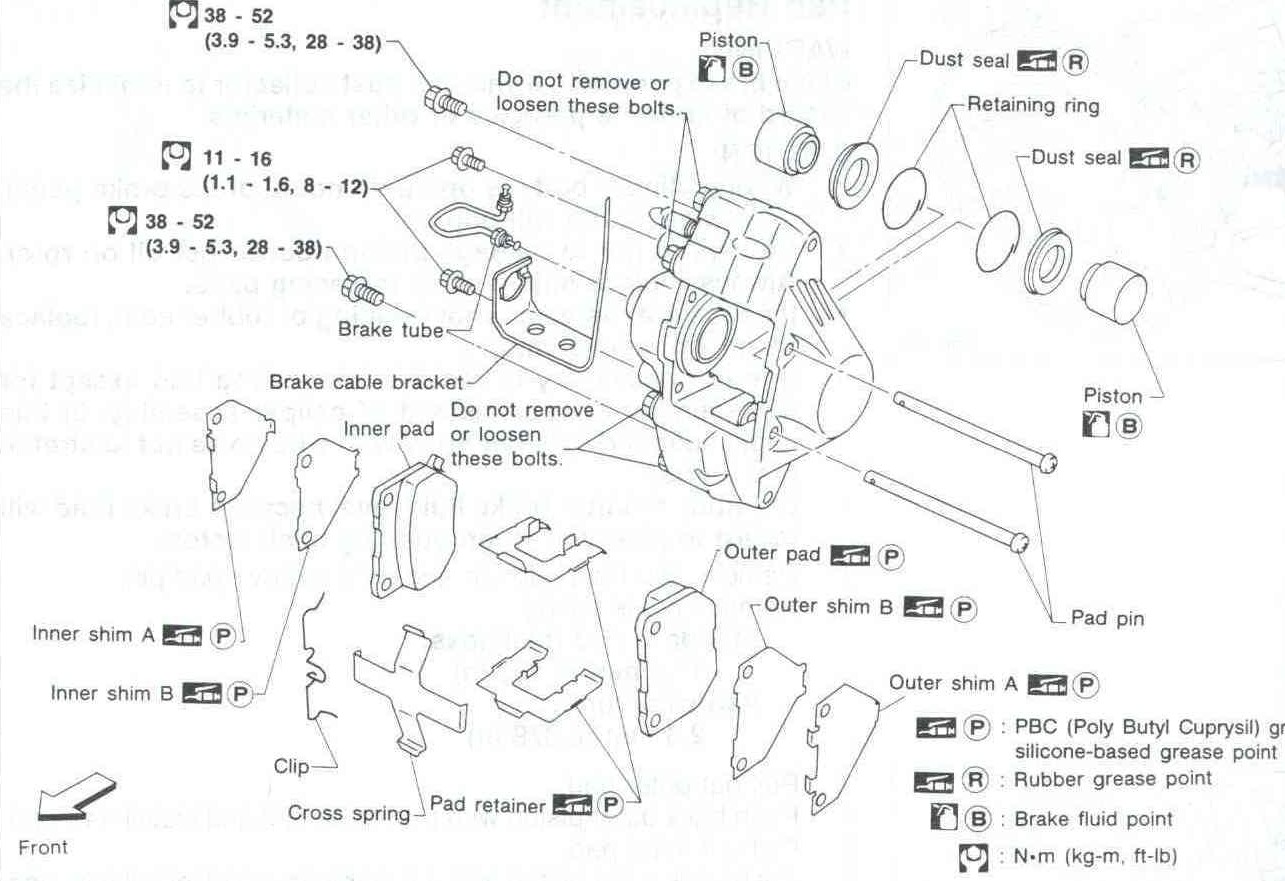
Brake Pad Replacement
Now that you have brand new calipers, you need to know how to change the pads. Since the caliper is fixed, the pads are mounted differently. I’ve scanned a few service manual pages from the 300ZX FSM to help you with pad replacement.
Front:

Rear:
Rear e-Brake Drum:

Driving Impression
Since I did not have the master cylinder when I swapped the calipers and rotors, I had the opportunity to drive the 240 around with the stock master cylinder. The brake pedal was soggy prior to the brake swap and worse with 3 times as many caliper pistons. Although the pedal was soggy, it was immediately apparent that the brakes were more effective. Braking effort was improved as well as fade resistance. After installing the 300ZX master cylinder, I fell in love with my 240 all over again! The pedal feel is better than any car I have ever felt. The proportioning of the brakes with the new master cylinder is absolutely perfect. Setup for trail braking and you’ll have it. Panic brake and the car stops true. I’m absolutely impressed with the brakes.
Good luck, drive safely, and have fun!
Alternatives
One good alternative to the 300zx brake swap is the hardware found on the Infinity Q45. The equipment will mount just as the 300zx’s units, but will offer more wheel clearance. The Q45 front brakes are the same diameter as the 300ZX rotors but only come in a 28mm size. The main advantage to the Q45’s equipment, is that it uses a 2 piston slider caliper. The pistons are located on the back side of the caliper allowing the front side to offer nearly the same wheel clearance as the 240’s stock brakes.
For those interested in avoiding the purchase of new wheels or wheel spacers, the Q45 calipers are a noteworthy option to consider. At this time, I’m not familiar with the years of production that provide the parts for the swap.
5-Lug Conversion
In the event that you want to convert your S13, or S14 base model 240 to 5-lug hubs, you’ll need to know a few things.
Front conversion:
Converting S14 240’s to 5 lug is as simple as locating 5-lug hubs from an SE 240, or buying new components from Nissan.
The conversion on S13’s is not as simple. If you want to follow the path of using all OE parts, you will need the S14 upright, along with the S14 ball joint. The ball joint is necessary for the reason that the shape of the S13 ball joint prevents it from working properly and creates a extremely unsafe vehicle to drive.
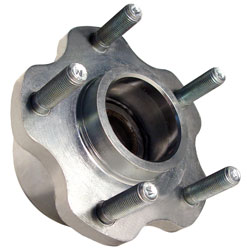
The alternative to doing all of this work, including trying to source out used components that are not damaged or worn is to use a 5-lug conversion hub. PDM Racing offers a few alternatives, one is pictured below.
Rear Conversion:
The rear conversion is much easier, in terms of parts combinations. Simply find a 5-lug hub from an S14 240, or a Z32 300ZX. The non-turbo hub is identical to the unit used in the S14. The 300ZX TT hubs are different and will not work in any case. I have learned that it is a good idea to try and source all of your parts from the same donor such as the hubs, e-brake back plate, bolts, etc. Although this is not a requirement, it will help.
You can use brand new OE parts, source out used components, or check out PDM 5-lug rear hubs.
![]()
List of Part Numbers
A couple of people need to be acknowledged for helping me with this list.
McGuirk from both Fresh Alloy and Zilvia as well as Chris Stout.
Front Calipers:
(Numbers listed as RH caliper / LH caliper respectively)
41001-30P00 / 41011-30P00 Manufacture date 2/89 – 7/90 (N/A Aluminum 26mm)
41001-40P00 / 41011-40P00 Manufacture date 7/89 – 7/90 (Twin Turbo Aluminum 30mm)
41001-40P00 / 41011-40P00 Manufacture date 7/90 – 9/91 (TT and N/A Aluminum 30mm)
41001-45P00 / 41011-45P00 Manufacture date 9/91 – 4/92 (TT and N/A Aluminum 30mm)
41001-37P00 / 41011-37P00 Manufacture date 4/92 – 8/92 (N/A Cast Iron 30mm)
41001-37P00 / 41011-37P00 Manufacture date 7/92 – 9/93 (TT Cast Iron 30mm)
41001-37P00 / 41011-37P00 Manufacture date 8/92 – 9/93 (N/A Cast Iron 30mm)
41001-37P01 / 41011-37P01 Manufacture date 9/93 + (TT and N/A Cast Iron 30mm)
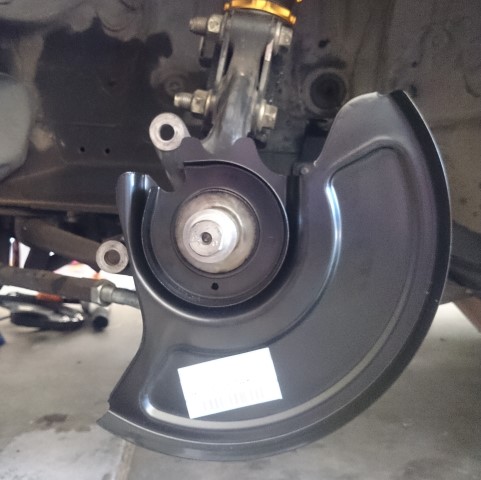
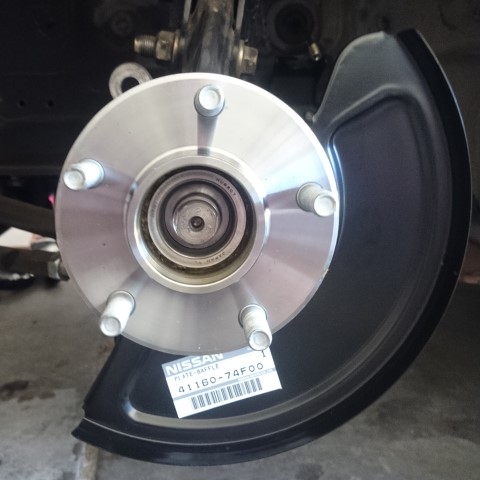
Brake Splash Shield (with the help of Nathan Rogut)
Front Splash Shields (30mm) which definitely fit S14, and I believe fit S13 as well.
41150-74F00 SPLASH SHIELD, FRONT RIGHT
41160-74F00 SPLASH SHIELD, FRONT LEFT
(Pictures provided by Nathan of the front splash shield fitment)
Rear Splash Shields – 300zx
44030-48P10 SPLASH SHIELD, REAR LEFT
44020-48P10 SPLASH SHIELD, REAR RIGHT
Brake Hardware Kit:
41080-40P25 Twin Turbo or N/A calipers manufacture 2/89 – 8/89
41080-40P26 Twin Turbo or N/A calipers manufacture 8/89 – 2/91
41080-40P27 Twin Turbo or N/A calipers manufacture 2/91 +
Spring Return:
41090-50P01 N/A calipers manufacture 2/89 – 7/90
41090-40P01 Twin Turbo calipers manufacture 7/89 + (Alternate pt. 41090-40P02)
41090-40P01 N/A calipers manufacture 7/90 + (Alternate pt. 41090-40P02)
Rear Calipers:
44001-43P00 Manufacture date All (Turbo and N/A Aluminum or Iron Depending on year)
44011-43P00 Manufacture date All (Turbo and N/A Aluminum or Iron Depending on year)
Master Cylinders:
46010-30P01 Manufacture date 2/89 – 7/90 (17/16″ NA Tokico)
46010-30P02 Manufacture date 7/89 – 7/90 (17/16″ TT Tokico)
46010-30P02 Manufacture date 7/90 – 2/91 (17/16″ NA & TT Tokico)
46010-30P10 Manufacture date 2/89 – 7/90 (15/16″ NA Nabco non-ABS)
46010-30P21 Manufacture date 2/89 – 7/90 (17/16″ NA Nabco)
46010-30P22 Manufacture date 7/89 – 7/90 (17/16″ TT Nabco)
46010-30P22 Manufacture date 7/90 – 2/91 (17/16″ NA & TT Nabco)
46010-45P00 Manufacture date 9/91 – 9/93 (1″ NA TT Tokico)
46010-45P00 Manufacture date 2/91 – 9/91 (1″ NA & TT Tokico)
46010-45P20 Manufacture date 9/91 – 9/93 (1″ NA & TT Nabco)
46010-45P20 Manufacture date 9/93 and Up (1″ NA & TT Nabco)
240 Front hubs for 5-lug conversion:
ABS equipped 240’s:
40200-67F50 2/94-5/97
40200-0V010 5/97-9/98
40200-5L310 9/98+
Non-ABS equipped 240’s:
40200-0V210 5/97+
40200-65F50 2/94-5/97
Rear hubs for 5-lug conversion:
From the MotoIQ website, user Hijacker provided me with an updated list of rear hub part numbers.
NSK 43210-35F01 ———–> 02/89-03/90 VG30D (Auxiliary P/N 43210-AA000)
NTN 43210-32F06 ———–> 02/89-03/90 VG30D (I’m assuming these are from 2 separate manufacturers. The print out doesn’t specify side like it does from here out)
43280-30P05 —————–>09/93- VG30D RH
43280-AA000 —————–> RH 07/90-09/91 VG30D
43280-AA000 —————–> RH 09/91-09/93 VG30D
43280-AA000 —————–> RH 03/90-07/90 VG30D
43280-40P06 (43280-AA300) -> RH 09/91-09/93 VG30DTT
43280-AA300 ——————> RH 07/90-09/91 VG30DTT
43280-AA300 ——————> RH 09/93- VG30DTT
43280-AA300 ——————> RH 07/89-07/90 VG30DTT
43281-30P05 (43281-AA000) -> LH 09/93- VG30D
43281-AA000 ——————> LH 07/90-09/91 VG30D
43281-AA000 ——————> LH 09/91-09/93 VG30D
43281-AA000 ——————> LH 03/90-07/90 VG30D
43281-40P05 (43281-AA300) -> LH 09/91-09/93 VG30DTT
43281-AA300 ——————> LH 07/90-09/91 VG30DTT
43281-AA300 ——————> LH 09/93- VG30DTT
43281-AA300 ——————> LH 07/89-07/90 VG30DTT
Note from Hijacker regarding the parts list: This was the printout given to my from my parts guy. I was pricing out rear bearings to put on my NA Z32 rear hubs and we ran into the parts listing issue of which hubs are available, what’s the cost, etc. It looks like the 89-90 model years use the same bearing for each side, while the 90 and up models use the side specific bearings. The price was almost astronomically higher than the early model non-specific ones. Go figure, right?