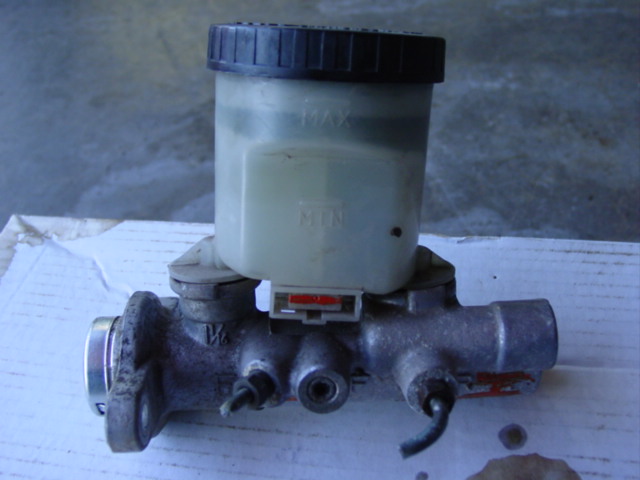
One of the more important aspects of the swap is upgrading the Master Cylinder. The pedal feel on the 240SX is weak with the stock brakes, but feels even worse with 12 pistons worth of brakes. In order to do the swap, all you will need is the master cylinder from a 300ZX. The proportioning between a turbo 300ZX and NA 300ZX is the same. If there is any concern, make sure to pick up the master cylinder that works with the calipers you are using. The brake booster is not necessary although it is a worthy addition.

There are a few different options from which to choose. Check out the parts listing page for the details. The 17/16″ MC with a manual trans equipped 240 brake booster can be a bit stiff. The manual trans equipped 240 has a smaller stock MC than an automatic equipped 240SX. The automatic equipped 240SX brake booster offers more assistance. Using the automatic’s booster along with either the 1″ or 17/16″ MC will offer the same advantages of a larger MC but with an easier pedal.

Another options is to swap the 300ZX booster along with the master cylinder. See the end of this write-up for details.

One of the questions that always comes up is the proportioning of the 300ZX MC vs the 240’s MC and the effect of using the 300ZX MC with stock 240 rear brakes. Below are a few excerpts from FreshAlloy members:

The way OE proportioning valves work is that the front and rear line pressures go up by the same amount until the pressure reaches the so-called “split point”. At this point, the rear pressure increases at a lower rate than the front pressure (with the proportionality factor given by the reducing ratio).

Now the reducing ratio for the Z32 and 240sx MC’s are the same (0.4), so the only difference is the split point. The Z32’s split point is lower than the 240sx, so above the split point, the Z32’s rear line pressure will always be lower than that of the 240sx.

What this is saying, is that there is no way the rear brakes are going to lock up first by swapping in a 300ZX MC while using Z32 front brakes and stock 240 brakes in the rear.

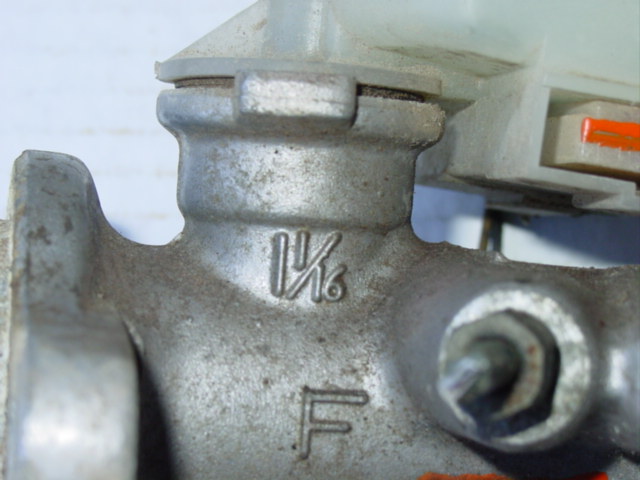
All that said, I chose the 1 1/16″ MC for my swap.

Parts Necessary

  • Master Cylinder
  • Brake Booster (optional, read below)
  • Brake Fluid

Tools Necessary

  • Jack and Jack Stands
  • Metric sockets and wrenches
  • 10 mm Metric Flare Nut Wrench (optional but useful)
  • Allen Drives
  • Cutting tool (Dremel, air cutoff, etc)
  • Hammers and a small punch
  • Flaring tool

Please note, there are multiple combinations of parts that will give you the results for which you are looking. A brake booster from either a 300ZX or an automatic equipped 240SX will give more assist requiring less pedal effort. I have received emails from people that complained about the pedal effort being too high when using the 17/16″ MC. Using the smaller MC’s or bigger boosters will help reduce pedal effort while maintaining the better pedal feel of the upgrade.

Also, you may want to consider using a 15/16″ MC (if you had the 7/8″) for a mild improvement with no modifications necessary.

The 1 1/16" Master Cylinder in all of its glory.
The 1 1/16″ Master Cylinder in all of its glory.
Original OEM Nissan parts were identified with a cast of the size. Unfortunately, this is not a consistent feature.
Take a moment and set up a funnel and drain pan to allow the master cylinder to drain. Remove the brake lines and allow the master cylinder to drain. Avoid spilling brake fluid on paint as it is highly corrosive. You may want to mark the lines front and rear to avoid any confusion through the project.
Remove the two nuts that attach the master cylinder to the booster.
Regardless of whether or not you have ABS, the 300ZX master cylinder will work. If you do not have ABS, you will need to remove the plug from the second front brake line port, illustrated below.
Regardless of whether or not you have ABS, the 300ZX master cylinder will work. If you do not have ABS, you will need to remove the plug from the second front brake line port as shown.

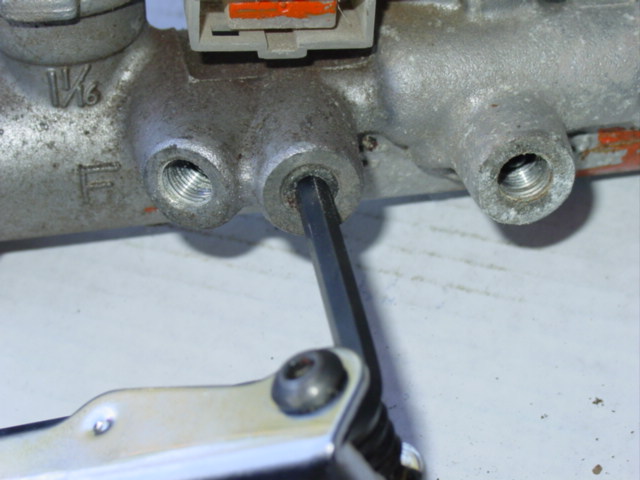
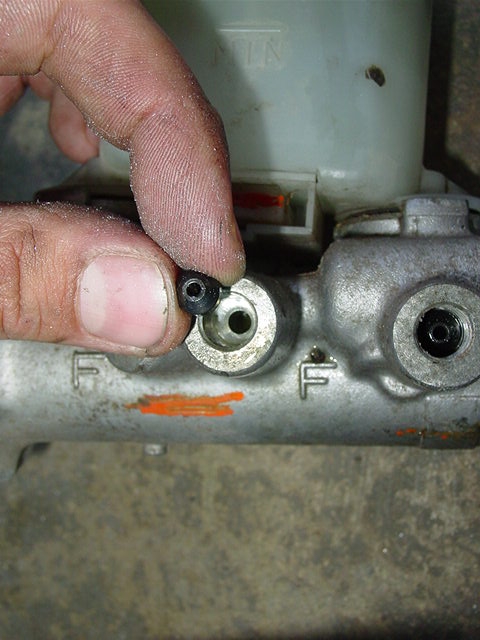
If you have ABS, you do not have to remove the plug. In that case, skip to the master cylinder installation.

Typically, a standard allen tool will be more than adequate to remove the plug. In some cases, it appears that remanufactured master cylinders have a 5 sided allen plug. You will need to find a way to remove the plug possibly using an undersized 6-sided allen tool.
Typically, a standard allen tool will be more than adequate to remove the plug. In some cases, it appears that re-manufactured master cylinders have a 5 sided allen plug or some non-standard variation. You will need to find a way to remove the plug possibly using an undersized 6-sided allen tool.

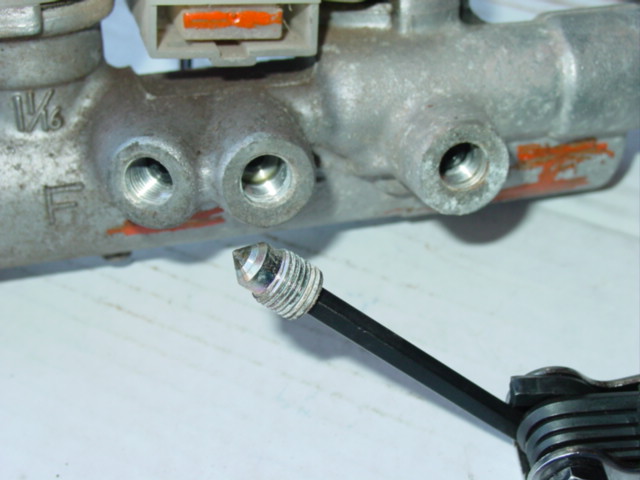
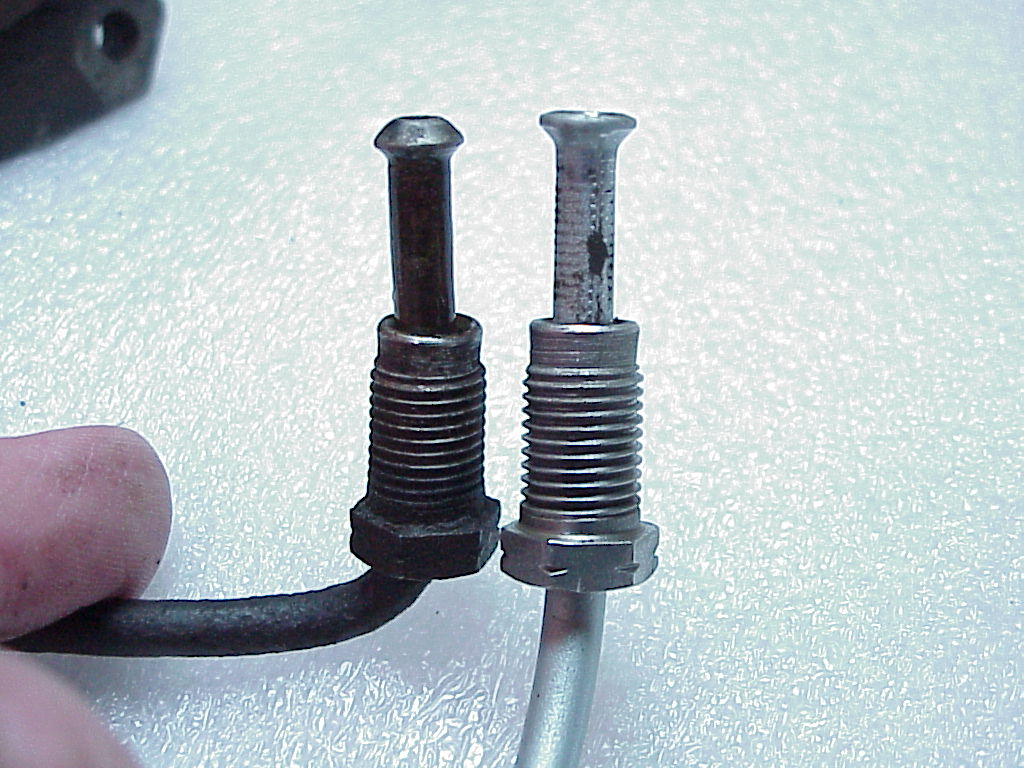
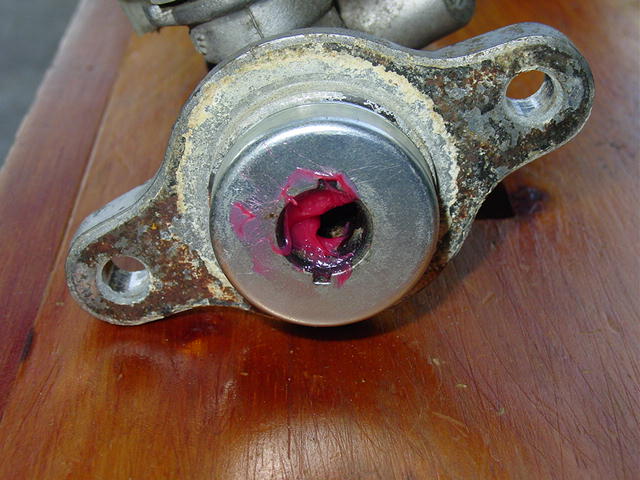
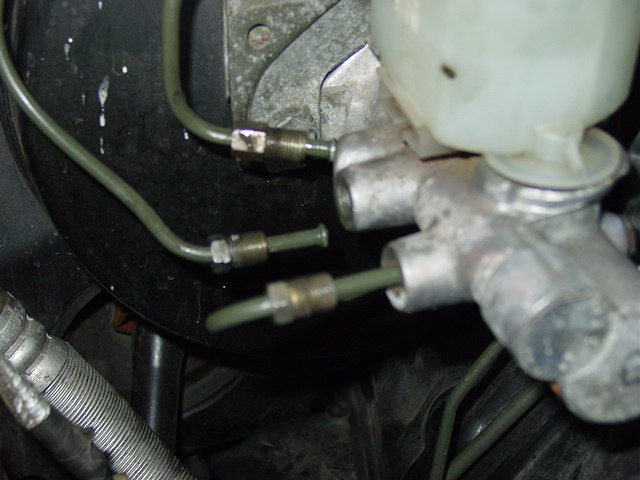
You will notice that the plugged hole is missing the proper flare fitting. You have two options to resolve this issue, the first is a rather simple fix. You will need to find a bubble flare tool to put a flare in the line that will work without the missing fitting.

I found this picture on a Jeep Wrangler forum that very clearly shows the difference between a bubble flare (left) vs a tapered flare (right).
The second option is to remove a fitting from the stock 240 MC and use it in the new MC. The fittings are pressed into the master cylinder and cannot be removed without destroyed the 240's master cylinder. Use a cutting wheel to cut out the small fitting. Be careful not to cut into the fitting.
The second option is to remove a fitting from the stock 240 MC and use it in the new MC. The fittings are pressed into the master cylinder and cannot be removed without destroyed the 240’s master cylinder. Use a cutting wheel to cut out the small fitting. Be careful not to cut into the fitting.
Take the fitting that you just pulled from the old master cylinder and carefully insert it into the 300ZX master cylinder.
Using a small punch, tap the fitting into the master cylinder. You may need to use sand paper to grind down the fitting to make it fit.
Using a small punch, gently tap the fitting into the master cylinder. You may need to use sand paper to grind down the fitting to make it fit.
With the new fitting in place, it's time to install the new master cylinder.
With the new fitting in place, it’s time to install the new master cylinder.

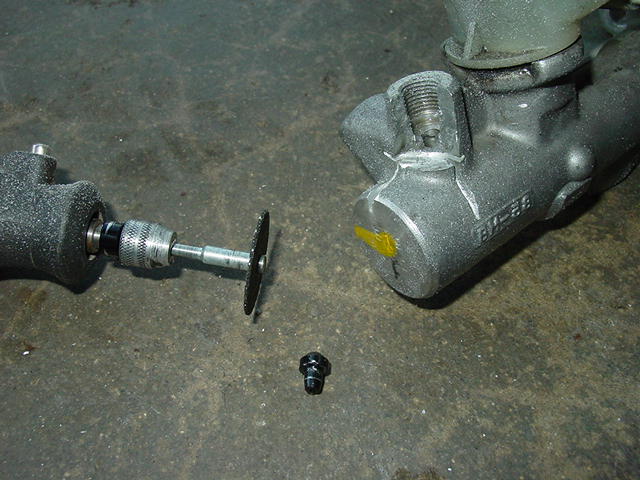
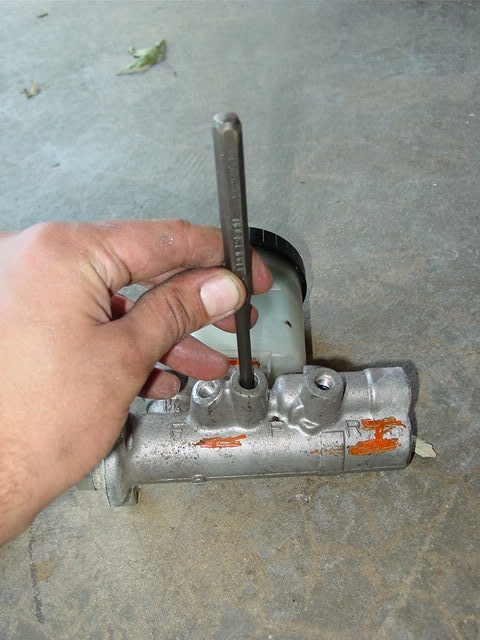
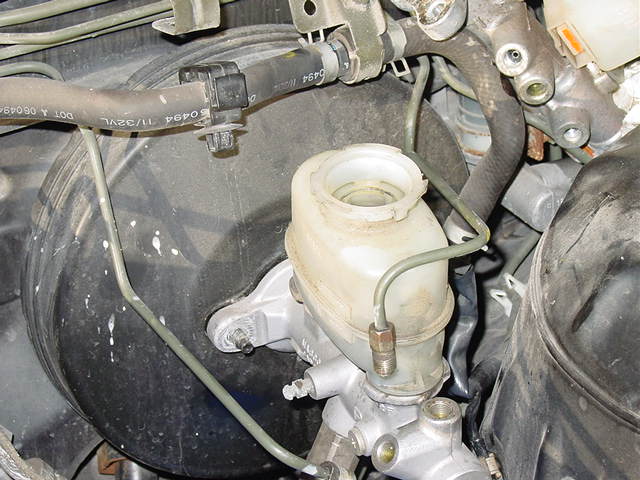
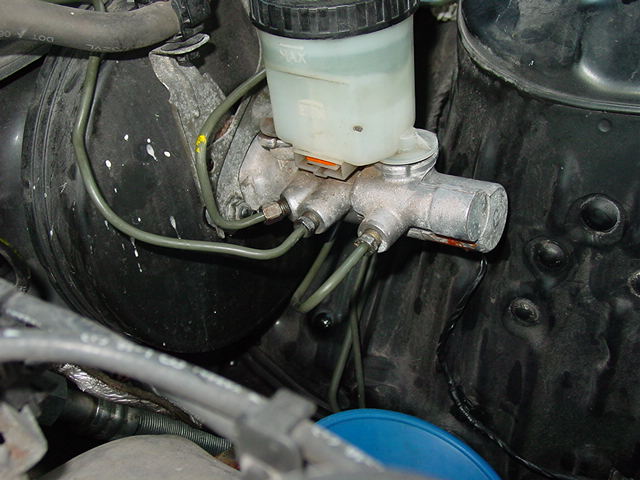
Before you install the master cylinder, take a moment to flush the reservoir with brake cleaner. This will not be necessary with a new master cylinder.

Place some grease in the hole of the master cylinder and install it on the 240's booster.
Place some grease in the hole of the master cylinder and install it on the 240’s booster.
With the 300ZX master cylinder in place on S14's, you will notice that the brake lines are no where near the right locations. S13 brake lines will line up without any modifications. (S14 pictured)
With the 300ZX master cylinder in place on S14’s, you will notice that the brake lines are no where near the right locations. S13 brake lines will line up without any modifications. (S14 pictured)
You can carefully bend the lines to meet with the new locations (again, with ABS, you will only be using a front and rear line) Make sure you do not kink the lines.
With the lines bent, it's time to thread them into the master cylinder.
With the lines bent, it’s time to thread them into the master cylinder.
With the lines installed, you need to take care of one last modification. You will need to attach the brake fluid level wiring to the new master cylinder. I salvaged the plug that was used on my master cylinder. You can also use standard female blade connectors to do the same task. I spliced the new plug onto the existing wiring.

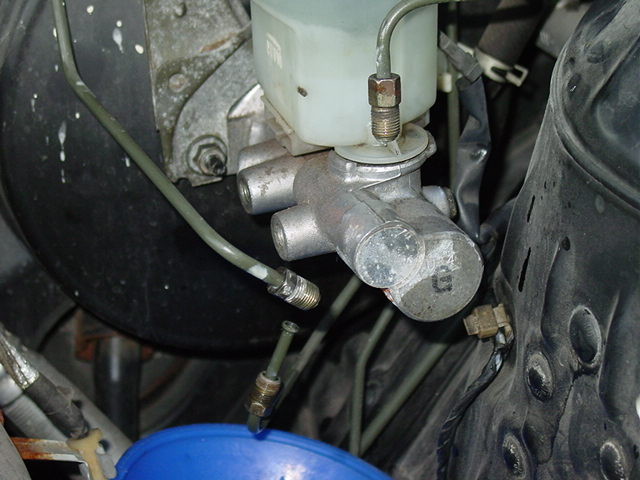
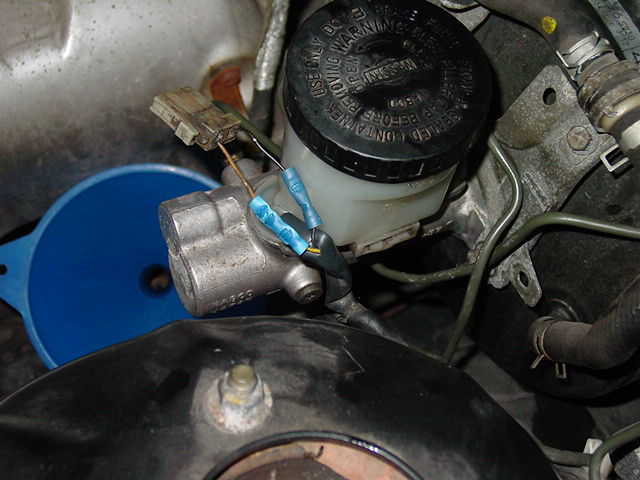
Before adding any fluid, attach the plug and make sure that the brake light on the dash stays lit when the ignition is turned on. After adding fluid, make sure the light turns off.

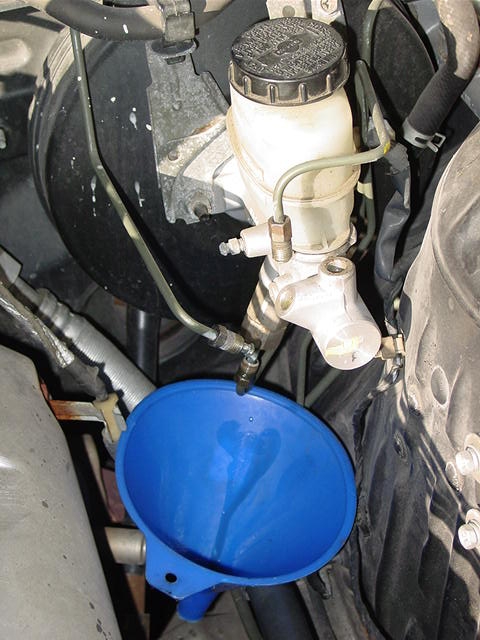
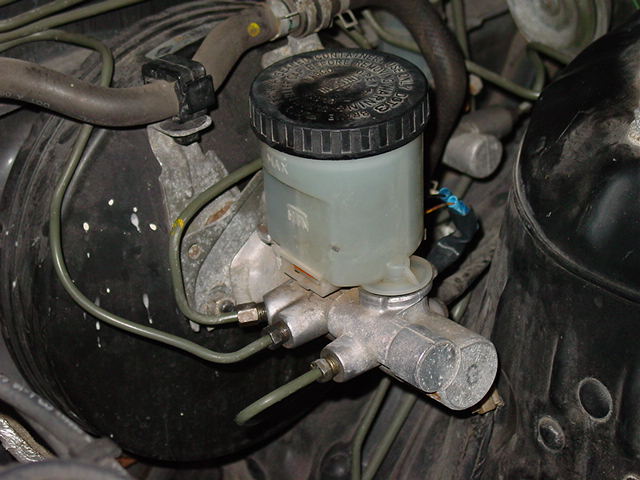
If the master cylinder is the only modification you are doing, you will need to thoroughly bleed the brakes. Start by gravity bleeding the entire system, and then use your favorite method of bleeding to finish the job.

FYI: Gravity bleeding is the process of opening all of the bleeders and letting the fluid drain out. This is especially helpful when you’ve installed a new master cylinder.

Once the brakes are bled, top off the fluid, and attach the cap.

Note: Doriftomodachi from Zilvia.net discovered that is possible to swap the fluid reservoir from the original master cylinder. Swapping the reservoir allows you to use the original fluid level wiring without having to splice wiring.

During the intro I noted the option of swapping the 300ZX booster along with the master cylinder.  I never had a chance to do it myself but I have spoken to those that have.  Dave Coleman of Sport Compact Car and MotoIQ fame performed the swap on his project car.

Dave compares the 300ZX booster on the left to the stock 240SX booster on the right. The 300ZX booster has significantly more volume which provides greater assistance.
The only modification necessary is trimming the studs that attach the booster to the firewall.
The only modification necessary is trimming the studs that attach the booster to the firewall.  Use the length of the stock booster’s studs as reference.

The master cylinder swap isn’t a necessary component for a successful brake swap however the improvement in pedal feel and brake control is a worth while effort that ties all of the work together.

The next sections will cover the part numbers and brake swap alternatives. Click the link below for the complete series.

The Definitive 300ZX Brake Swap Series