Once upon a time, circa 2000, I set out to do what would be the biggest automotive project I had done to date. I swapped the engine in my Civic and it turned out well. These days, this engine swap isn’t a big deal however I want to share my adventure from concept to completion. When I started working on converting my site, I thought about rewriting this story to add my current experiences and recommendations. In the end, I decided to preserve my adventure in its entirety. Most of the shops and resources that I used are long gone and I’ve removed the links. If you’ve been at this game for a while, you my remember those long gone shops.
Looking back over this story, I realize how much I didn’t know then, and how much I’ve learned in the nearly 20 years since. I only had this Civic for about 2 years before I totaled it. The story lives on in the hatchback I bought shortly after and still have to this day! On with the story!

What can I say? I did it. Years of planning and dreaming of a swap have come to a very satisfactory end. This page will include my experience with the operation as well as some pointers and ideas if you chose to do the same or in the process of researching this project.
- Dreaming Process
- Research Process
- Locating the Parts
- Check is in the mail
- Prepping the Civic
- Prepping the Engine
- Dropping in the new engine
- Driving Impressions
- The Next Step
- A Year Later
- Pictures from the swap as well as current pictures
Dreaming process….
It all begins with the thought of, “what can I do to seriously add power and enjoyment to my ride?” I had all sorts of crazy ideas floating through my head. Chips making 20hp, intakes producing 15hp, headers that give you a whopping 20-25hp!!!! Uh…okay. Most of us start off on the wrong foot. Believing everything in the magazines.
Once the painful truth emerged, I realized that to make some serious horsepower it was going to take more than an air filter and a cam to get what I wanted.
With that in mind, I looked into more elaborate modifications. Quite honestly, anything more than an intake or exhaust was going to kill me financially, so I decided to look for the option that would give me the most bang for the buck as well as future potential. I looked into turbos and superchargers, but when you look at the numbers, it doesn’t look good. With the stock bottom end on the original D16Z6 single overhead cam VTEC engine, it isn’t possible to
safely boost over 5-6 psi. With the Jackson Racing supercharger, the civic puts out roughly 145-150 hp. Having lined up to a JR SC equipped civic at the drag strip, I realized that the kit was a joke. Running a pathetic 15.6 in the quarter was enough to make me realize that building the stock engine, in any way, would be a waste. Turbos seemed to give better quarter mile times, but I was still not impressed.
What now? The answer is obvious. Engine Swap. The good guys at The Hybrid Garage provided enough information to first fuel the dream and then later pursue it. Which Engine do I want? There are so many to choose from. There’s the Integra RS/LS/GS 1.8L DOHC non-VTEC engine (B18B), the Integra GS-R 1.8l DOHC VTEC(B18C1), Integra Type R DOHC VTEC (B18C5), The Del Sol VTEC 1.6L DOHC VTEC (B16A3). For starters, any non-VTEC engines were pretty much out of the question. In a way, I didn’t feel like loosing the technology that I already had; that being VTEC. The concept of VTEC is awesome and the thought of loosing it seemed ludicrous. The Type R engine would have been awesome with it’s 195hp, tightly geared transmission, and LSD, but the thought of really digging into the wiring harness was a bit frightening. The same goes for any ’96 and up engine due to the emissions friendly OBD-II computers. It came down to the Integra GS-R engine and the Del Sol VTEC engine. For a while, I thought a 10 hp difference would be negligible. I was horribly wrong. Some people will argue that the B16A
engine is a better choice for a swap, however, the lack of low end torque makes it a bear to drive at times. On the other hand, the B18C1 develops very nice torque at the bottom. Although most of us would like to race “all the time” the reality of normal driving would dictate that nice low end torque is a necessity. In all honesty, having to drive the car like “you just stole it”, for normal driving can be rather tiresome.
That solves it. The Integra GS-R engine was the choice.
Top
Research Process…
Once I made the decision, it was time to determine exactly what I needed and what had to be done to make this work.
The nice thing about having the EX civic was that I already had most of the wiring necessary. The only wires that had to be added were the Intake Air Bypass wire and the Knock Sensor wire. Piece of cake!
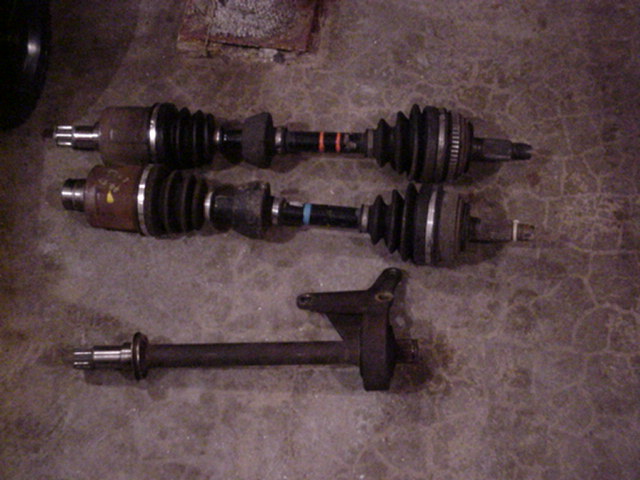
In order for everything to work properly, I would need the engine, transmission, shift linkage, half shafts and intermediate shaft, and the ECU. To retain the stock AC compressor, I would also need the Del Sol VTEC AC bracket. To retain Power Steering, I would need the Integra power steering pump. I would also need to pick up the GS-R’s catalytic converter for the reason that the O2 sensor is mounted in the cat. The alternative would be to pick up a B16 Exhaust manifold.
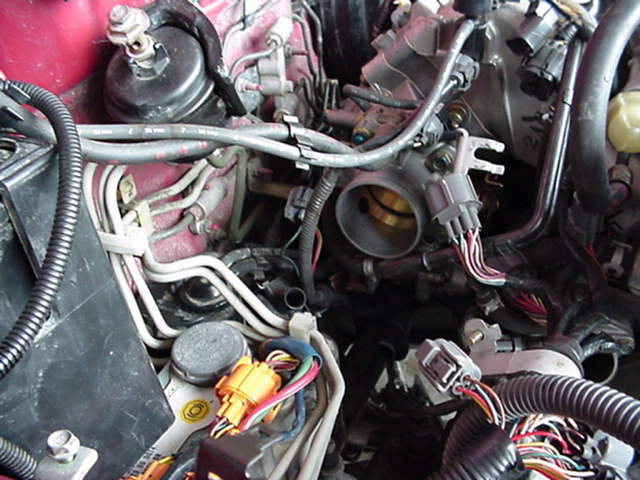
In the process of doing research, I discovered a potential problem. My civic had factory ABS. This was an option that I requested when I originally ordered the car. The civic’s ABS pump was mounted low on the firewall on the passenger side. After having studied the B18C1 I realized that the intake manifold’s bizarre shape positioned the
throttle body in a bad spot with respect to the ABS pump. Not sure if it was going to be a “serious” issue, I pressed on.
**A note for anyone that may be doing a swap in the future, the ’96-’98 B18C1’s will work with the OBD-I computer. The engine was the same from ’94-’98. All you would need to do is pick up a ’94-’95 computer. The only disadvantage to using an OBD-II engine is the cost of picking up an OBD-I computer.
Top
Locating the parts…
I had contemplated trying to locate a Japanese version of the engine (JDM) The same engine in Japan produces a little more power than the US version. This is due to the higher compression pistons they use in Japan. I had read on several occasions that JDM engine suppliers have a very limited time to pull engines. This can lead to a rather messy engine in terms of wires or hoses that have been cut, rather than disconnected. Another issue, is that most JDM packages do not come with wiring harnesses, shift linkage and axles or even transmissions.
Back in 1997, I met an individual by the name of Jerome Soh over Honda Performance email list. At that time, Jerome was a small guy that sold a few parts over the internet. Over the past 3 years, I’d gotten to know that his service and commitment are matched by no one. Along with that, he developed a used Honda parts company called Sohfast Auto Parts, Inc. Jerome carries probably the most complete packages that you can buy. You do pay a little more for it, but he makes sure you are 100% satisfied. He earned my trust over the years by the little bits and pieces that I had ordered from him.
Check is in the mail…
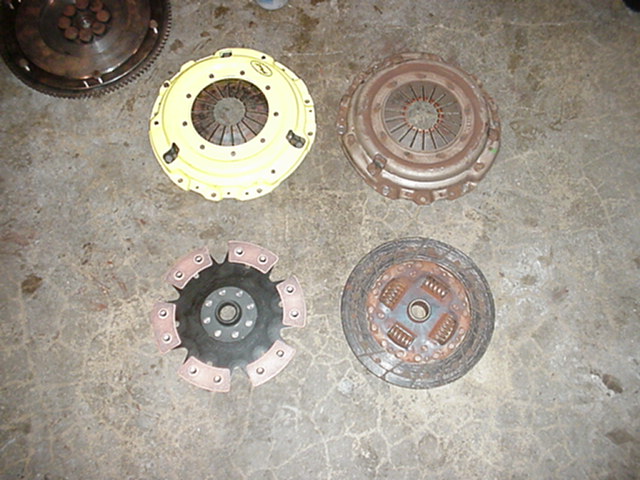
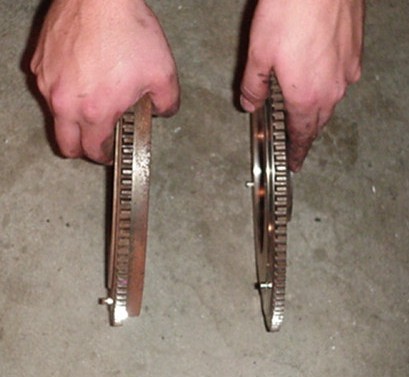
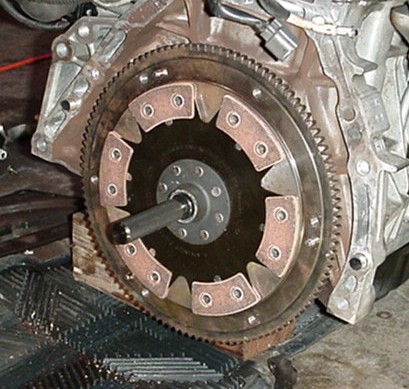
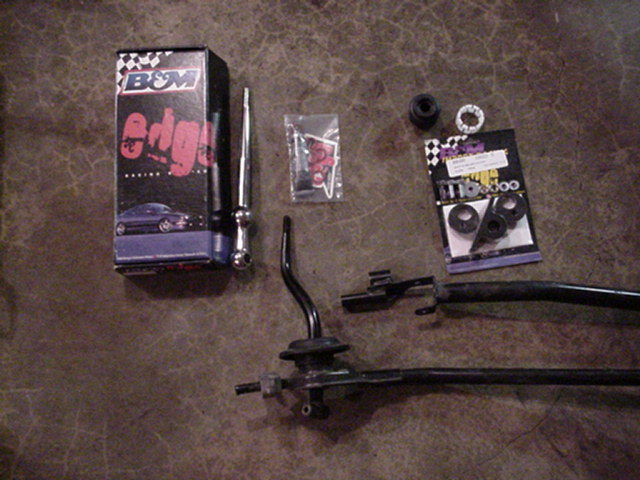
It was time to commit to the project. My original request was for a B18C1 with a Type R transmission, but there wasn’t one available at the time. Since I had already allotted the money for the transmission upgrade, I thought I would add a few more parts to the list. Along with the engine, I ordered an ACT 6-puck clutch, Xtreme pressure plate
and a Sohfast Lightened flywheel.

After I sent in the payment, I decided that some maintenance hardware was in order. The new engine had about 50,000 miles. As anyone would know, doing any maintenance to an engine is easier when it isn’t in the car. With that knowledge, I ordered a new water pump, front main seal, rear main seal, cam seals, timing belt, timing belt
tensioner and valve cover gasket. I also ordered a new distributor cap and rotor as well as plug wires.
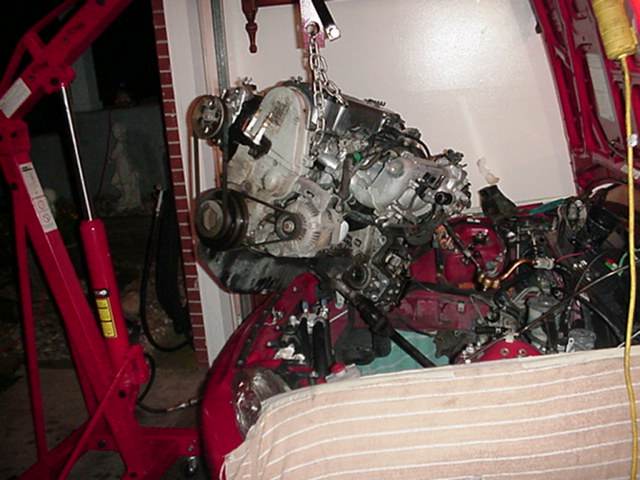
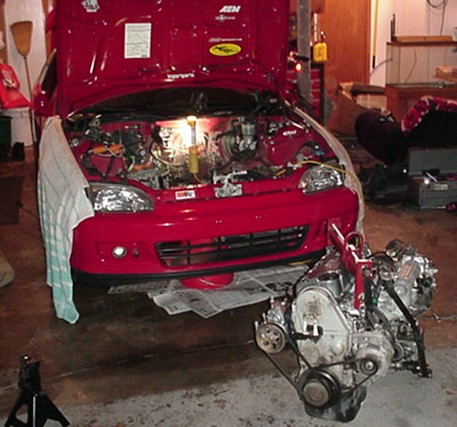
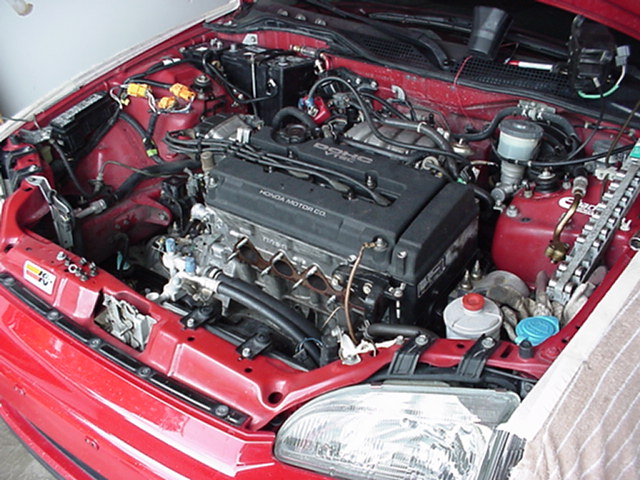
Prepping the Civic…
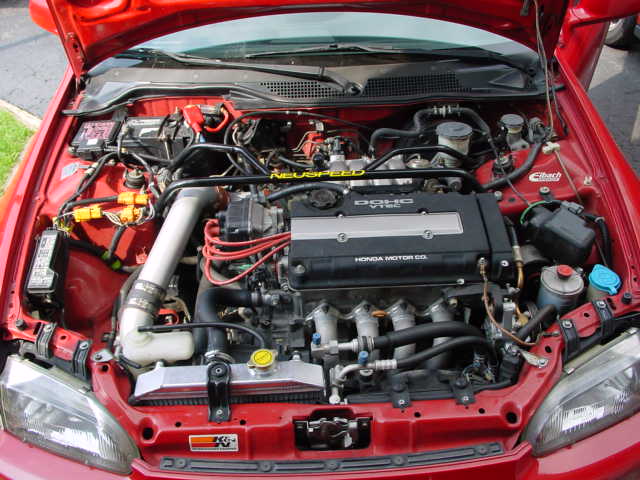
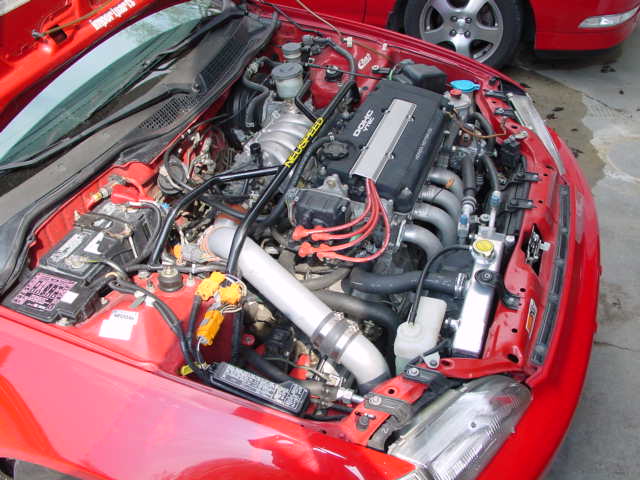
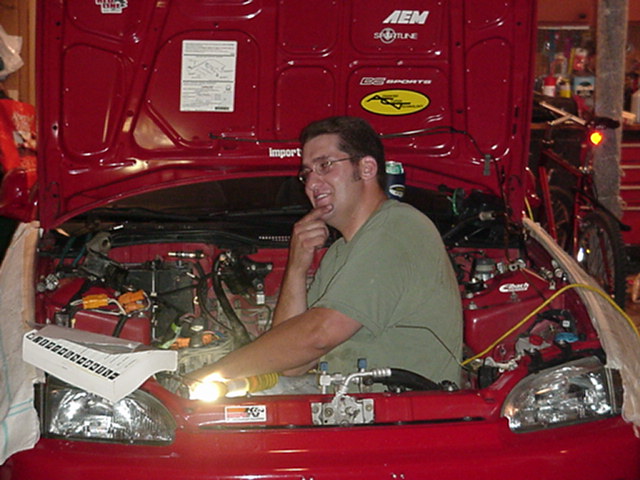
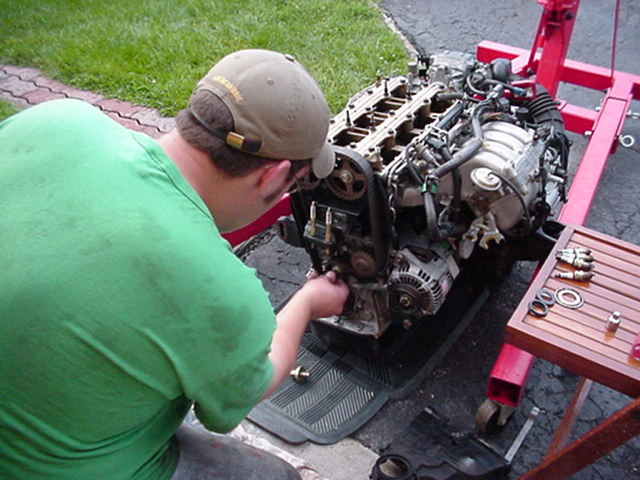
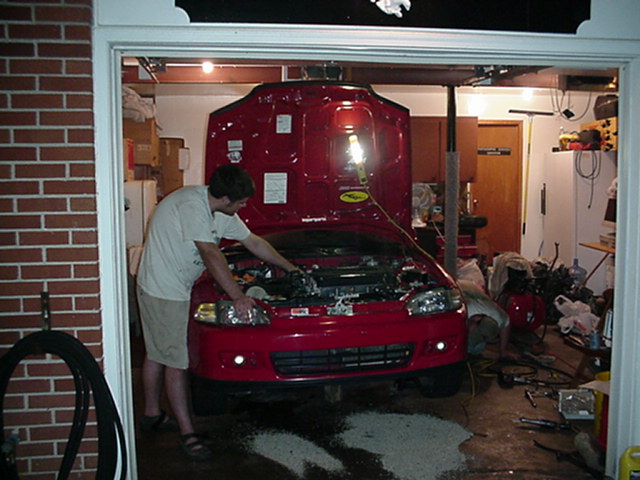
Obligatory “sitting in the engine compartment” picture.
I was forced to start the swap process earlier than I had planned due to a spun rod bearing.

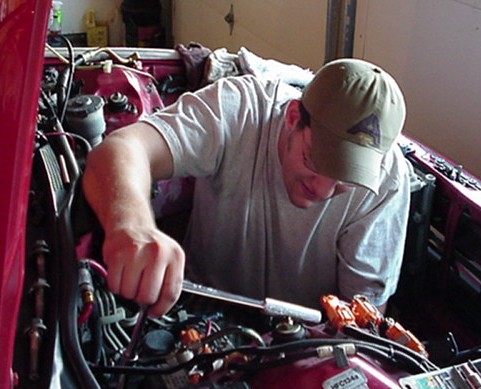
At this time, I didn’t even have the donor engine in my possession. At any rate, I started the process by removing the old engine. I was rather amazed by how easy it is to disassemble a Honda. The wiring is so easy to remove. On the civic there are 3 harness plugs on the passenger side, and three on the driver’s side. Disconnect them and flop them over the engine. That’s it! A few hours later and the engine was hanging by two motor mounts.
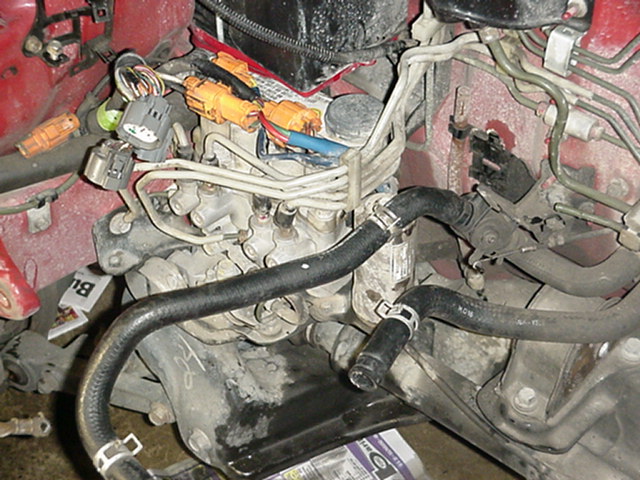
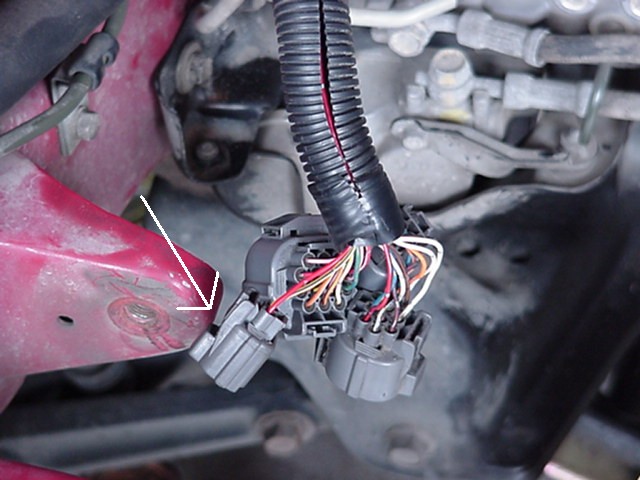
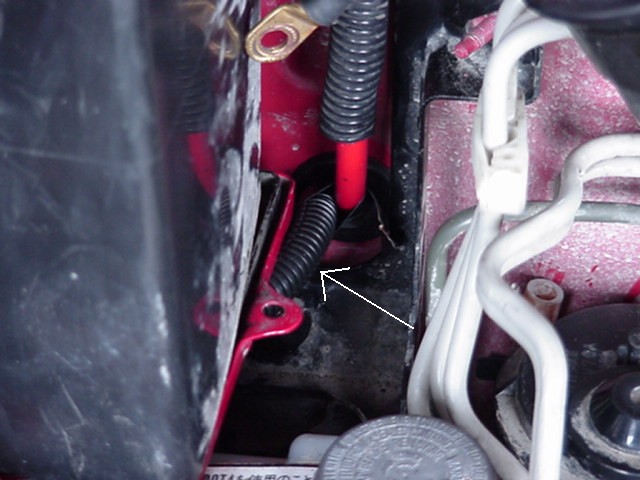
With the engine out, I was able to work on the wiring. I discovered that it was easier to use the civic’s original EVAP purge wire for the IAB control. I swapped the EVAP purge wire for the IAB on the ECU plug harness and ran a new EVAP purge wire as well as the 12v wire to a 4th harness plug on the passenger side. You have to get this from the
integra harness. After that, add the knock sensor wire and the wiring is done. Mind you, this is in an EX civic. On any other trim, you may have to add more wires. Here are a couple of shots of the new wiring that I passed through the firewall.

Other than doing the wiring, there isn’t anything else that needs to be done.
Top
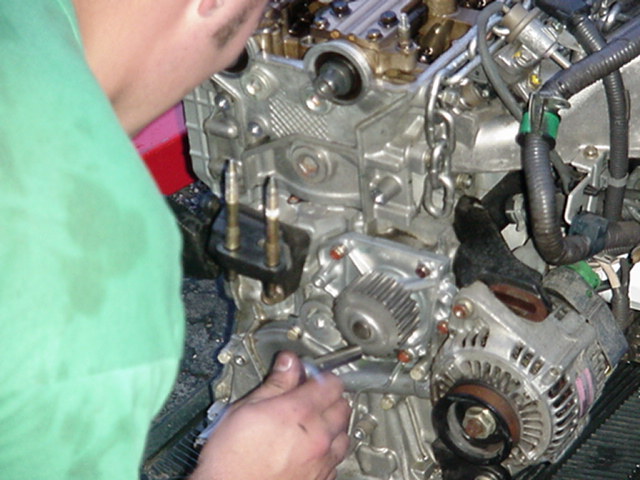
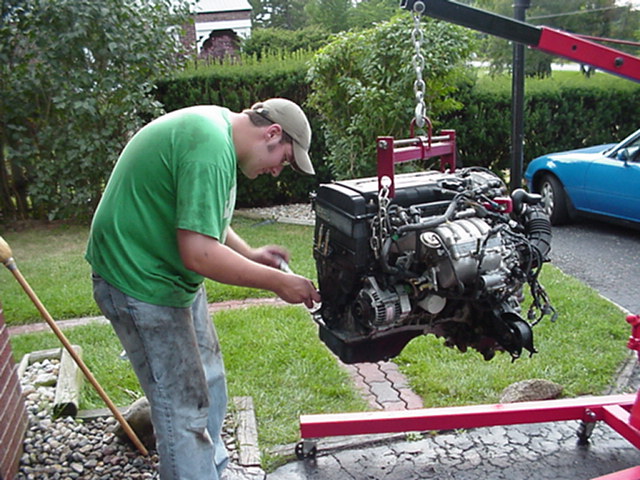
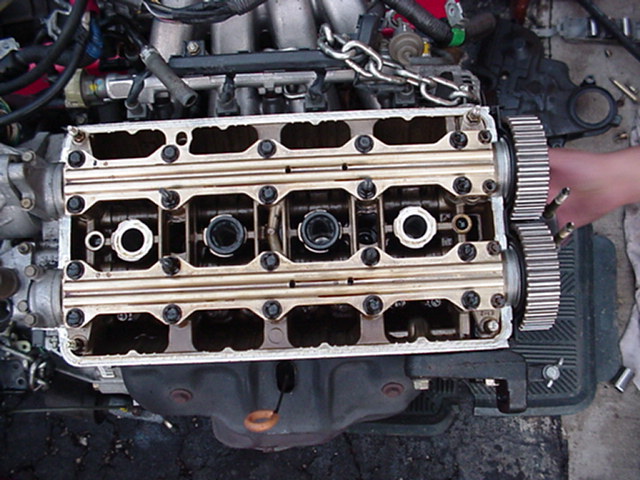
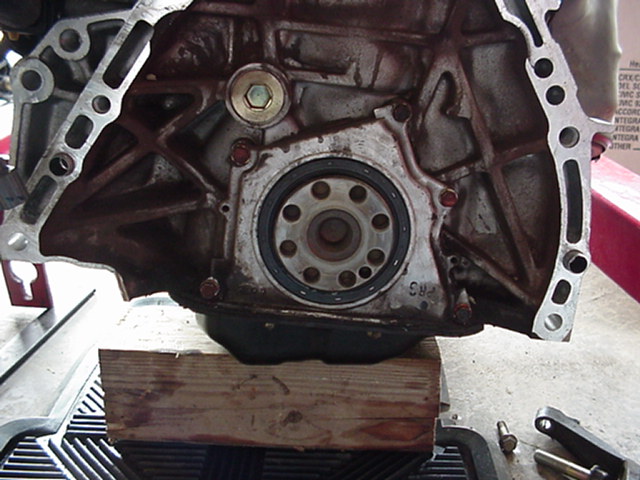
Prepping the engine…
After washing off nearly every molecule of dirt, I started to do the maintenance work on the B18C1. First off I replaced the water pump, timing belt, timing belt tensioner, front main seal, and cam seals.
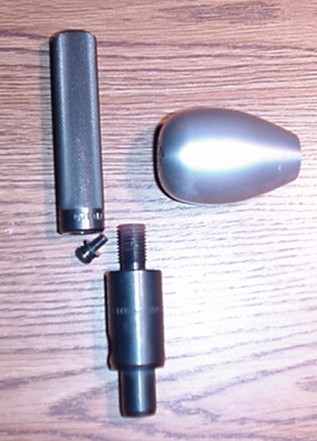
Another option I picked up was STR’s cam seal. A common problem with B-block Honda’s is an oil leak caused by the cam seal in front of the distributor. The seal becomes hard over time and cannot prevent oil from leaking out. STR’s solution is a machined aluminum version that utilizes O-rings. The installation was very easy and has not leaked a drop since I’ve installed it.

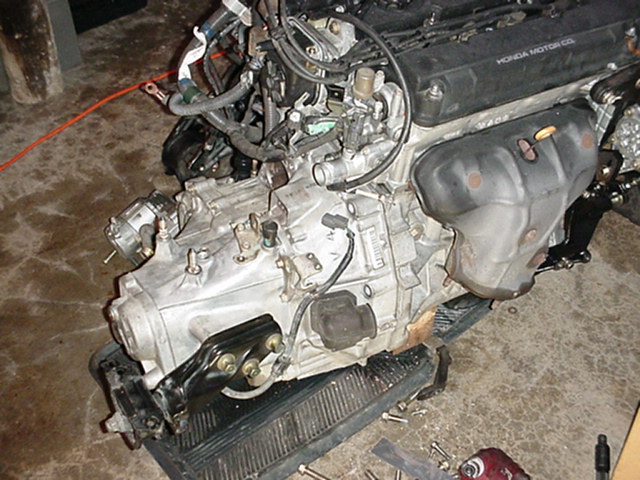
After procuring a clutch centering tool, I was able to install my new rear main seal, flywheel, pilot bearing, clutch, pressure plate and throw out bearing. With the tranny back on the engine, I reinstalled the Intermediate shaft as well as anything else that could be installed prior to installing the engine. With all of the maintenance work complete (see pics below), it was time to shoe-horn the engine into the civic.


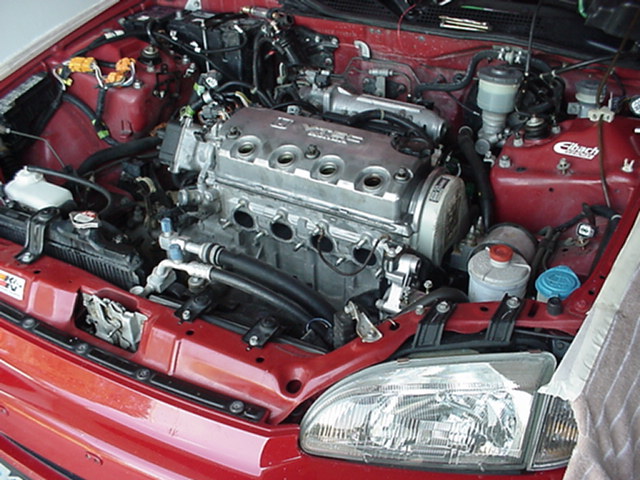
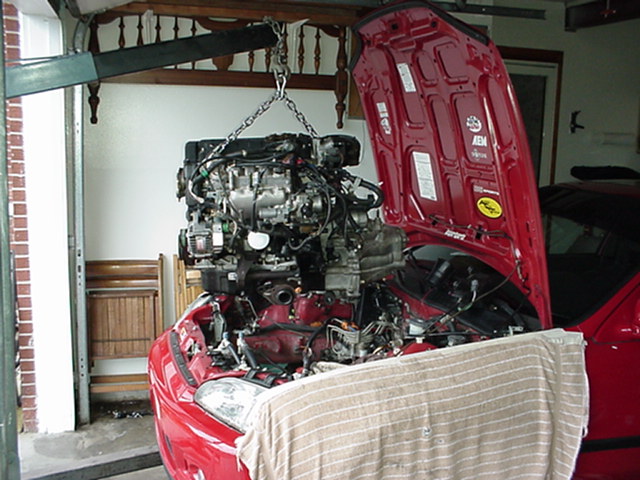
Dropping it in…
The installation went really well. I can honestly say that there were no real complications throughout the entire process. The only tricky step was getting the rear mount back onto the engine. After that, it was just a matter of plugging the harness together, attaching hoses, finishing up the motor mounts and adding fluids.
The ABS pump did pose a problem after dropping the engine in, but nothing serious. Some minor brake line and wire rerouting and everything was fine.
The only outside help that I needed was to take the car to an exhaust shop to have the exhaust lengthened. The exhaust manifold and cat combination was shorter than the original engine. Not a problem. Sounded pretty cool on the way to the shop.
One other important note that I think should be made is that the Civic’s stock radiator has smaller fittings than the GS-R’s. Temporarily, I’ve double clamped the hoses but I intend to either pick up an aftermarket radiator or a Del Sol VTEC’s radiator.
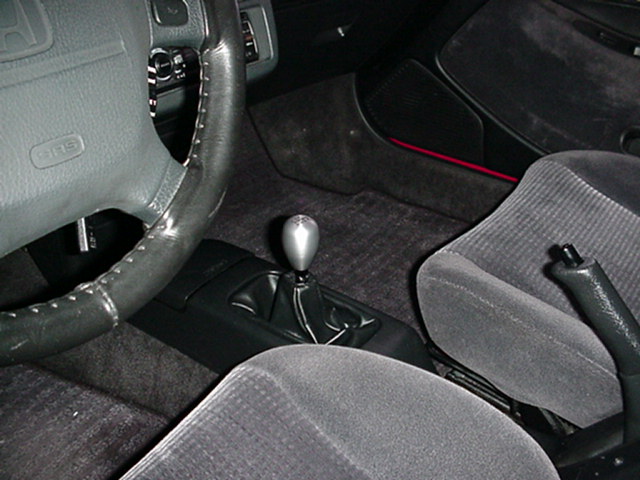
Driving Impressions…
The first thing that I noticed with the new equipment, is that the throttle response is much better with the new lightweight flywheel as compared to a B18C1 with a stock flywheel. The 6-puck ACT clutch was a challenge to manipulate. Once on the road, the difference was immediately noticed. There is torque everywhere. Although it still
isn’t a great deal of torque, compared to the stock D16Z6, if feels great. After pushing it to redline, all I could do was grin. The tighter gear ratios are also readily apparent. The extra torque makes traffic maneuvers so much easier and requires so much less effort.
I’ve discovered that I can casually drive the car now. Before, I felt the need to beat the car in order to keep up with traffic or to get moving. Power shifting and redline were an everyday event. Now, I almost never power shift and 5-6k is the general limit for each gear for perky take off’s.
The ACT is a remarkable clutch offering very quick shifting when you need it. Grinding gears is pretty much a thing of the past…aside form driver error. However, it is a bit much for normal driving. It is very difficult to slip the clutch and take off smoothly. I’ve grown accustomed to technique necessary to use this clutch, but ever so often I botch my launch or let up on the clutch to quickly, resulting in a herky jerky shift.
Bottom line? I’m completely satisfied with the results of the swap.I would do it again in a heart beat!!
The Next Step
I’ve already been asked the question as to what my next project is going to be. I’ve thought of what I want to do and come to this conclusion: I want to enjoy the car right now. The swap took a lot of energy and time. I would like to enjoy what the car has to offer now before I start digging into another big project.
However, here’s a list of things I’ve been considering:
I may swap in a more “user-friendly” clutch in the near future. I’m still debating whether or not to leave the 6-puck alone.
I need to do some suspension work before I really do anything else. My Tokico HP’s are loosing their effectiveness. Plus the shocks cannot compensate for the extra weight of the new engine. After shocks, I need to look into replacing a few bushings to try and tighten up the responsiveness of the car.
Once that’s out of the way, I’ve been toying with the idea of using the Honda CR-V’s engine block to make some intense low end torque. The CR-V’s B20 block is compatible with any B-block hardware available. What I would like to do with a B20Z block is send it out and have it prepped to work with my current cylinder head. Before I decide how I’m going to build the block, I need to determine if I want to go turbo later.
If I don’t choose to go turbo, in the future, I would like to raise the compression as high as I can while still using premium pump fuel.
If I choose to go turbo there are many other factors that need to be resolved before I can install a turbo.
A Year Later…
After year of tinkering and tuning, I thought it would be a great idea to give my impressions after about 27,000 miles. First, I want to address the concerns and issues the I brought up in “The Next Step”
I nearly logged 14,000 miles on the ACT 6-puck clutch and decided that the aggressive nature of the clutch was too much for a daily driver. Driving to work in the morning with one eye open provided to be a very challenging task. I broke down and installed ACT’s Street disk and used the same pressure plate. Read about my impressions
here.
It didn’t take very long to realize that my Tokico’s just plain sucked! After a few autocrosses, I realized that I was running slower than I did with the old engine. Why? The car was too fast for the suspension to keep up. At first, I was very disappointed with the fact that a relatively stock DX hatchback could out run me. My first step was to replace the 80,000 mile Tokico HP’s (yeah, I think they had a lot to do with it!). I installed KYB AGX shocks. I could tell the difference immediately! I picked up the pace at the track but I was still not satisfied. I was still encountering nasty under steer. My next step was to replace the Bridgestone RE730’s with their S03 Pole Position tires mounted on Kosei K1 racing wheels. In the meantime, I added Z-10’s radius arm kit.
Armed with the new hardware, I headed out to see what I had accomplished. Much to my surprise, the car handled superbly. The combination of new shocks, tires, wheels, and radius arm kit proved to be a winner. I managed a spot as the 5th fastest out of 110 drivers on my first day out! Each race following that successful event was met with equal or better performance.
I’ve learned quite a bit about racing and my car this last season. The need for finesse and proper tuning became very obvious. What I find really interesting, is that I’m not done with my proposed handling modifications!
I also resolved the problem with the small radiator fittings using Fluidyne’s Civic radiator with larger Integra fittings. Read about it here.
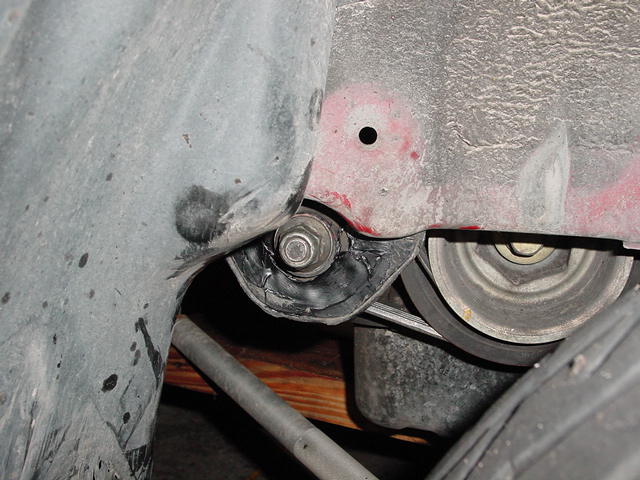
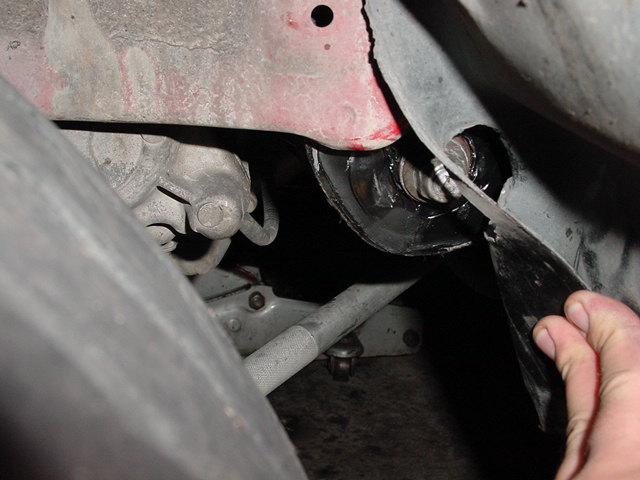
Another modification that I feel needs to be mentioned is making cheap Poly Urethane motor mounts. Ben, my Nissan buddy, pointed out that you can buy different forms of Urethane that can be used to fill motor mounts in order to make them firmer. The newest trick was to use 3M’s window weld. Check out my how to and impressions
here.
On the topic of the B20 and the possible future of the B18C1: I don’t think I’ll go through the trouble to gain .1 l of displacement (B18C1 crank in a B20 block). Prior to picking up my 240SX, I felt that I wanted to build a turbo engine that started life out as a turbo engine. The SR20DET from the Silvia is a perfect candidate. That will be covered
in another article. I realized that I love the way the civic feels and sounds. I decided that any engine building will be strictly NA. I’ll probably go with some CTR pistons and cams, do a little work with the head and intake manifold and run a Hondata stage 4 ecu.
What do I think after a year of fun (and frustration)? I still couldn’t be happier with the car. I won’t publish my quarter mile time simply for the reason that I can’t nail down a good launch. I build this car to race on a track, not in a straight line and it shows. I will say that I managed to run better than 95 mph trap speed. That should be enough info to give you an idea of the potential!
A few more pictures of the operation


Recent Pictures