Open Diffs are a drag and aftermarket limit slip units can be outrageously expensive. There is hope for any non-LSD equipped 240SX. Factory limit slip diffs are available from many different Nissan offerings. The 300zx, LSD equipped 240’s, Q45’s and J30’s to name a few. In most cases, the only extra parts necessary are 240SX VLSD diff outputs that can be picked up at your local Nissan dealer.
I picked up a ’90 300ZX non-turbo diff. This is the R200V differential that is recommended. It has the same final drive ratio as the 240sx at 4.083:1. The turbo 300ZX has an R230V diff with a 3.69:1 final drive ratio. Some say that that case will not fit in S13 240’s. Plus, the taller ratio will make for a more sluggish 240 unless you are putting down serious power.
Below is the process to change the diff and the parts necessary.
Note: S13 and other notes from 240SX list members are at the end.
Tools Necessary
- socket set
- Combination wrenches (box wrench)
- Jack and Jack Stands
- Pry bar
Parts Necessary
- R200V differential (4.083 final drive ratio)
- Correct diff outputs if you don’t have a 240 diff: 38220-92L00, 38220-52F01
- 2 quarts of 80W-90 Gear oil (I used Pennzoil, Nissan’s Recommendation)
- For S13’s, you will need to obtain the correct rear cover.
The Differential:
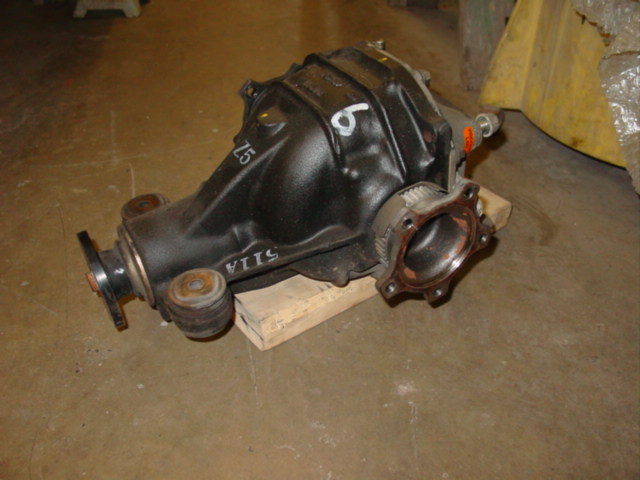
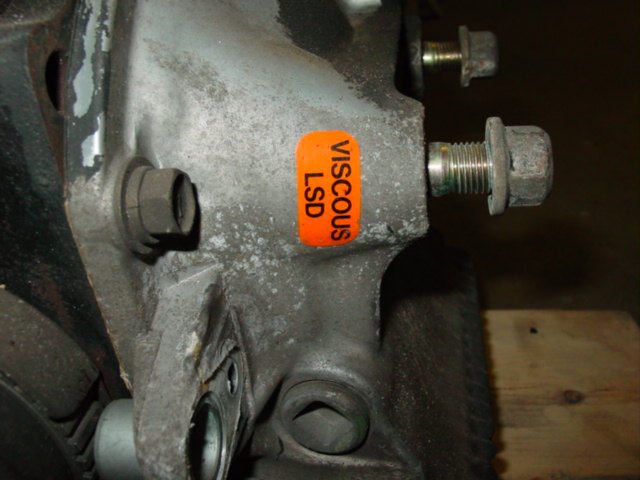
Prepping the new diff
Regardless of how new the diff is, it is a good idea to change the fluid. Plus, if you are changing the diff outputs, you are going to need to drain the fluid anyway. Depending on which cover you have, the drain plug will be on the bottom and the fill plug will be on the driver’s side of the diff. Either way, this is a much easier process when the diff is not in the car.
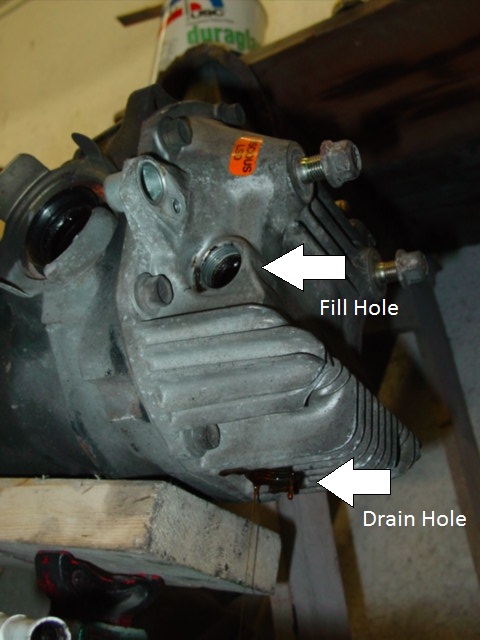
Once you have drained the oil, remove the outputs. Again, if you have an VLSD from a 240, you will have the correct outputs and can skip to refilling the diff with new fluid.
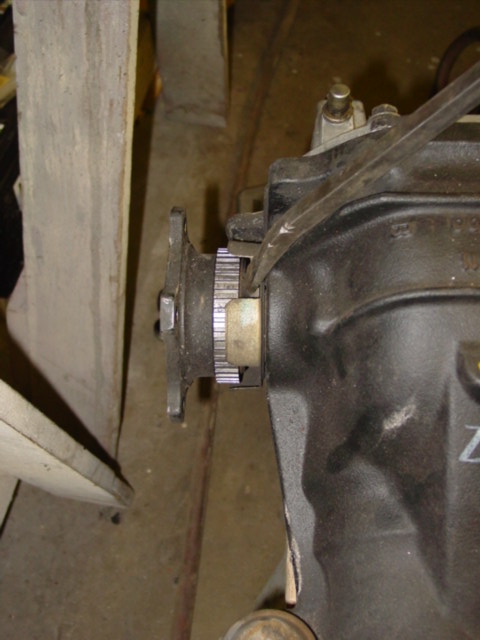
Here are a few pics comparing the diff outputs. You’ll see that the 300ZX outputs have ABS rings and a completely different bolt pattern.
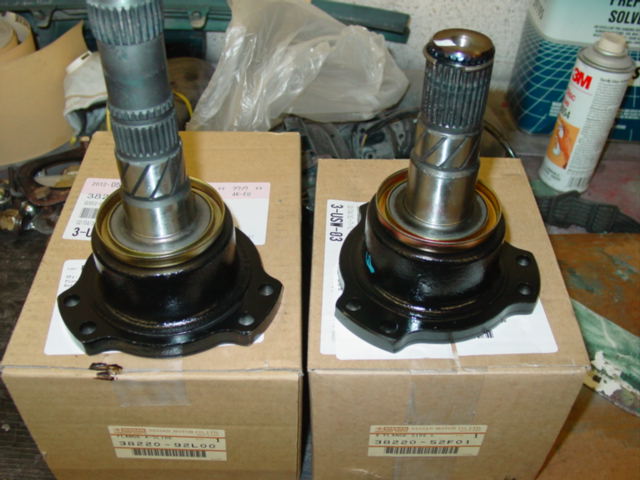
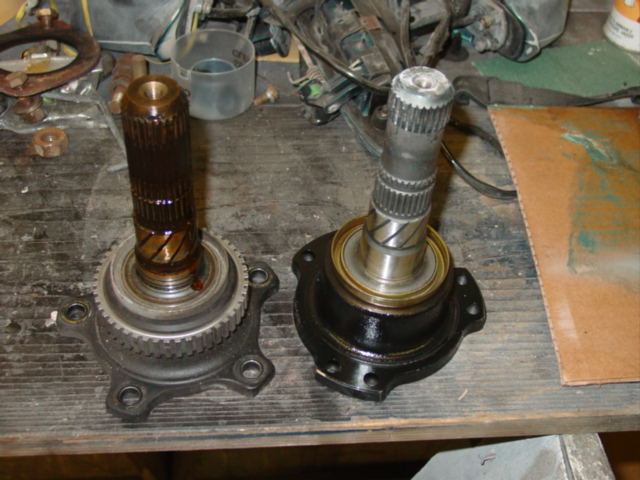

Sadly, when I did this swap over a decade ago, I didn’t compare the non-vlsd outputs to the vlsd. Sorry about that.
Note: You cannot use the 300ZX half shafts. They are about 1-2 inches longer than the 240’s half shafts and do not have the proper rings to protect the wheel bearings. Jeff Callaway attempted to combine the 300ZX & 240SX half shafts with no luck. The 300ZX components have a larger spline diameter preventing the combination.
Using a rubber mallet or a hammer and a piece of wood, tap in the new diff outputs.
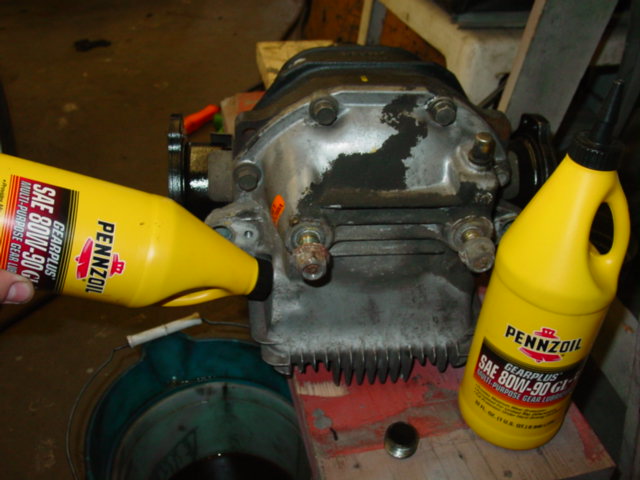
At this point, you can refill the diff with fluid. I chose to prop the front of the diff with a piece of wood to make it level as it would be in the car. The service manual calls for about 3.5 pints. Keep adding fluid until it runs out of the fill hole and install the plug.
Installing the diff
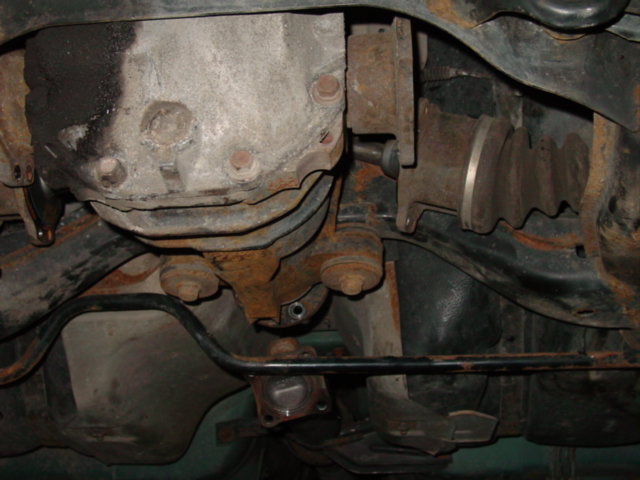
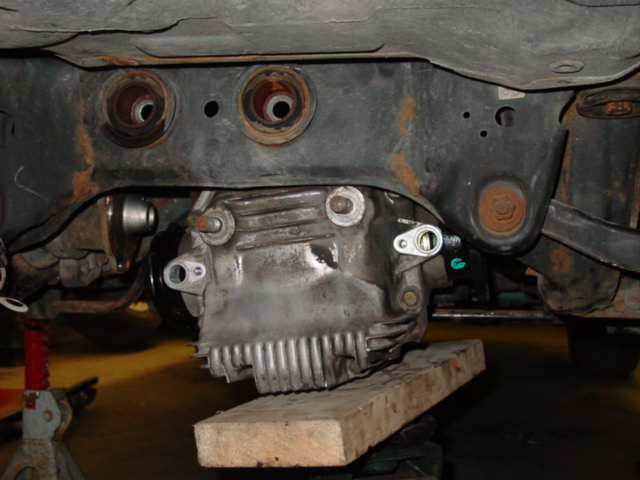
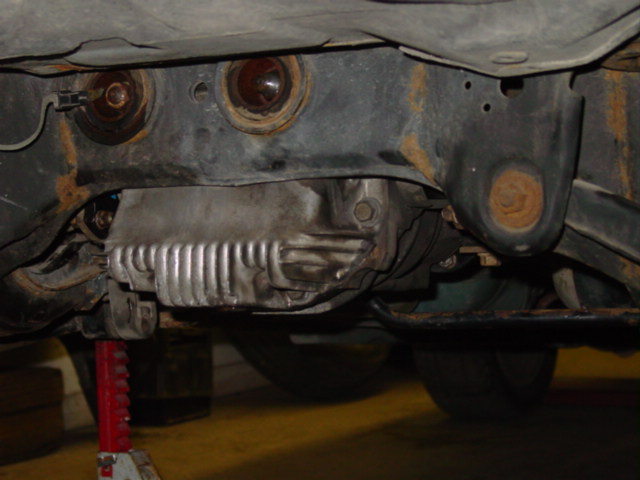
Raise the rear end of the car and support it with jack stands. The best place to support the rear end of the car is by the front of the sub frame mounts. Although I didn’t remove the sway bar (regrettably so), it would make the process significantly easier. Support the diff using a jack and a piece of wood. Be careful, the diff is well over 70 lbs. Remove the drive shaft bolts and move it aside. Remove the half shaft bolts and push them out of the way. Ultimately, you can give yourself more room by removing the half shafts entirely, but that would take quite a bit more work. Remove the two big bolts on the bottom of the diff and remove the two nuts on the back of the diff.
Driving Impressions
During normal driving the diff is completely invisible. Corning under power is much more confidence inspiring. Power sliding and drifting is much more predictable. Hard acceleration is definitely improved on abnormal surfaces. As with the diff upgrade on my civic, this is a critical upgrade for serious driving.
Those swapping into an S13
S13 240’s diff mounts differently than the S14 and pretty much any other chassis where an R200V diff was standard. This requires a different rear cover as well as a change to the front bushings. Here is an explanation from 240SX chat list subscriber Jeremy Dibble:
I posted on freshalloy about the s14/j30/z32 diffs having bushings on the front that need to be replaced with metal spacers. The reasoning behind this is that the s14/j30/z32 diffs are mounted by bushings to the subframe where as the s13 is metal on metal to the subframe. When replacing just the rear cover the front points are bushing mounts while the back ones are 4 small solid mounts. Also note the rear cover is aluminum and rather fragile. If the front end of the diff is allowed to move then it puts stress on the solid mounts on the rear of the diff. I will be getting metal spacers fabricated for this purpose to install my s14 Nismo diff in my s13 since the s14 subframe won’t swap over without special eccentric bushings.
I also want to add that you may want to consider SPL’s aluminum diff bushings for the front mount.
J30 Diff
The Infinity J30 uses an ABS sensor that attaches to the input of the diff. If you have an ABS equipped 240, this will be the same sensor ring. This sensor ring requires that you have a drive shaft that is approximately .55″ shorter than the non-ABS counterpart. If you do not have ABS, you will have two options. First, you can buy the ABS driveshaft. Second you can buy the non-abs diff input. This information was provided by Bill Redding, also a 240SX chat list subscriber.
Another important point to note, is that the J30’s final drive ratio is taller than the 4.083 found in 240’s and NA 300ZX’s. The gear is approximately 3.9:1
Another alternative – Swapping Internals
One other option that most people do not consider, in the case of obtaining a J30 diff, or trying to swap a diff into an S13, is to swap the internals. Technically, the only difference between an R200 and an R200V is the addition of the VLSD unit. I would recommend having a shop do the work for the purpose of getting the tolerances correct.
This idea will prevent you from having to figure out how to properly swap any diff into an S13. Swapping the VLSD unit into the original case will allow you to safely install the differential.