Oh boy
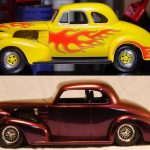
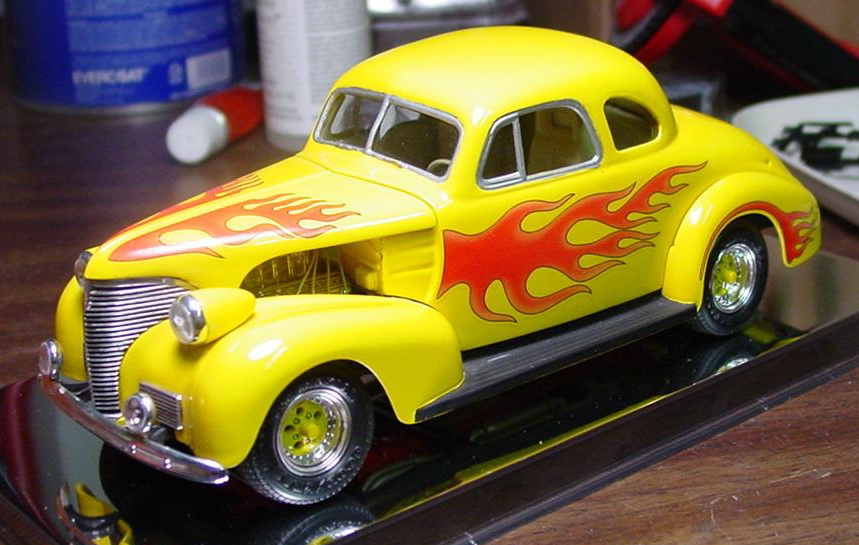
I can’t seem to help myself when it comes to rework projects. The model was originally finished in 1996. During that build, I did minor detail shaving and during the process, as well as fill in the door panel lines. Don’t ask my why because I can’t remember. As much as I loved it early on, over time I really felt that it needed a new look.
2008 Rework
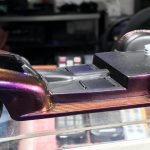
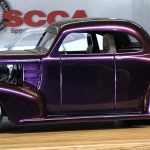
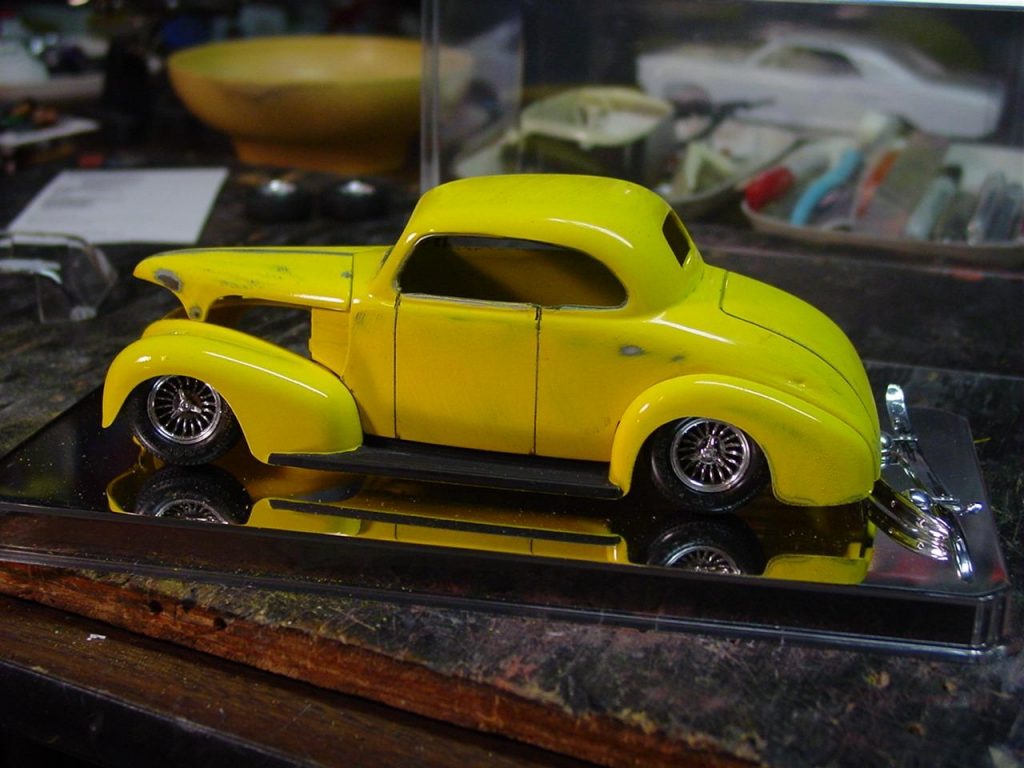
Started in 2007 and completed in 2008, I had a plan to paint the Chevy with a color changing paint, lower it, clean up the lines further by turning it into a pillar-less hard top and added ’65 Corvette wheels. The rework concentrated on body and focused very little on chassis, suspension and interior detail.
Once complete, I fell back in love with this kit.

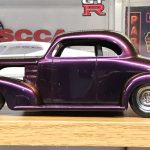
Fast Forward – 2018
A few years after completing the rework, I realized that I didn’t like the ‘Vette wheels. It was many years later that I started toying with the idea of using another set. I bought a couple sets of 60’s/70’s Stock Car wheels and tires and used a set on my ’53 Chevy rework (yes, another rework project). The stock car wheels and tires transformed the look of the ’53 (along with aggressive lowering) and knew I needed to do the same for the ’39.
Starting The Rework
This project started with the simple idea of swapping the wheels. Unfortunately, since the wheels tucked into the fenders, I couldn’t just pull them off. As I started separating the chassis from the body, I decided that I couldn’t ignore the sloppy work I did on the suspension and exhaust.

My wheel swap turned into a chassis, engine and suspension rework. The interior really needed work but since the main body was firmly glued to the lower section, I was fine to leave it be. (is this foreshadowing?) Once I pulled apart the chassis, I realized that I needed to start over with the suspension and exhaust. I knew I would use solder for the exhaust but I needed to figure out how I would modify the suspension. In the meantime, I I mocked up a set of the stock car wheels to see which direction I wanted to go with the rework. I also picked up a set of Parts by Parks machined smooth hub caps to see if I wanted to use them.
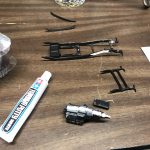
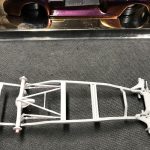
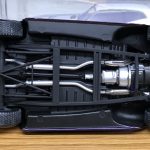
Chassis Rework
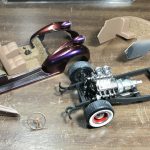
I need to preface this section by admitting that there will be strange parts combinations that probably wouldn’t be done in real life. However, it worked well for this build. While digging through my parts stash, I settled on a Dodge rear axle and suspension links from a pro-street kit. I used a section of square tube styrene to build an attachment point for the links. For the front, I found the complete suspension from a ’94 Firebird. I was stunned by how perfectly it fit! Not only did it fit, I was able to utilize the locating pins on the part which made it easier to finish the work which was accomplished by measuring and marking the location and then drilling. For better fitment, I had to reshape a small part of the frame to ensure proper fit but overall, it was the easiest part of this rework! Added bonus: The engine fit with no additional modification. Along with the new suspension, the chassis received significant attention. I removed the original leaf spring mounts and fill all of the sink marks.
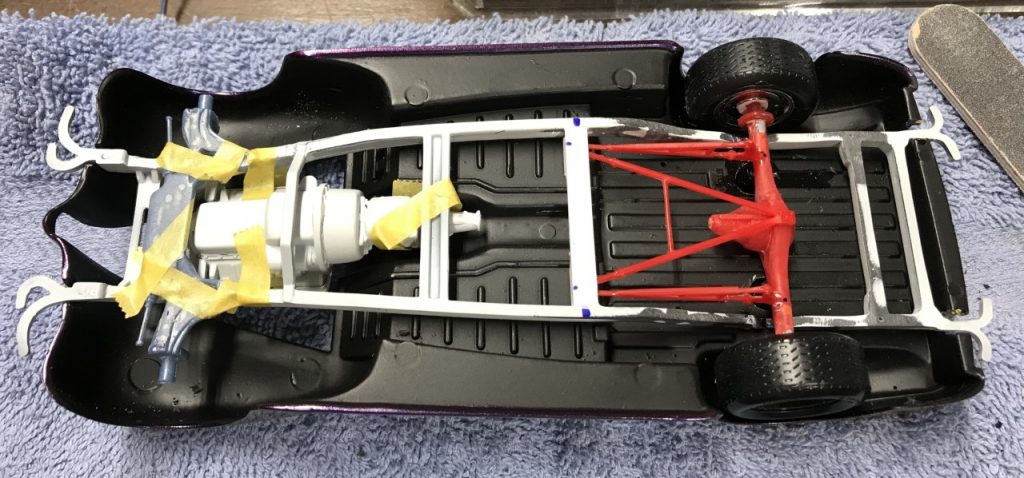
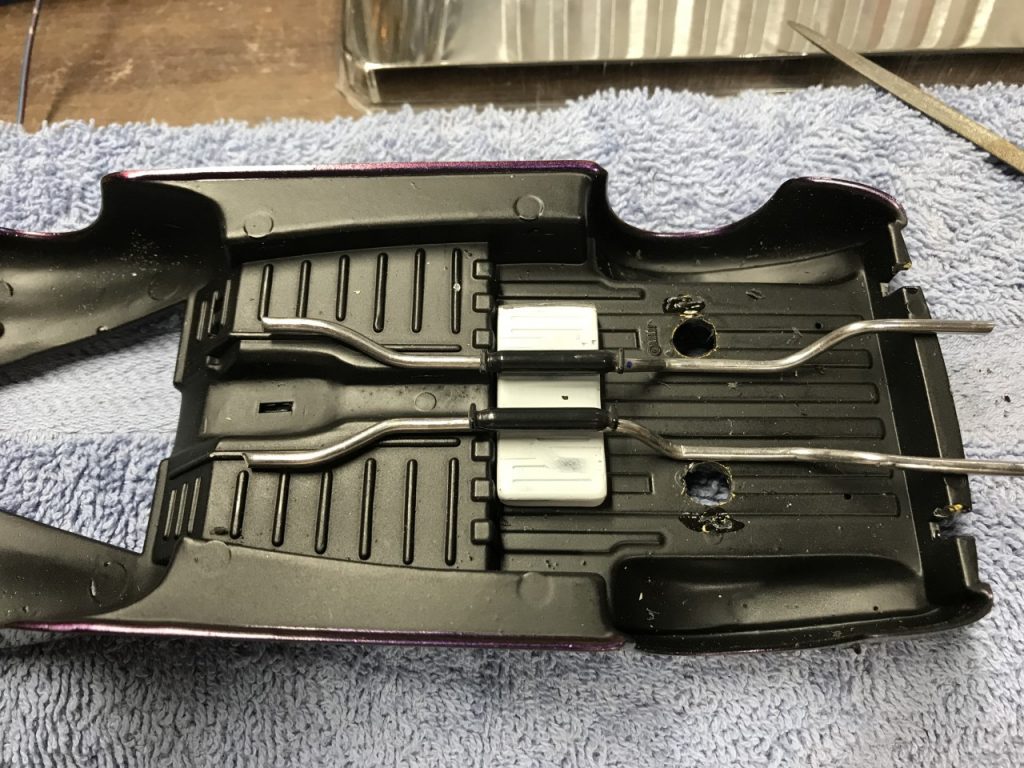
The last piece of the chassis puzzle is the exhaust. I reused the glass-packed mufflers and made the rest with solder. I had removed the gas tank from the chassis and decided to attach it to the bottom of the body which I made sure to set it in place while bending the exhaust.
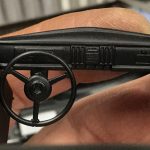
Falling down the rabbit hole – Interior
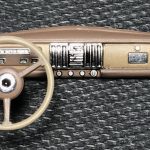
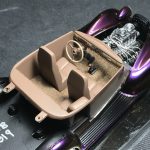
As much as I wanted to rework the interior, I chose not to do it since it would require splitting the body from the lower pan. I knew it would damage the paint and I had no way to fix it. All that changed when I dropped the model and gravity did it for me. The paint was damaged around the fender but overall, the body was ok. The scare aside, I could now rework the interior! The only real detail in the interior is the dashboard. Without spending a great deal of time on detailing after stripping the paint, I decided to add as much to the dash as possible and flock the interior. I chose a Tamiya flat earth for the base color and buff for the accents. I added a bare metal foil as well.
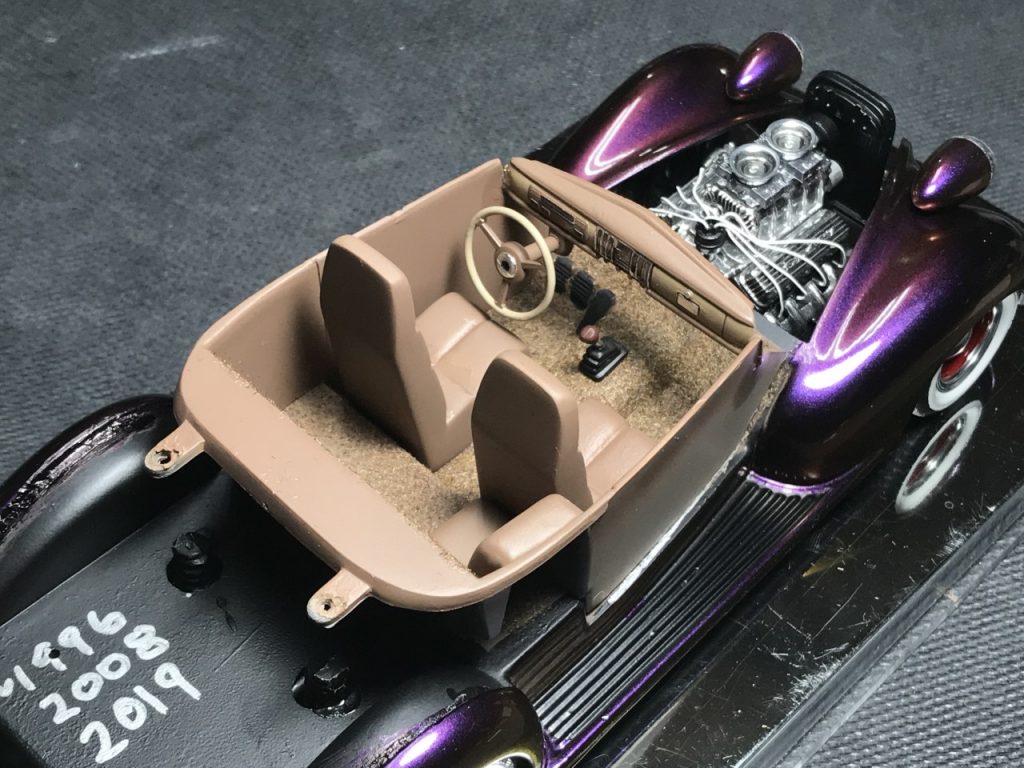
One additional detail is painting the “rubber mats” for the running boards.
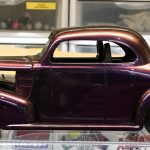
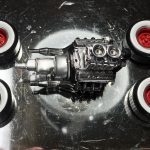
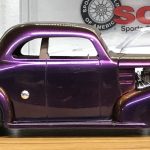
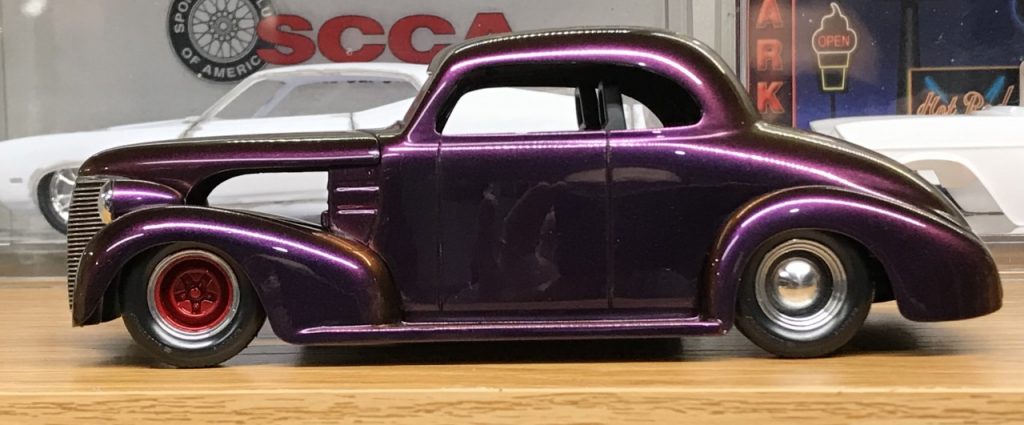
Wheels, Tires, Engine and Details
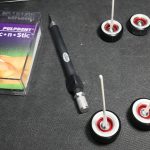
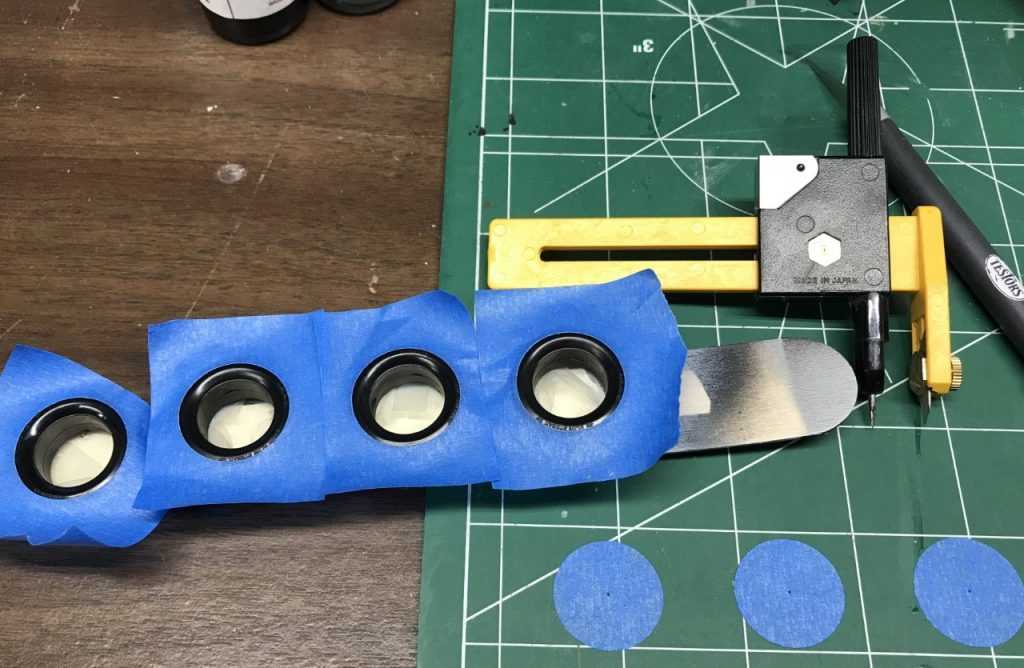
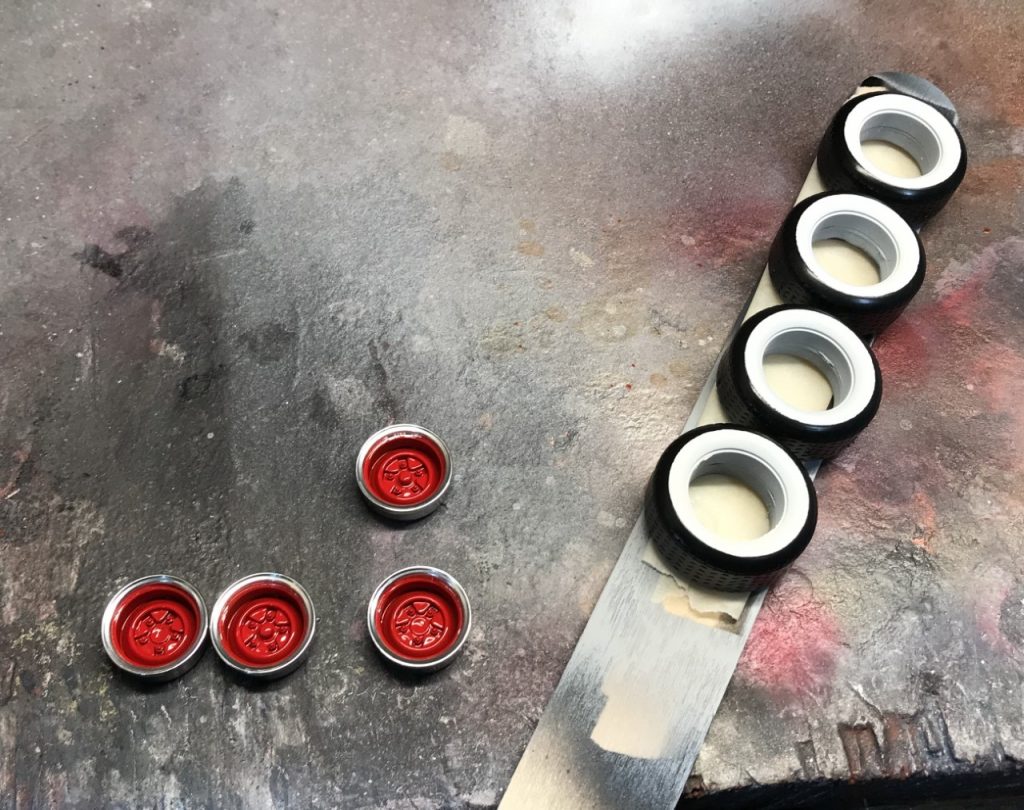
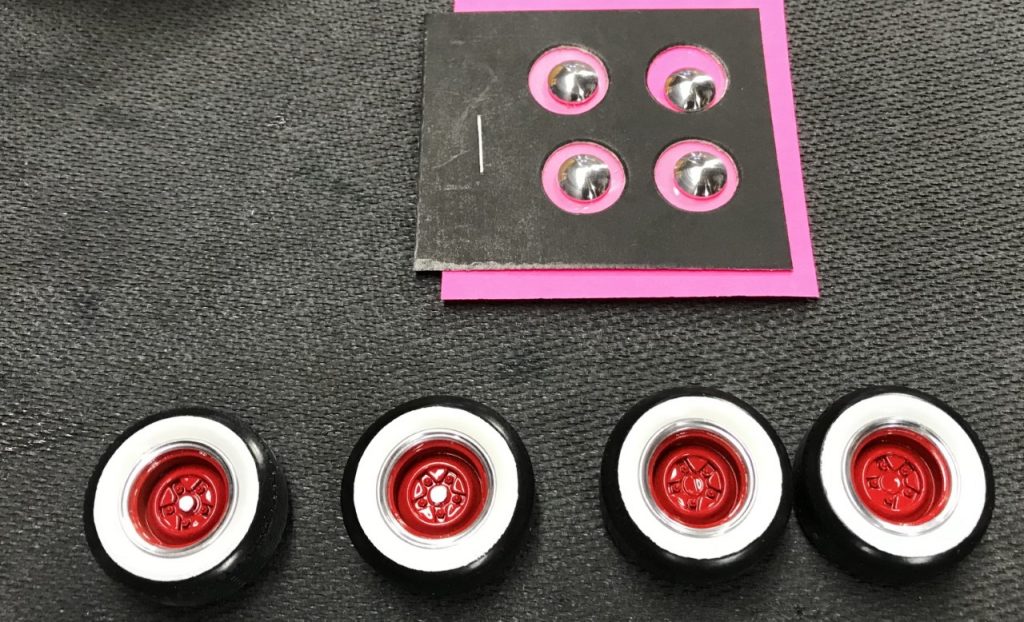
During the build, I started to think that the tires really needed to have white walls. Even with a red center and chrome lip, the model needed more. I decided to try and use a circle cutting tool for RC car bodies that I have. After a successful test on a scrap tire, I was ready to commit.

The engine was blown apart and stripped. I filled the seam in the oil pan and transmission. I Spazstix chrome painted the headers, valve covers, intake manifold, blower and velocity stacks. The engine was painted with Alclad steel and the transmission with Tamiya gloss aluminum. I added a Detail Masters distributor and plug wires. Lastly, I added a ’94 Firebird driveshaft to complete the drive-train.

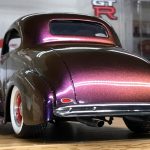
After attaching the body sections together, and attaching the completed body to the chassis, I needed to add a few more details. I stripped the body colored bumpers and sprayed them with Spaztix chrome, added aluminum tubing for exhaust tips and used Detail Masters photo etched tail lights to give this Chevy tail lights for the first time!

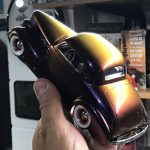
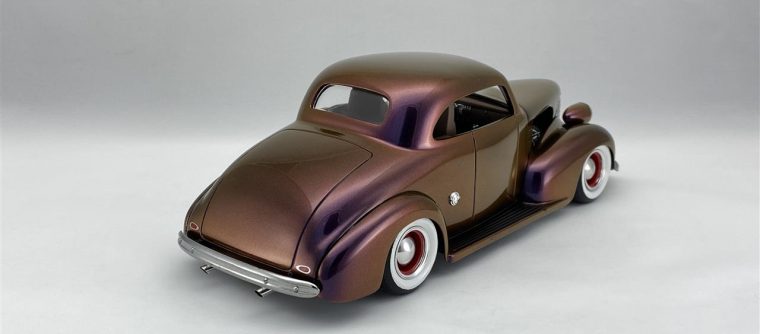
Final Thoughts
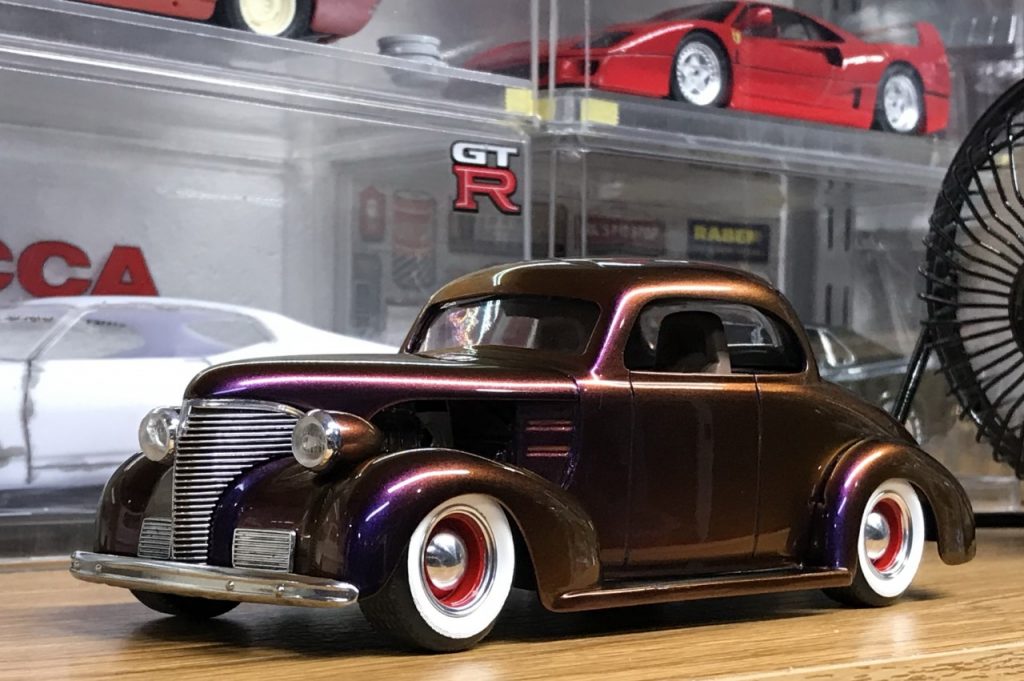
I took a great build and made it amazing! The damage to the paint caused by dropping it is noticeable if you look closely but isn’t obvious. I’m beyond thrilled by the look of the new wheels and tires. The added detail of the whitewalls, red and chrome wheels along with the Parts by Parks hub caps really stands out. The fact that the car now “rides” on a more realistic frame and suspension also pleases me. I’m glad I dug into this rework and had the opportunity to make it amazing!
Original Build: 1996
First Rework: September, 2008
Final rework: July, 2019