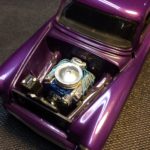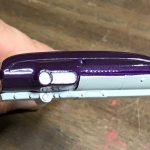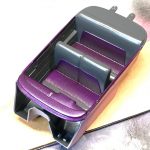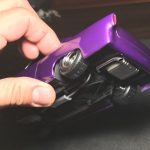
I always like they way this project turned out. It was my second custom project, after my ’39 Chevy. From what I remember of the original build, I really struggled with the putty work but in the end, blending the front grill together, frenching the tail and head lights along with the rock guards on the rear quarters, turned out very well.
The intention of this rework is to address everything else that wasn’t quite right. I stuffed a 427 from a ’65 vette under the hood but never made an exhaust. I had envisioned a more detailed interior but lost interest and painted it all black. The ’79 Z28 Camaro wheels look okay, but really don’t fit the overall look of the car.
This rework addressed each of those issues and more. Since I still had the parts, I want to use the original inline 6 along with the custom parts that came with it. Originally, I had intended to leave the molded-into-chassis exhaust since I was using the original engine. However, my extreme lowering project changed that plan. More on that shortly. The interior work will be addressed by adding more colors and details. The biggest, most obvious change is the wheel and tire combo. I’m using an old Stock Car style steel wheel and tire combination found on Model Roundup’s website. Along with the wheels, I’m going to lay the car on the ground. When I mocked up the body with the new wheels, I knew it was the right look.
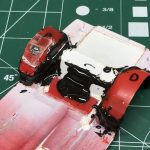
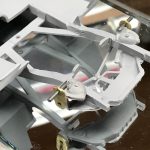
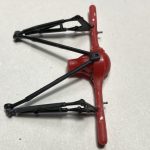
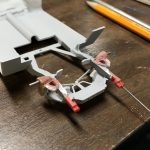
Once I pulled apart the model, I set the body aside and tore into the chassis plate. In order to get extremely low, and make the modifications look believable, I needed to cut out quite a bit of the area around the rear axle. As I started removing material, I realized that most of the original exhaust was going to be removed and I decided to remove all of it. I used a spare kit to repair fill in the area where the exhaust lived. For the rear axle, once I cut away the wheel wells, and the all of the material between the frame rails, I worked on getting the ride height I wanted. In order to maintain continuity through the build, I used three business cards for spacing. Once I marked the chassis, I notched the frame for clearance and moved forward with filling in the removed material. I used sheet styrene to create a pocket for the axle and used various original parts to complete the work. I used the wheel wells from my spare kit to build new, deeper wheels wells on my modified chassis. It is possible that I did more body work to this chassis that I did the body! Finishing the rear axle, I used a multi-link setup from my parts box and built a new drive shaft using aluminum tubing and u-joints from my parts box. The modifications to the front suspension involved using brass strips and metal wire to relocate the wheels. I sprayed the wheels with Alclad chrome.
For the interior, I chose an OEM pattern with my own color choices. I sprayed the dash and door sills body color along with the seat inserts. Once I sprayed Tamiya acrylic gray on the rest of the seats, I sprayed everything with Tamiya semi-gloss clear to dull the gloss inserts. I used a combination of bare metal foil and Molotow chrome to detail the dashboard. I added flocking for the carpet and package shelf. The final detail was adding a rear view mirror for the sole purpose of hanging a set of “fuzzy” dice.
I built the original inline six using the kit’s upgraded header and carb/intake combo. I used a detail masters distributor kit and Alcald chrome for the header and valve cover.
Wrapping up the details, I built a new exhaust using plumbers solder and a parts box muffler. I also found the importance of mocking up “all” of the parts prior to committing to paint. The original exhaust/header was routed below the cross-member. Due to the thickness of the header, it sat lower than the ride height! I was able to modify the header by making relief cuts on the top and bending it over the cross-member. I modified the solder exhaust to meet the header in its new location. I topped off the exhaust with an aluminum tip that just peaks under the rear valance.
I’m blown away by the improvements on this project! Although it was tempting to give this project a new coat of paint, I kept the body original to how it was built in ’99 to preserve my early efforts at custom body work. Even so, the rest of the model now compliments my original efforts.
Originally Completed: 1999
Rework Completed: November 2017


