
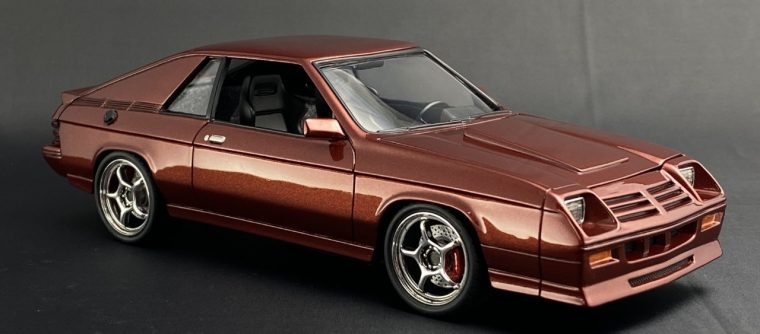
You may say, there was no such thing as a 1982 Dodge Hemi Charger. That’s true, but it doesn’t mean I can’t build it that way! Pure kit-bashing fun with this one.
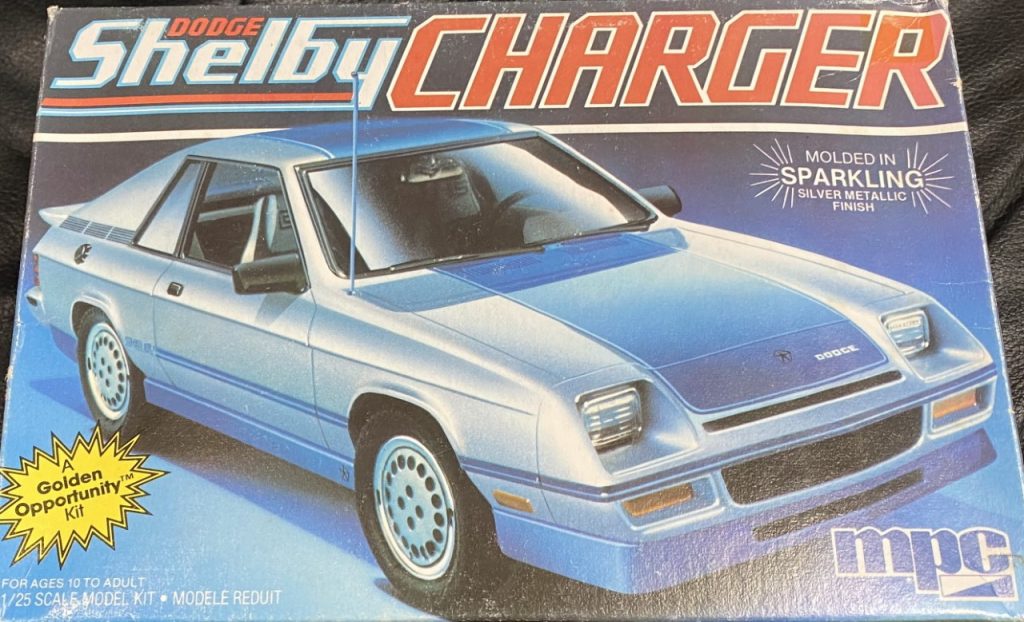
This project started after I had finished building an identical Charger. When I had originally discovered this kit, I wanted to build one that resembled the 1:1 that my dad owned as well as build one for myself. After having struggled through the entire build, I didn’t want to subject myself to the same difficulties on the second kit. Rather than trash the kit, I decided that it needed a V8. I’m not going to try for functional accuracy but I wanted to get close. I pulled a 426 Hemi from my spares and found out that it fit in the bay.
Getting this across the finish line required substantial fabrication. This fact is why it took me over six years to finish! Over that span of time, I would pick up the project and make progress. Then I would get stuck and it would sit for a while. Inspiration would hit and I would complete more work. Then get stuck and set it aside. In the end, the build changed direction several times and as a result, I have a finished build that is convincing execution of the original idea.

Donor Parts/Kits
- Opel GT rear axle
- Dodge D100 gas tank
- 69 Camaro front subframe and suspension
- 66 Charger complete hemi
- 66 Charger pedal set
- 70 GTX interior transmission tunnel
- 70 GTX muffler
- 70 GTX Shifter
- 55 Ford rear shock/springs
- Unknown – Recaro seats, radiator and electric fan
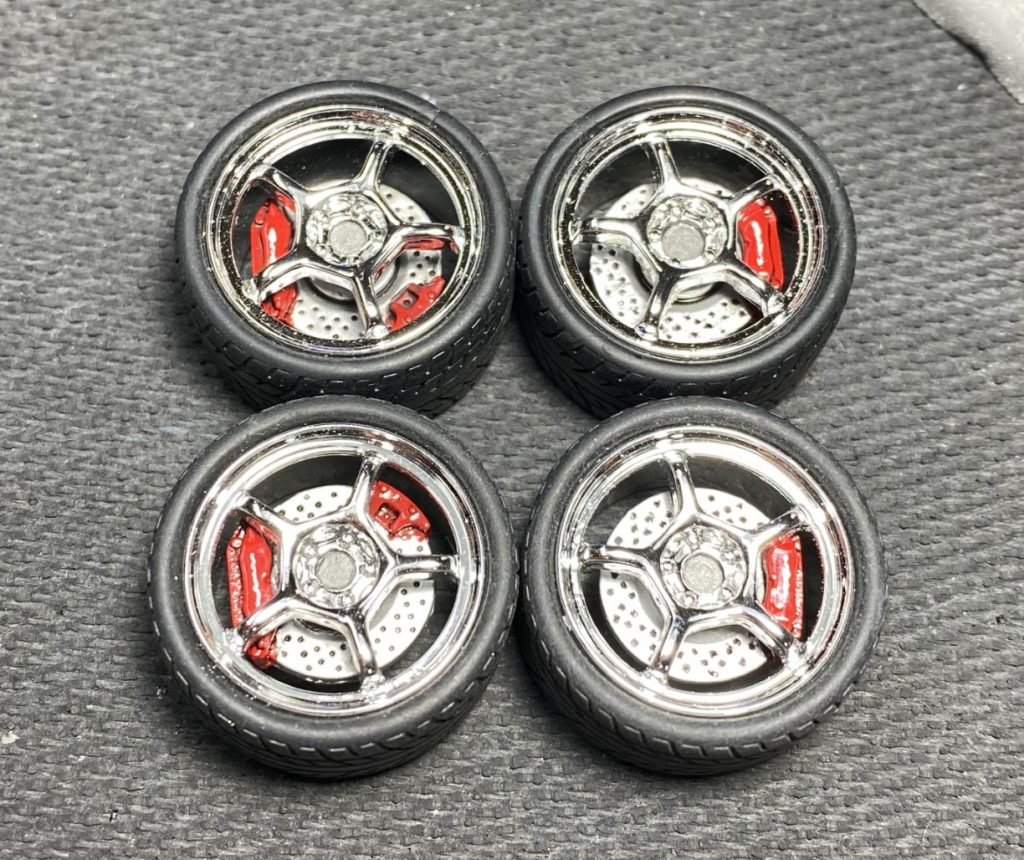
- Pegasus wheels
- Clearly Scale brake rotors
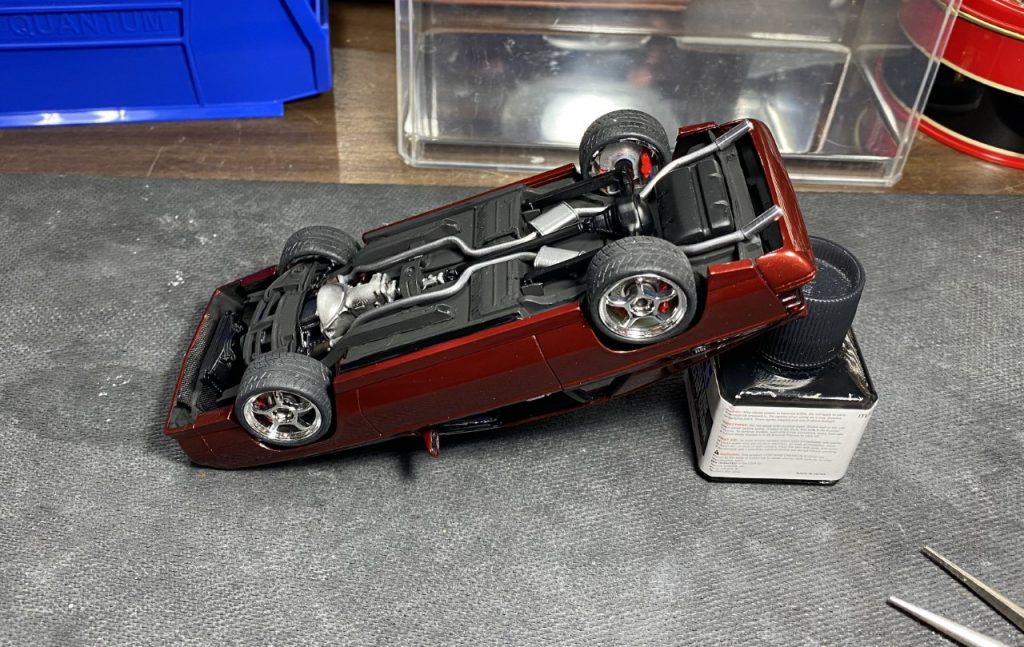
Chassis
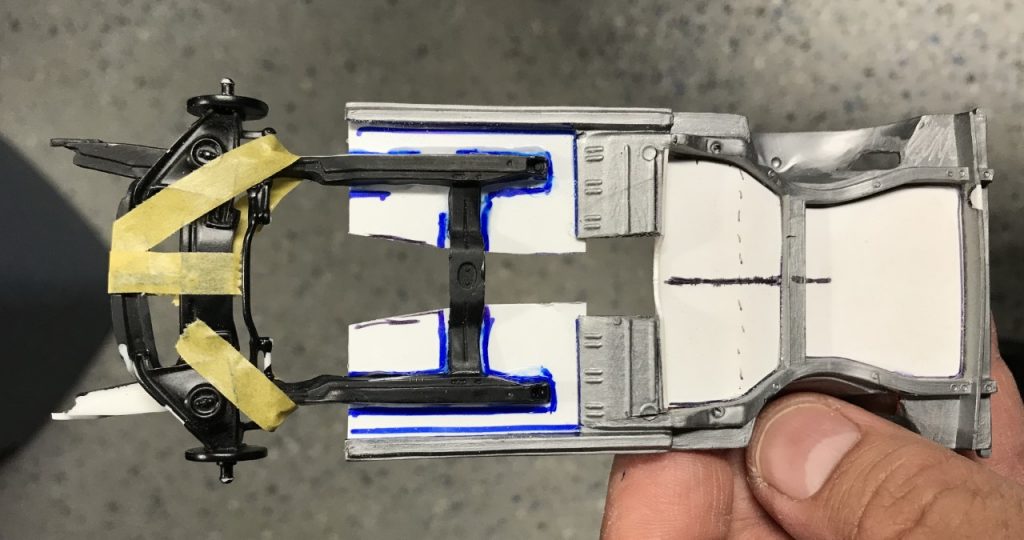
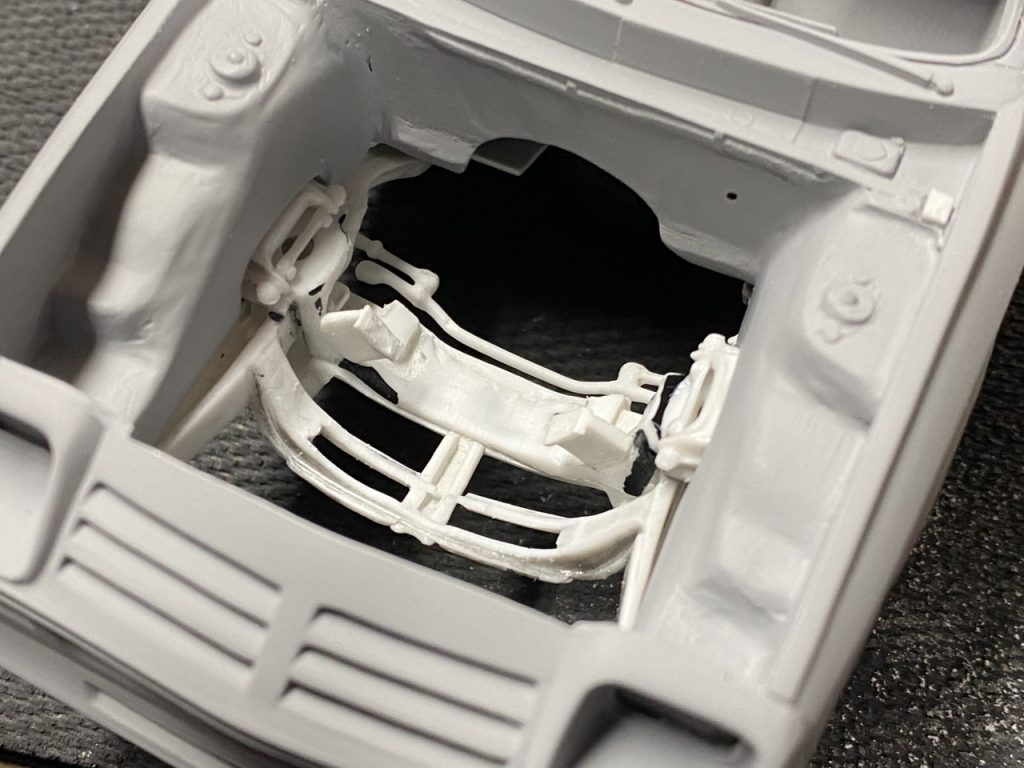
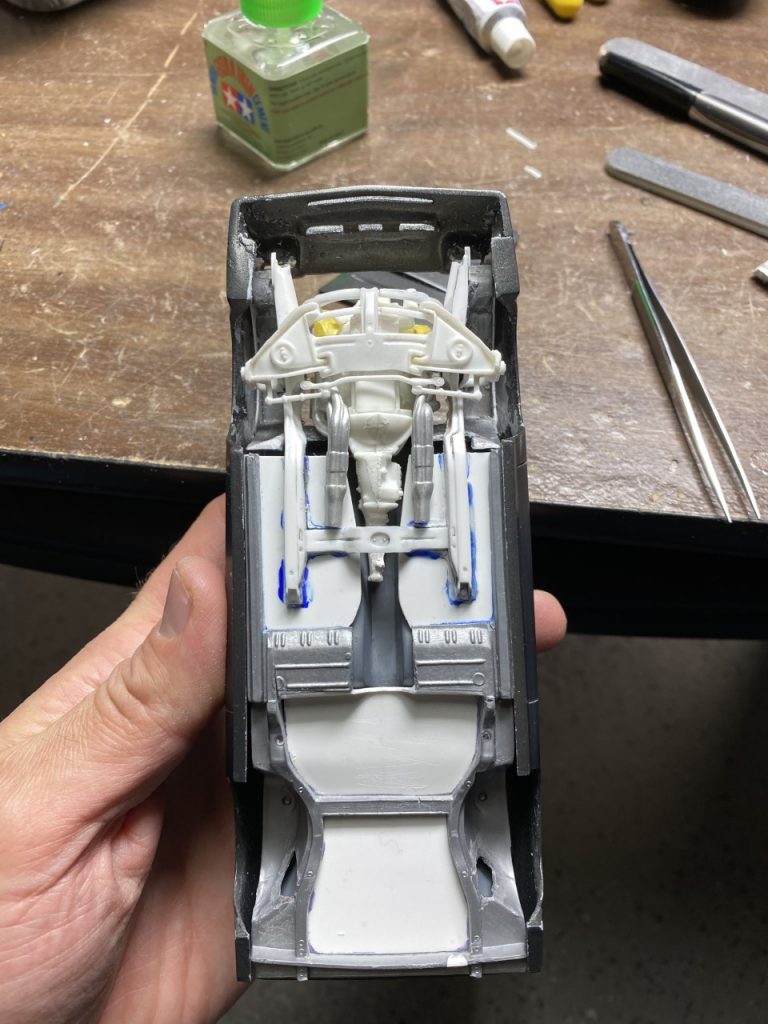
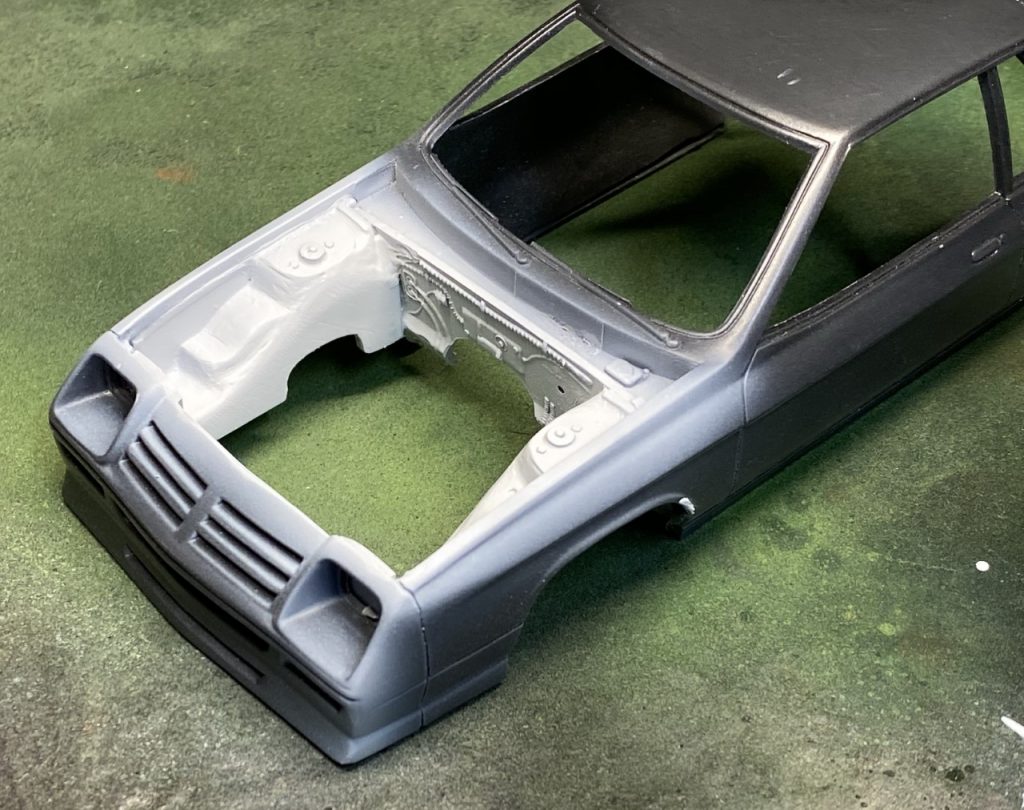
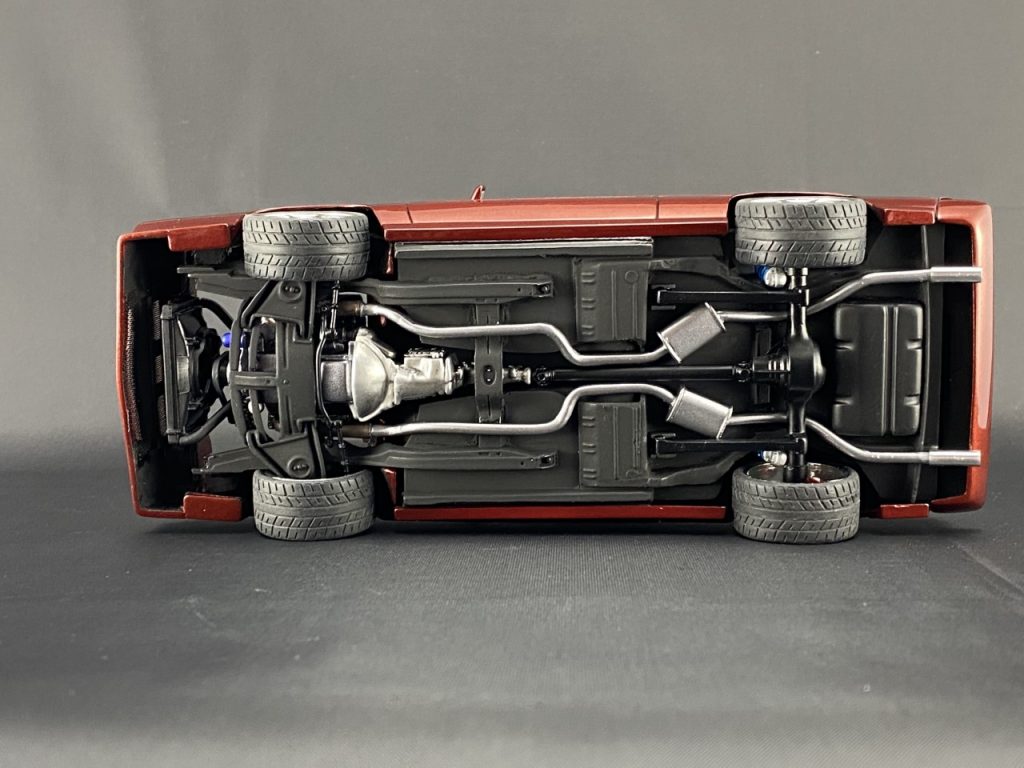
Ultimately, the biggest modifications would involve the chassis. This part of the build was the biggest hang-up through out the entire build. As you can see below, the engine bay was separated from the part. Then most of the floor pan was removed and replaced with sheet styrene.

Over the years of the build, I really struggled with how the V8 and suspension would work together. I thought about modifying the original parts but realized that once I made clearance for the engine, there wouldn’t be enough left to use.
Later, I thought about grafting a narrowed front subframe and chassis components from a ’70 roadrunner. That seemed clumsy at best.
At long last, I settled on the front frame and suspension from a ’69 Camaro. It may be slightly wider than I needed, but I could make it work. Once I cut away the rest of the Camaro chassis, I was left with the parts I needed. After much measuring and marking, I had it attached to the Chargers heavily modified chassis. Shortly after, I finished stripping the paint from the Camaro parts and prepared the chassis for more detail work.
The next step was preparing the subframe for the new engine. Using my mock-up engine, I massaged the subframe and engine to allow it to fit as low as possible allowing the stock hood to fit. Next, I made engine mounts with sheet styrene.
It was time to start fabricating the rest of the chassis! Clearance work for the tires was complete years ago to the chassis and the body. I patched holes in the rear wheel wells with curved clear plastic from a jug.
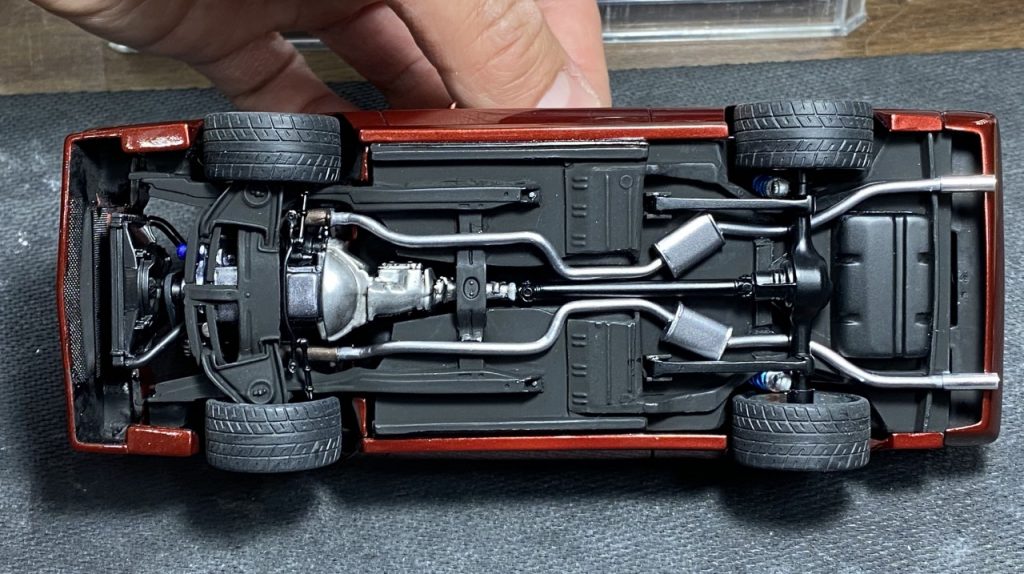
The rear axle was sourced from an AMT Opel GT kit. I made “shackles” using sheet styrene. I then added coil-overs from a 55 Ford truck kit. The gas tank was sourced from the Dodge little red wagon kit. The exhaust was constructed using solder and a Plymouth GTX muffler cut in half and “fixed” with sheet styrene. For a drive shaft, I used one from my parts stash.

Overall, I was really pleased with the work I had done for the chassis. The only change I would make is to make the exhaust more symmetrical. That aside, I couldn’t be much happier!
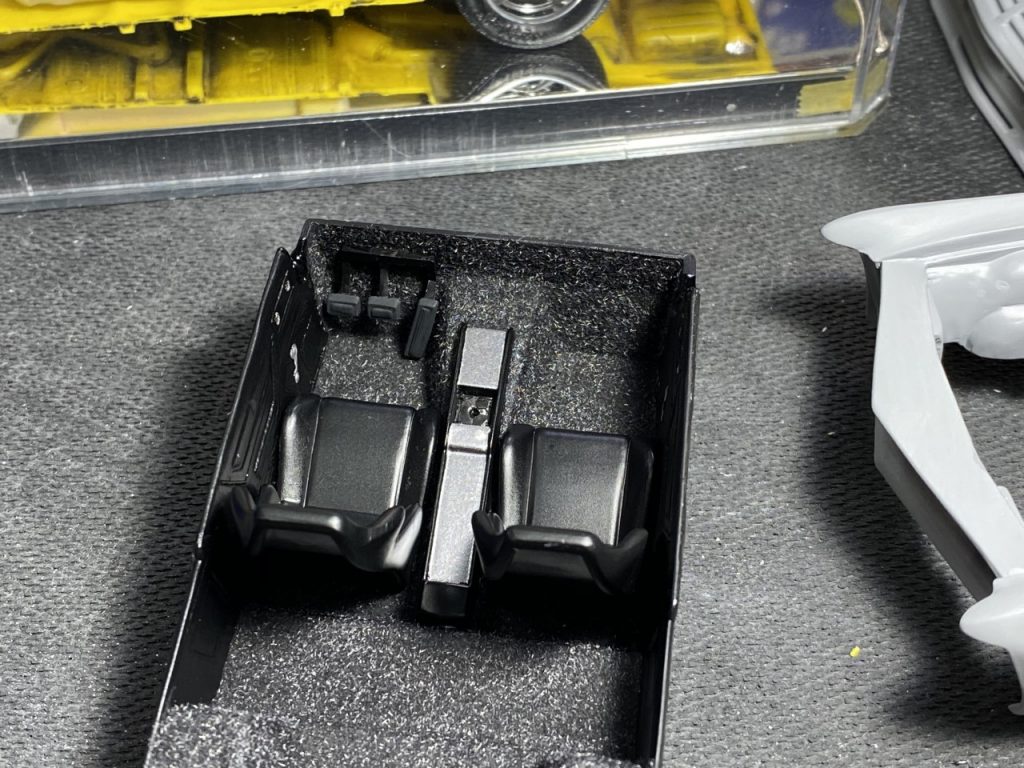
Interior
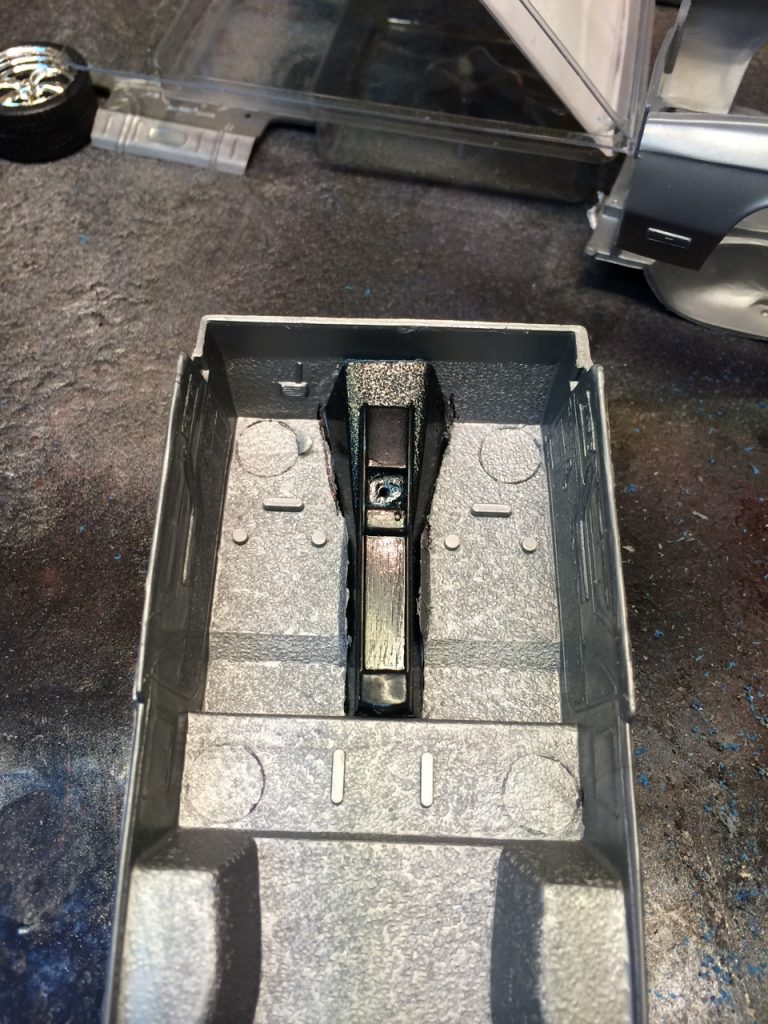
Considering all of the work necessary to build the chassis, the interior was straightforward. The biggest change was adding a tunnel for the drivetrain. Solving the challenge, I used the interior tunnel from a ’70 GTX. I completed this work very early in the build.
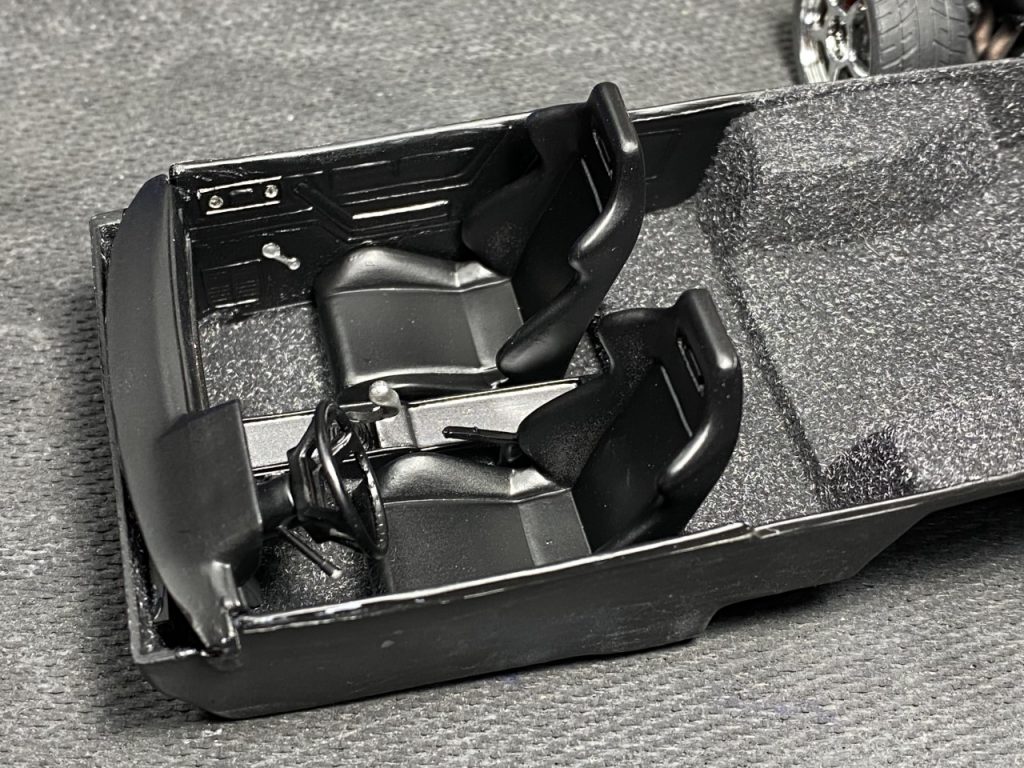
My only concern through the years was what I would use to finish the interior. In the end, I decided to use a pair of Recaro seats and leave out the rear seats. The original seats looked out of scale.
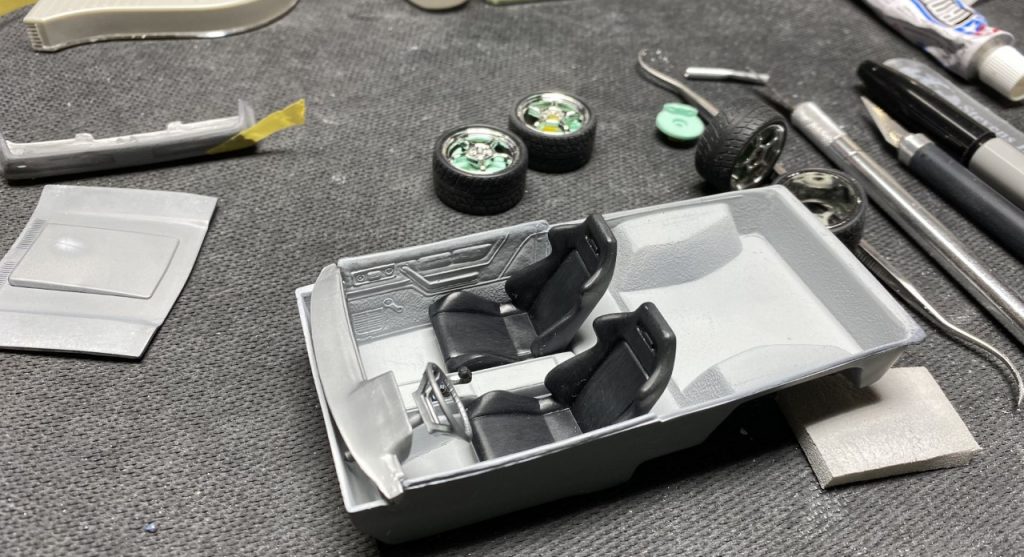
The interior was finished using Tamiya semi gloss black with light gunmetal accents. Topping off the interior, I used flocking to cover the sea of floor space. A set of pedals from a ’66 coronet kit were added to fill the void under the dash.
The simple dash was detailed by adding a light gunmetal accent and hand painted gauges. The 70 GTX’s shifter was stripped and painted to match the theme of the interior.
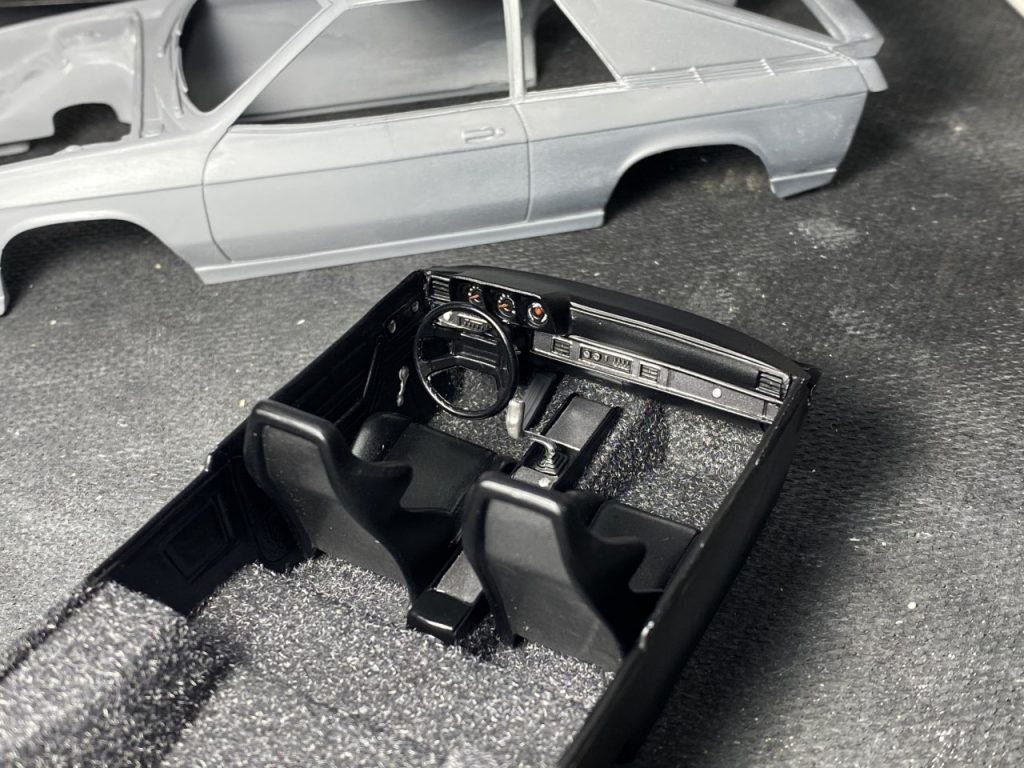
Overall, the simple interior looks great.
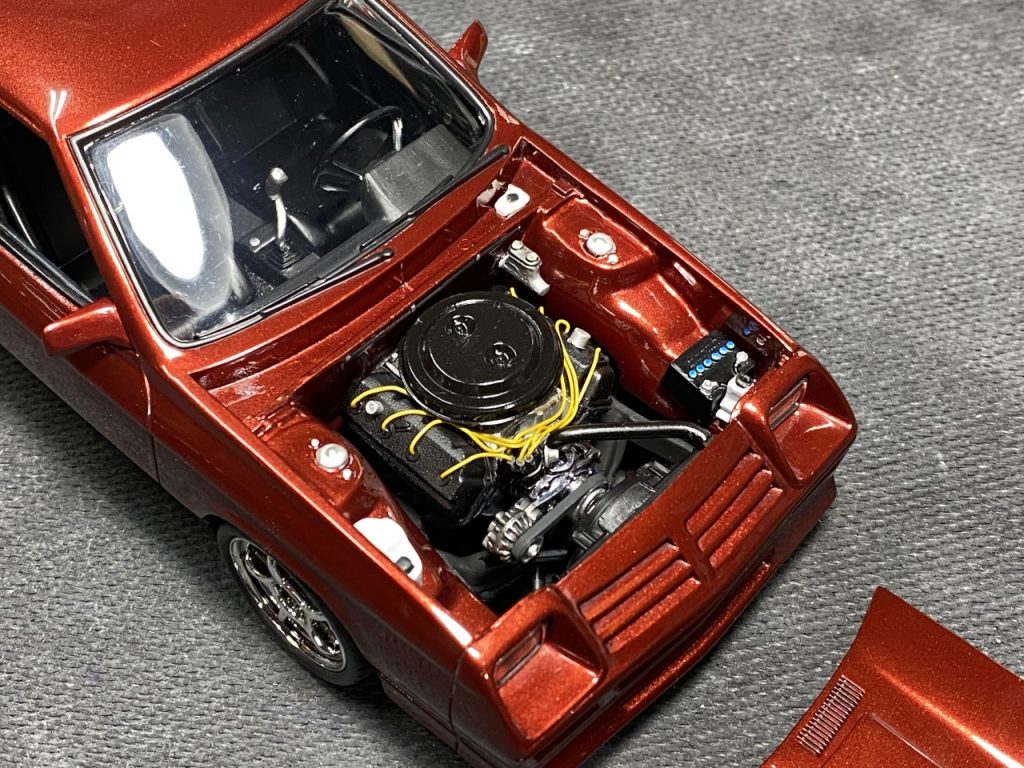
Engine
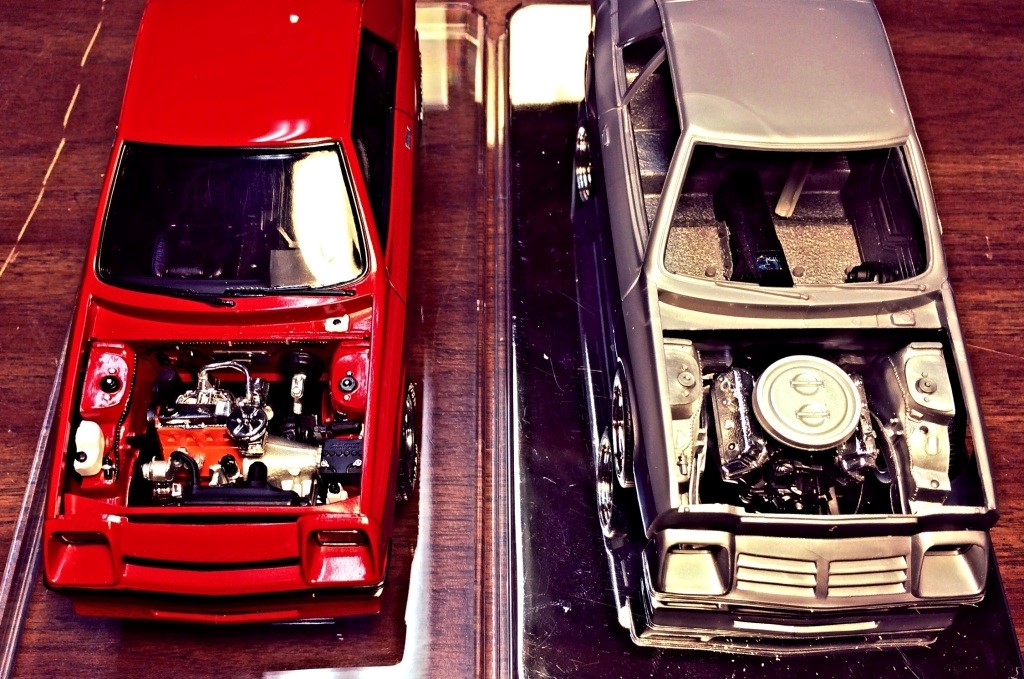
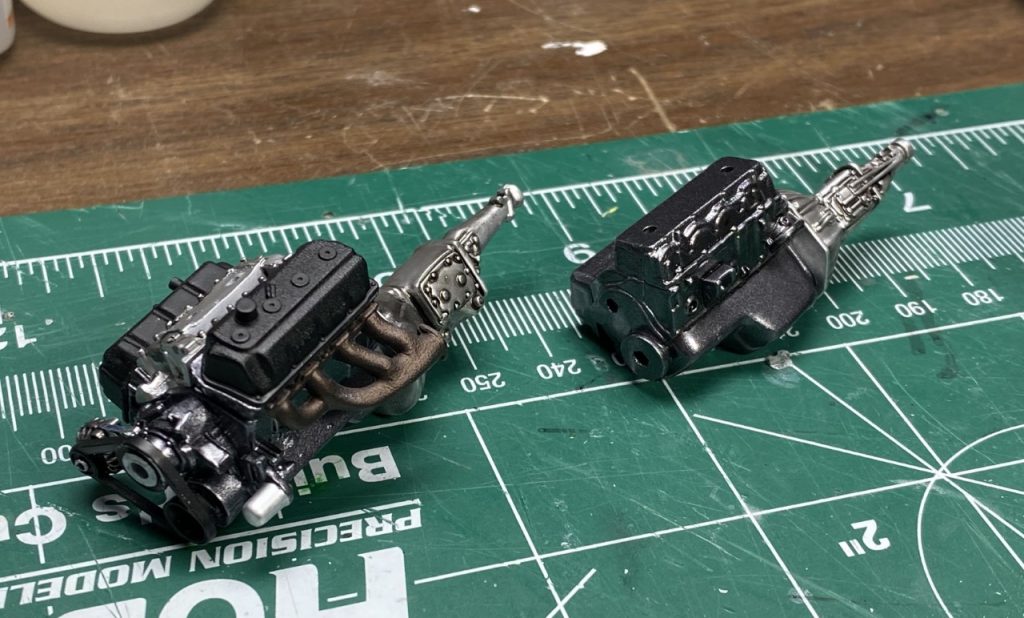
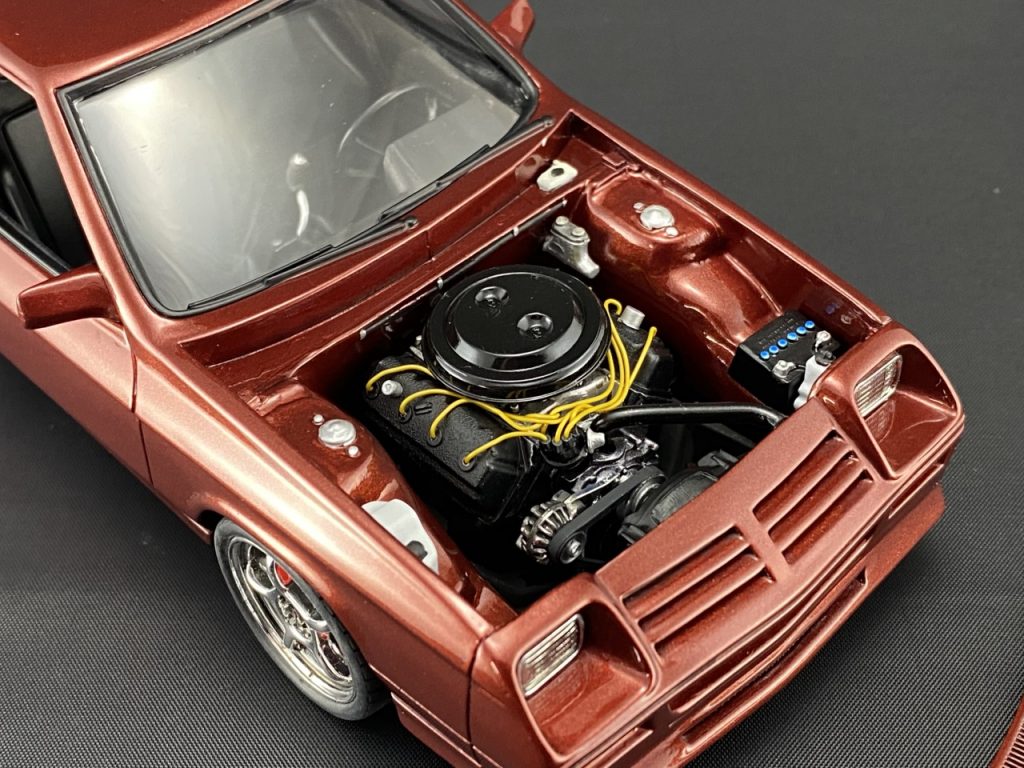
Ah the engine. This is the heart of this beast and the motivation for this build! The engine itself is mostly unmodified. The oil pan was butchered to make it fit around the Camaro subframe. It’s another unrealistic modification but I can live with it. Once the modifications were complete, the rest of the engine was built “box stock”
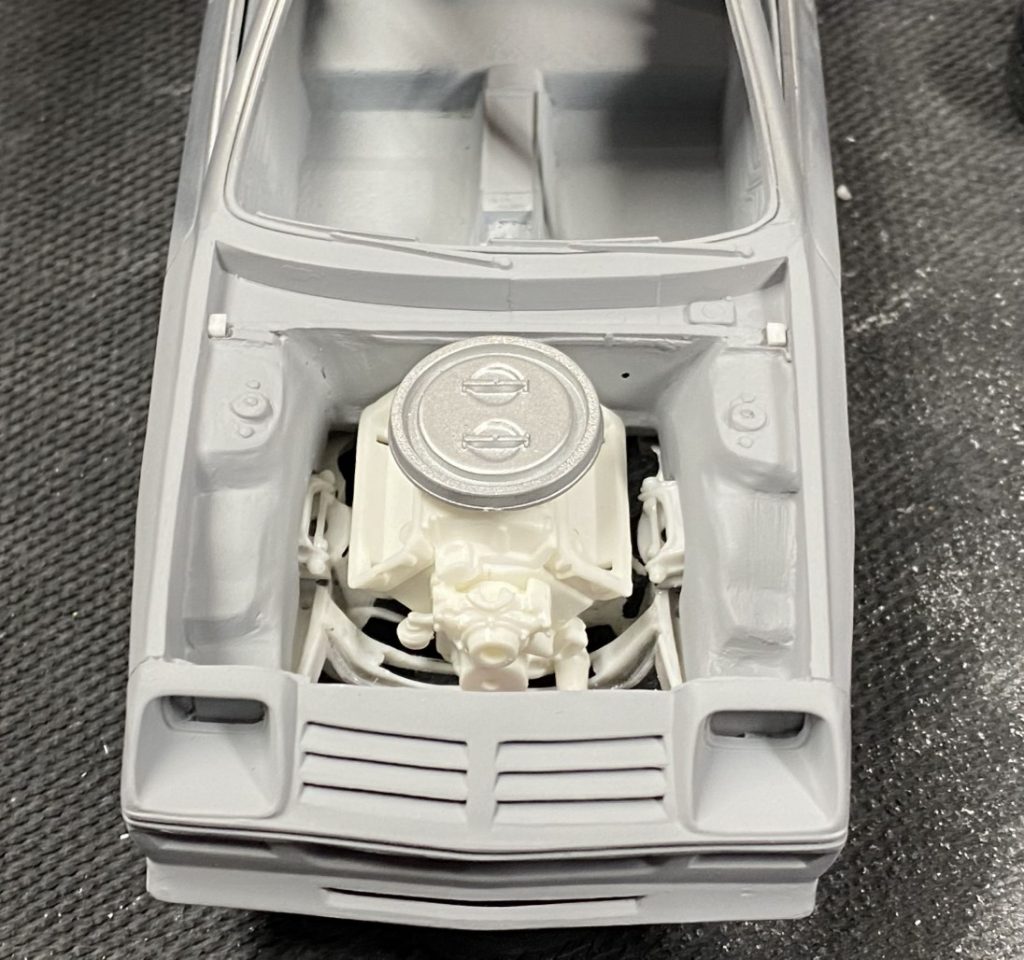
One of my original thoughts was to use the racing headers that came with the 66 charger. If I had used a different subframe, I probably could have squeezed them in. However, clearance issues forced me to use the stock manifolds. That’s still a lot of horsepower!
Fitment work decided and complete, it was time to finish the engine. I decided on gunmetal for paint and semi gloss back for valve covers.
Wrapping up the work on the engine, I added a set of spark plug wires.
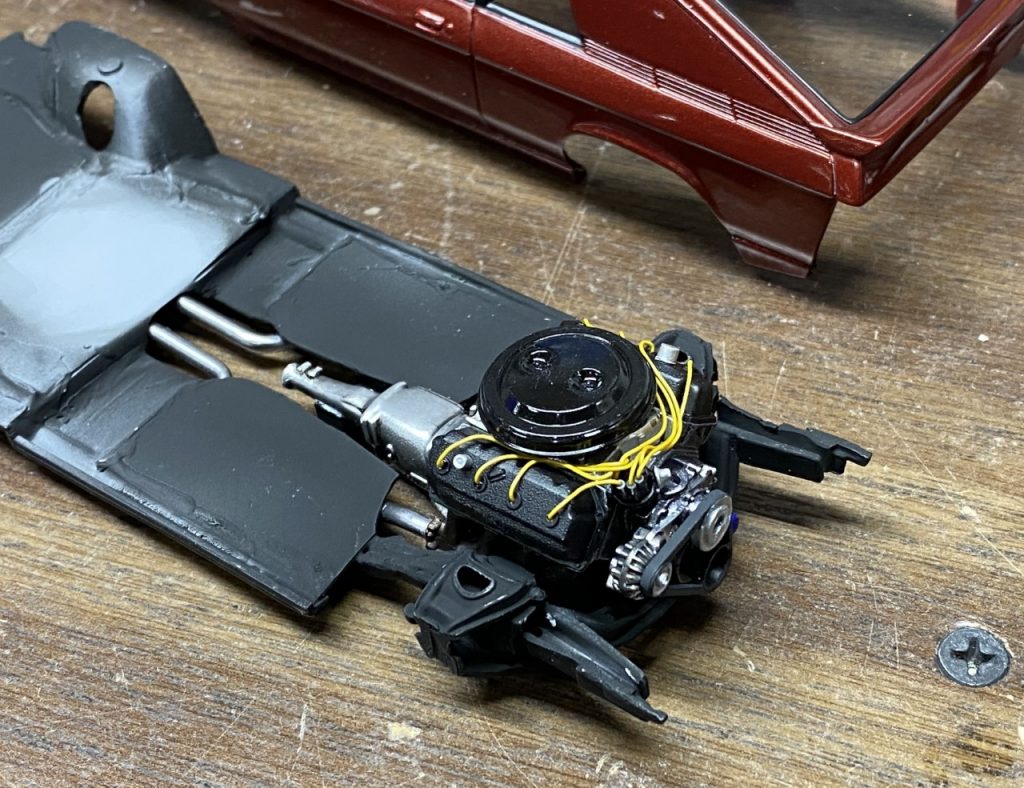
The last step of the engine swap was fabricating upper and lower radiator hoses using solder.
For a radiator, I found one with electric fan in my stash. The rest of the engine bay was completed using the original bottles and battery from the kit. Due to clearance issues, I had to abandon the brake booster. The master cylinder was pinned and attached to the firewall.
Body
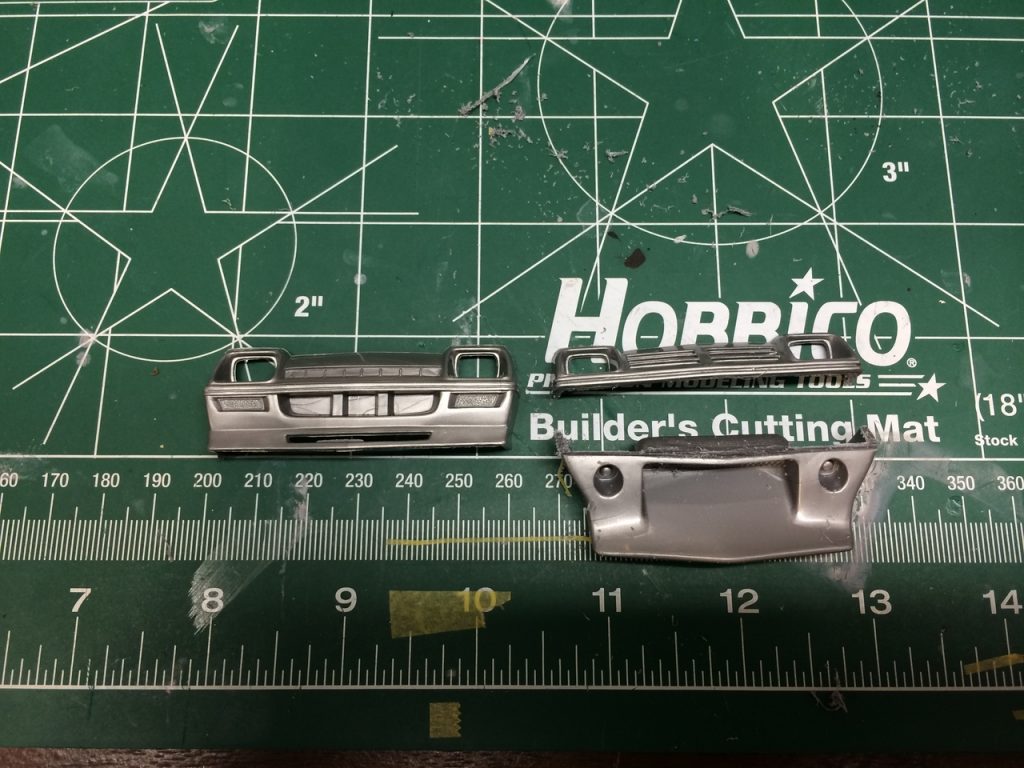
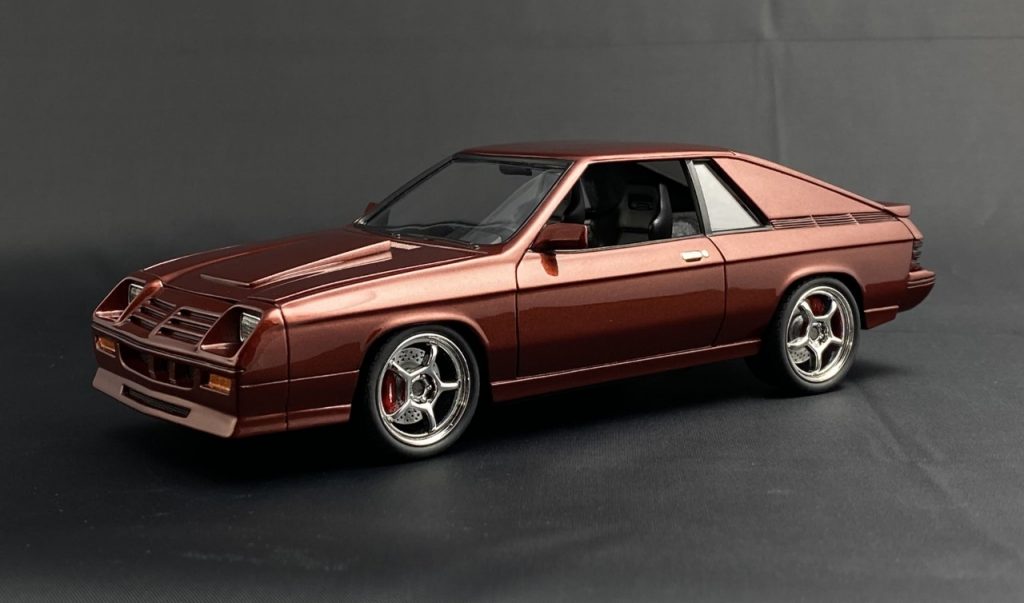
My original intent was to keep the body as stock in appearance as possible. Most of the modifications were performed on the front of the body. I wanted to combine the non-Shelby top portion with the Shelby bottom. The kit had a wildly modified piece using the non-Shelby grill. Beyond that, the work complete was to address the awkward fit of all the pieces.
Early in the build, I addressed a bad warp in the body using heavy brass stock, clams and heat. This worked surprisingly well to address the issue.
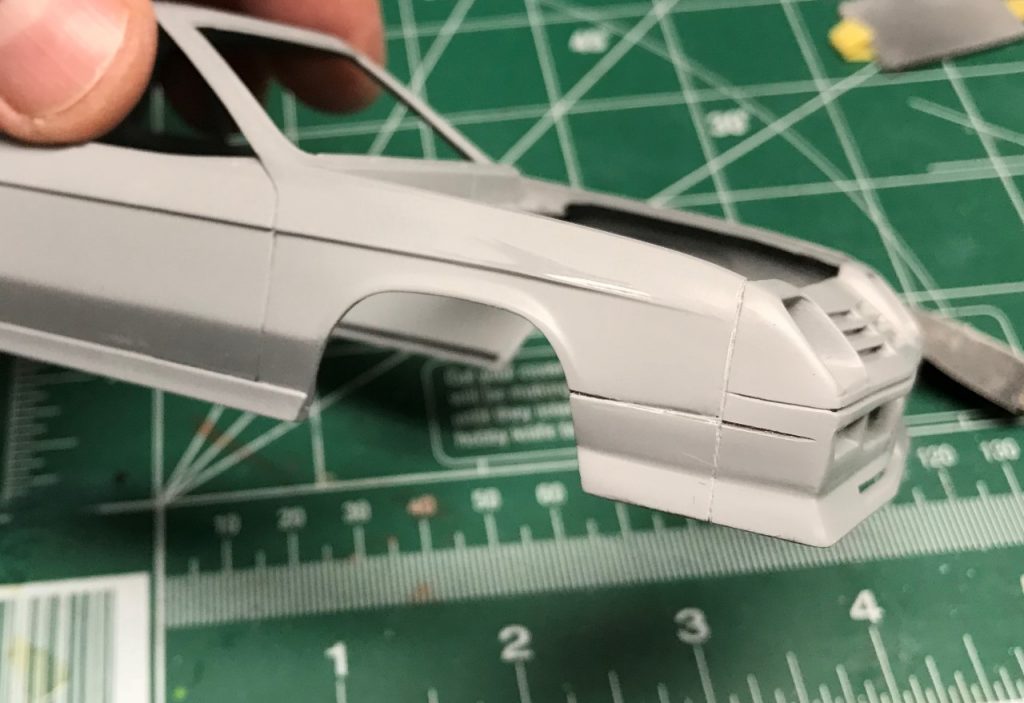
As I mentioned, the ground effects and front bumper did not line up well. The odd side markers will filled in, and then putty was used to level bring the fender to the same level as the bumper and ground effects. I also filled in the original seams. A razer saw was used to add new lines to the body.
Having completed the body work, I jumped on painting the the body. This would turn out to be a bad idea considering the fact that I hadn’t finished the fabrication work on everything else. After the body was painted, I made the decision to attach the engine bay to the body. I tried to do the work without damaging the paint. As work progressed, I caused more and more damage. It was time to strip it and start over.
The engine bay was modified to allow me to glue it to the body. I created side pieces using sheet styrene. The work filled the gaps and created mounting surfaces. Additionally, I used sheet styrene to fill gas between the frame and the body. They were notched to fit the upper control arms. As you can see in the picture below, I was heading towards a second paint job even without stripping the body.
Part of my reluctance to strip the paint was knowing I would have to start the body work from scratch. In the end, I knew it couldn’t be avoided if I wanted the best chance for a good finish. In the tank it went.
The benefit of the years of work already completed, along with my improved skillset, I was able to quickly repair the body work and managed to create sharper seams. In the end, I’m glad I had to start over. I was also able to correct other issues in the body I had ignored before the first paint job.
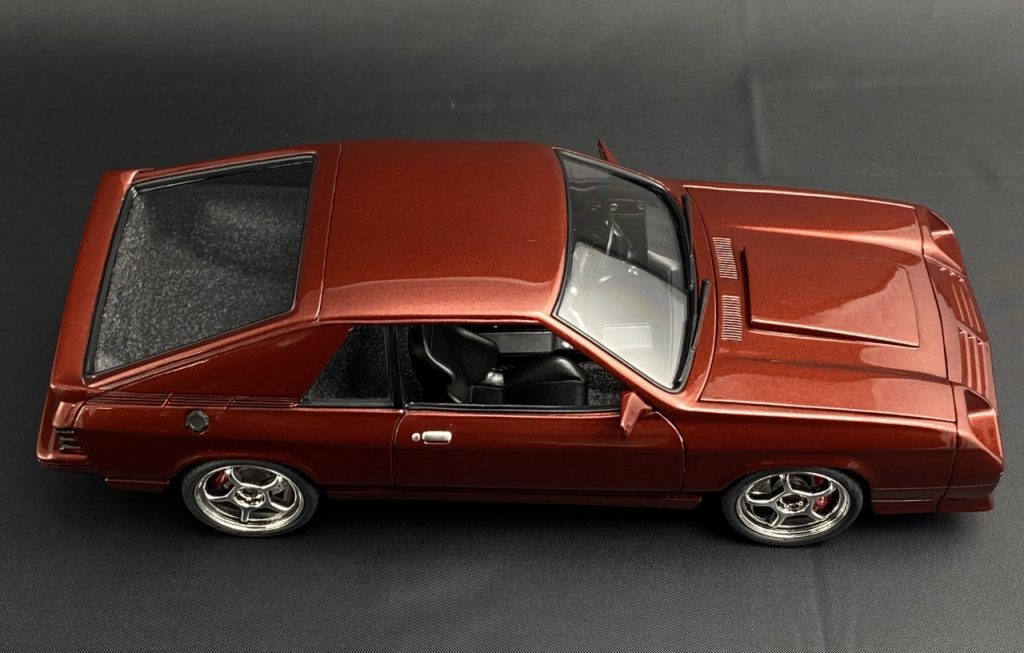
Another small detail added was a mounting point for the rear view mirrors. I’m not entirely sure how they were supposed to be attached without the modification. However it was intended, I preferred my version.
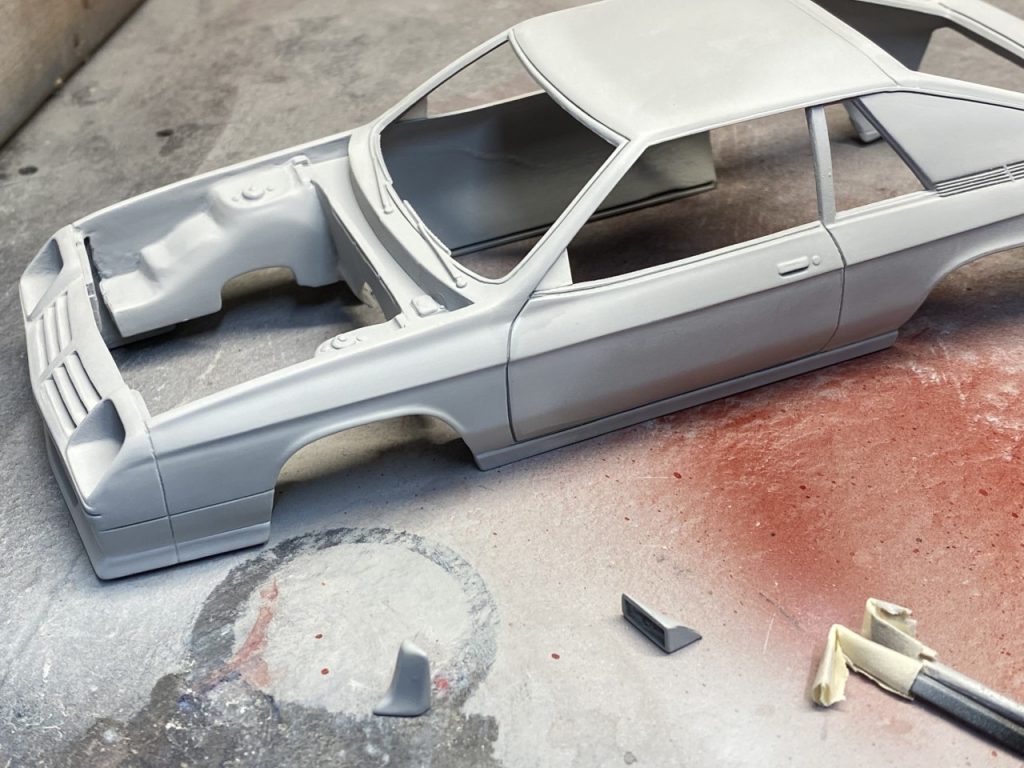
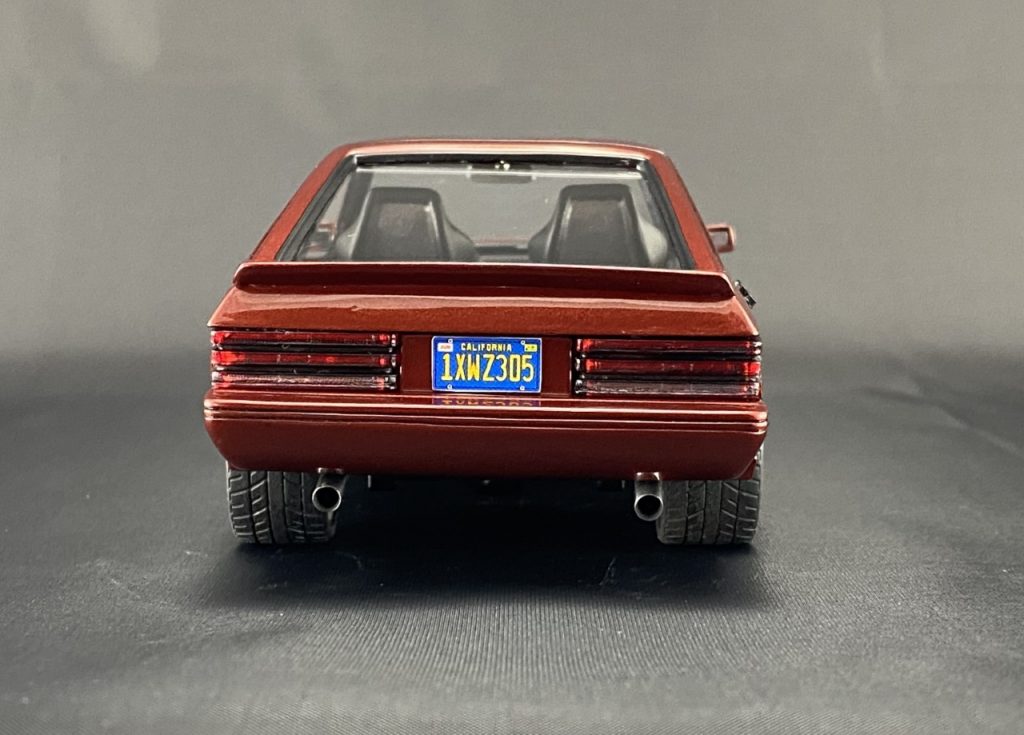
One other modification done to the exterior involved trimming the chunky blocks from the rear bumper. The smoothed bumper compliments the build much better!
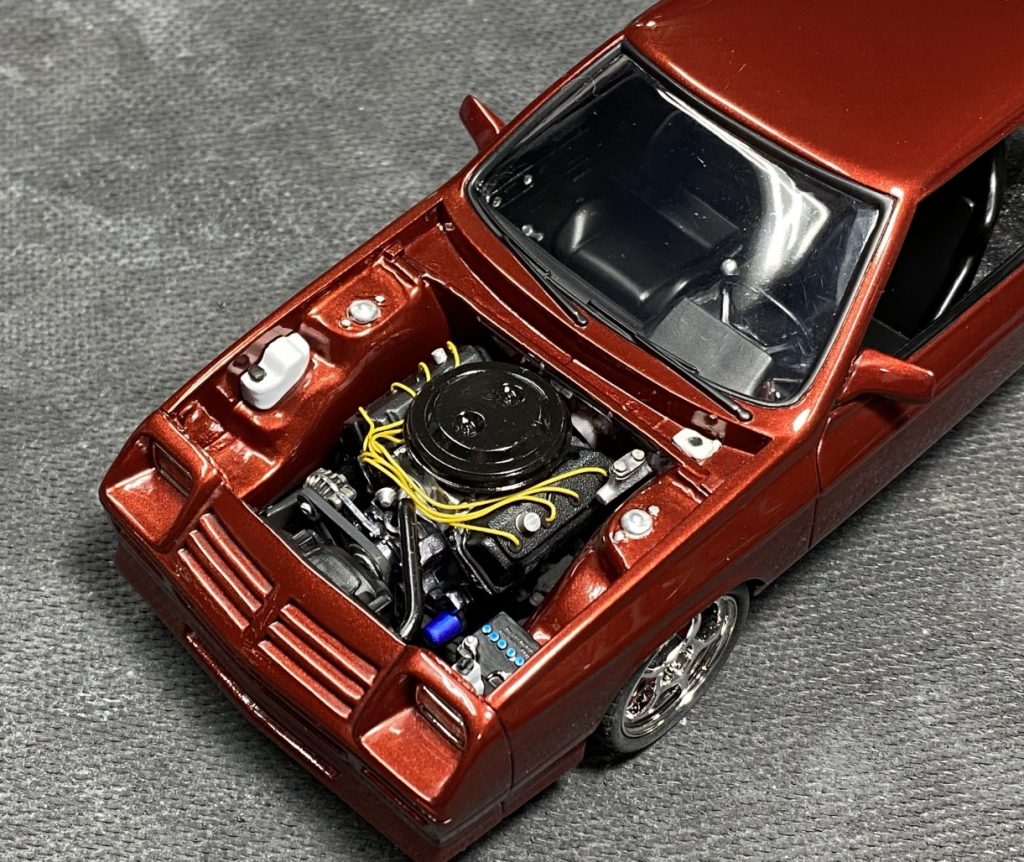
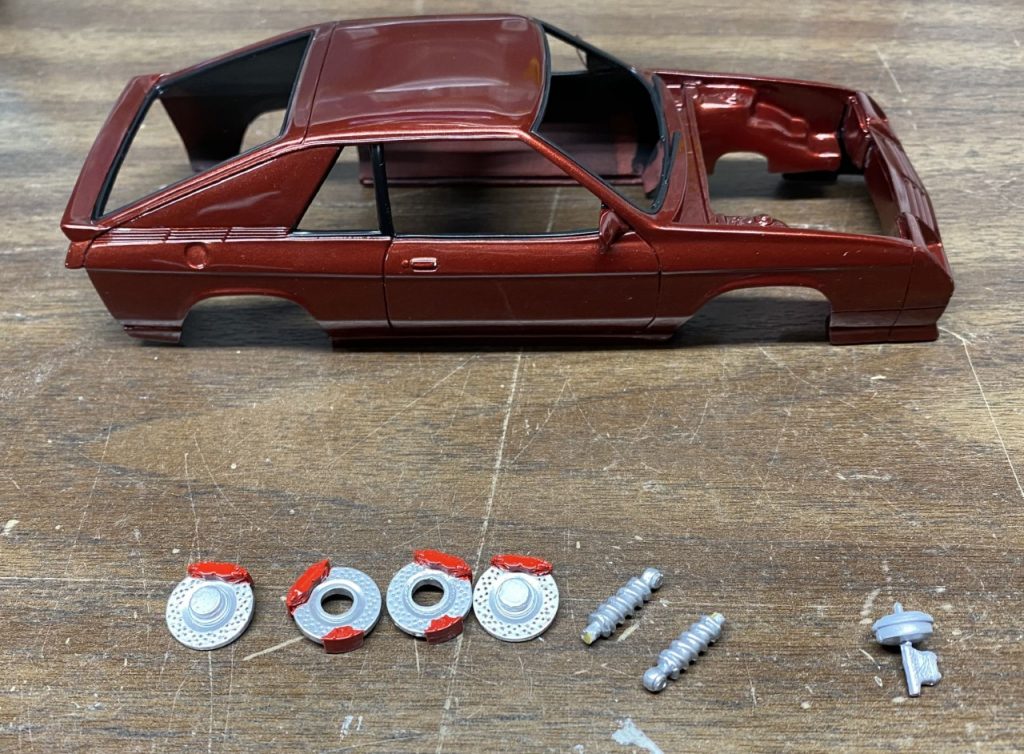
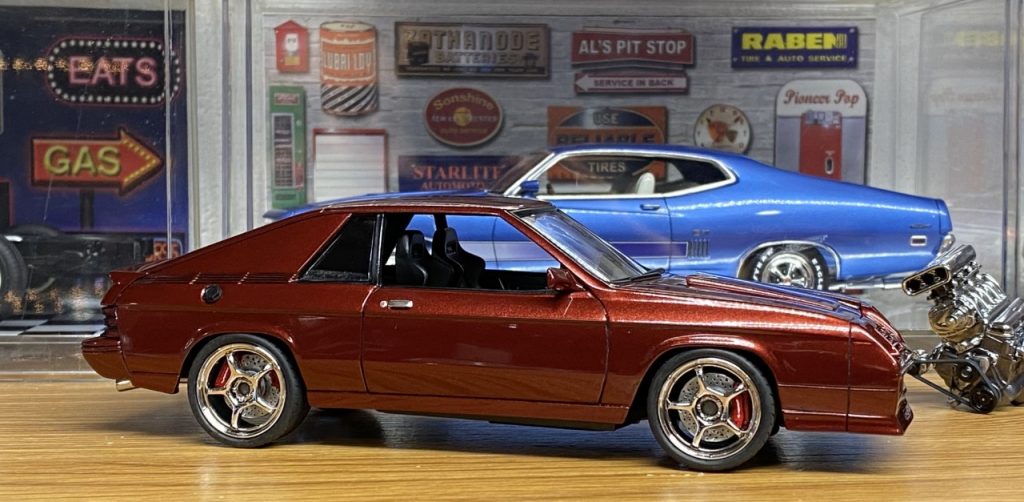
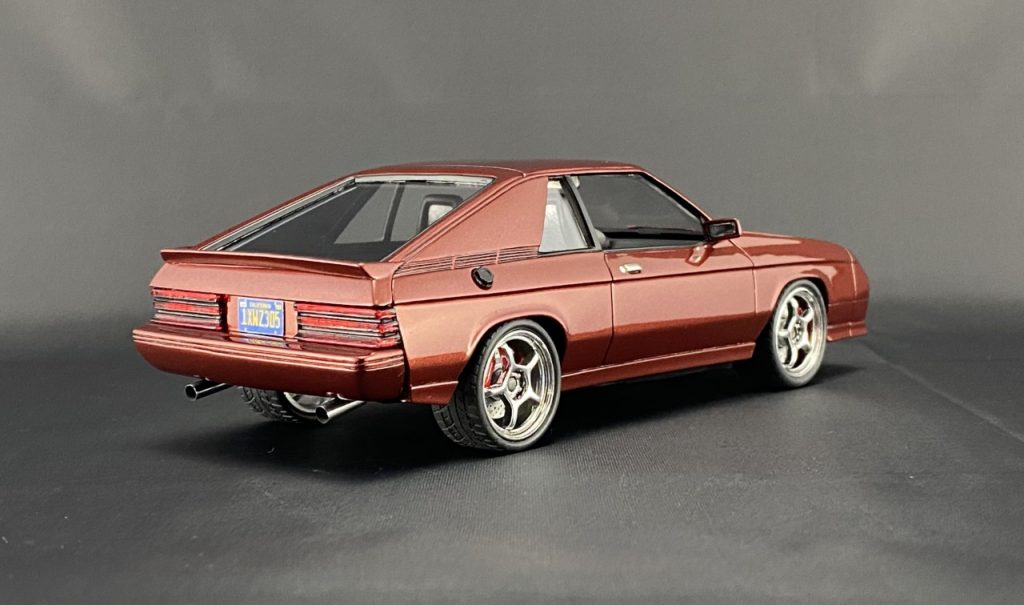
As I recall, my decision to paint the body gunmetal was based on using my stash of enamel paints. Throwing out that idea, I dug into my new stash of lacquers and absolutely had to use Gravity Colors Dodge High Octane Red.

The next step was spraying the body in 2 part clear then sand and polish.
Way back at the beginning of the build, I ground open the lower grill. After finishing the body, I added mesh to the openings.

After sanding and polishing the body, I masked the trim and painted it semi gloss black.
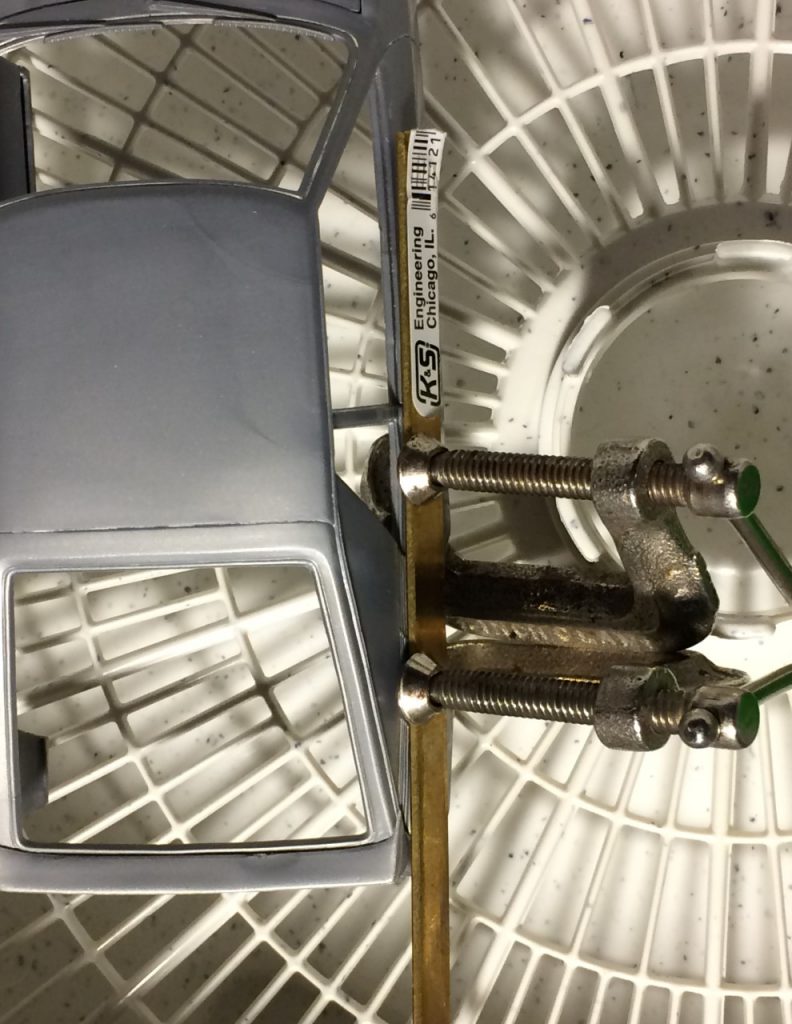
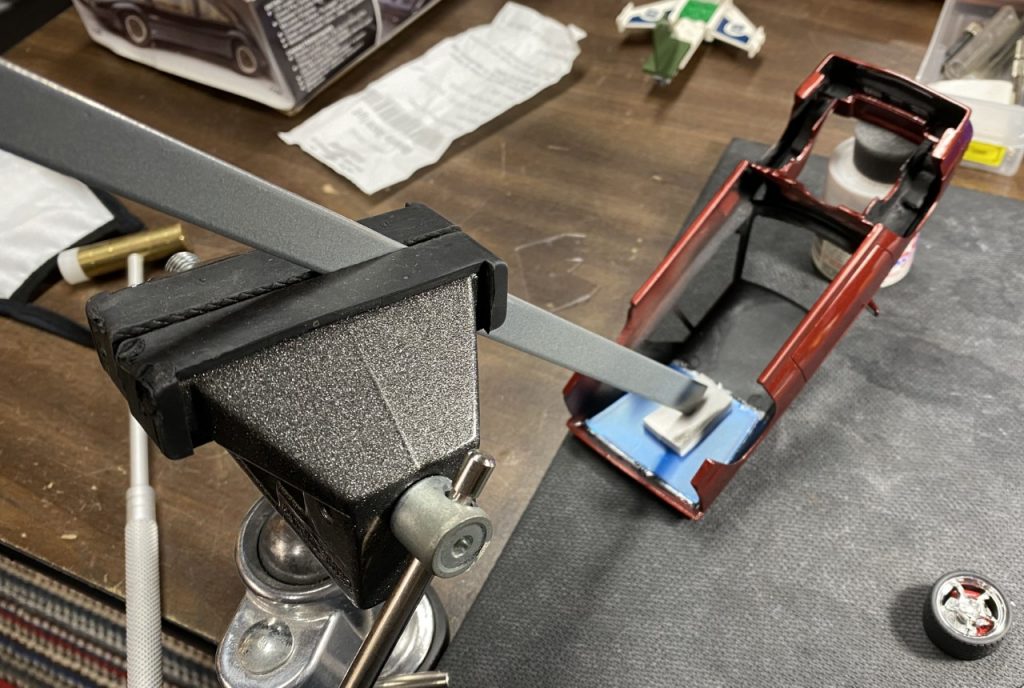
The kit glass was mostly damaged. The windshield had imprints from the tires. I was able to clean it by sanding and polishing the piece. I replaced the rear and side glass with clear sheet. The challenge with using clear sheet is the fact that it is flat and most class isn’t. I used a vice and a piece of steel stock to hold them in place while the glue dried.
Wrapping up the details on the body, I used black panel line accent to highlight the panel lines.
Final Assembly
As I rounded the corner to the finish line, I needed to finish several details. The wheels and brakes needed to be modified to make everything work. Due to a mistake, I drilled through the center cap of one wheel. It was a happy mistake because it improved the look of the wheels. I drilled the rest and created new caps with sheet styrene. The rear wheels would be mounted to metal pins. The Clearly Scale resin brakes were drilled to allow the wheel to slip in. The front brakes/wheels would be glued directly to the spindle with no pin. I created spacers to fit the wheels to the rotors properly.
With the wheels and brakes complete, it was time to attach them to the model. I started with rears since they would be glued to the pins in the rear axle. The ride height and wheel location were set prior to this point.
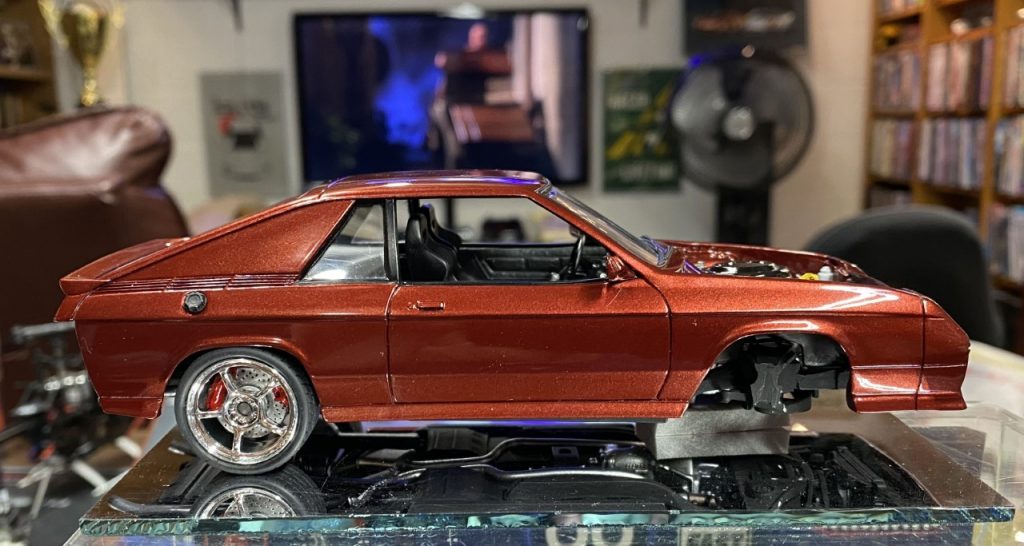
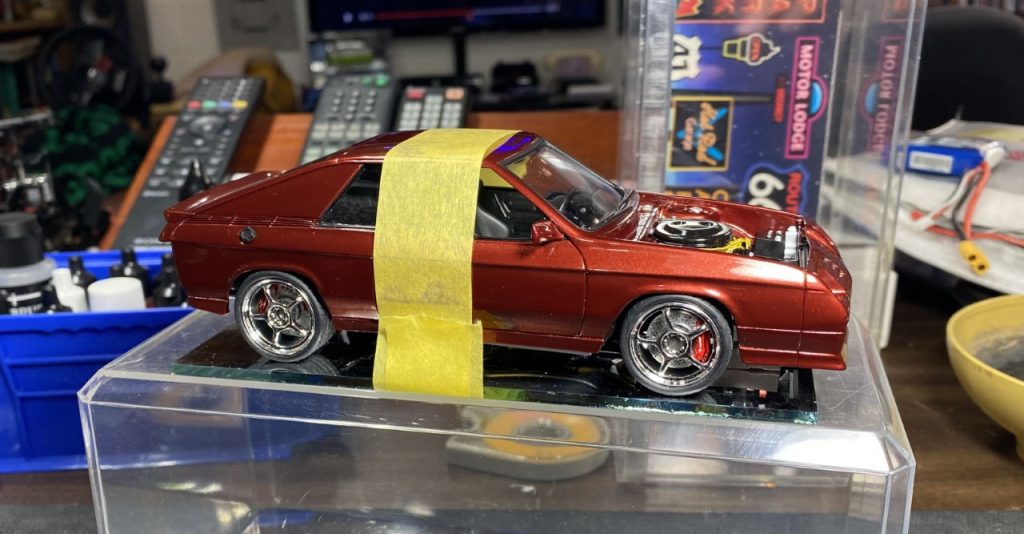
To get the ride height correct up front, I used sanding sponges as a shim. Once I confirmed the ride height, I taped the model to the mirror I use for a flat base. Using epoxy, I glued the front wheels in place. Epoxy not only creates a strong bond but gives me time to carefully position the wheels. The benefit of taping it to a small mirror is that I can easily move the model around to check alignment while the glue sets.
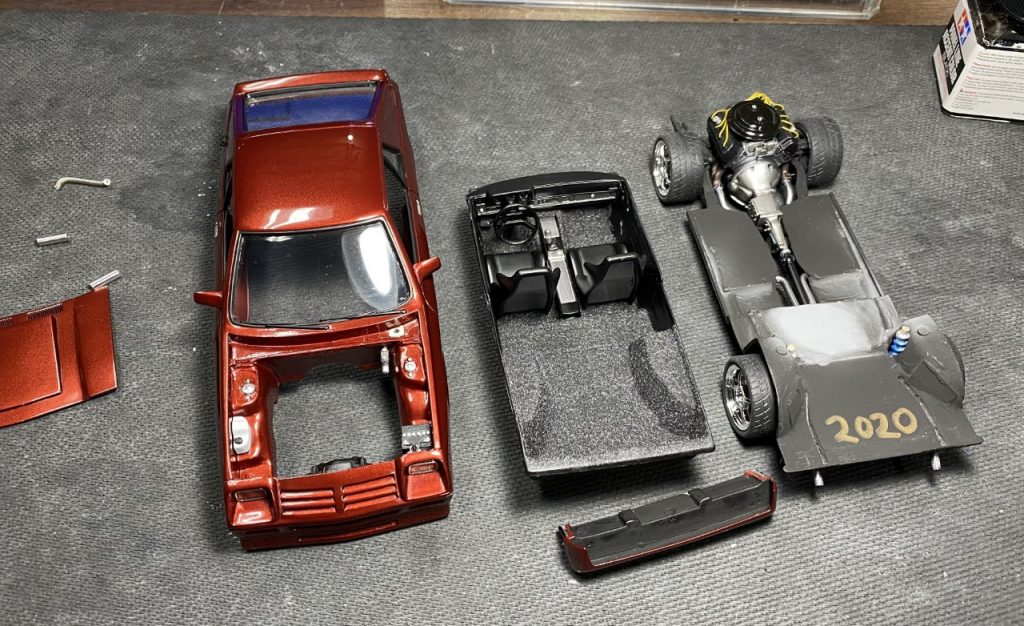
At last, I could marry the main components together. The chassis is marked with the year of completion before everything is glued together.
With the main components glued together, I could wrap up the final details. I made upper and lower radiator hoses using solder.
The final touch are a pair of polished aluminum tubes glued in place for exhaust tips!
Other details include the head and tail lights, BMF for door handles and front indicators and the gas cap.
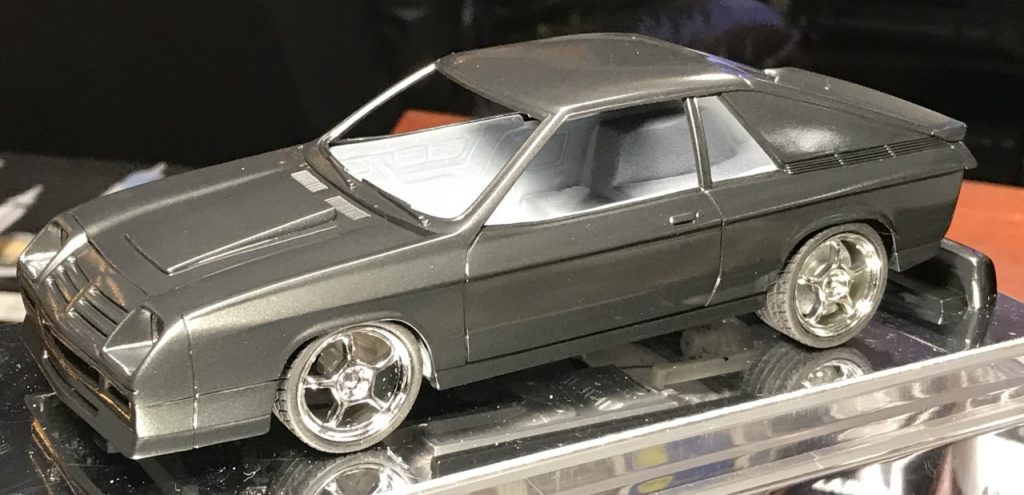
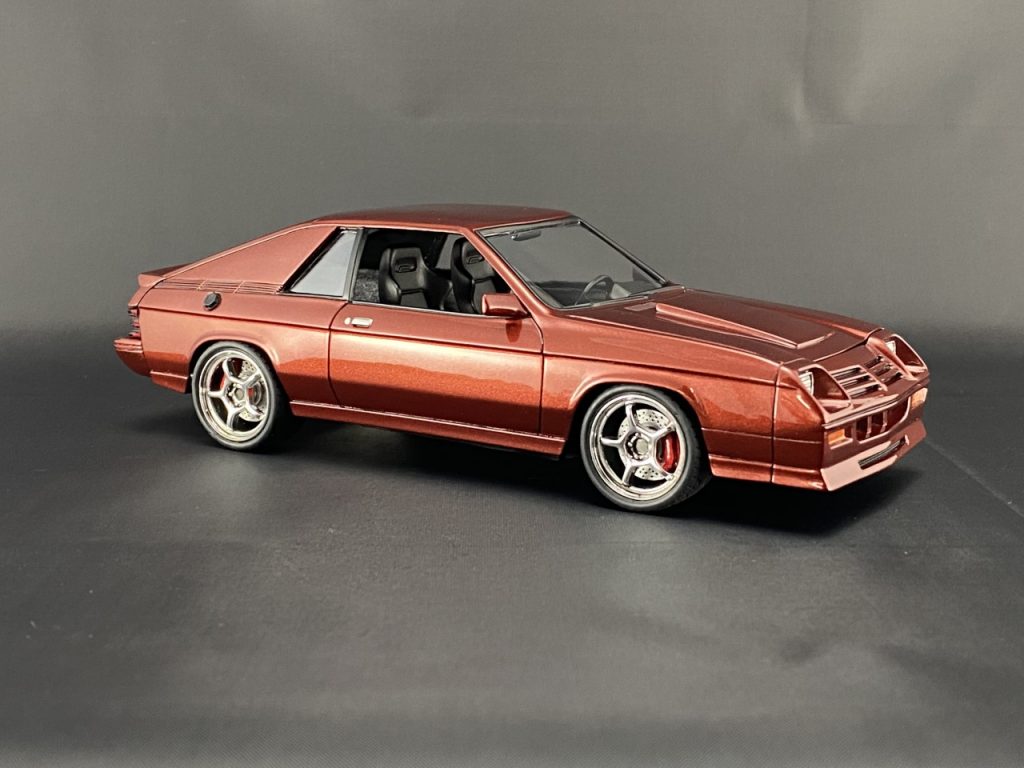
Done!
Six years in the making and now it is complete! The tipping point of the build involved completing the fabrication on the chassis, engine and body work. I knew I’d be close to the finish line. Even so, the final stretch was very exciting. Seeing this build finished brings me joy!
Final Thoughts
Did this kit turn out how I had hoped? Yes. Could I have done more work to make the conversion more convincing? Yes. Even so, I’m still very satisfied.
What I find interesting is seeing evidence of my skill level and building strategies have changed in six years. When I stripped the first paint job, I found JB Weld for filler. That was a short lived direction that I quickly abandoned years ago. My ability to repair and rework the styrene is leaps and bounds better than it was back then. This fact played out well when I dropped the lid from my dehydrator on it and caused significant damage. There is no evidence of that. Had I done it six years ago, I would have scrapped the build.
From the original concept, externally, the only thing I changed was adding the “cowl” hood. I needed the room for the air cleaner. Also, the original color idea was scrapped. Otherwise, it looks like I hoped it would. Better in fact. Mechanically, I had always intended to use the Opel rear axle but the rest developed as time pressed on. Again, very satisfied with the final results.
Completed: October 2020