The Kit
While watching a build videos from The Scale Modeler on Youtube, I saw his build of this kit. I then remembered how much I like this car when it was first shown at the Detroit Autoshow. I decided that I needed to build one as well!
Build Plans
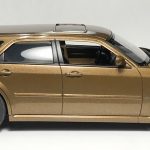
For the most part, it is a box stock build. I used Y9 dark gold paint from Scale finishes. I like the idea of using a classic color on a modern build. Gravity Colors 2-part clear was used for the finish.
The next change was a new set of wheels. The kit wheels and tires look too small. While going through my stash of wheels, I found a set of Fireball Models “Stunner” wheels and decided to use them. I bought them a few years ago with plans for using them on a different build but found that the advertised scale 20″ was much closer to a scale 23″. They were too big. However, they fit the Magnum perfectly. I also found several pictures online of the full scale version of the wheels mounted on Challengers. Perfect!

The Body and Finish
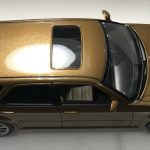
The Magnum body is fairly free of defects. There are a few sink marks on the rear d pillar and front fenders. A bit of putty took care of that. Mold lines were also faint and easy to remove. The Magnum bumpers are separate pieces that I chose to glue in place after ensuring the completed chassis would fit. Once all of the prep work was complete, I started spraying color.
I used Scale Finishes glossy Y9 dark gold paint. The last project I used their paint was the ’70 Roadrunner I finished a few years ago. I struggled using the paint then and I struggled once again here. The color builds very slowly and is difficult to to make uniform. While painting, I ran out of paint and realized that none of the separate parts matched. I ordered another bottle but elected to use the base cote version. Once that arrived, I quickly finished spraying color. The base cote version is much easier to use! Shortly after, I sprayed the body with Gravity Colors 2-part clear.

After curing for a few days, I sanded and polished the clear and masked the body for trim paint. To avoid hand painting the grills, I painstakingly masked it with Tamiya tape and parafilm.


Once the trim was complete, I was able to start adding the rest of the details.

Interior
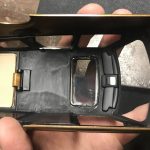
The Magnum’s interior is comprised of quite a few parts. Everything was engraved will and required minimal clean-up. As usual, the two-part front seats along with the rear bench required filler to clean up the seams. Once complete, I reviewed reference photos online to decide my color scheme. Rather than use a black and gray combination that is typical for the Magnum, I chose a dark charcoal gray (mix of Tamiya grays) and Tamiya buff. Once painted, I flocked the interior with charcoal grey flocking and added decals and detail paint to the dash and other parts.


Chassis and Engine
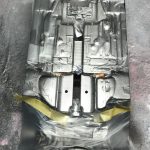
As with the rest of the kit, the chassis and engine practically fell together. I started by prepping the parts, attaching them to sticks, priming them and spraying various colors as required.
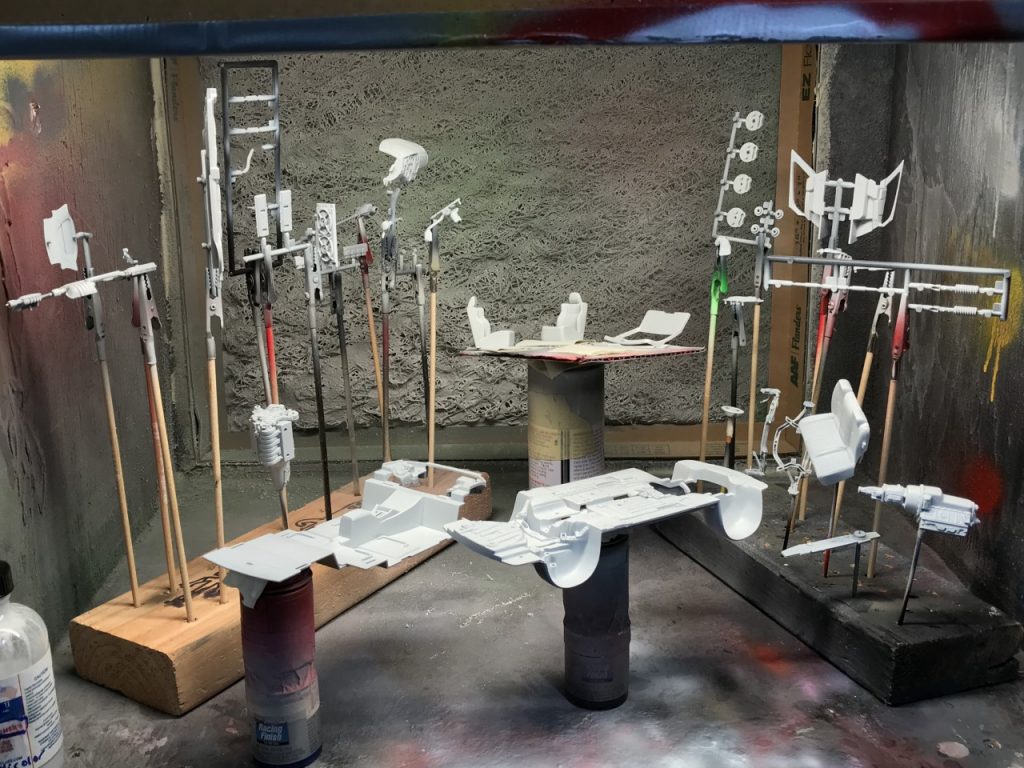
The chassis was sprayed satin black. I usually spray body color on the chassis. While reviewing the engravings, I realized that most of the chassis is covers and plastic. I didn’t feel it was worth the effort and stuck with a solid color. Once sprayed, I masked and sprayed all of the heat shields. Using Tamiya panel line accent, I washed all of shields and cross-members. It was time to start assembly.

The engine was easy to assemble and detail. My only regret was not shaving the molded script on the covers before adding decals. The decals didn’t line up with the engravings!

Chassis details and suspension were quickly attached. It was time to move towards final assembly.

Wheels
Now that the bulk of the work was complete, it was time to start wrapping up the build. The Fireball Models Stunner wheels are nicely cast. I still had to take time to clean up flashing between the spokes. I also needed to address wheel attachment. Fireball provides a really long post which I had to cut down substantially to get the proper offset.

I then prepped, primed and sprayed them with decanted Tamiya gloss aluminum. Shortly after, I hand painted the spokes with Tamiya gold. I followed with a black-wash to highlight the center cap and lug detail.

Attaching the wheels was easier than expected. The kit uses a combination of metal pins for the front and metal axle for the rear which conveniently simulates the rear half shafts. I had to cut the mounting pin on teh wheels further which revealed a hole which simplified attachment. I had to lower the rear of the car which was accomplished by grinding a slot for the axle, then gluing the brake disks a little higher.
When the wheels were attached, during final assembly, I realized that the gold spokes didn’t work with the body color. My son confirmed my suspicion and we decided I needed a different color.

I didn’t want to use black so I elected Tamiya bronze…which almost looks black.

Details and Final Assembly
With the wheels attached, I focused on the final details. I chose the blacked-out version of the headlights and used foil for the side marker. The tail lights were colored using a red Sharpie. I had to glue them in place which give me a better outline for the clear part of the lens. For the front and read turn signals, I used Tamiya clear orange to paint the bulbs.
Lastly, I attached the rear view mirrors, included metal exhaust tips, rear wiper and license plate.

Final Thoughts
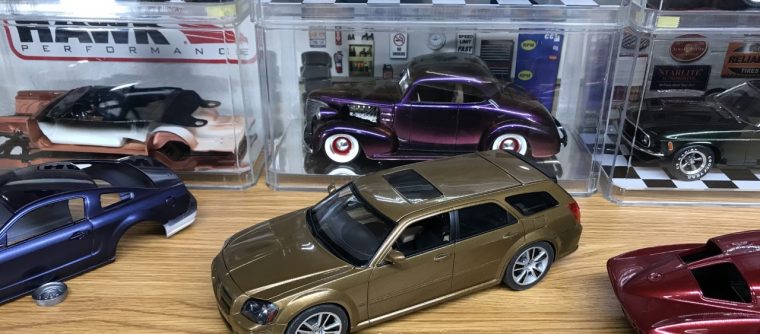
I’ve always loved this car and actually hope to buy one as a 1:1 project. I’m really pleased with the final results. I’m on the fence on whether the color is decent or if I love it. Either way, my feelings are positive! The kit itself was really easy to build. If I had chose to use the kits wheels, it would have been even easier to assemble. In the sea of challenging builds do to kit quality, this was a breath of fresh air.
Completed: September 2019