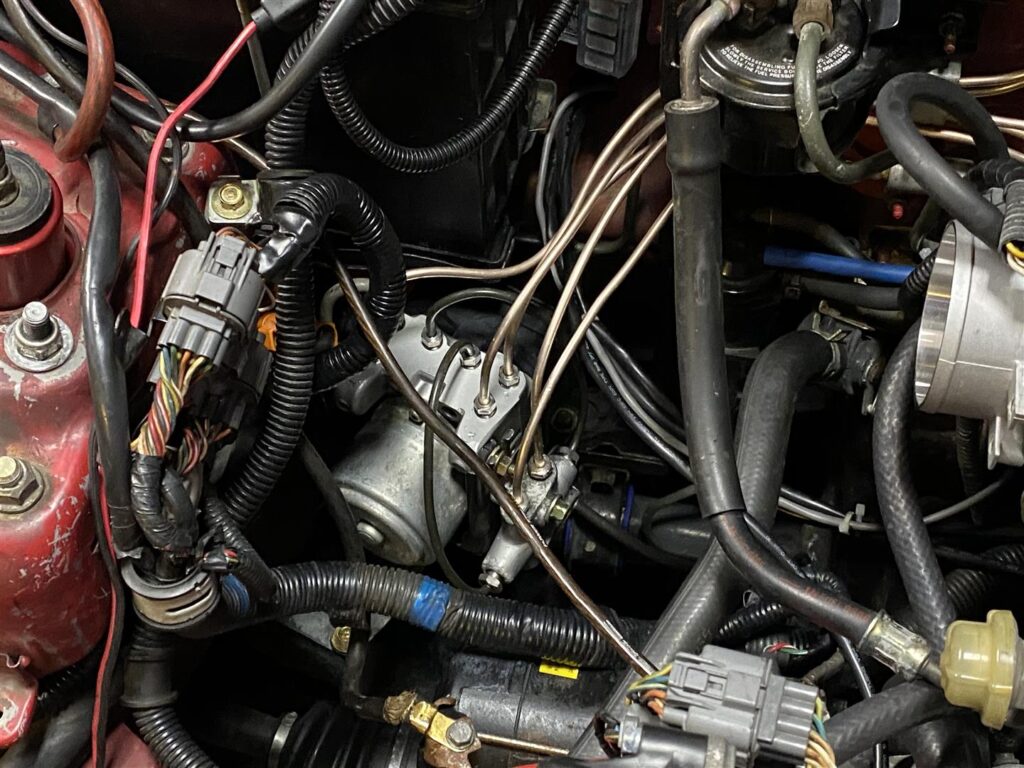
Note: This is a work in progress. I will update with more detail when I have time. Enjoy!
While researching potential ABS upgrade for my Civic, I discovered excellent solutions in the Honda S2000 and Acura RSX ABS units. What makes them ideal is that they are completely stand alone units both hydraulically and electrically. The computer is built into the unit and only requires power, brake signal and sensor wiring to connect. There is no connection to the ECU or other electronics and they do not perform any brake biasing.
With all of that in mind, I realized that Honda’s ABS units would be a great response to those building a project and thought, “It would be great if I could add ABS”.
HOMEWORK:
Several models’ service manuals were reviewed to determine which options were ideal!
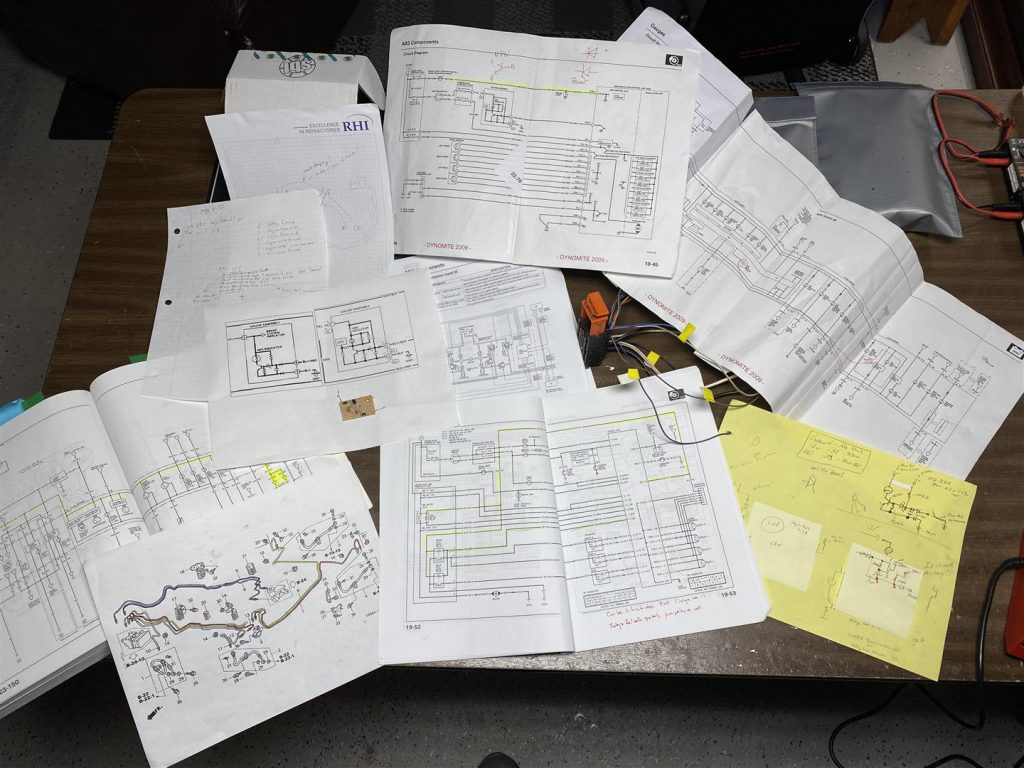
My intent with this write-up is to provide you with a roadmap to incorporate ABS into your project. I will cover the electrical connections as well as the mechanical requirements to complete this project.
Main Features
When considering options for a painless upgrade, a standalone unit with external brake biasing, that doesn’t tie into other systems, was necessary. There is a small window of opportunity within Honda’s offerings that provides this true option. Options include early 2000’s AP1 Honda S2000, All years of the Acura RSX and Acura NSX R (Need years for reference, may be easier to find a unicorn).
If you can find the NSX-R unit, Track Midwest member, Amir Bentatou, points out that the difference with the NSX-R is how much slip it allows before activating and how intrusive it is. In terms of feel, the S2000 and dc5 RSX is obvious when it activates. The NSXR is much more subtle. It’s the difference between the primary purpose being safety vs performance.
Note: I hadn’t considered internal brake biasing when I first completed this project. It is a function that could simplify your project if you aren’t building something for the track or if you aren’t worried about adjusting bias.
Cross-link/X braking
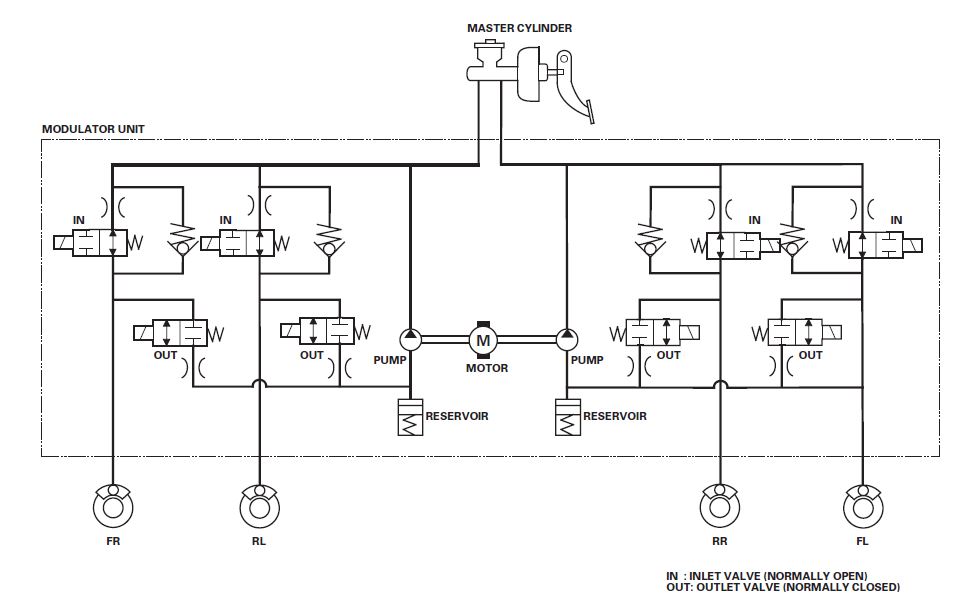
Important to know for a couple of reasons. A safety feature found in Honda’s braking system is Cross-link, cross, or X braking. Meaning, one port on the Master Cylinder is for FL, RR and the other FR, LR. If you blow a brake line, you maintain one front and one rear brake.
To make this system work properly, the master cylinder must provide equal, and consistent pressure from both ports. Please see the hydraulic circuit diagram below.
Parts Necessary
- ABS unit – Used parts from eBay have been selling for less than $50 shipped.
- The original mount for the ABS Unit. These are often included with the pump and include vibration isolation.
- Harness pigtail – this can be the trickier part of parts hunting. There are several Hondas that use very similar harnesses. Scour your local junkyard for opportunities.
- Sensors and tone rings. (sensors resistance between 400-2000 ohms)
- Proportioning valve
- Wiring and tubing to complete connection
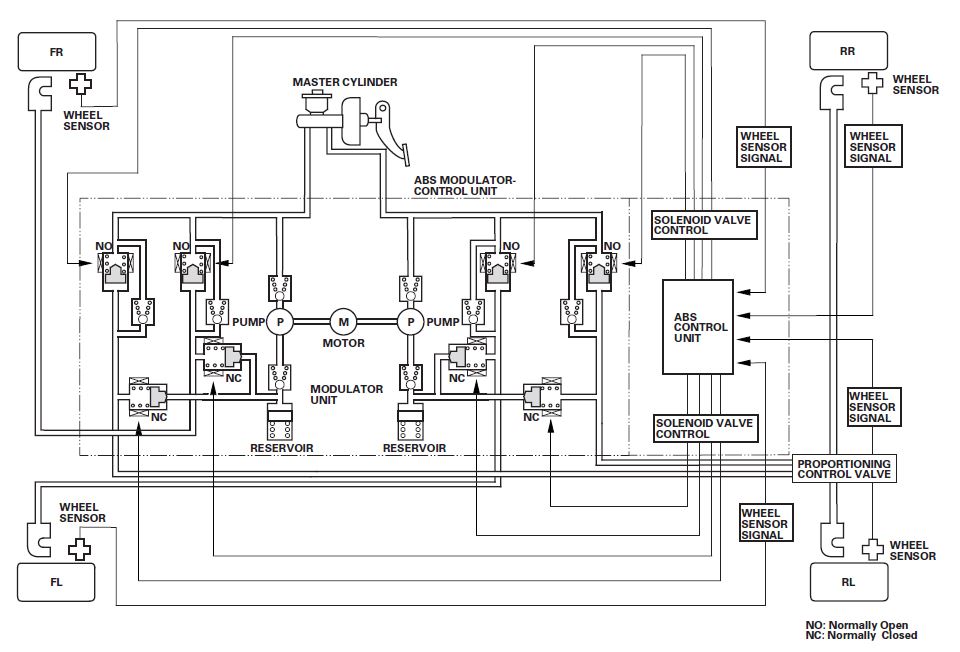
Below is a more elaborate diagram that shows the layout of the the hydraulic and electrical connections. Please note that the ABS unit itself is within the dotted line box. All other components are external.
Pump
I cannot speak for the programming differences between the modules. The note above suggests the NSX-R pump is more performance oriented. That aside, the main physical difference between the pumps is the size of the motor and the fact that the RSX pump uses bubble flare fittings vs the S2000’s tapered flare fittings.
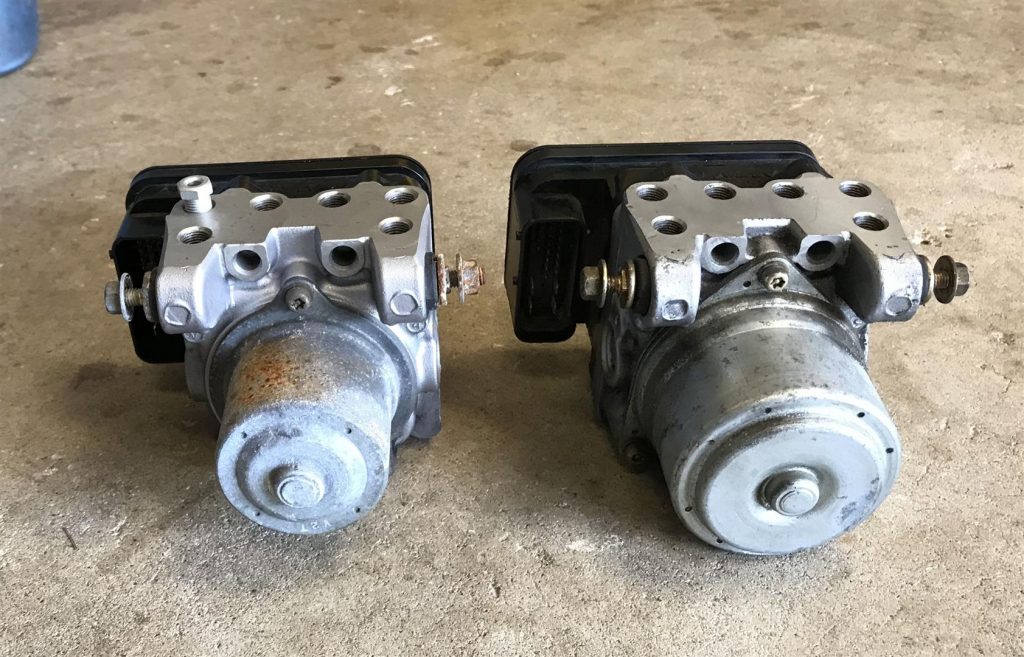
Proportioning Valve
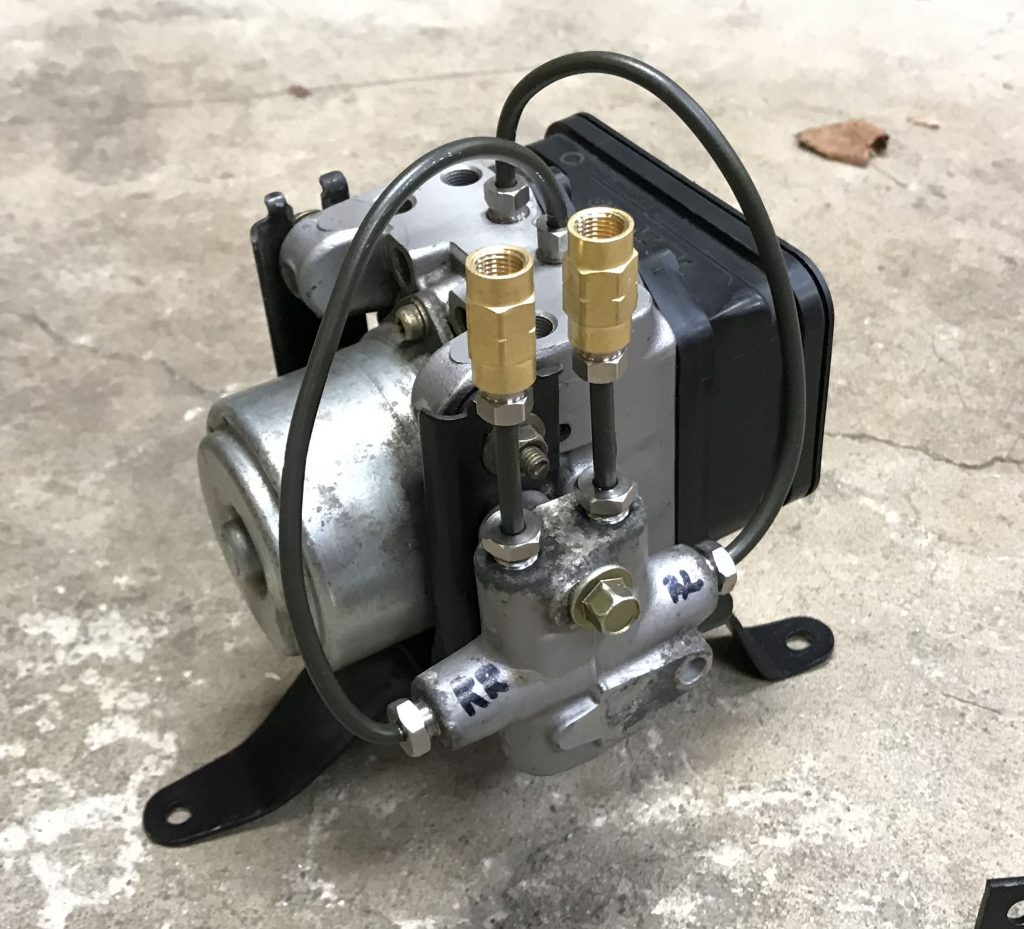
Without doing testing to measure the pressure drop of the Honda OEM prop valves, I can’t tell you which would be better for your application. For my project, I chose the RSX prop valve. A FWD prop valve for a FWD car. Consider an S2000 prop valve for rear wheel drive applications.
I do not know of an aftermarket solution that works with a Cross-link system. If adjustable brake biasing is needed, then two adjustable prop valves will be necessary.
Everything Else
For your application, are OEM sensor and tone ring options available. Is there aftermarket support for older cars that never had the option? The ABS control module has to see resistance within the range specified above to avoid a fault condition.
Electrical Connections
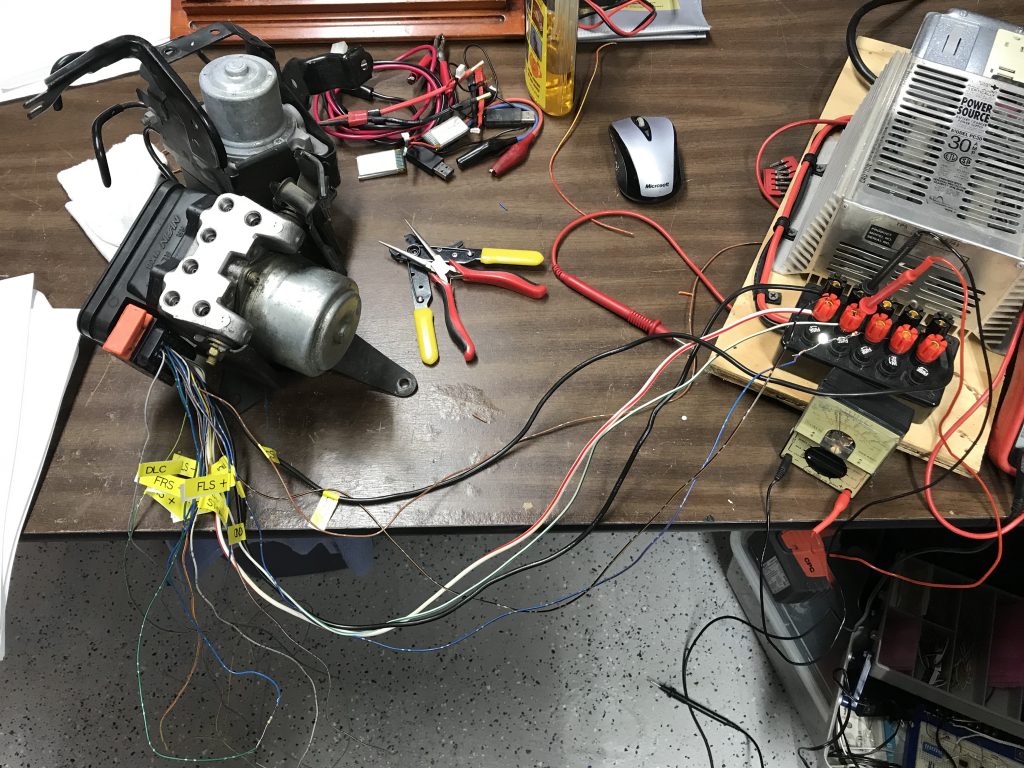
Before committing to installing the unit in my project, I bench tested to make sure the system would behave itself outside of the original installation. The system does not have CANBUS.
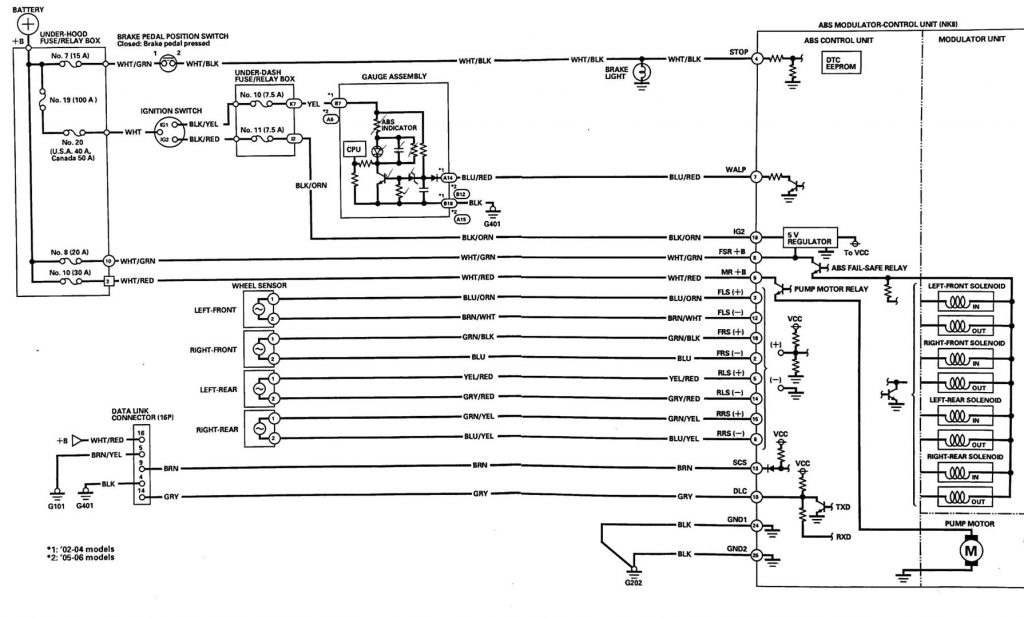
The complete electrical circuit diagram is provided below.
Key electrical connections:
- Power from ignition
- Fused power to the unit, 20 and 30 amp circuits
- 4 sensor connections
- Indicator circuit (if you chose to use it)
- Ground
- Service connector – Used to jumper, read codes and reset the unit.
- Data Link Connector if you want/can integrate into an OBDII system (not necessary)
Circuit Breakdown by pin:
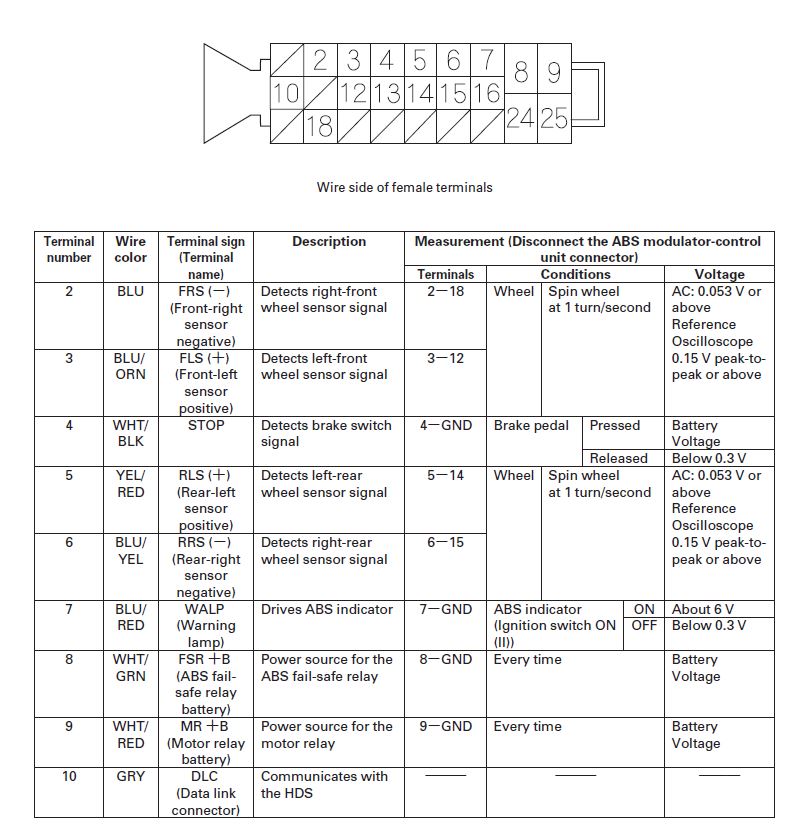
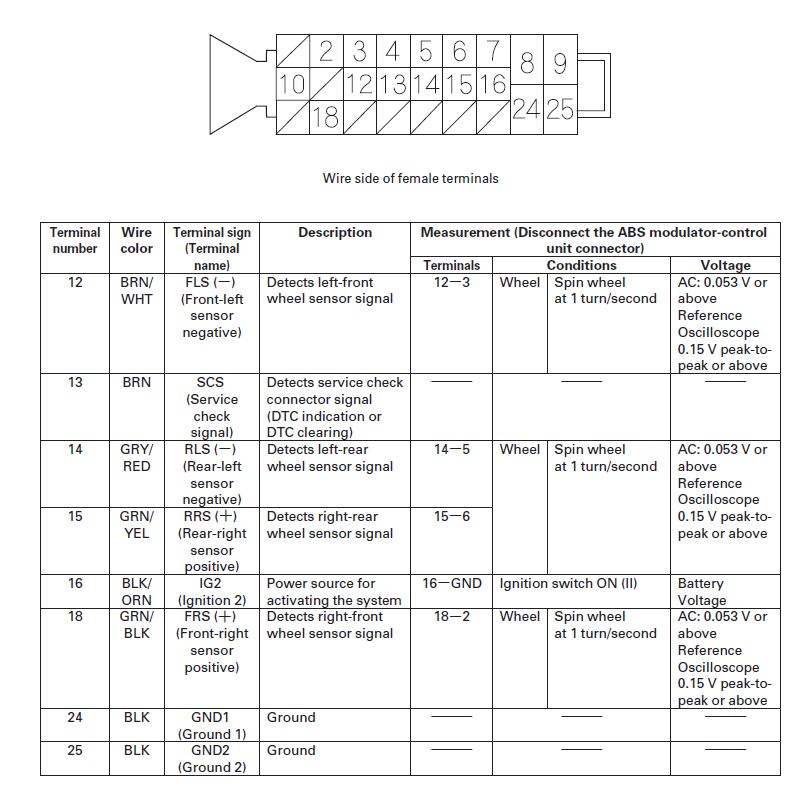
Plan your wire routing accordingly ensuring enough slack to properly connect the unit.
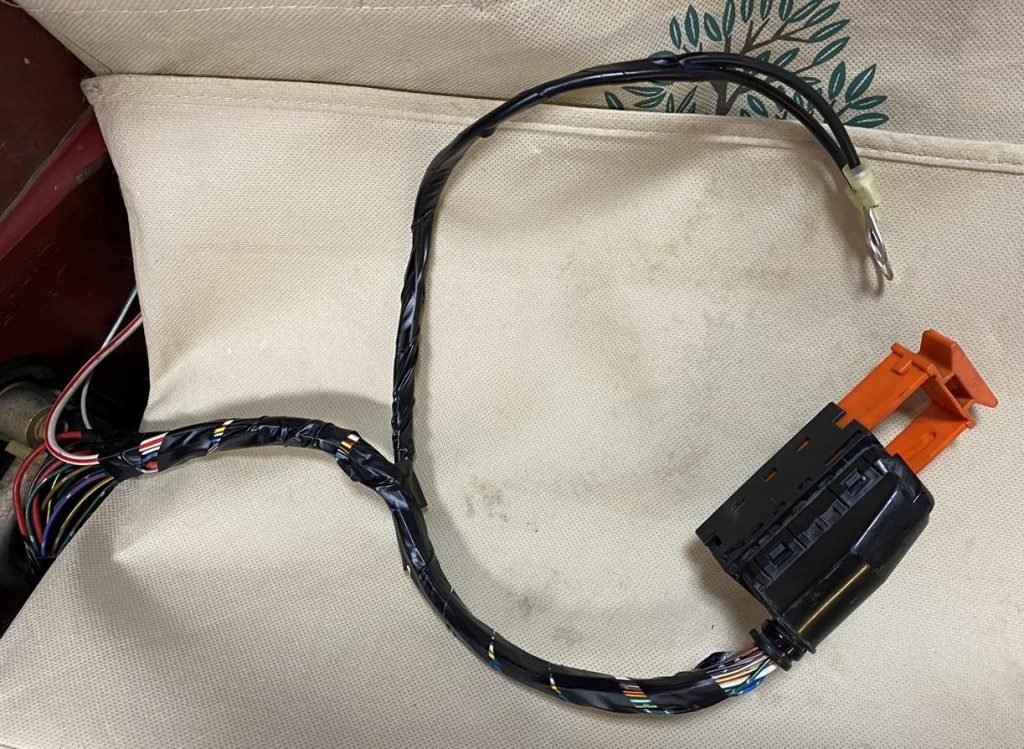
Extra Credit
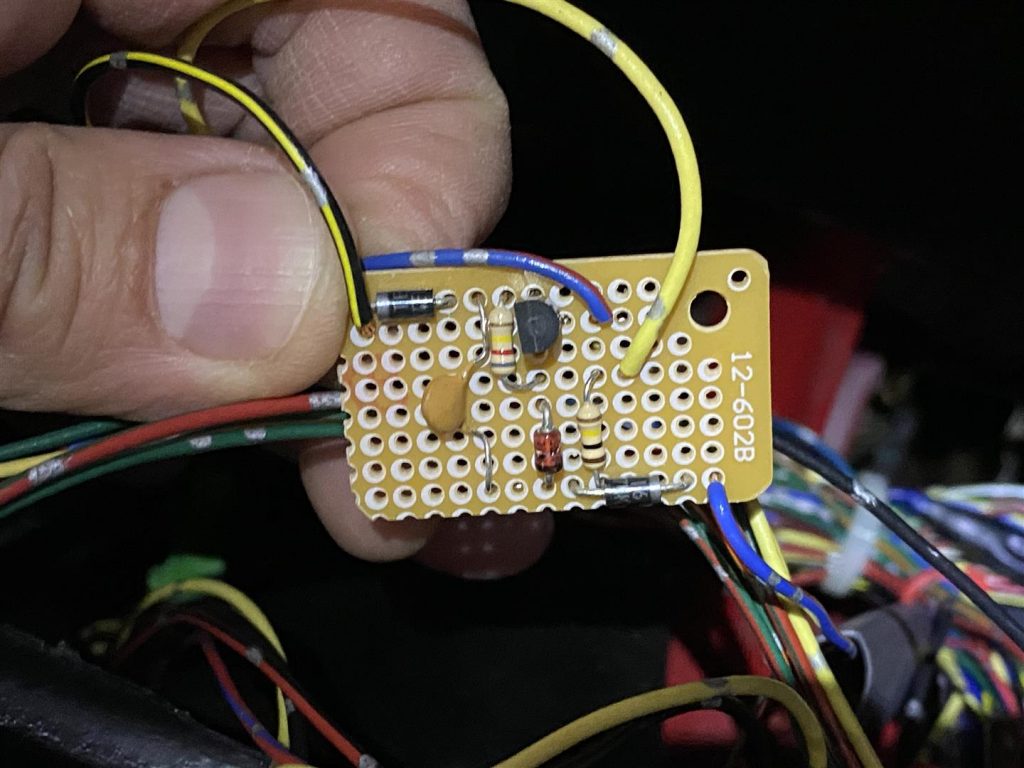
For OEM functionality in my Civic, I wanted the warning light to work properly. The circuit that drives the light is a normally “on” light when there is an issue with the unit. From the ABS unit, when all systems are good, the light circuit is “on”. I found a few variations of the circuit in service manuals. I picked the simplest and designed the circuit around it.
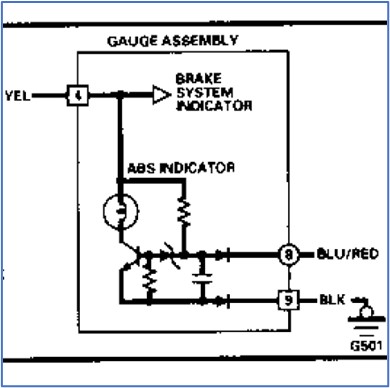
None of the component values were available. Through trial and error, I picked components and build the circuit. If you chose this path, keep in mind that the circuit is designed to drive an LED and not an incandescent bulb.
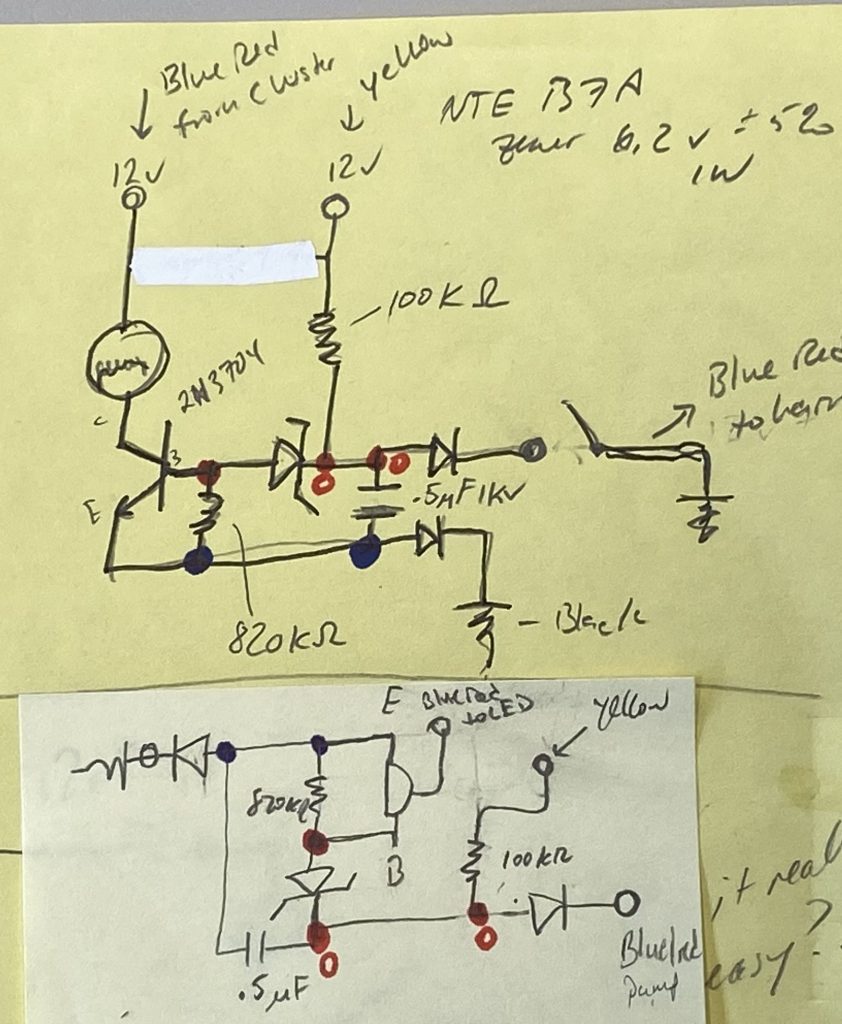
Wherever you chose to buy your components, assemble them on a PCB and wire it in.
Hydraulic
I’ll bring this up again, you have to operate this system with a master cylinder that produces equal pressure from each port. For my application, I chose to mount the proportioning valve to the unit itself. It greatly simplified the piping.
Installation
Chose a location that allows adequate access to run tubing and wiring. I suggest using the OEM bracket and fabricate mounts. Using the factory bracket as a starting point incorporates the OEM vibration dampening.
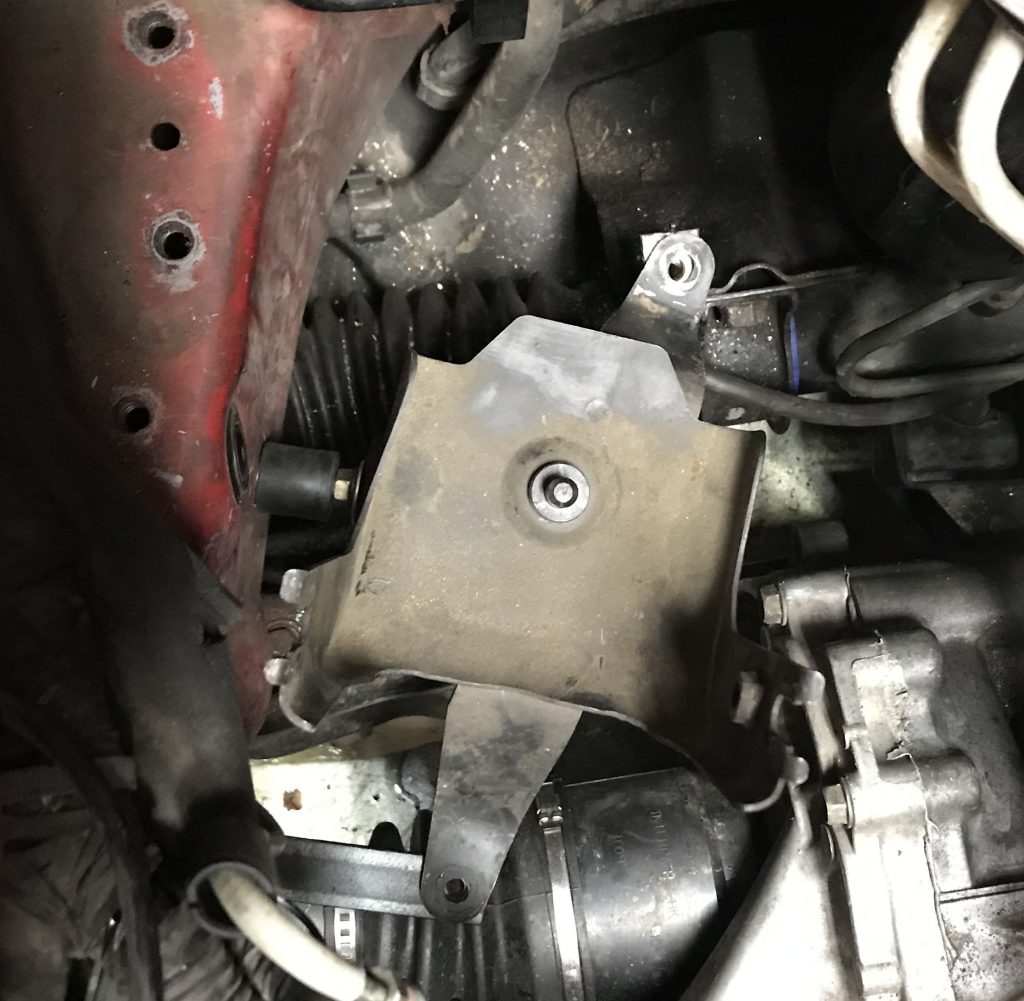
Run your tubing, bleed the system and get ready for a test drive!
