During the 2015 autocross season, I started to see the impact that 22 years of use had on random components on the Civic. As the season wore on, I found more maintenance items and knew I had to devise a plan to tackle every one of them before the 2016 season started. The final straw was a throttle cable failure during the last event of the year. I addressed that issue last fall but the rest still had to be resolved.

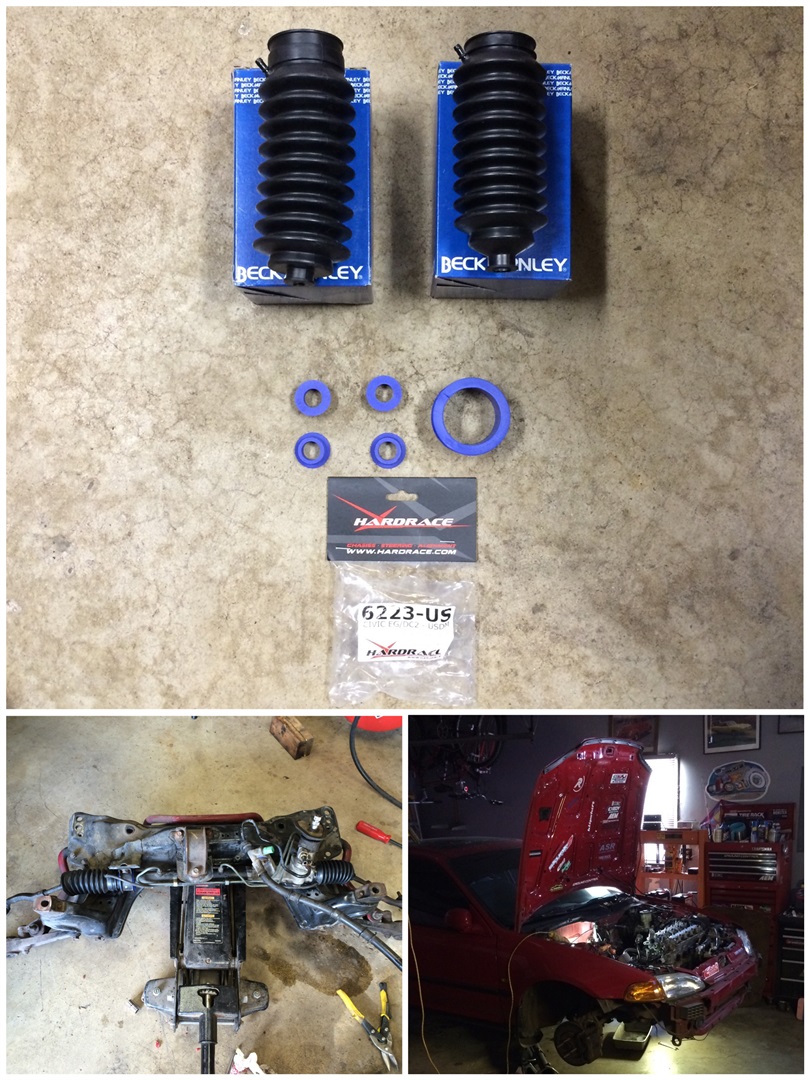
So…what did the Civic need? While swapping tires for events, I noticed that one of the steering rack bellows was torn and wide open. That was the first item on the list…the first of many. Knowing that the rack would have to be removed to replace the bellows, I decided to replace my crumbling, 12 year old poly bushings.

Moving along…

Proper Venting

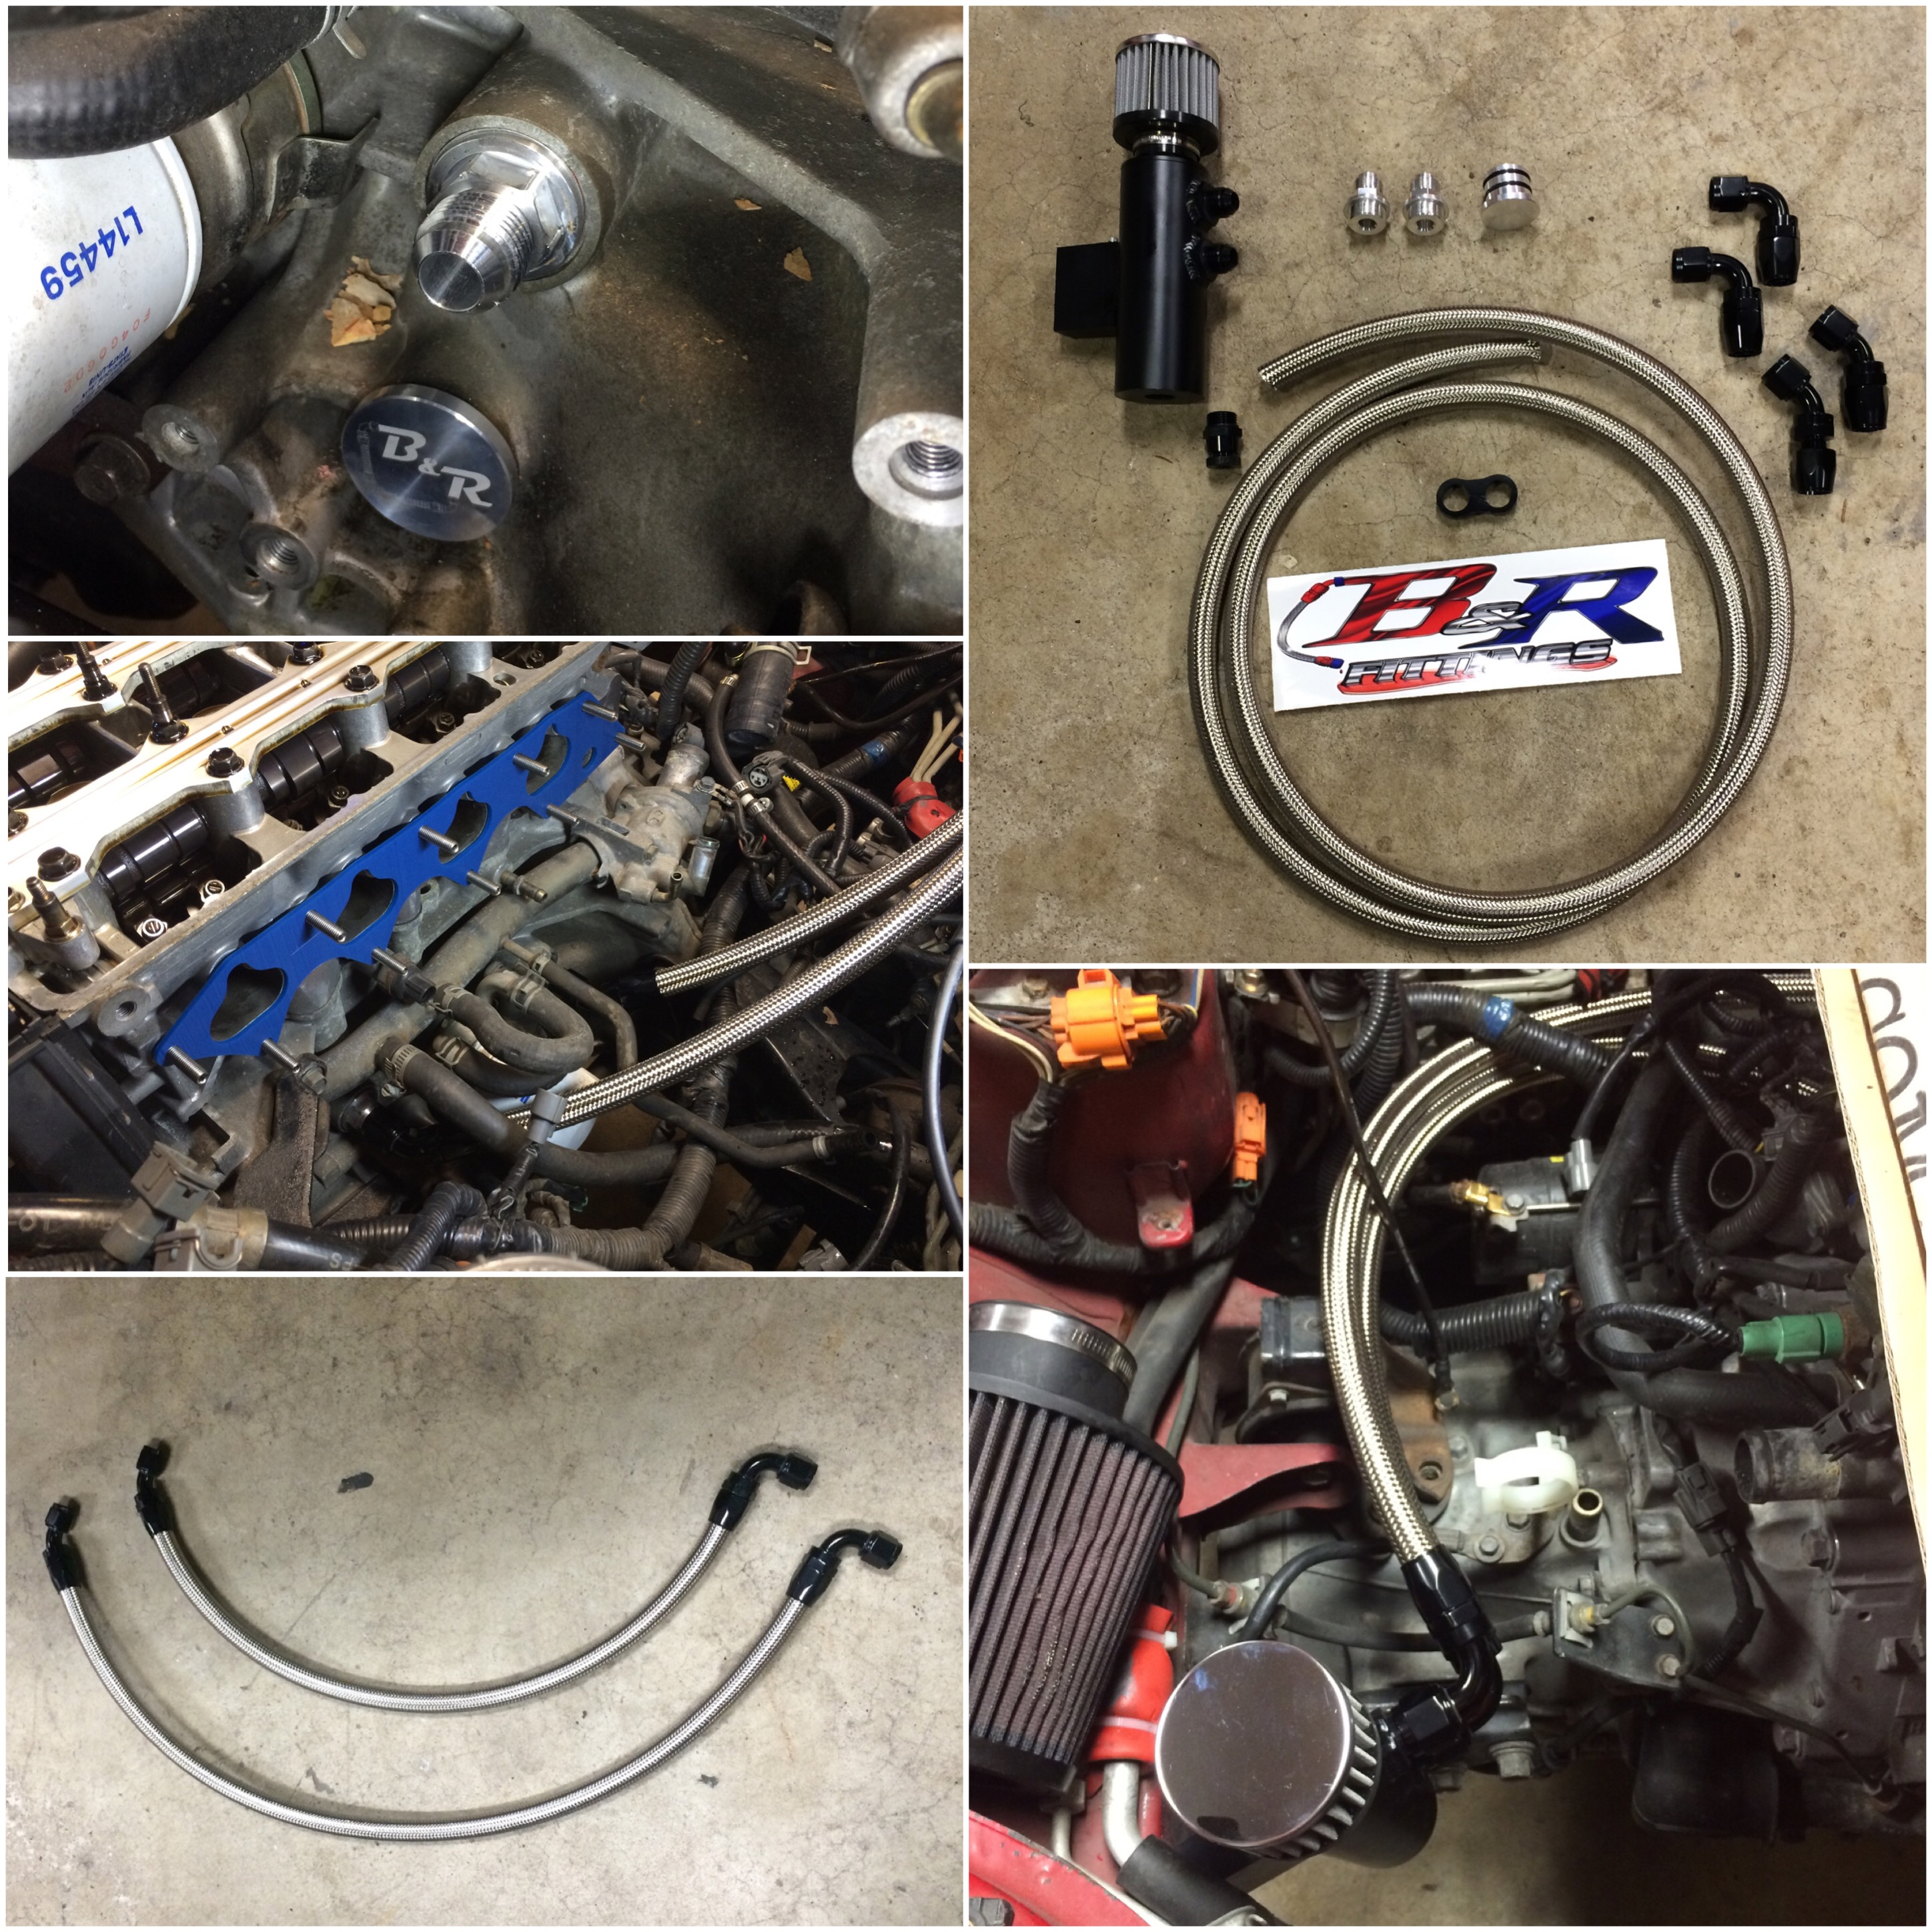
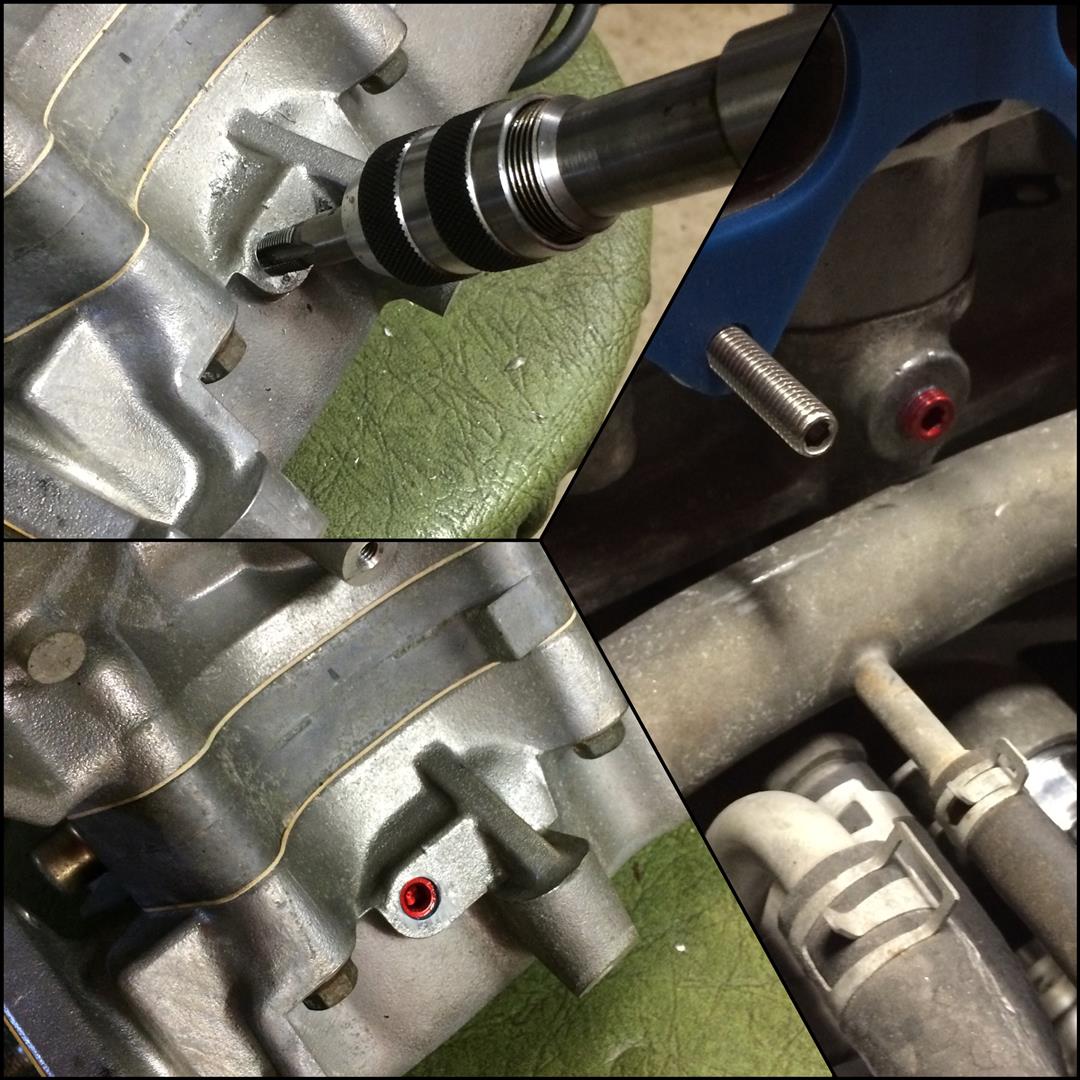
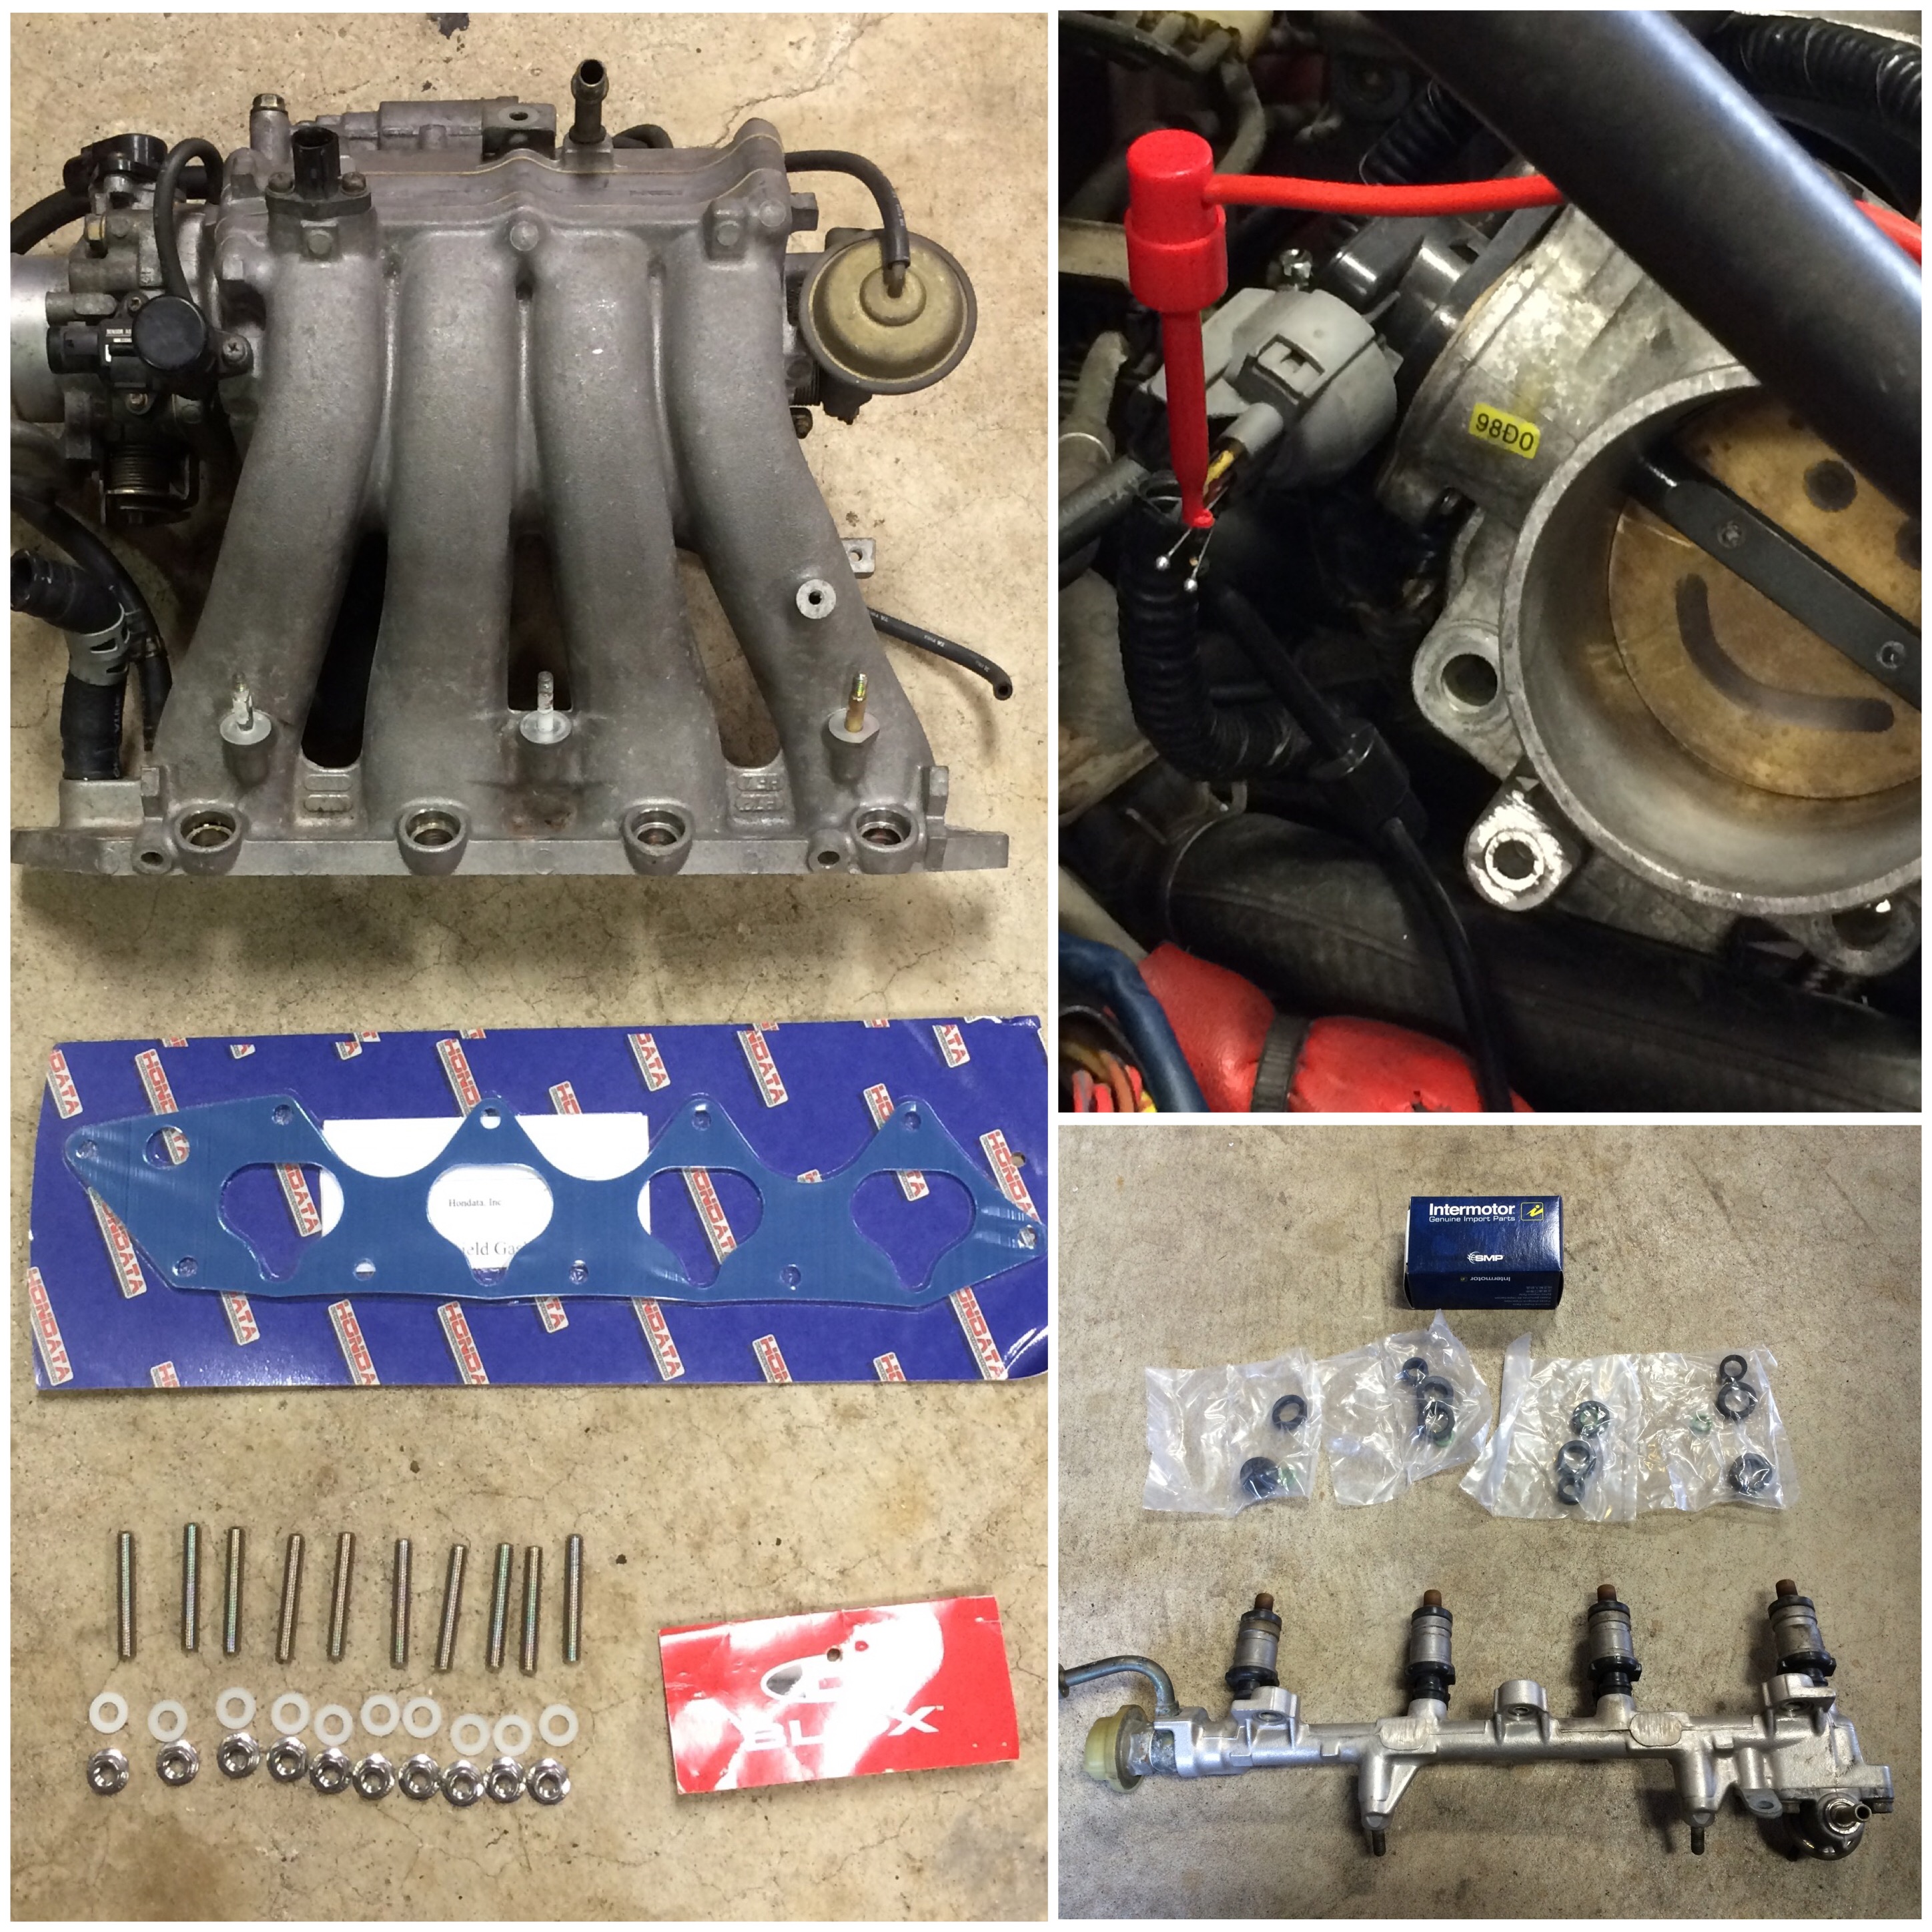
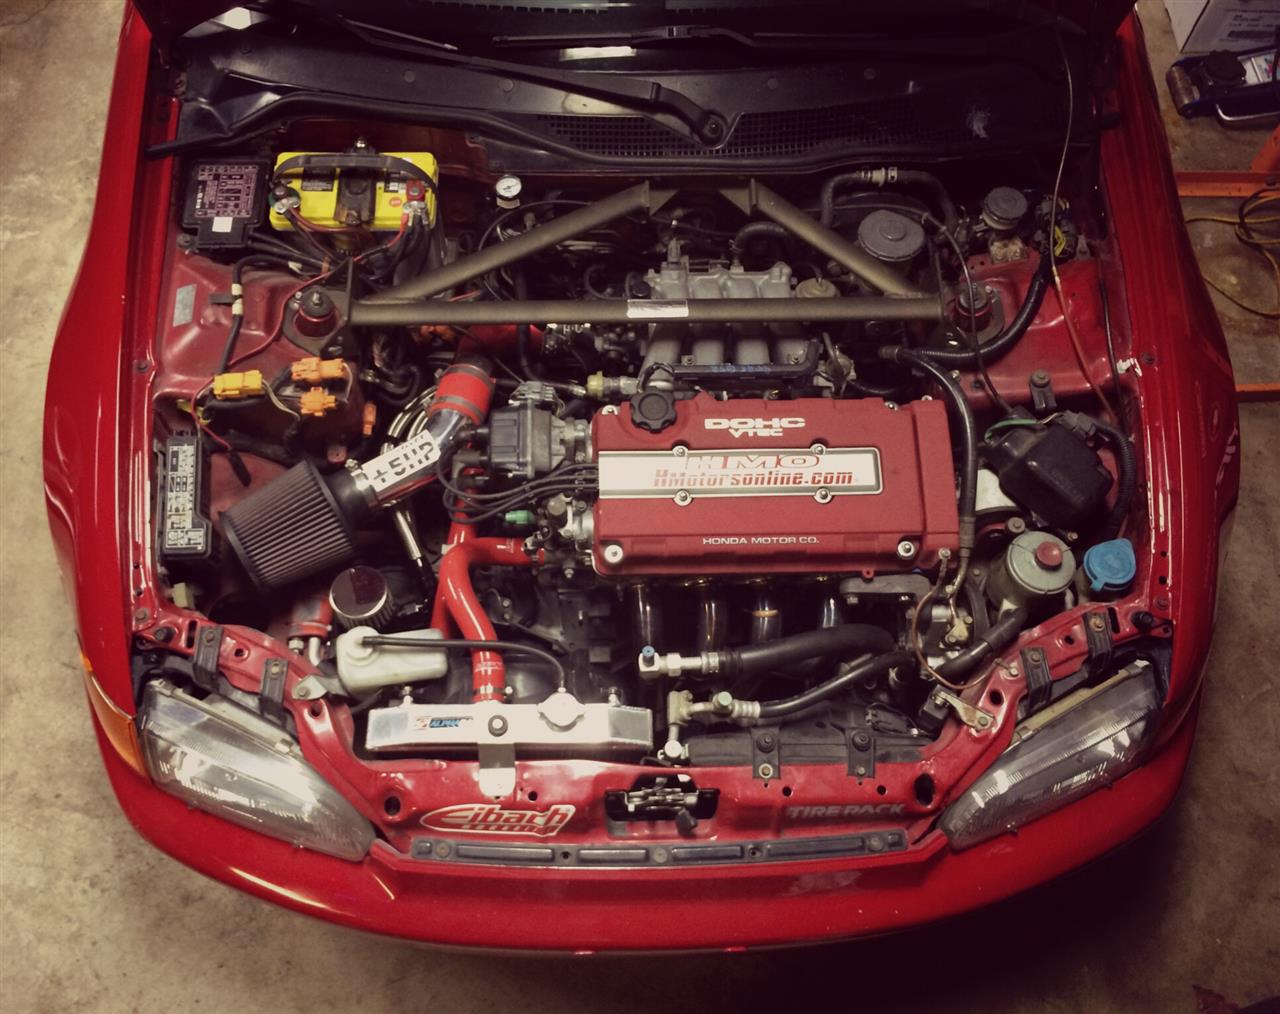
A few seasons ago, I installed a creatively engineered catch can that involved a lot of vacuum tubing, a used MTF container. I cut the check ball out of the PCV and plugged the nipple on the intake manifold. The “hack” worked and I stopped sucking oil into the intake manifold that was sloshing into the breather canister on the back of block during very hard right hand turns. This had always intended to be a temporary fix and I decided that the permanent solution would be part of my maintenance work. With that in mind, I knew that accessing the block ports would greatly be simplified if I removed the intake manifold. Since I would be removing the manifold, I decided to install a thermal barrier gasket. I had used one in the past and wanted another. What I remembered from my past experience was that the original studs were not long enough for the nuts to be fully engaged. I found extended studs and added them to the list.

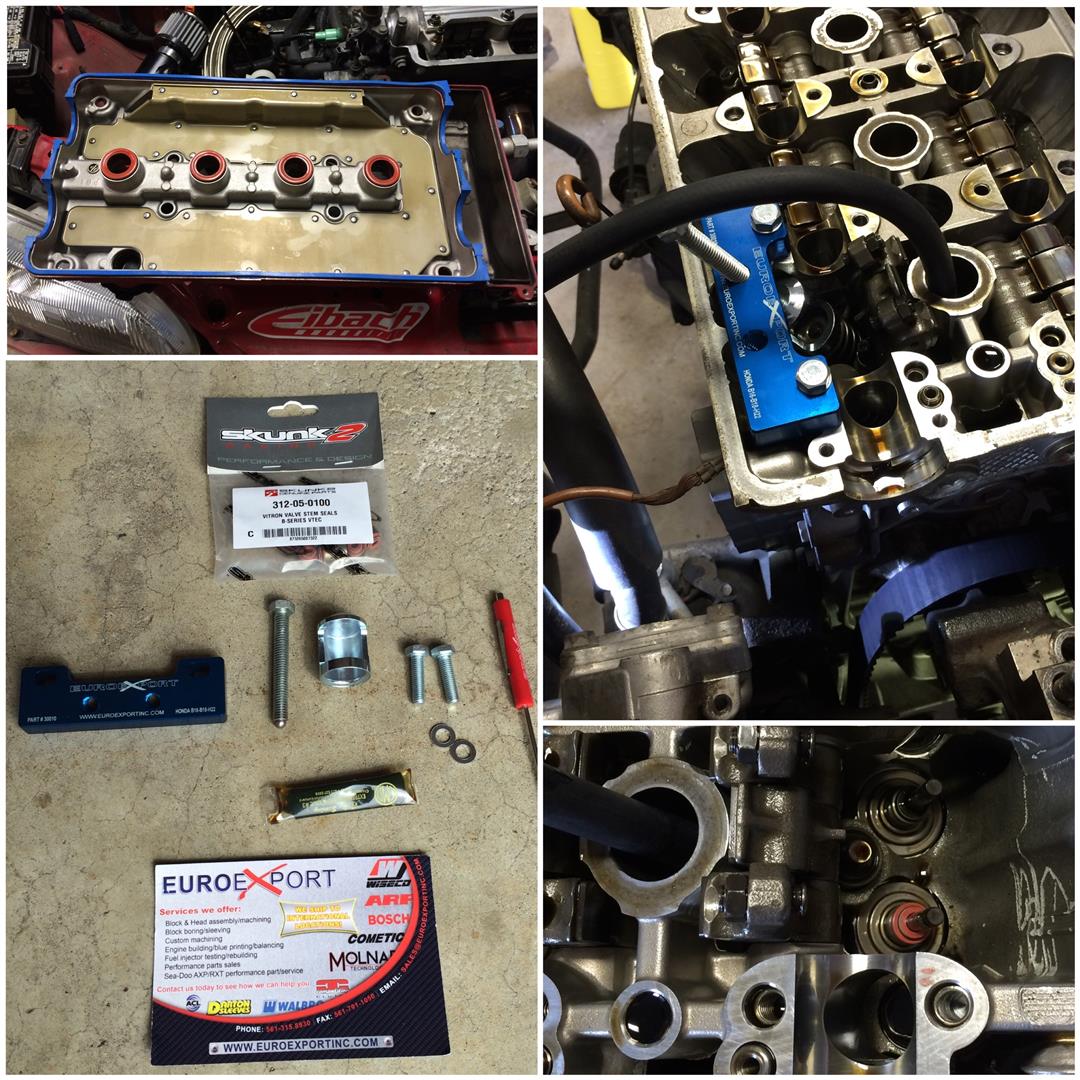
Over the past two seasons, I started to see that I was blowing smoke when decelerating from higher rpms. My 20+ year old valve seals were losing their edge. I didn’t feel the need for a full valve job and elected to replace the valve seals with the head still attached to the engine. A friend of mine found a great tool designed to make quick work of the job.

Better Pan

One other problem I was experiencing was oil starvation during hard right hand turns. Sadly, I do not have an oil pressure gauge to prove my experience, however noticing that VTEC was dropping during those turns was enough for me to realize that I was losing pressure. In order to avoid the issue, I had to overfill by at least a half quart of oil. I ordered a Moroso 5.5 qt. pan which includes trap doors and baffles for better oil control. When I dropped the original pan, I discovered that my oil pick-up was dented. I’ll get into more detail shortly.

In The Back

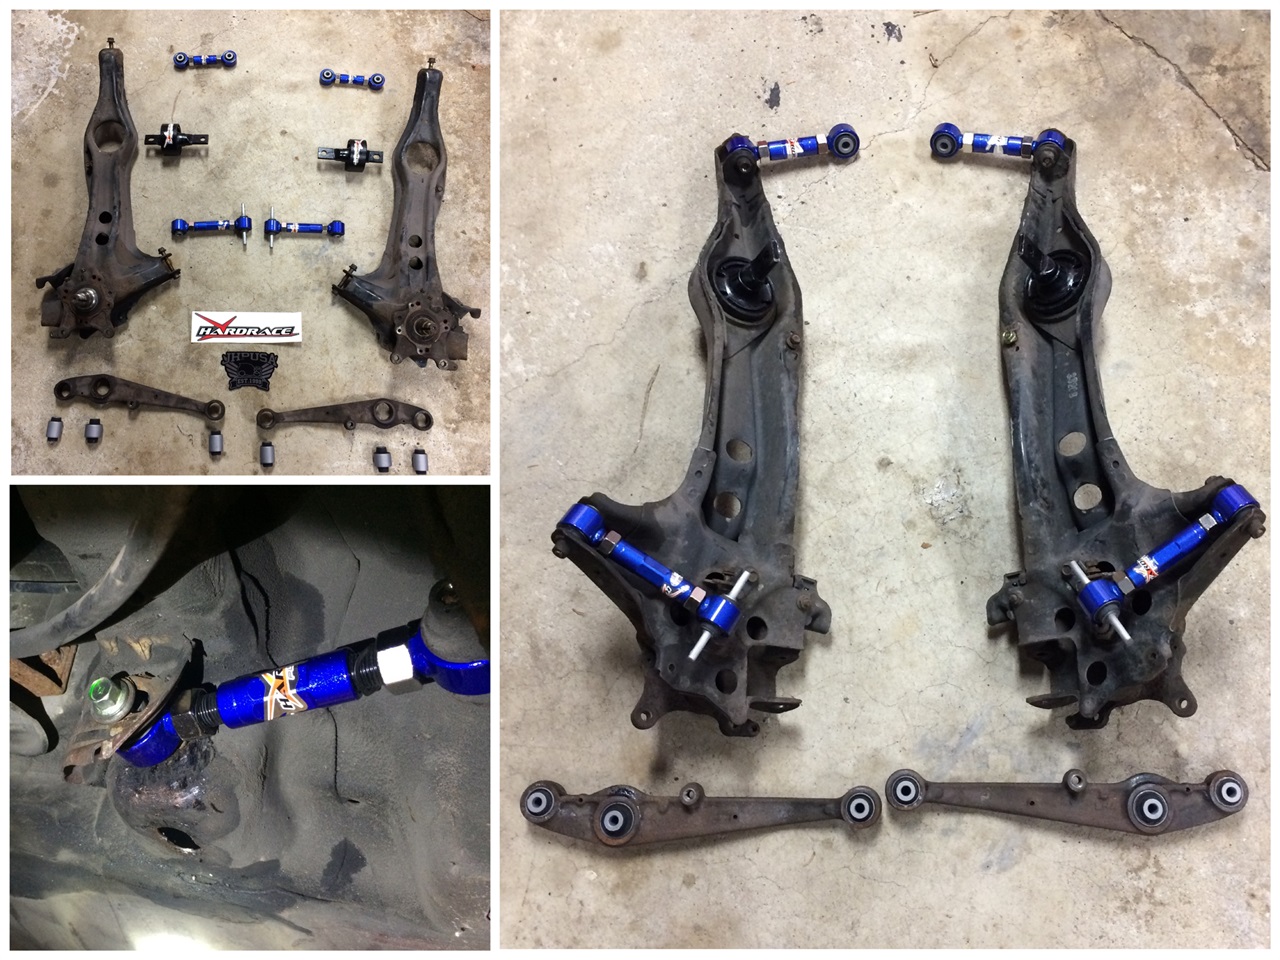
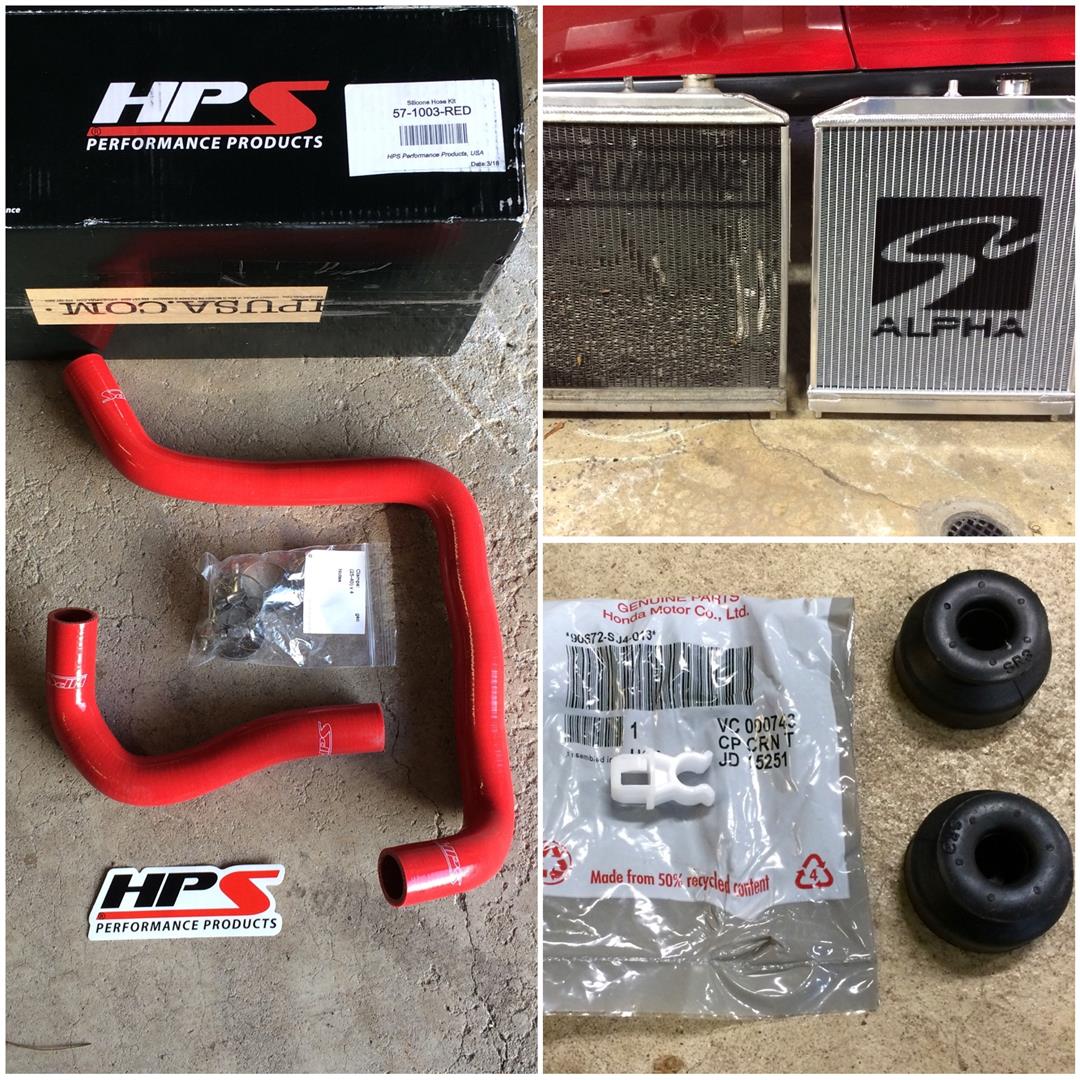
Moving to the back of the car, I found that rubber in my adjustable camber links had dry rotted and needed to be replaced. They were ten years old and served their purpose. While I was working back there, I decided to replace my original compensator arms (toe links) as well as replace the poly urethane pivot bushing and lower control arm bushings. More on that shortly.

My lengthy intro aside, here is the short list of all the work I completed.

  • Valve seals
  • Intake manifold studs and thermal gasket
  • Injector o-rings and seals
  • Catch can crank case venting
  • Radiator and hoses
  • Oil pan and Oil pick-up
  • Steering rack bellows and bushings
  • Rear lower control arm bushings, Camber link, compensator link and pivot bushings
  • Front brake pads, calipers and rotors
  • CV boots
  • All associated gaskets and seals
  • Gas pedal stop
  • Door card fabric
The Work

Starting on the rear suspension, I worked my way through removing most of the bolts with no issues. Years of maintaining the car, and liberal use of anti-seize, have prevented the bolts from rusting in place. Unfortunately, the inner compensator arm bolts had never been removed and required the use of a cutoff wheel. Once everything was removed, it was time to install the new bushings and arms.

Rear Suspension
Once I pressed all of the original bushings, it was time to install the new Hardrace components. Shortly after, the arms were reinstalled.
When using rubber bushings, it is imperative that bolts are torqued with the suspension at ride height. Nearly every bolt is accessible except for the outer upper control arm. Taking advantage of my extended lugs, and flipping my steel wheels, I was able to reach every bolt.
I refreshed the steering rack with new bellows and Hardrace bushings

For the engine block breather kit, I decided to go with a kit from B&R fittings. They were willing to assemble a “back of block” kit that didn’t include hardware to drain back to the pan. I was going to mount the can low and wouldn’t need the additional hardware. My though process for using the back of the block was that I could vent the block without having to modify my valve cover. With no fabrication required, the installation was relatively easy.

To gain better access to the rear block ports, I removed the intake manifold. Once the manifold was removed, I pulled the plugs,installed the adapters and installed the breather plug. I attached the fittings to the catch can hoses and ran them to the front where I mounted the catch can. 
In order to completely eliminate the original breather, I pulled the vacuum port out of the intake, drill and tapped the hole and then plugged it. I did the same to the valve cover. I also plugged the port just over the original canister.
While I had the intake manifold off, I decided to add a Hondata thermal gasket, Blox studs, calibrate my TPS and new injector hardware to freshen the 20+ year old o-rings and seals.
While I had the intake manifold off, I decided to add a Hondata thermal gasket, Blox studs, calibrate my TPS and install new injector hardware to freshen the 20+ year old o-rings and seals. I also removed the IACV and flushed it thoroughly with brake cleaner; Also reinstalled with a fresh gasket.
My Fluidyne radiator was almost 16 years old and was starting to leak. To replace it, I bought a Skunk 2 radiator. I also picked up new OEM radiator bushings. I also had to order new hoses and elected to use HPSs silicon hoses. I thought the red hoses were a nice touch!
My Fluidyne radiator was almost 16 years old and was starting to leak. To replace it, I bought a Skunk 2 radiator. I also picked up new OEM radiator bushings. I also had to order new hoses and elected to use HPS’s silicon hoses. I thought the red hoses were a nice touch!
 In hopes of cleaning up an oil burning issue during deceleration, I replaced the valve seals. I picked up a tool to help me with the springs and a compression testing hose to pressurize the cylinders. Once that was completed, I adjusted the valve lash, installed fresh gaskets and new plugs.
In hopes of cleaning up an oil burning issue during deceleration, I replaced the valve seals. I picked up a tool from EuroExport to help me with the springs and a compression testing hose to pressurize the cylinders. Once that was completed, I adjusted the valve lash, installed fresh gaskets and new plugs.
In hopes of ironing out an oil starvation issue while driving on a track, I bought a Moroso high capacity oil pan. While I was replacing the pan, I noticed that the original pickup has dented. I bought a new OEM pickup and installed everything with new gaskets.
While I was digging through the car, I noticed that the CV boots had deep cracks. Although they were not leaking, it wasnt going to be long. Rather than replace my good working Drive Shaft Shop Race axles, I ordered new boots and installed them.
While I was digging through the car, I noticed that the CV boots had deep cracks. Although they were not leaking, it wasn’t going to be long. Rather than replace my good working Drive Shaft Shop Race axles, I ordered new boots and installed them.
The front brakes were refreshed with new rotors, pads and calipers. This is the poor man ITR brake setup utilizing Mini rotors and the Type R caliper. The rotors and calipers are from Rock Auto and the pads are Carbotech XP10's.
The front brakes were refreshed with new rotors, pads and calipers. This is the poor man ITR brake setup utilizing Mini rotors and the Type R caliper. The rotors and calipers are from Rock Auto and the pads are Carbotech XP10’s.
Once everything was installed and tested, I headed over to a friends shop and had it aligned.
Once everything was installed and tested, I headed over to a friend’s shop and had it aligned. One thing to note is that I went through and replaced several bolts in the suspension to ensure everything would continue to be easily serviceable.
Here it is, the night before the first autocross of the season. Everything was checked over, fluids topped off...off to the races!
Here it is, the night before the first autocross of the season. Another minor detail was modifying the air intake to try and push it away from the radiator. I bought a 45 degree aluminum elbow from Summit Racing and managed to get the filter right where I wanted it. Before I turned in for the night, I went over all of the work one last time. Next step…off to the races!

Prior to the first race, I also needed to wrap up my throttle cable replacement. The last step involved creating a proper pedal stop to prevent the cable’s rubber damper form being damaged. You can read about the work here.

At this point, the first part of the refresh project was completed. The project stepped well beyond the original scope at this point. For the most part, on a car this old, I didn’t mind having to order more parts to ensure future reliability. Parts like the oil pick-up, CV boots, fresh brakes, radiator hoses as well as several ancillary “nuts and bolts”. I had hoped that the work and expenses would drop off as I worked my way through the season. Alas, the Civic had other plans. Read about the continuing adventure in the next installment of Project Civic!